Painting the 1974 Honda CT70 Dax. Chapter two.

Read somewhere that successful people are not those who never fail, but the ones that keep trying after failure. That being said, I am trying to be successful. Still working on paint. This has been a master class in misery, reapplying paint for a third time, and still not quite sure its done. Thinking the end was near at the first of December, I went to clean out the holes on the body of the CT70 prior to the last coat of clear, and noticed some separation of the clear. Realizing it was also affecting the other body parts, everything was stripped back to primer by hand. The cause of the separation is still not completely clear, but probably has something to do with me using too much reducer, interactions between the House of Kolor and PPG paints, and cool temperatures in the shop.

This is early December. The graphics are done, and getting the body ready for the final coat of clear.

The separation was between the candy red and black base coats. Everything peeled off in a similar fashion on all the pieces, leading me to believe the incompatibility of the base coats, and too much reducer in the candy layers could be the culprit.

The amount of time that went into blocking out the clear three times, only to rip it off still smarts a little, but it had to be done.

At least it all came off uniformly. At this point, the guys at the paint store were advising to take off the base coat layer, and spray again.

Still in need of some detailing. After a lot of hand sanding, there were places where the sealer was sanded through, so I thought it best to re-seal the parts.

Here, the remainders of the sealer coat, tinted pink from the base coat, is seen. Every bit of it was sanded off before the black epoxy sealer was applied.

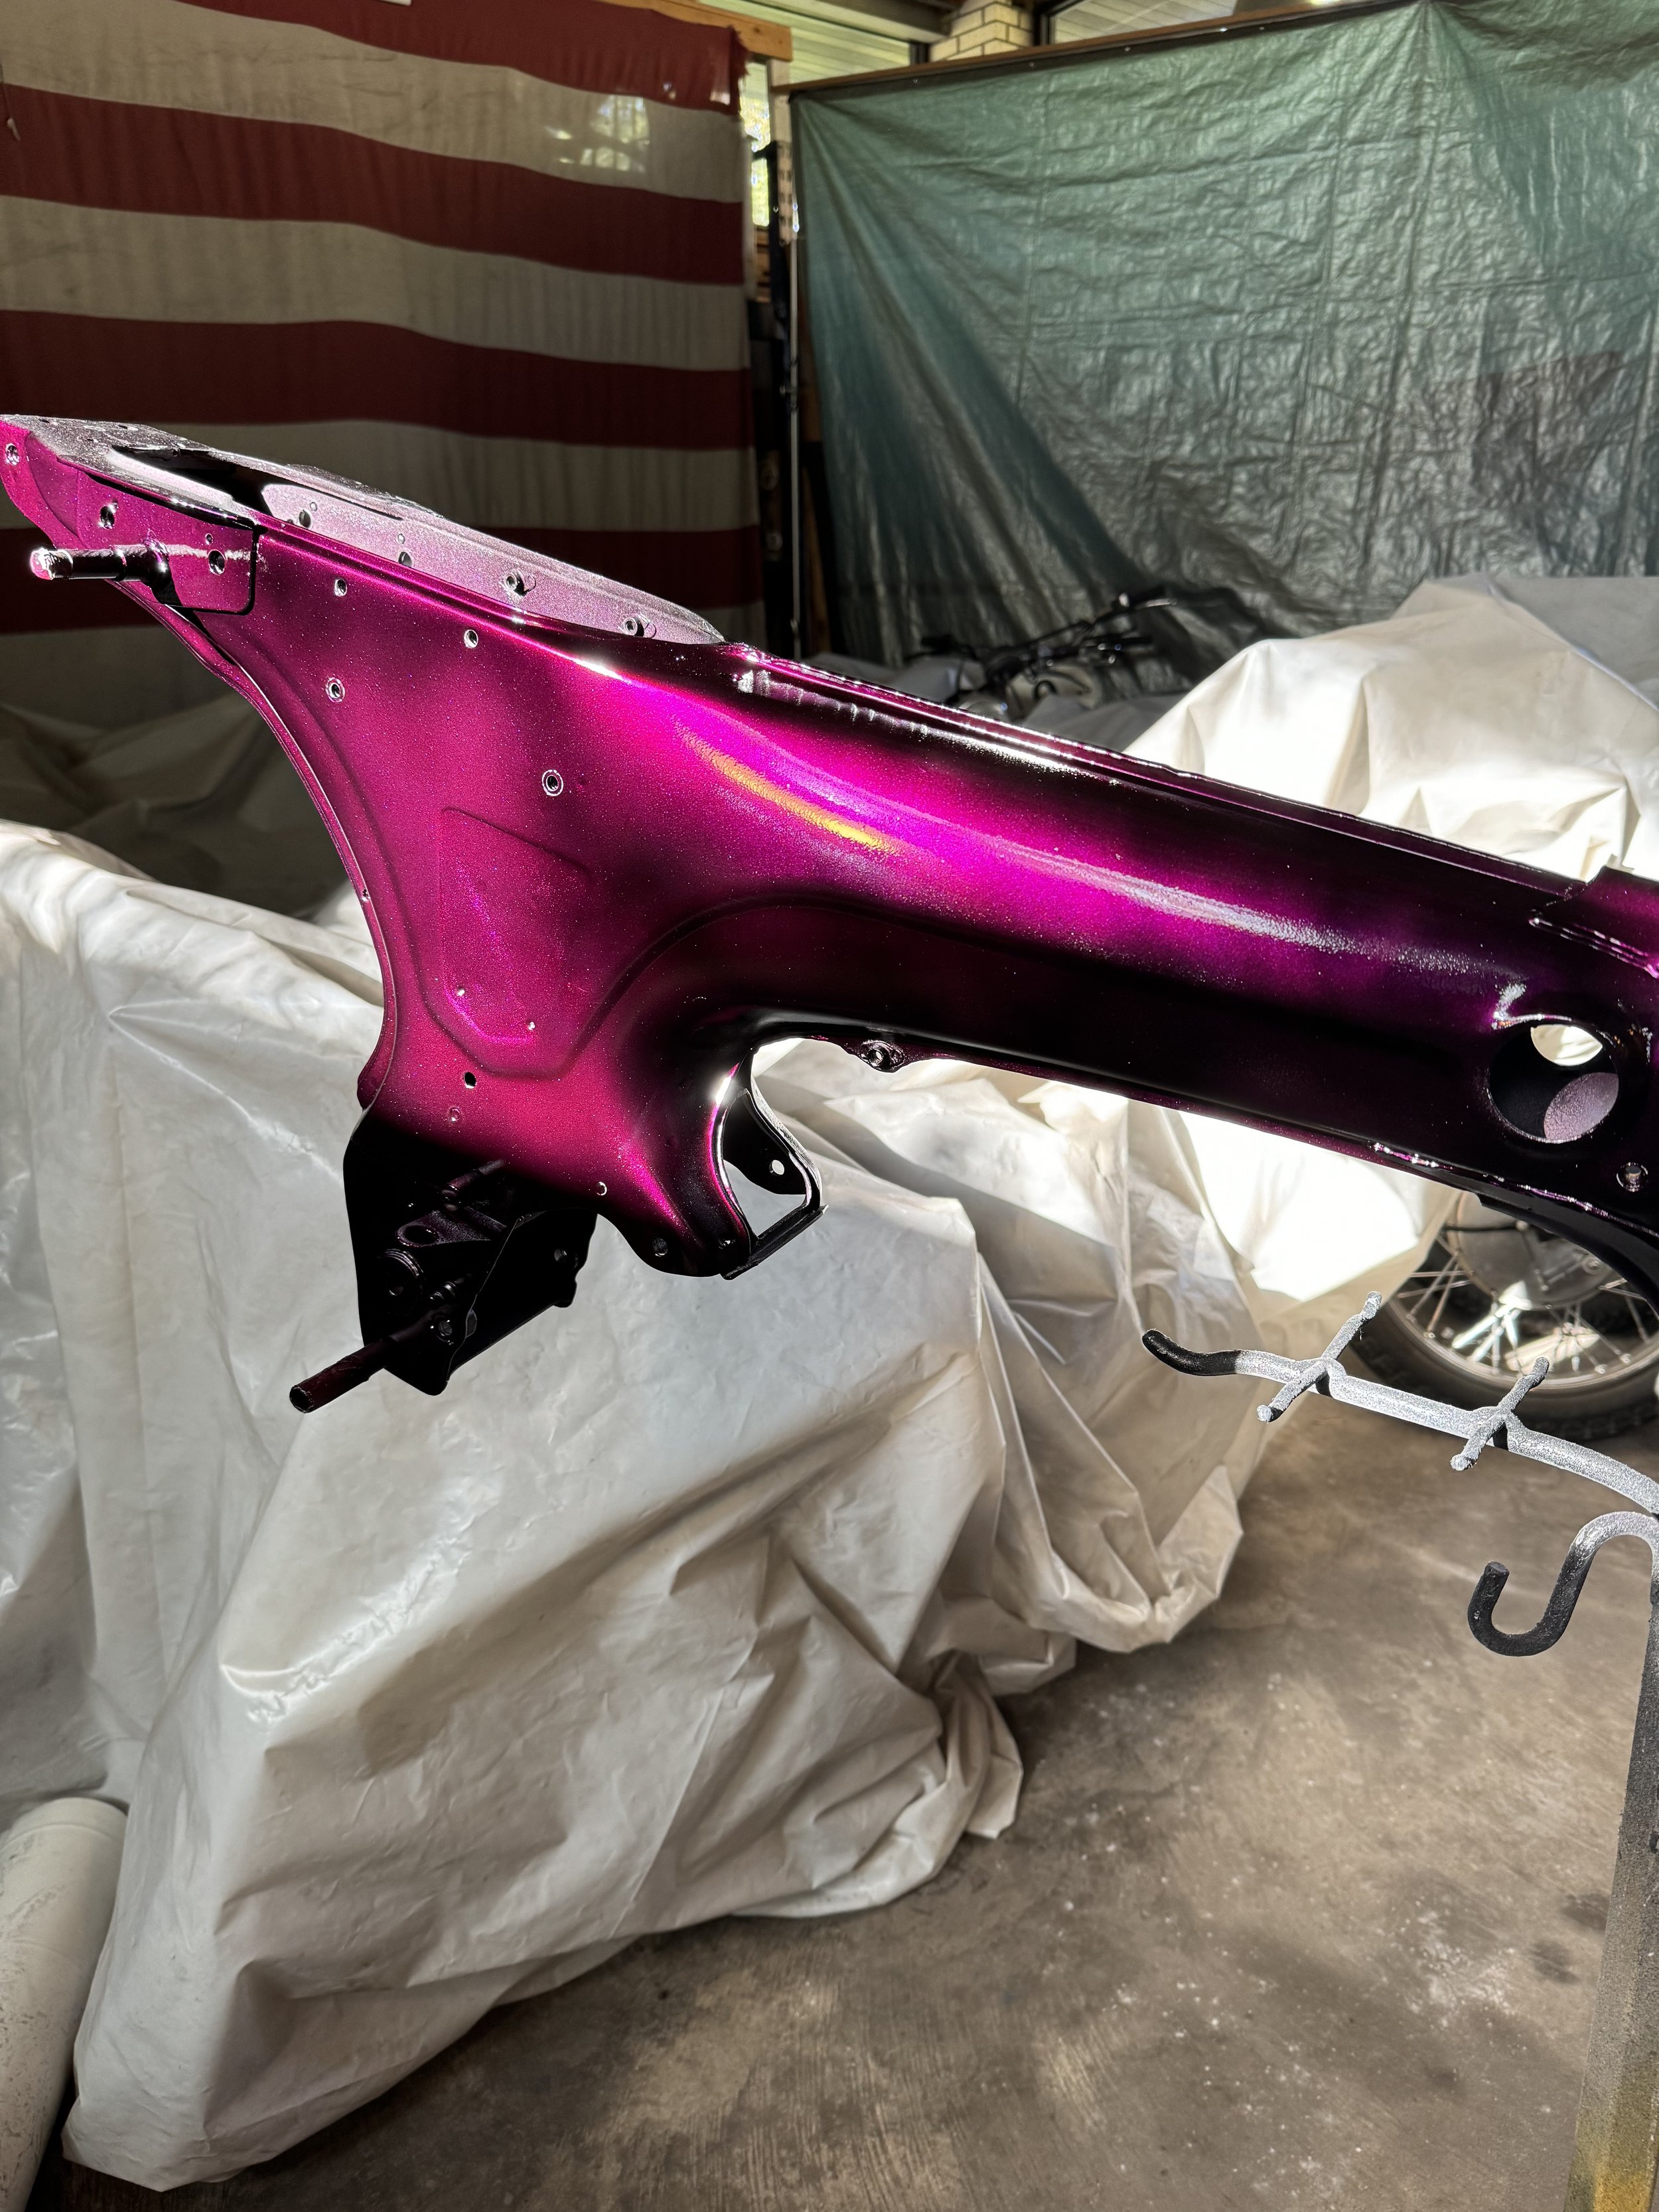
The front fender, also dyed pink.

When the bike was painted the second time, the black base coat was switched from PPG to a House of Kolor black base coat, to reduce the chance of interaction. After the sealer (black epoxy,) base coats and a couple layers of clear were applied for the second time, it was blocked out to start on the graphics. While peeling some masking off, an area below peeled off, all the way to the old primer.…sigh.

A closer inspection shows some of the pink that penetrated through the original gray sealer to the primer. Out toward the edges, the black of the sealer can be seen, where it was adhered to the primer layer. The remainder of the paint was tested with tape, and this seemed to be the only place the paint peeled off. Nevertheless, it was stripped down, and re-sealed one more time. While stripping it down, the remainder of the paint was confirmed to be well adhered. Why it peeled in this area only is still a mystery.

This time, every last bit of pink was sanded off.

The black epoxy sealer was given extra time to cure before topcoat, with the cool weather we have been having here in Denton.

After color and some clear, here is the third round of graphics getting underway. The graphics are all done by hand, and take some time. Hopefully, the third time is the charm.

We’ve been here before.

The gold and a couple layers of clear were blocked out before the Wimbledon white trim was added to the lettering.

“Feels like deja-vu all over again.” Another couple layers of clear, and it will be on to cut and buff!

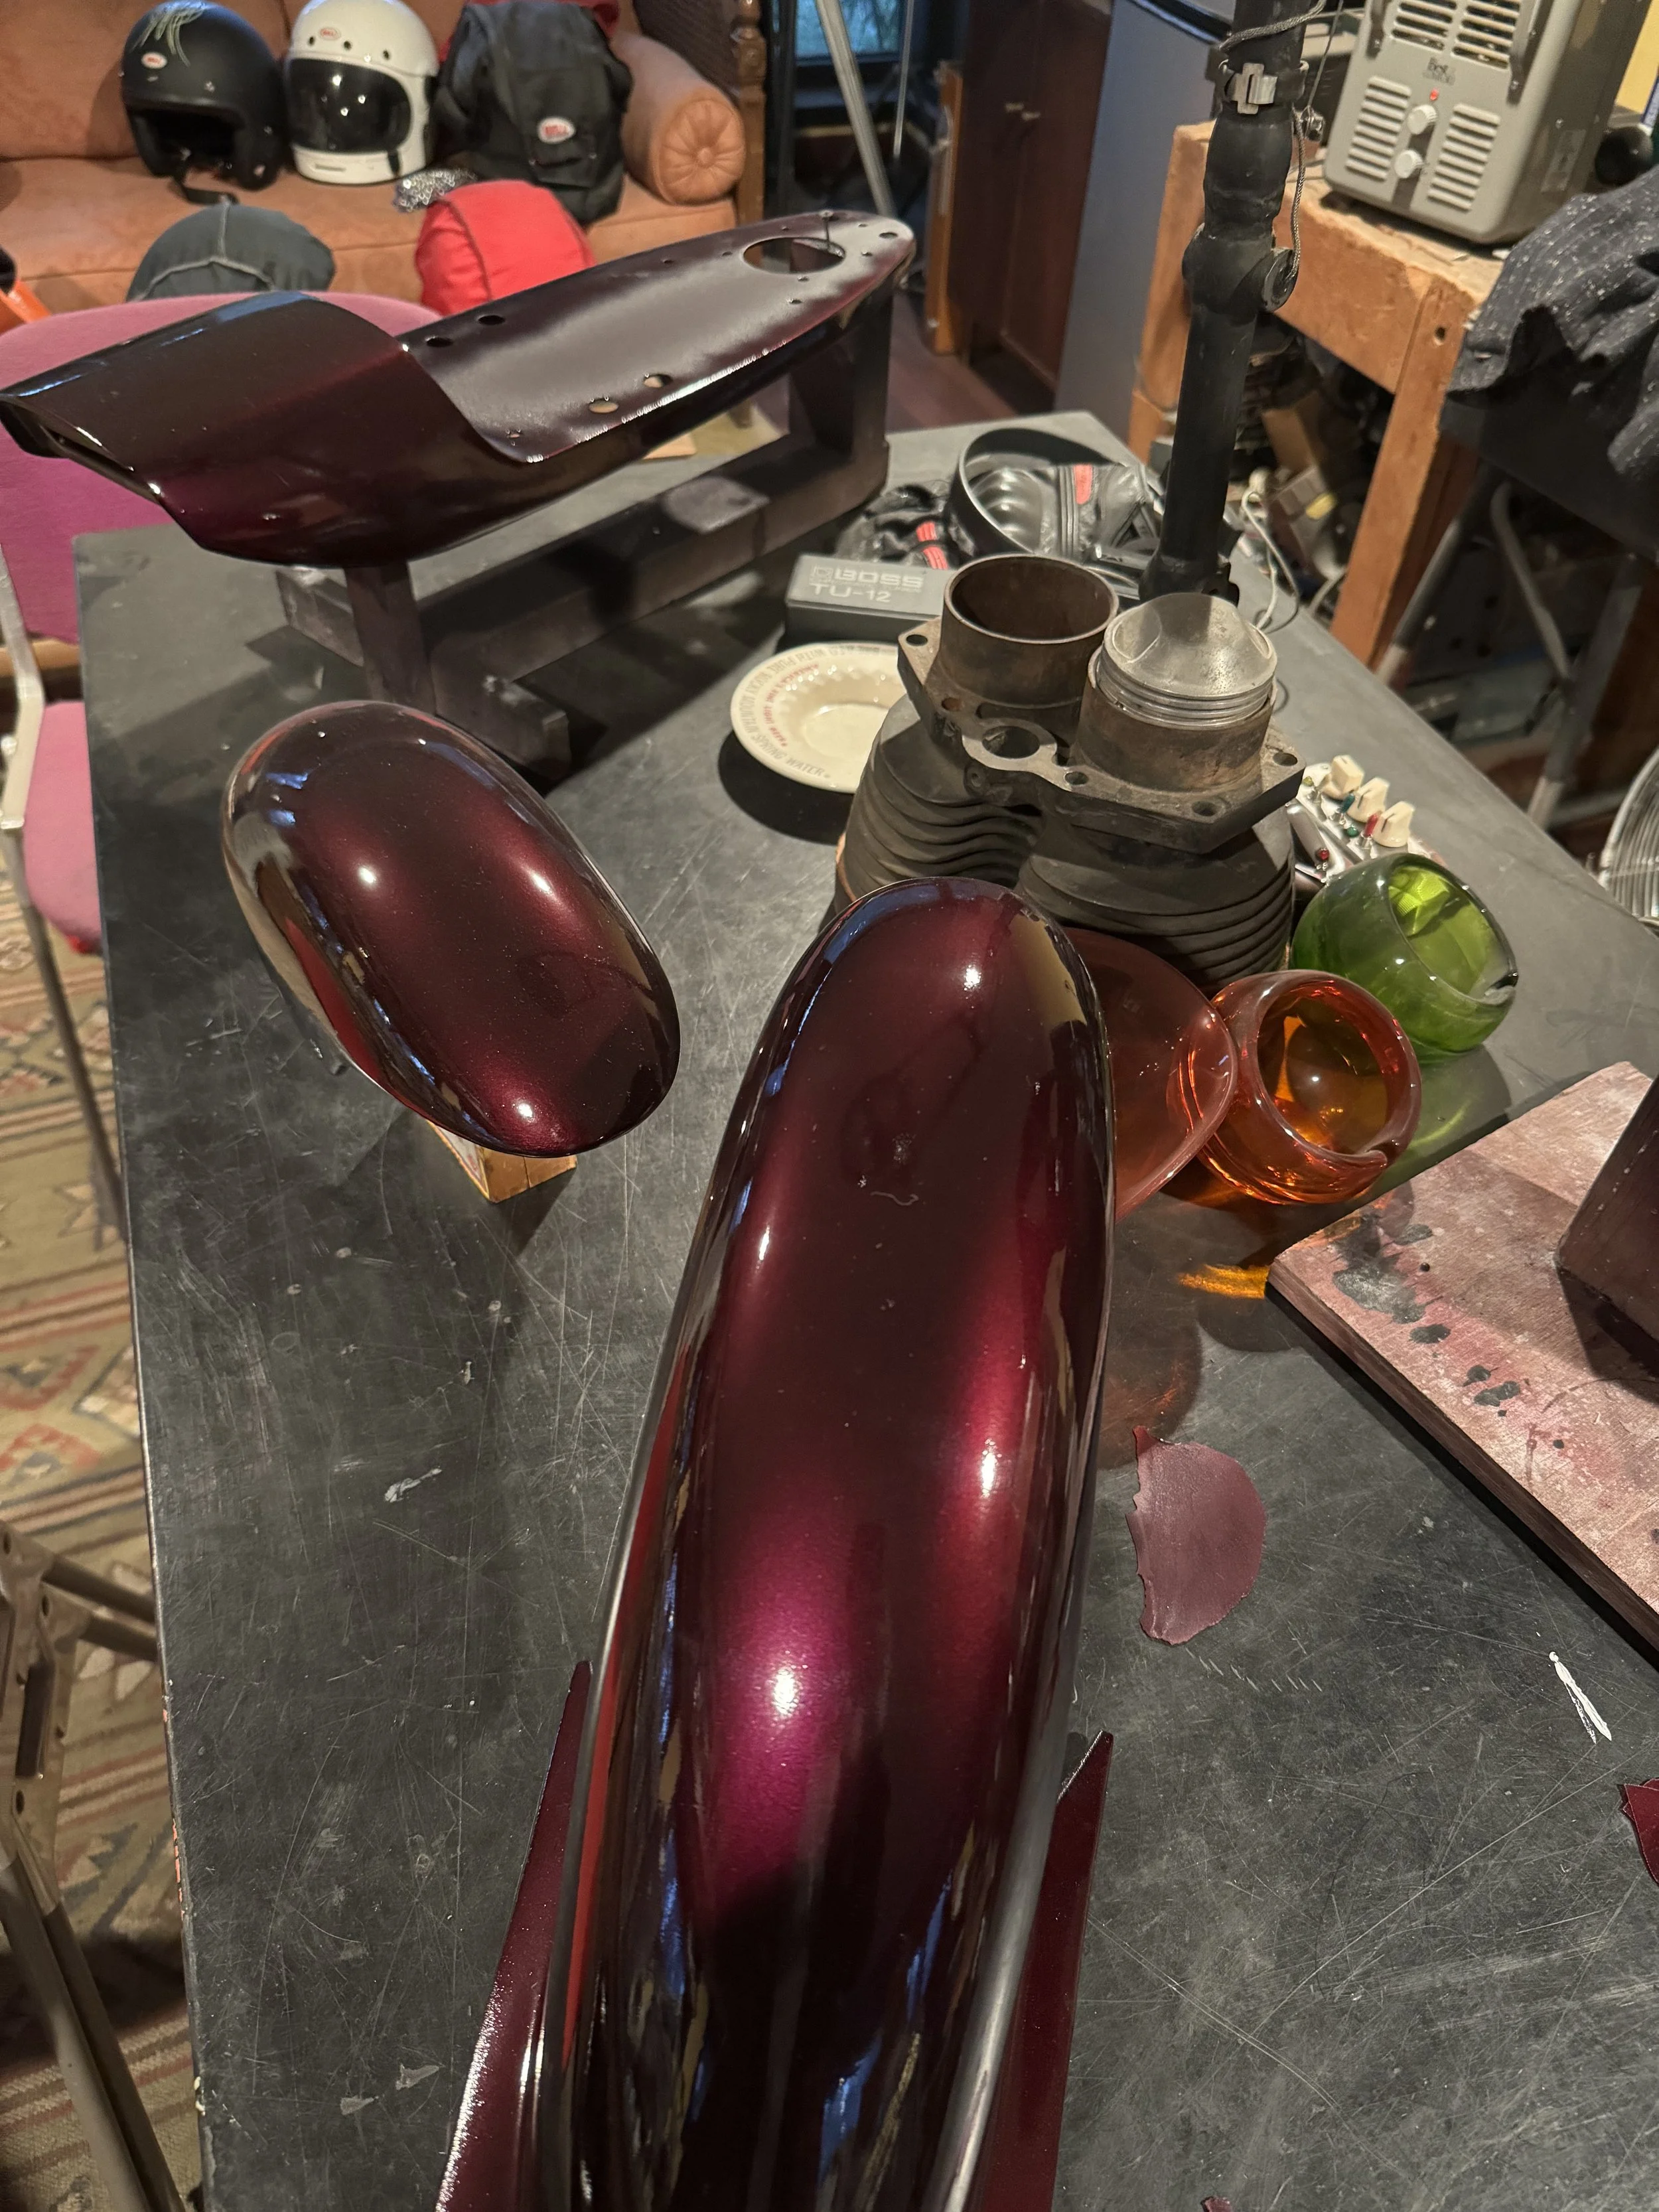
Fortunately, the other pieces look fine after their re-paint. They were also tested with tape for any lifting, and passed. These pieces have had a couple weeks to cure in the heated upstairs room of the shop.

The 1974 Honda CT70 Dax custom gets painted.

Painting time at the shop! The 1974 CT70 Dax custom bike received a coat of a rich, deep purple House of Kolor “Wild Cherry” over black base. Still stacking on some layers of clear and blocking in between, but the color is starting to get deep. The original plan was to paint the lower part of the bike white, like the CT117, but the color is so sleek, it is giving me second thoughts. There are still graphics to be added: a “Honda” logo will be going on the neck. The guy who owns the bike picked this color to match his early Ford Bronco. Good choice!

The color really accents some of the contour nicely.

When the sun shines directly on the paint, it takes on more red to pink shades. The metal flake in the candy coat really pops out as well.

In lower light, the color goes to a dark wine color, even looking black in some instances.

The paint chip was ever present, to keep the match as close as possible.

With a single coat of clear, it looks a little less rich.

A little orange peel on the first clear coat. Each layer is blocked out smooth before the next coat goes on.

New chrome, powder coat, zinc plate and custom parts for the 1974 CT70 Dax Custom.

The saying is: the last 10 percent takes 90 percent of the time to do the job. That is an exaggeration, perhaps, but a lot of little details have to be done, and in custom building, some of that means making parts. A set of fork spring cups for the top of the springs was turned on the lathe to finish the fork assembly. The powder coated parts are back, and look great. Sub-assemblies are going together like the fork components, wheels, muffler, and footpegs.

The spring cups were turned out of aluminum, and in addition to being a place for the top of the spring to rest, it has a groove that secures the top of the fork gaiters

Honda makes a part that holds the top of the fork gaiters, but they are made to be used with fork covers. Without fork covers, they do not look quite right, or at least they don’t look as clean as these pieces do.

Most all of the aluminum polishing is done, the parts are back from chrome and zinc platers as well as the black powder coated parts. One of the jewels are the chrome plated thumb screws for the seat hold down. The muffler was painted with high heat ceramic paint, and looks really sharp with the fresh chrome plating on the heat shield. The heat shield was attached with Honda screws and heat insulating washers. Even though the bike is anything but stock, when it comes to assembly of these parts, a lot of care goes into using as much of the original style hardware as possible.

Another sub-assembly getting attention was the handlebars and fork top clamp. The headlight assembly uses the bolts coming from the bottom of the handlebar clamp to hold the top of the bracket in place. The throttle was rebuilt using all new parts from Honda. A set of aluminum knobs were used in place of the original rubber ones.

The chrome plated wheel rims are from TB Parts, and look perfect! I tried out the aluminum rims, but the polish on those rims was nowhere as nice as these chrome ones.

Several sets of shocks are on hand to find the best match with all the final finishes. The yellowing gold reservoir shocks used in mock-up could still get the nod, but I am leaning toward the chrome ones.

Another 330mm shock, this DNM brand set will be an interesting one to try. More an off-road shock than street, it will probably end up on another build.

Some of the Honda bags, saved and photographed to keep track of supplies.

Inching a little close every day.

A set of Heidenau K-38 tires and some Michelin S-83 tires were considered for the build. I have used the Heidenau tires on multiple builds, and love their performance and looks.

It was hard not to pick the Heidenau’s. They look great with the assembled wheel rims and hubs. Even though there are stainless steel fasteners used on other parts of the build, I went with new OEM hardware when it came time to mount the hubs to the rims.

All ready for assembly!

In other news, some brass covers were made for the horns on the Tijuana Trike. With all the stuff going on on the front of the trike, it was more about safety than the need for another ornament. Brass discs were punched, domed, and soldered together to make the balls, and a simple cone was made from the same sheet, and soldered to the balls.

The finished product, safety-wired on with stainless wire.

The fire scale and excess solder were left alone for the patina.