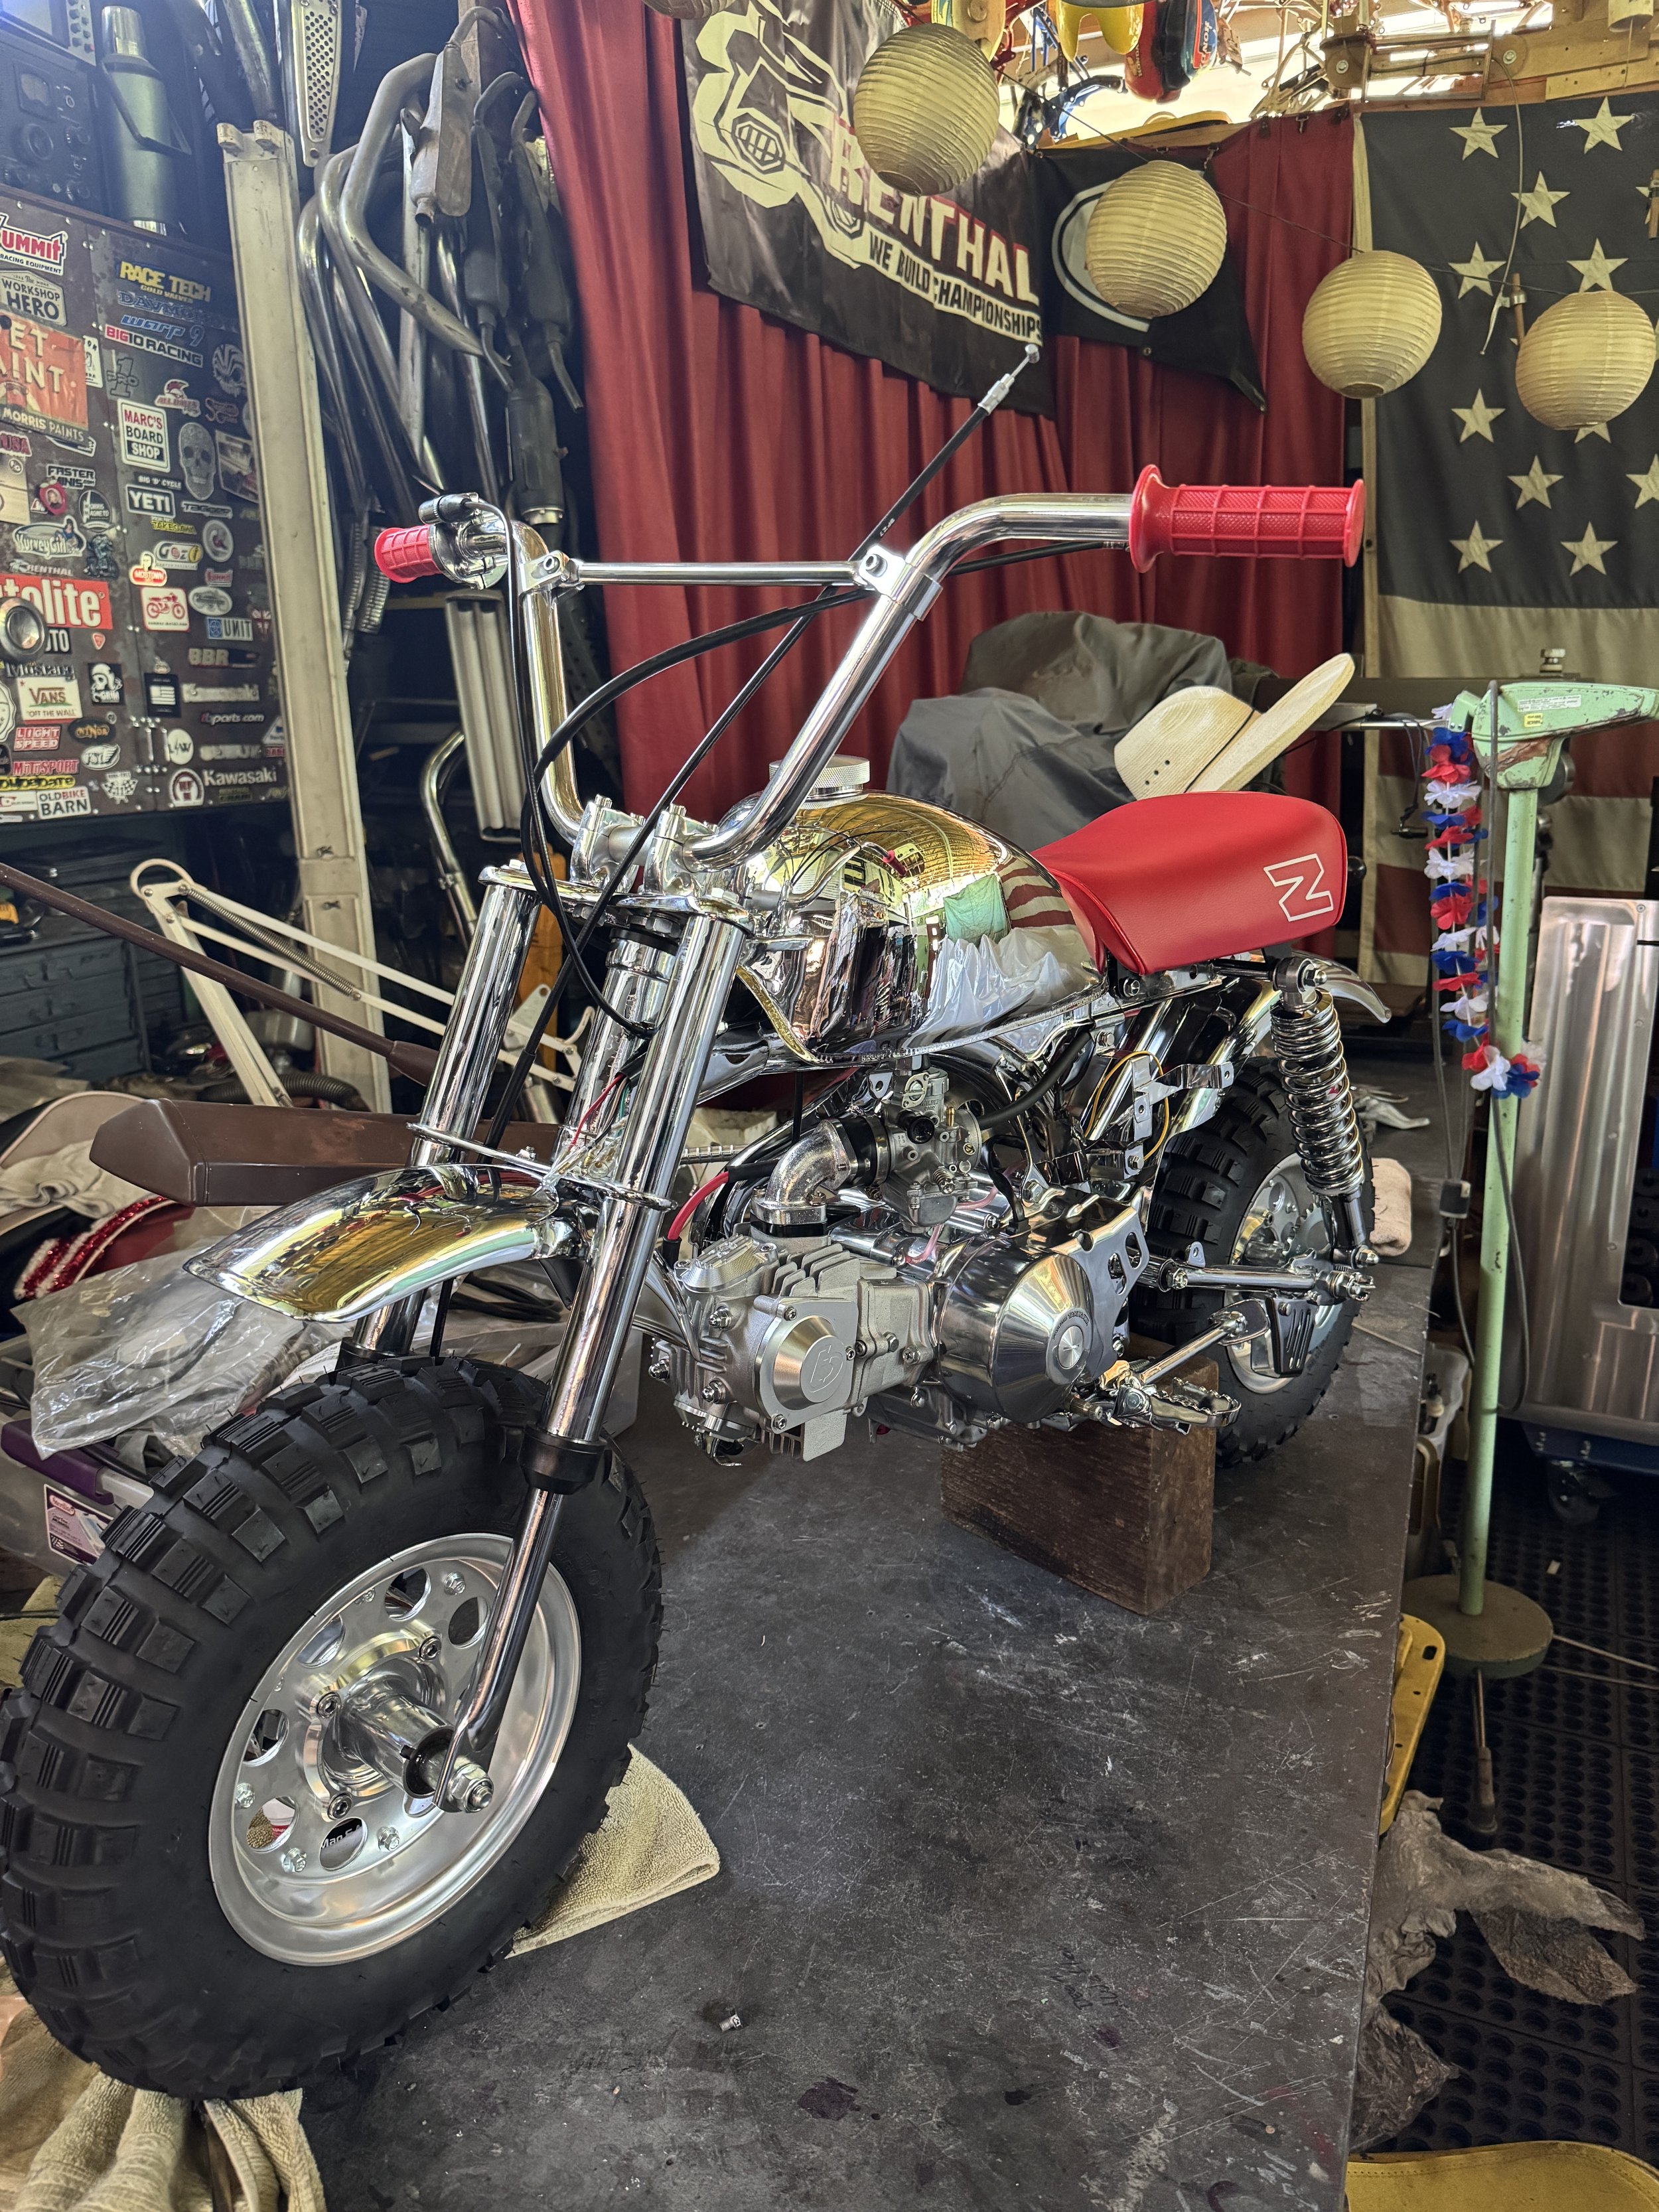
Still slugging out details. New parts like a front fairing and a headlight mount were worked out. Of course, more aluminum polishing was done. Getting the number plate, handlebars, fairing, and other parts polished and ready for mounting. Cables and levers are in place and working. Once the last pieces return from the chrome shop, the build will only need a few tings like light switches, fuel hose, and an air filter to be complete.
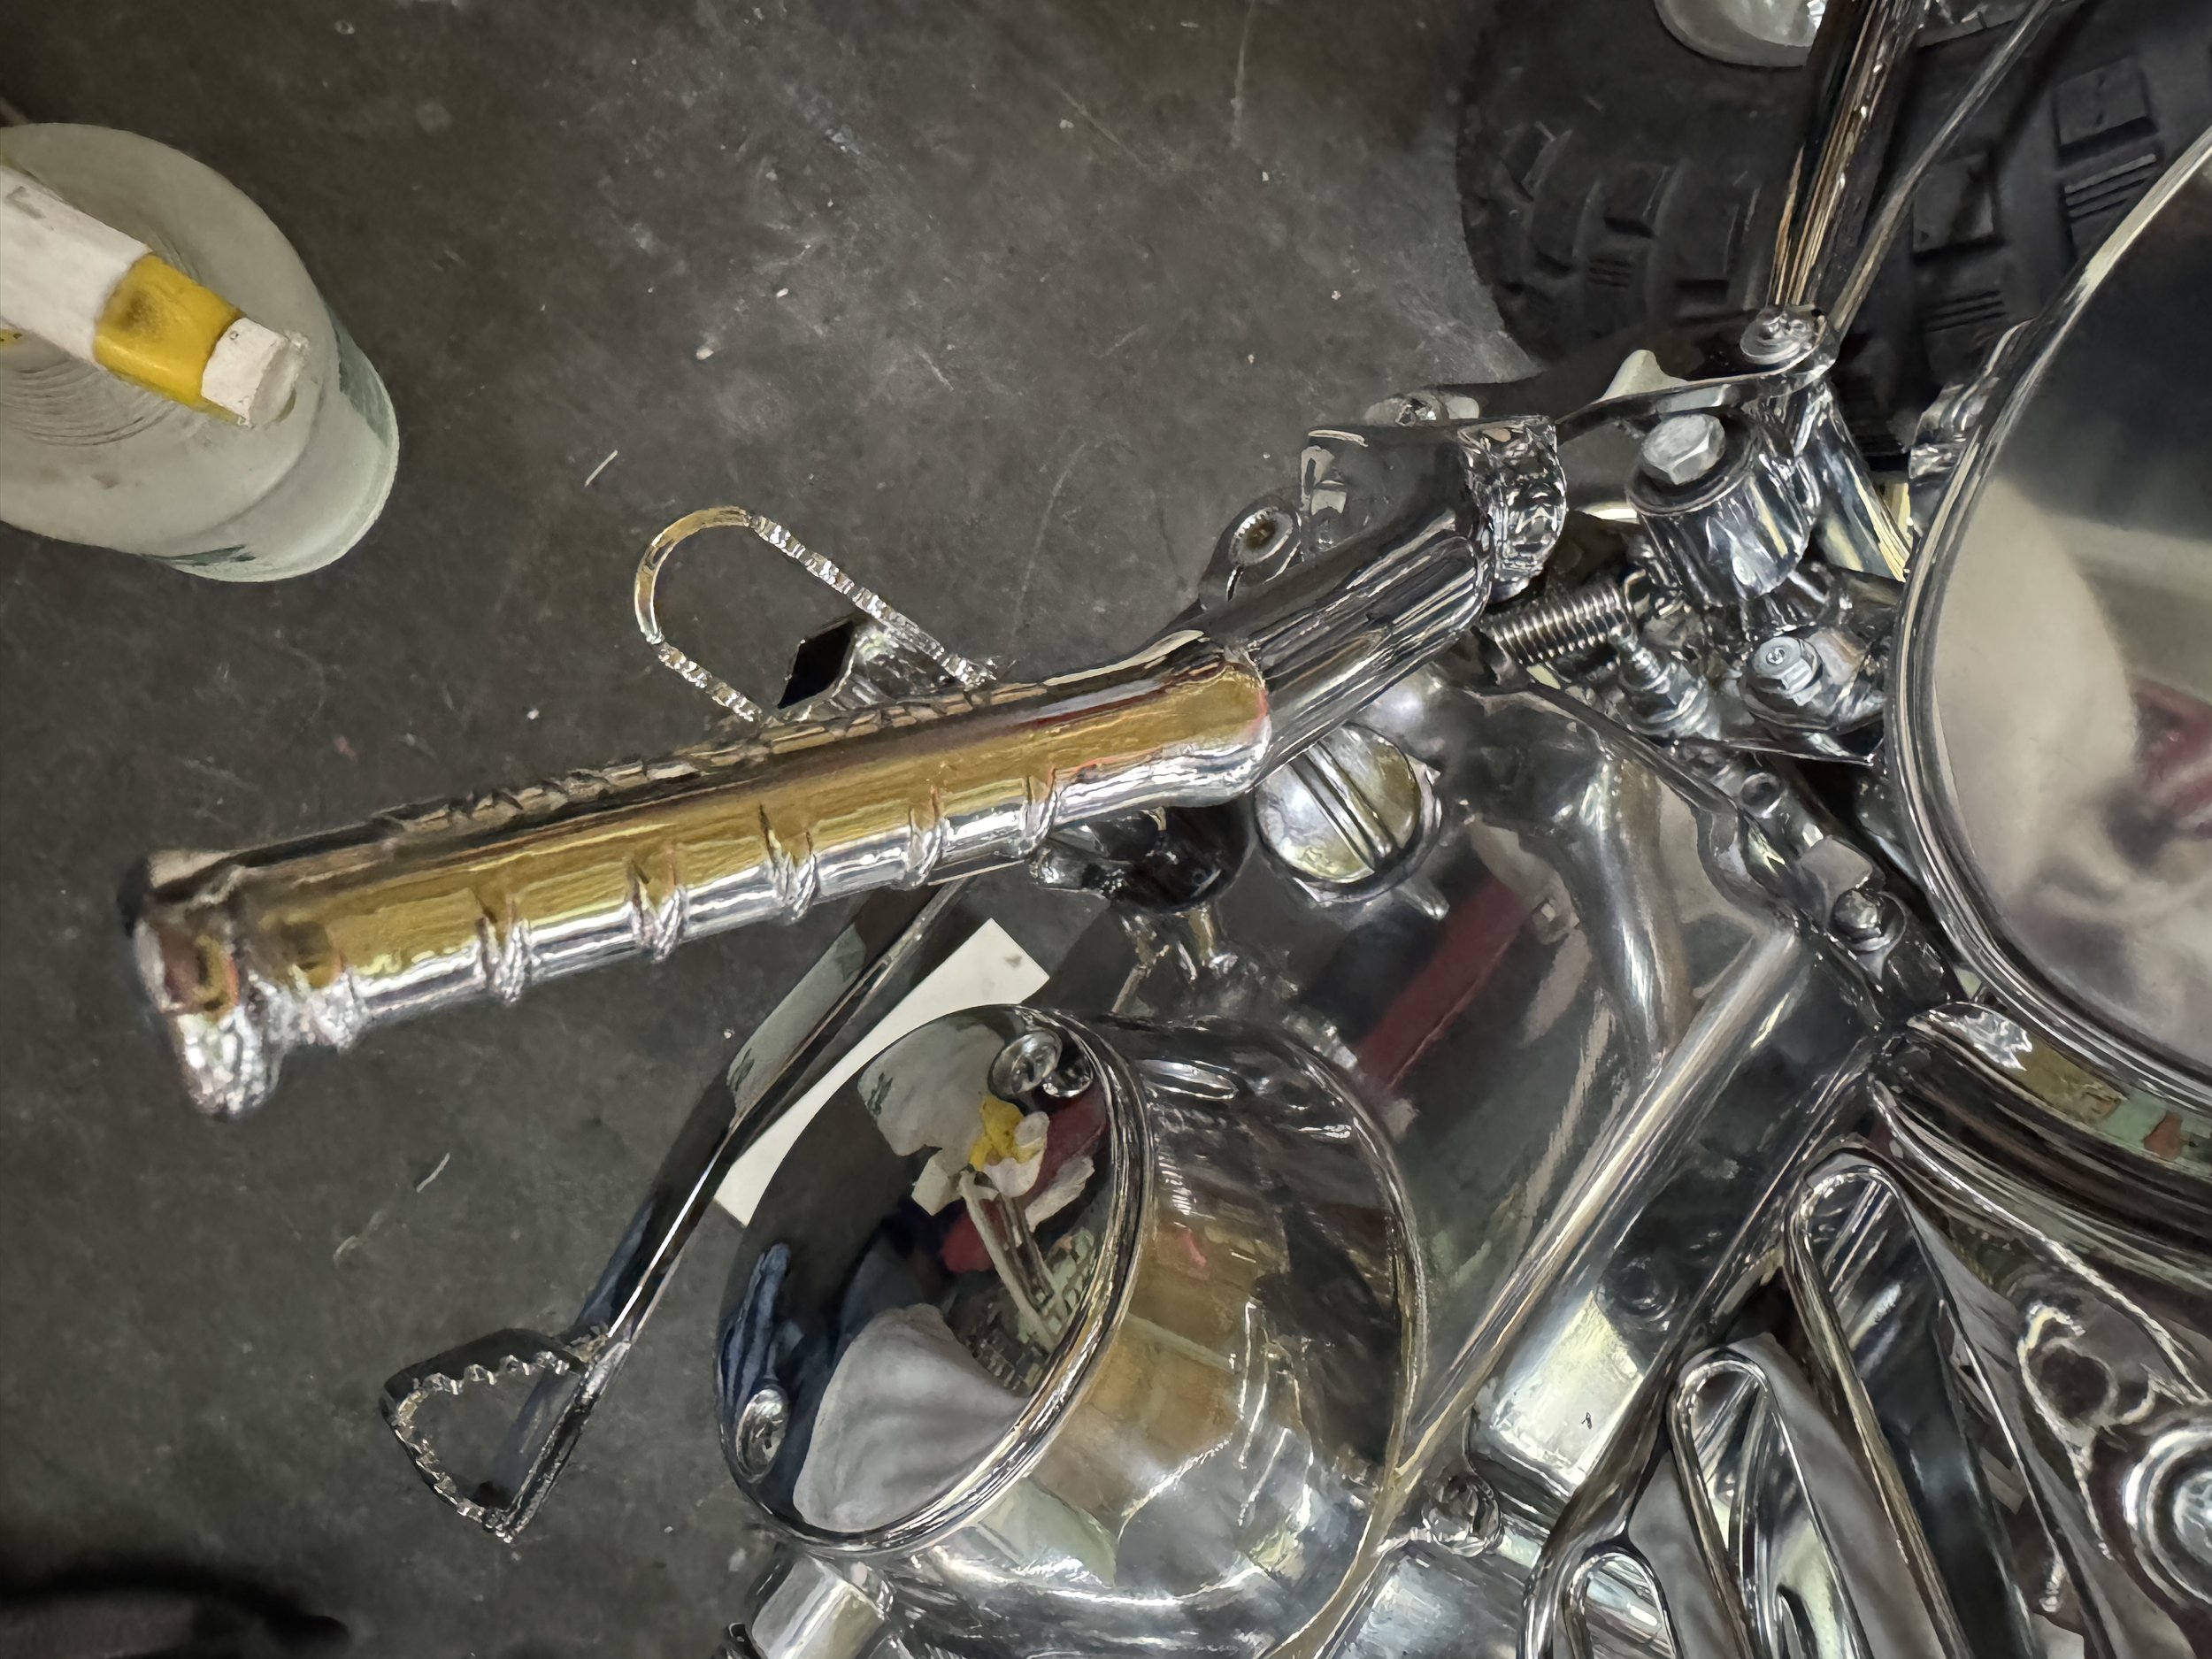
A set of Renthal Playbike bars was stripped of the shot-peen finish and polished out. The factory finish is quite durable, and was not easily removed. A set of reproduction Z50RD grips were sourced from NorthEast Vintage Cycle, as was the seat. A Takegawa magneto cover looks right at home without any additional polishing. The other engine covers need to be made to match.
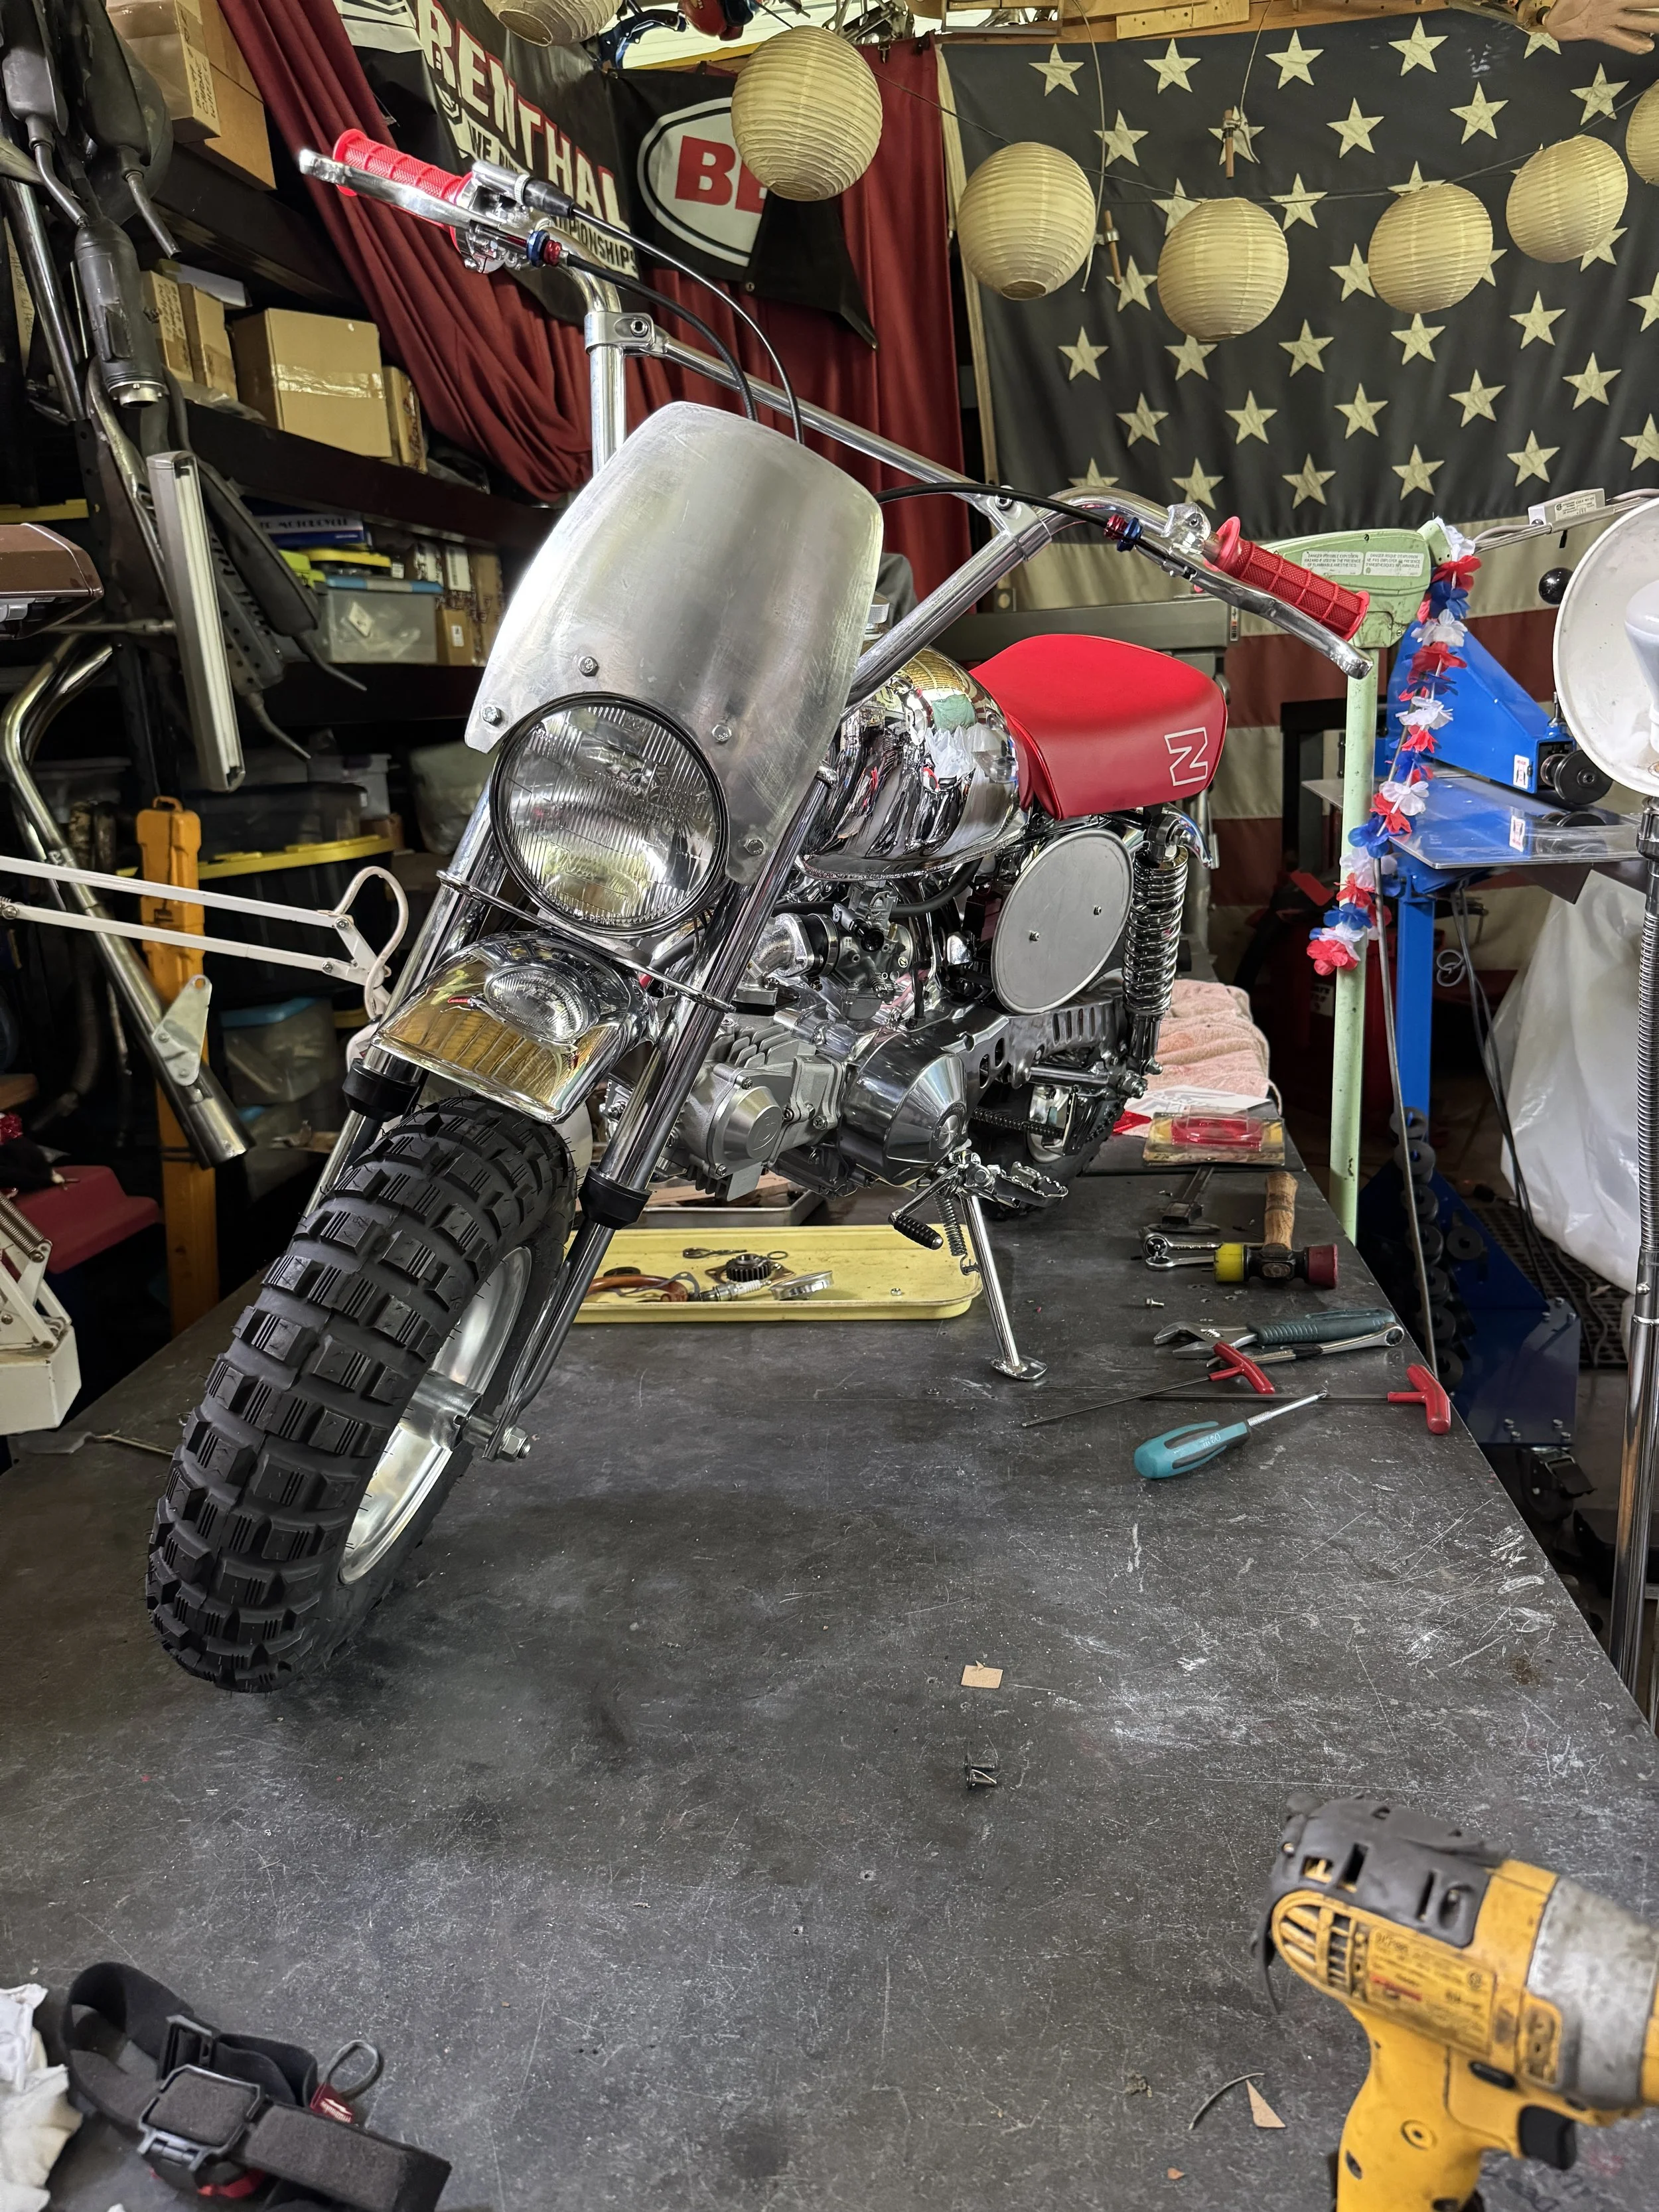
The headlight is mounted from a single bottom post, and the existing fender and handlebar mounting points were used to secure the assembly that holds the headlight and fairing in place. The arrangement is a little unusual in the respect that the typical fork ears that a headlight mounts on were not used, and since that is also the usual fairing mounting point, it meant a great deal of force would be exerted on the headlight mount at the bottom of the bucket. A set of struts were made to go from the lower front fender mount for the headlight, up to the screws coming off the bottom of the handlebar clamps, and the fairing attached to it.
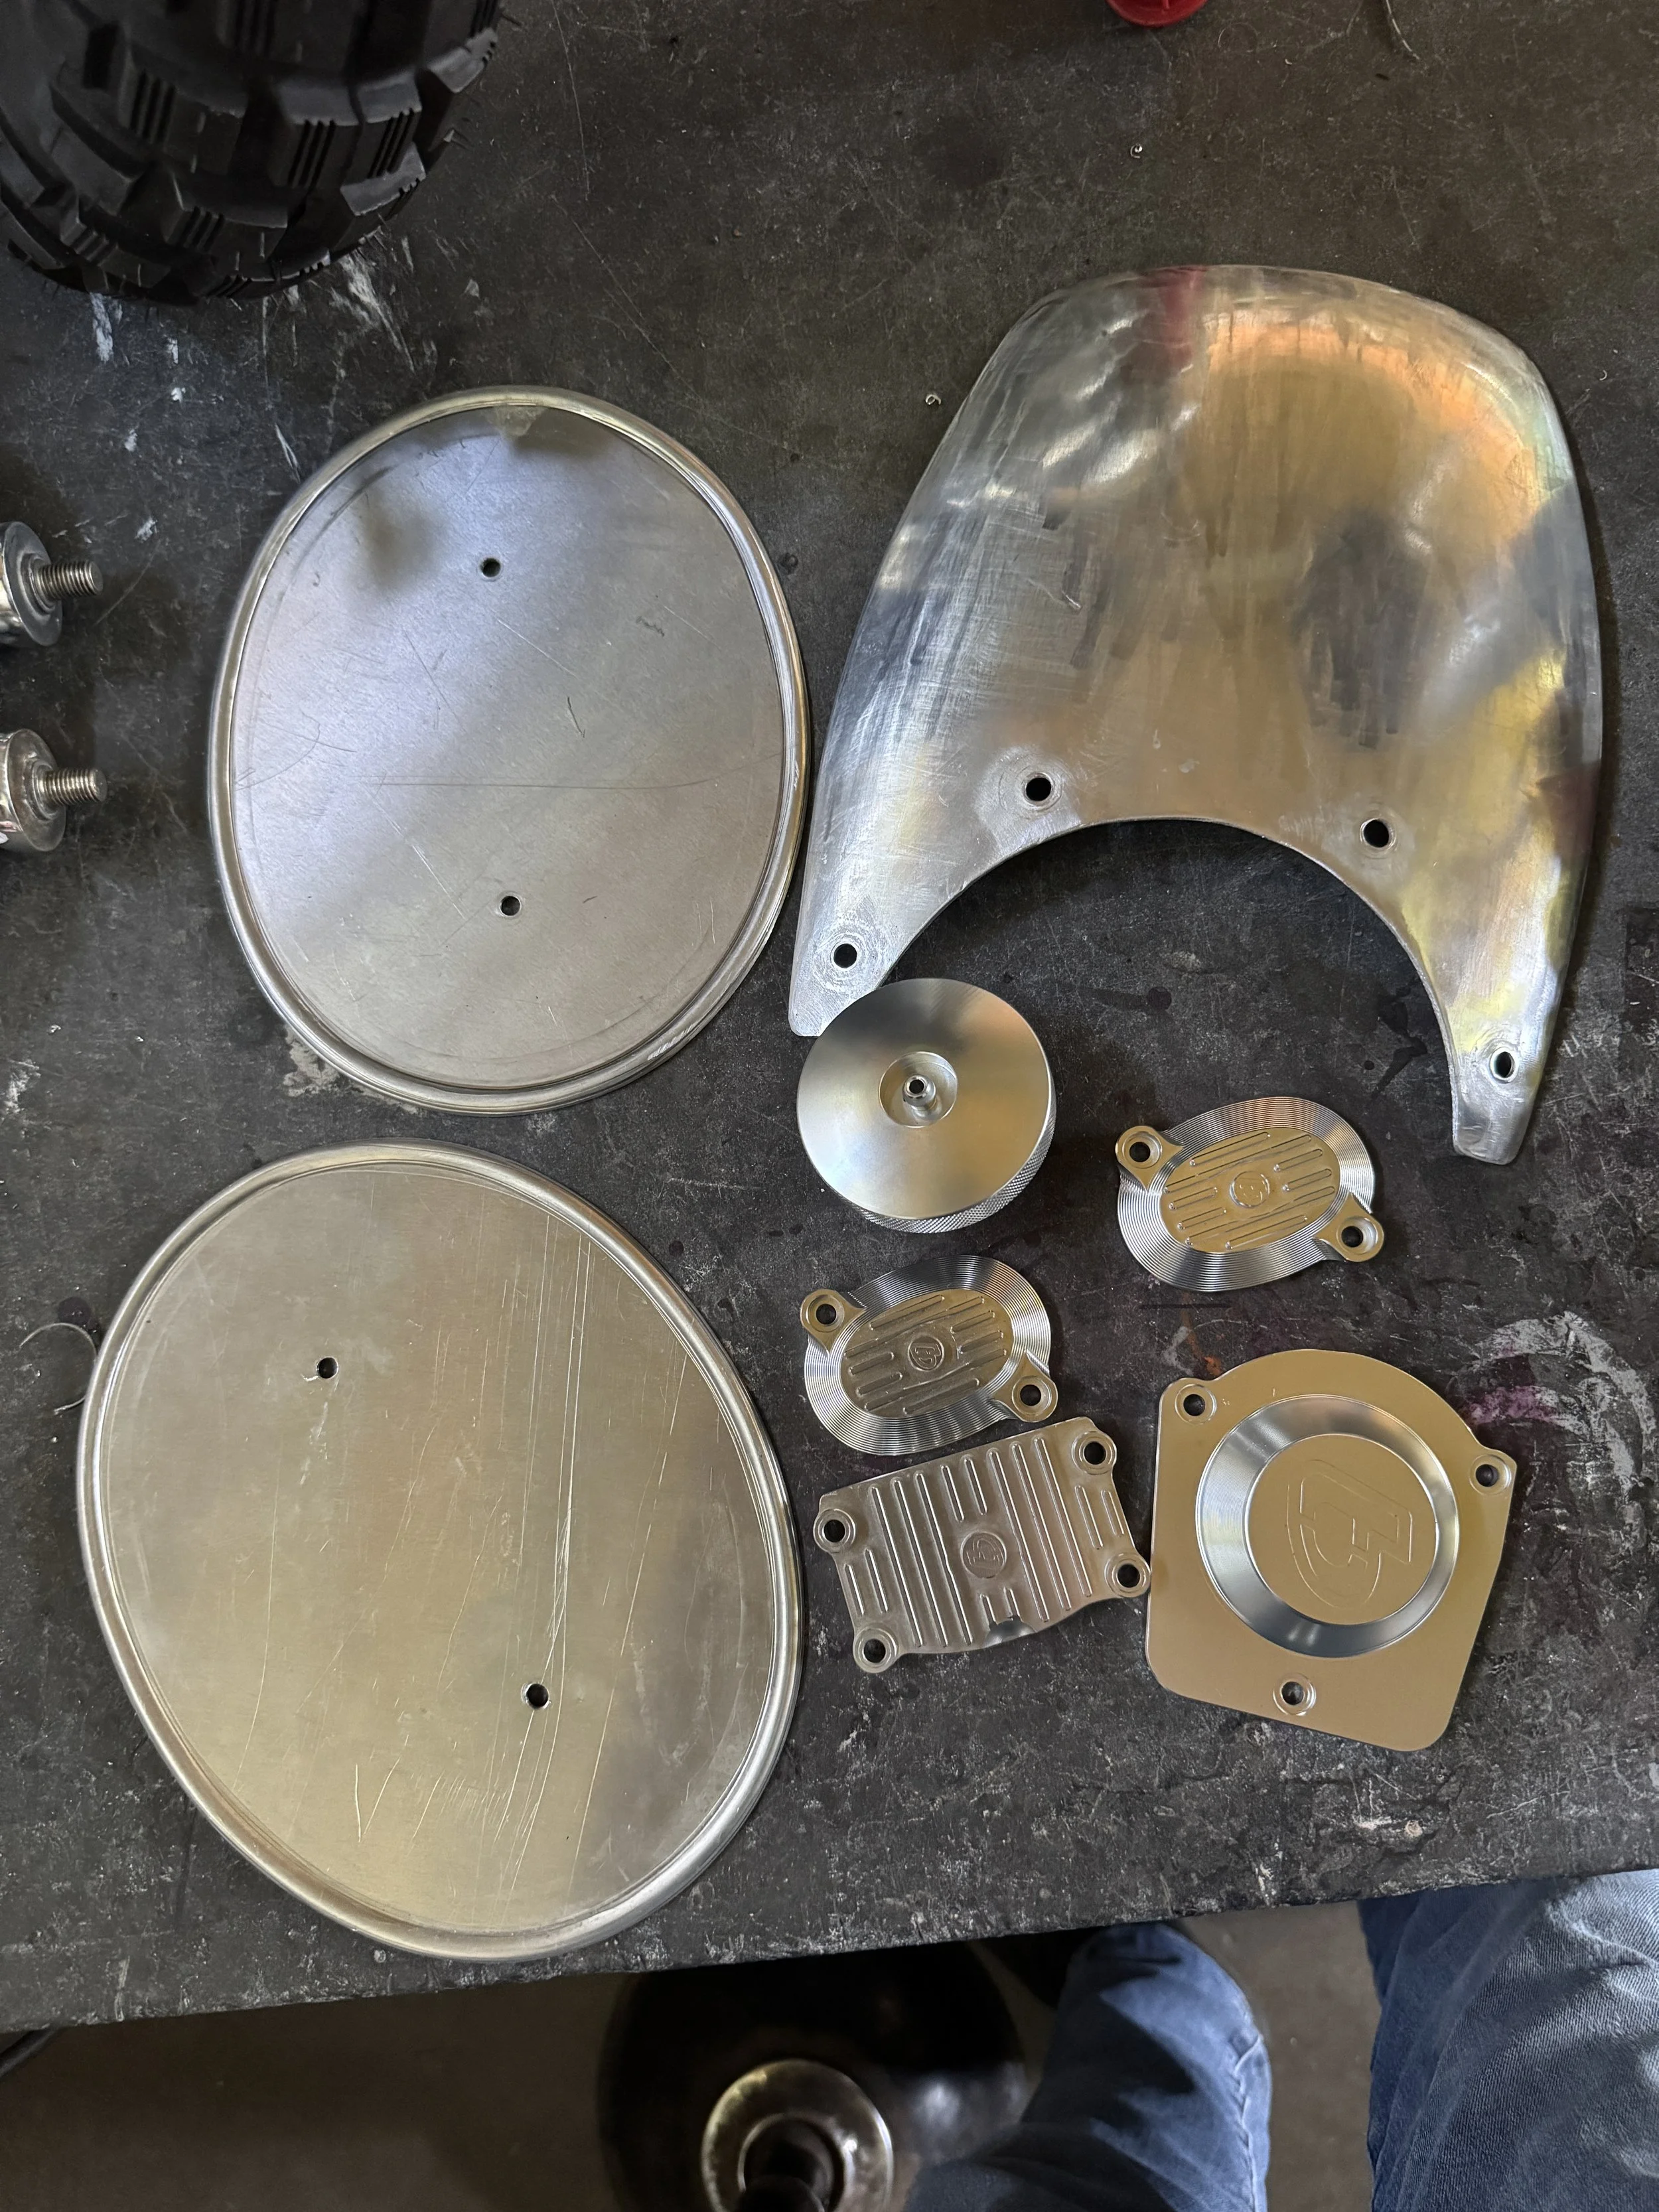
A bunch of pieces prior to sanding and polishing. The engine covers will be modified, with the cam chain cover getting trimmed, and the other covers smoothed and high polished. Some of the TB Parts pieces were shiny, but more a matte finish. The high polish finish will make them fit in with the rest of the parts better. Some of the marks from the English wheel are visible on the front fairing.

Other small details like filing the forging lines off the kickstart lever prior to high polish. The engine covers can be seen at top left. The stepped CNC finish is fine and probably dissipates heat a bit better, but the texture will be removed and the surface polished out.
The little extra work makes a difference.
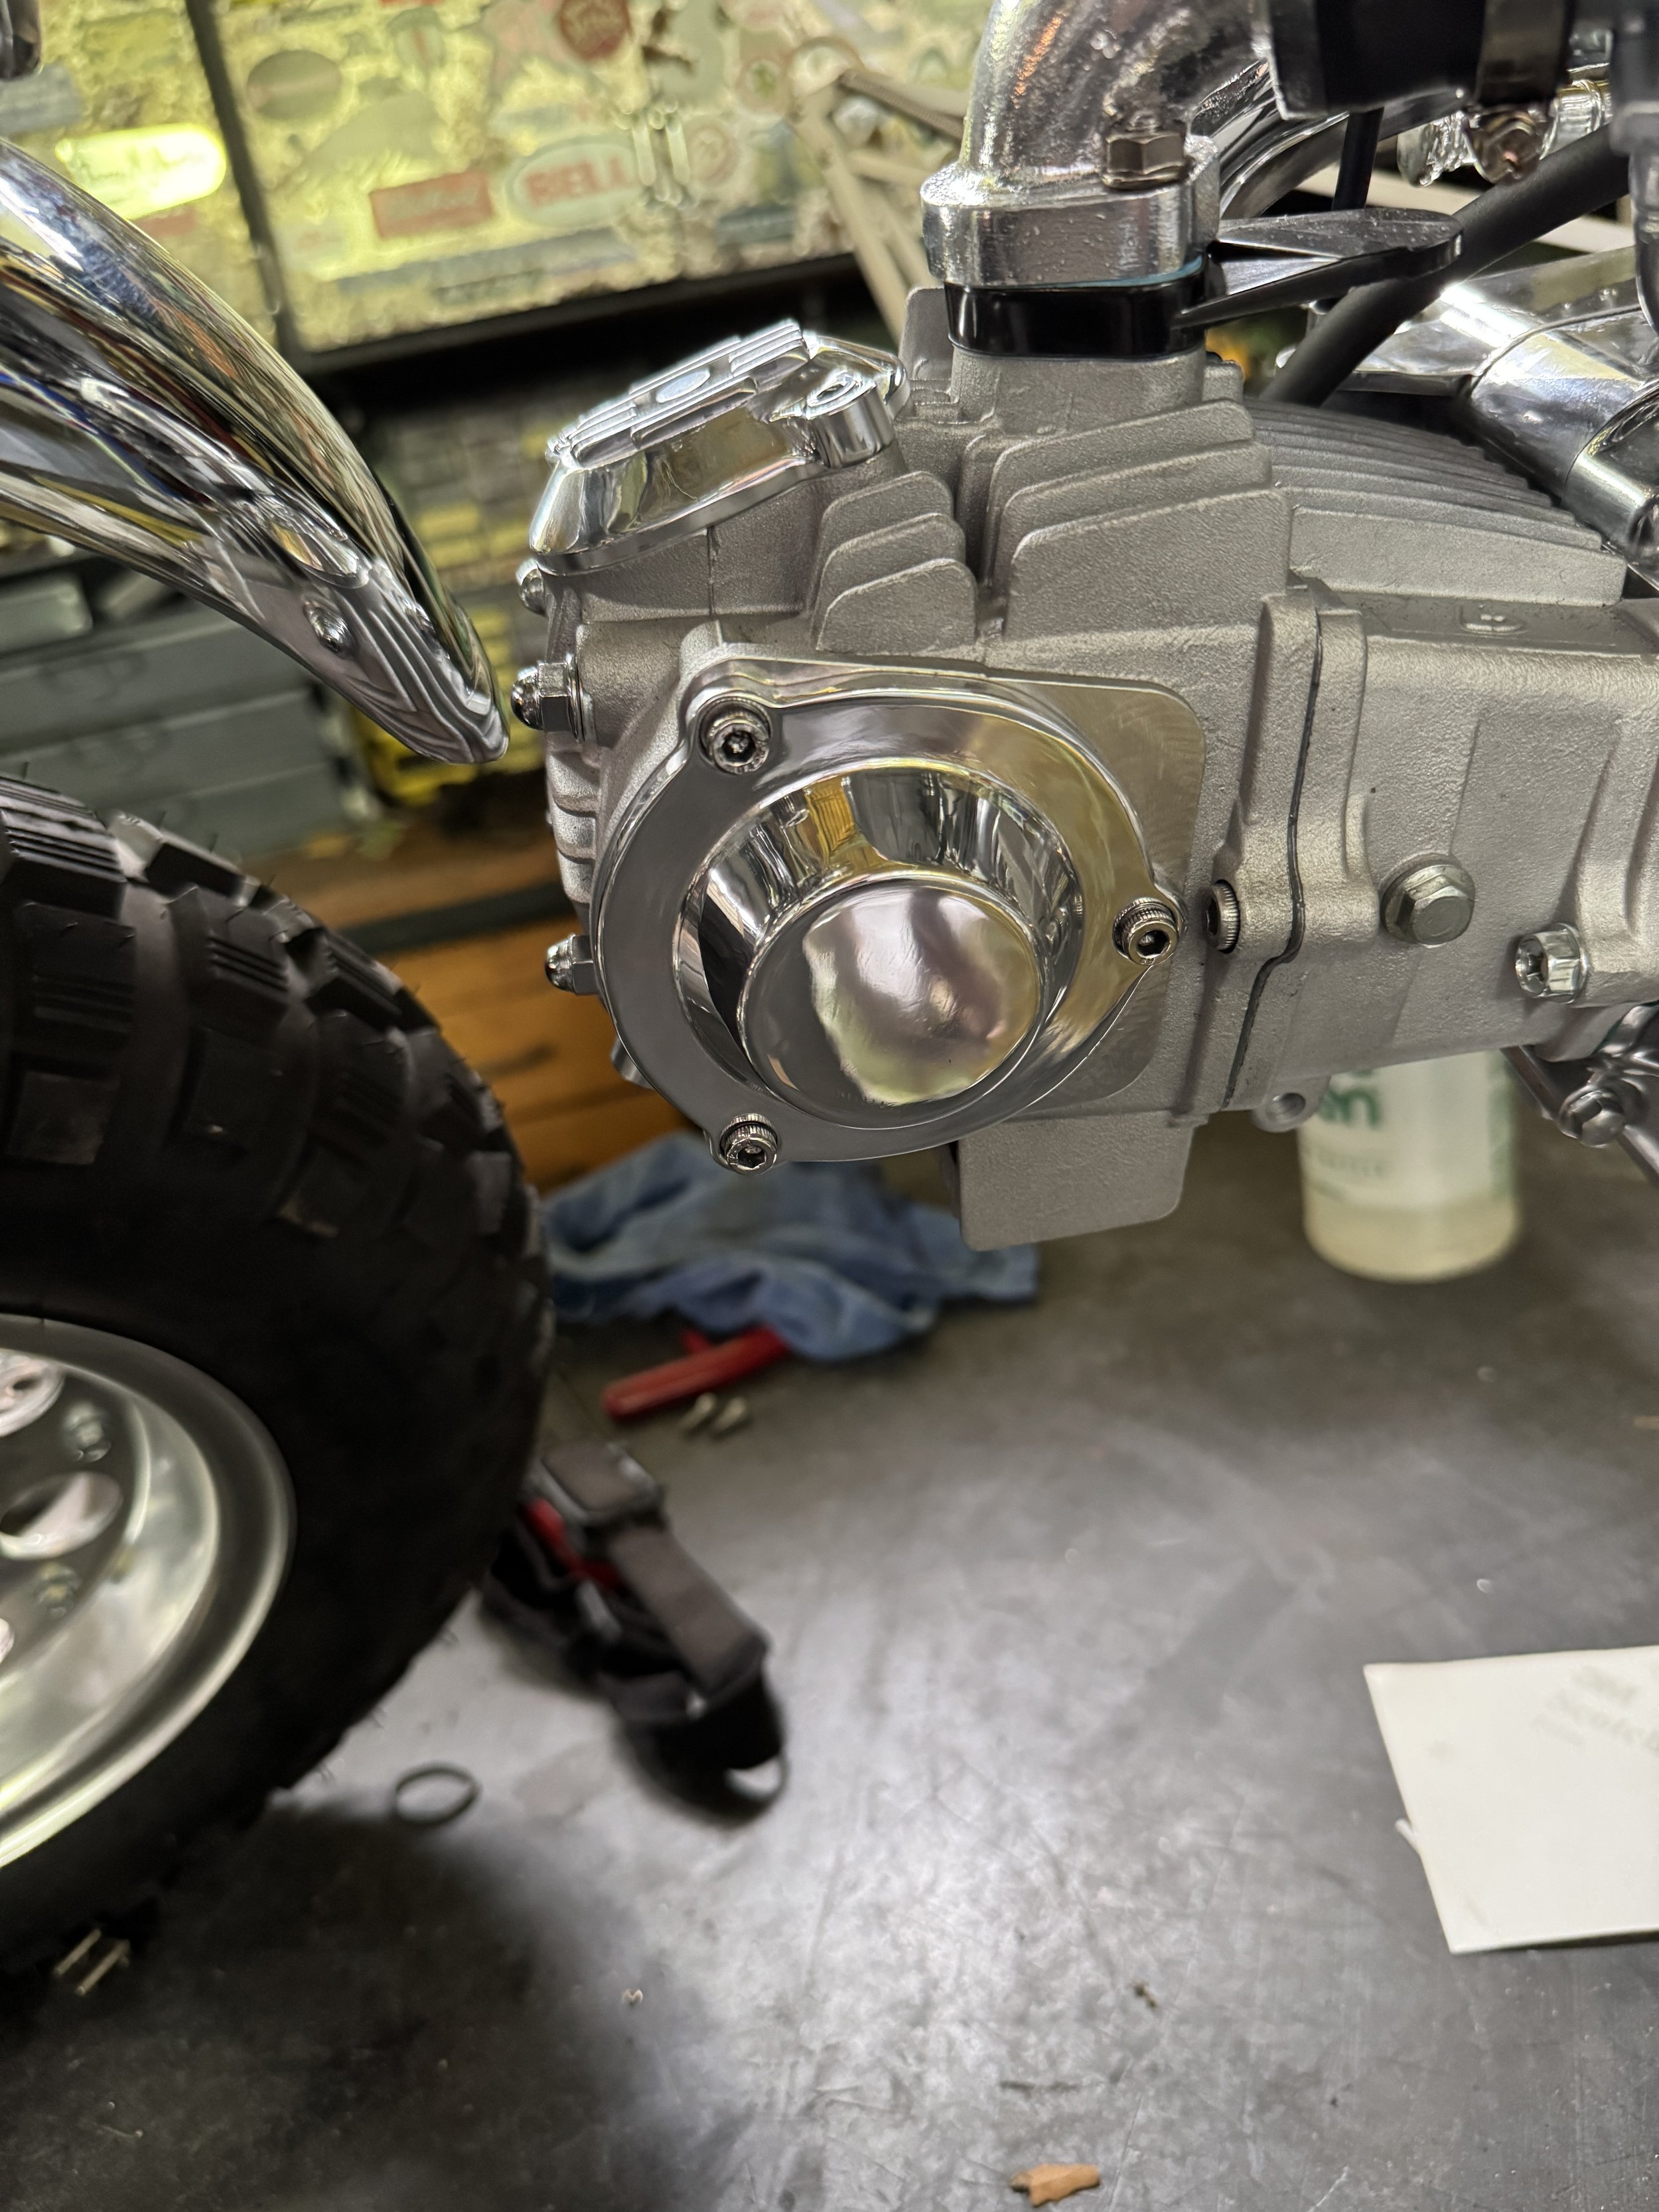
The cam chain cover flange was rounded out, and everything high polished.

The valve adjustment covers came out nice. All the stainless allen head screws were polished up as well.
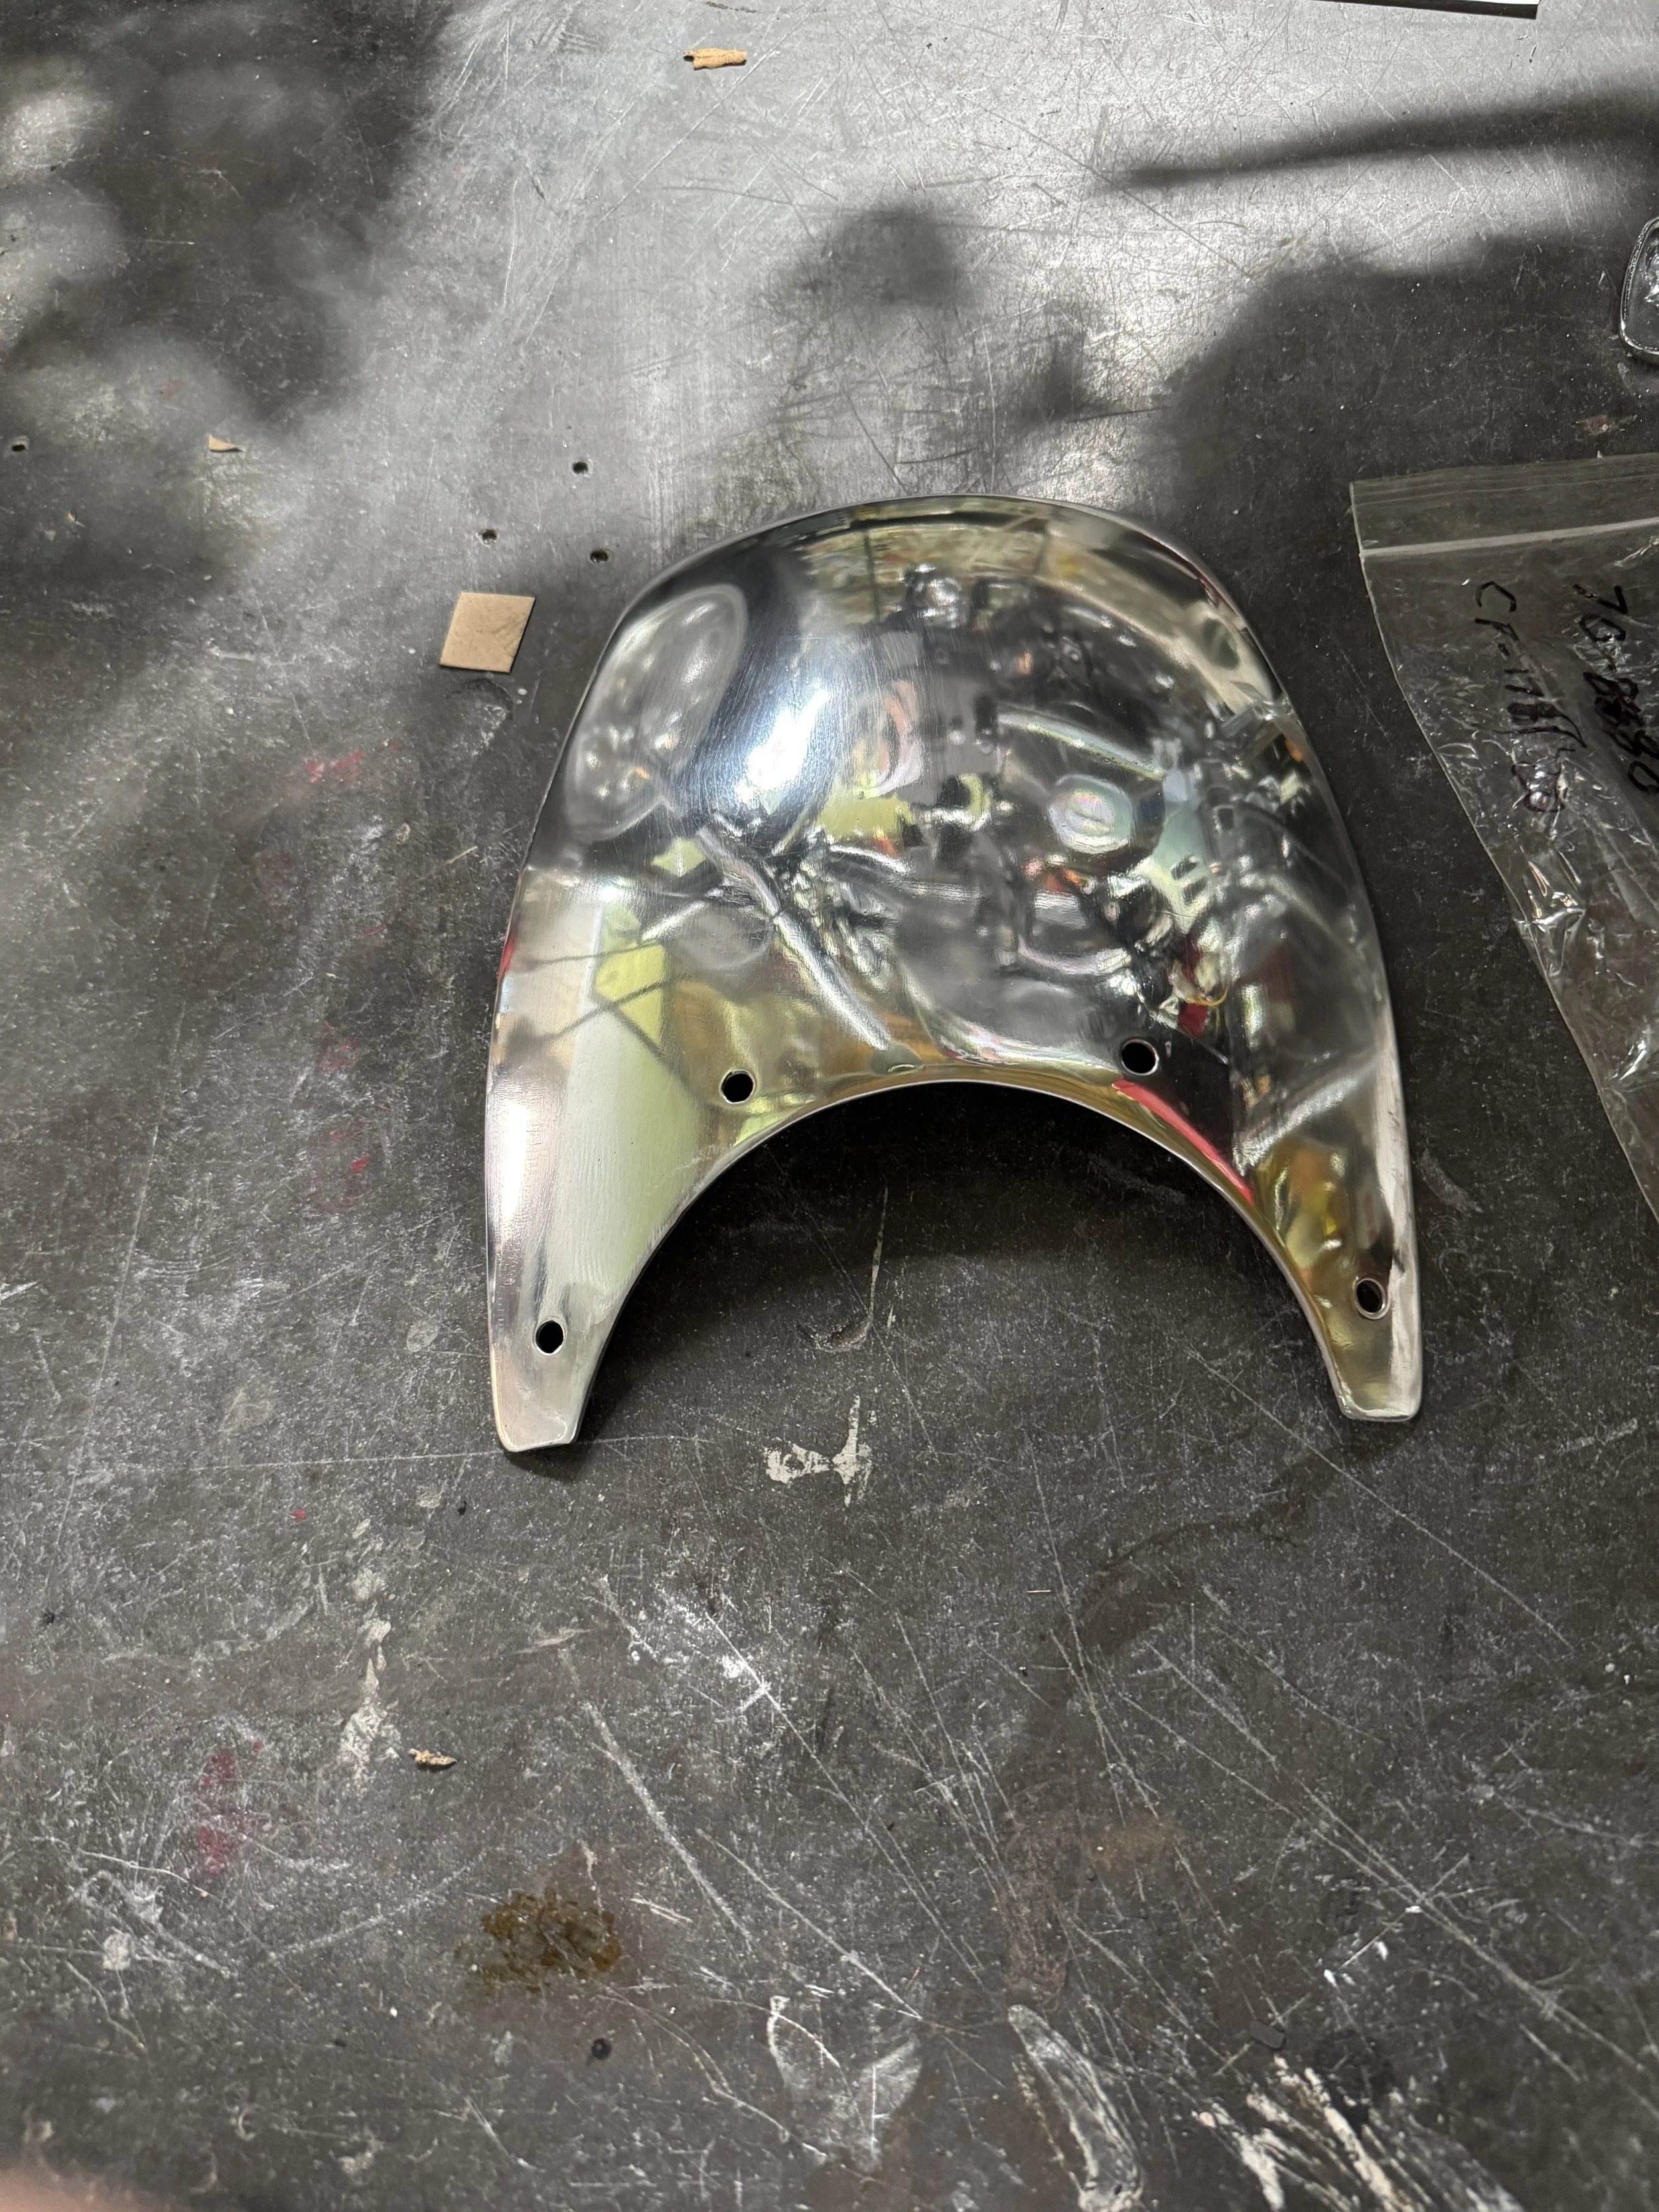
High polish on the fairing! Because it was formed mostly by the English wheel, the surface was already burnished and smooth, and required only a little sanding.
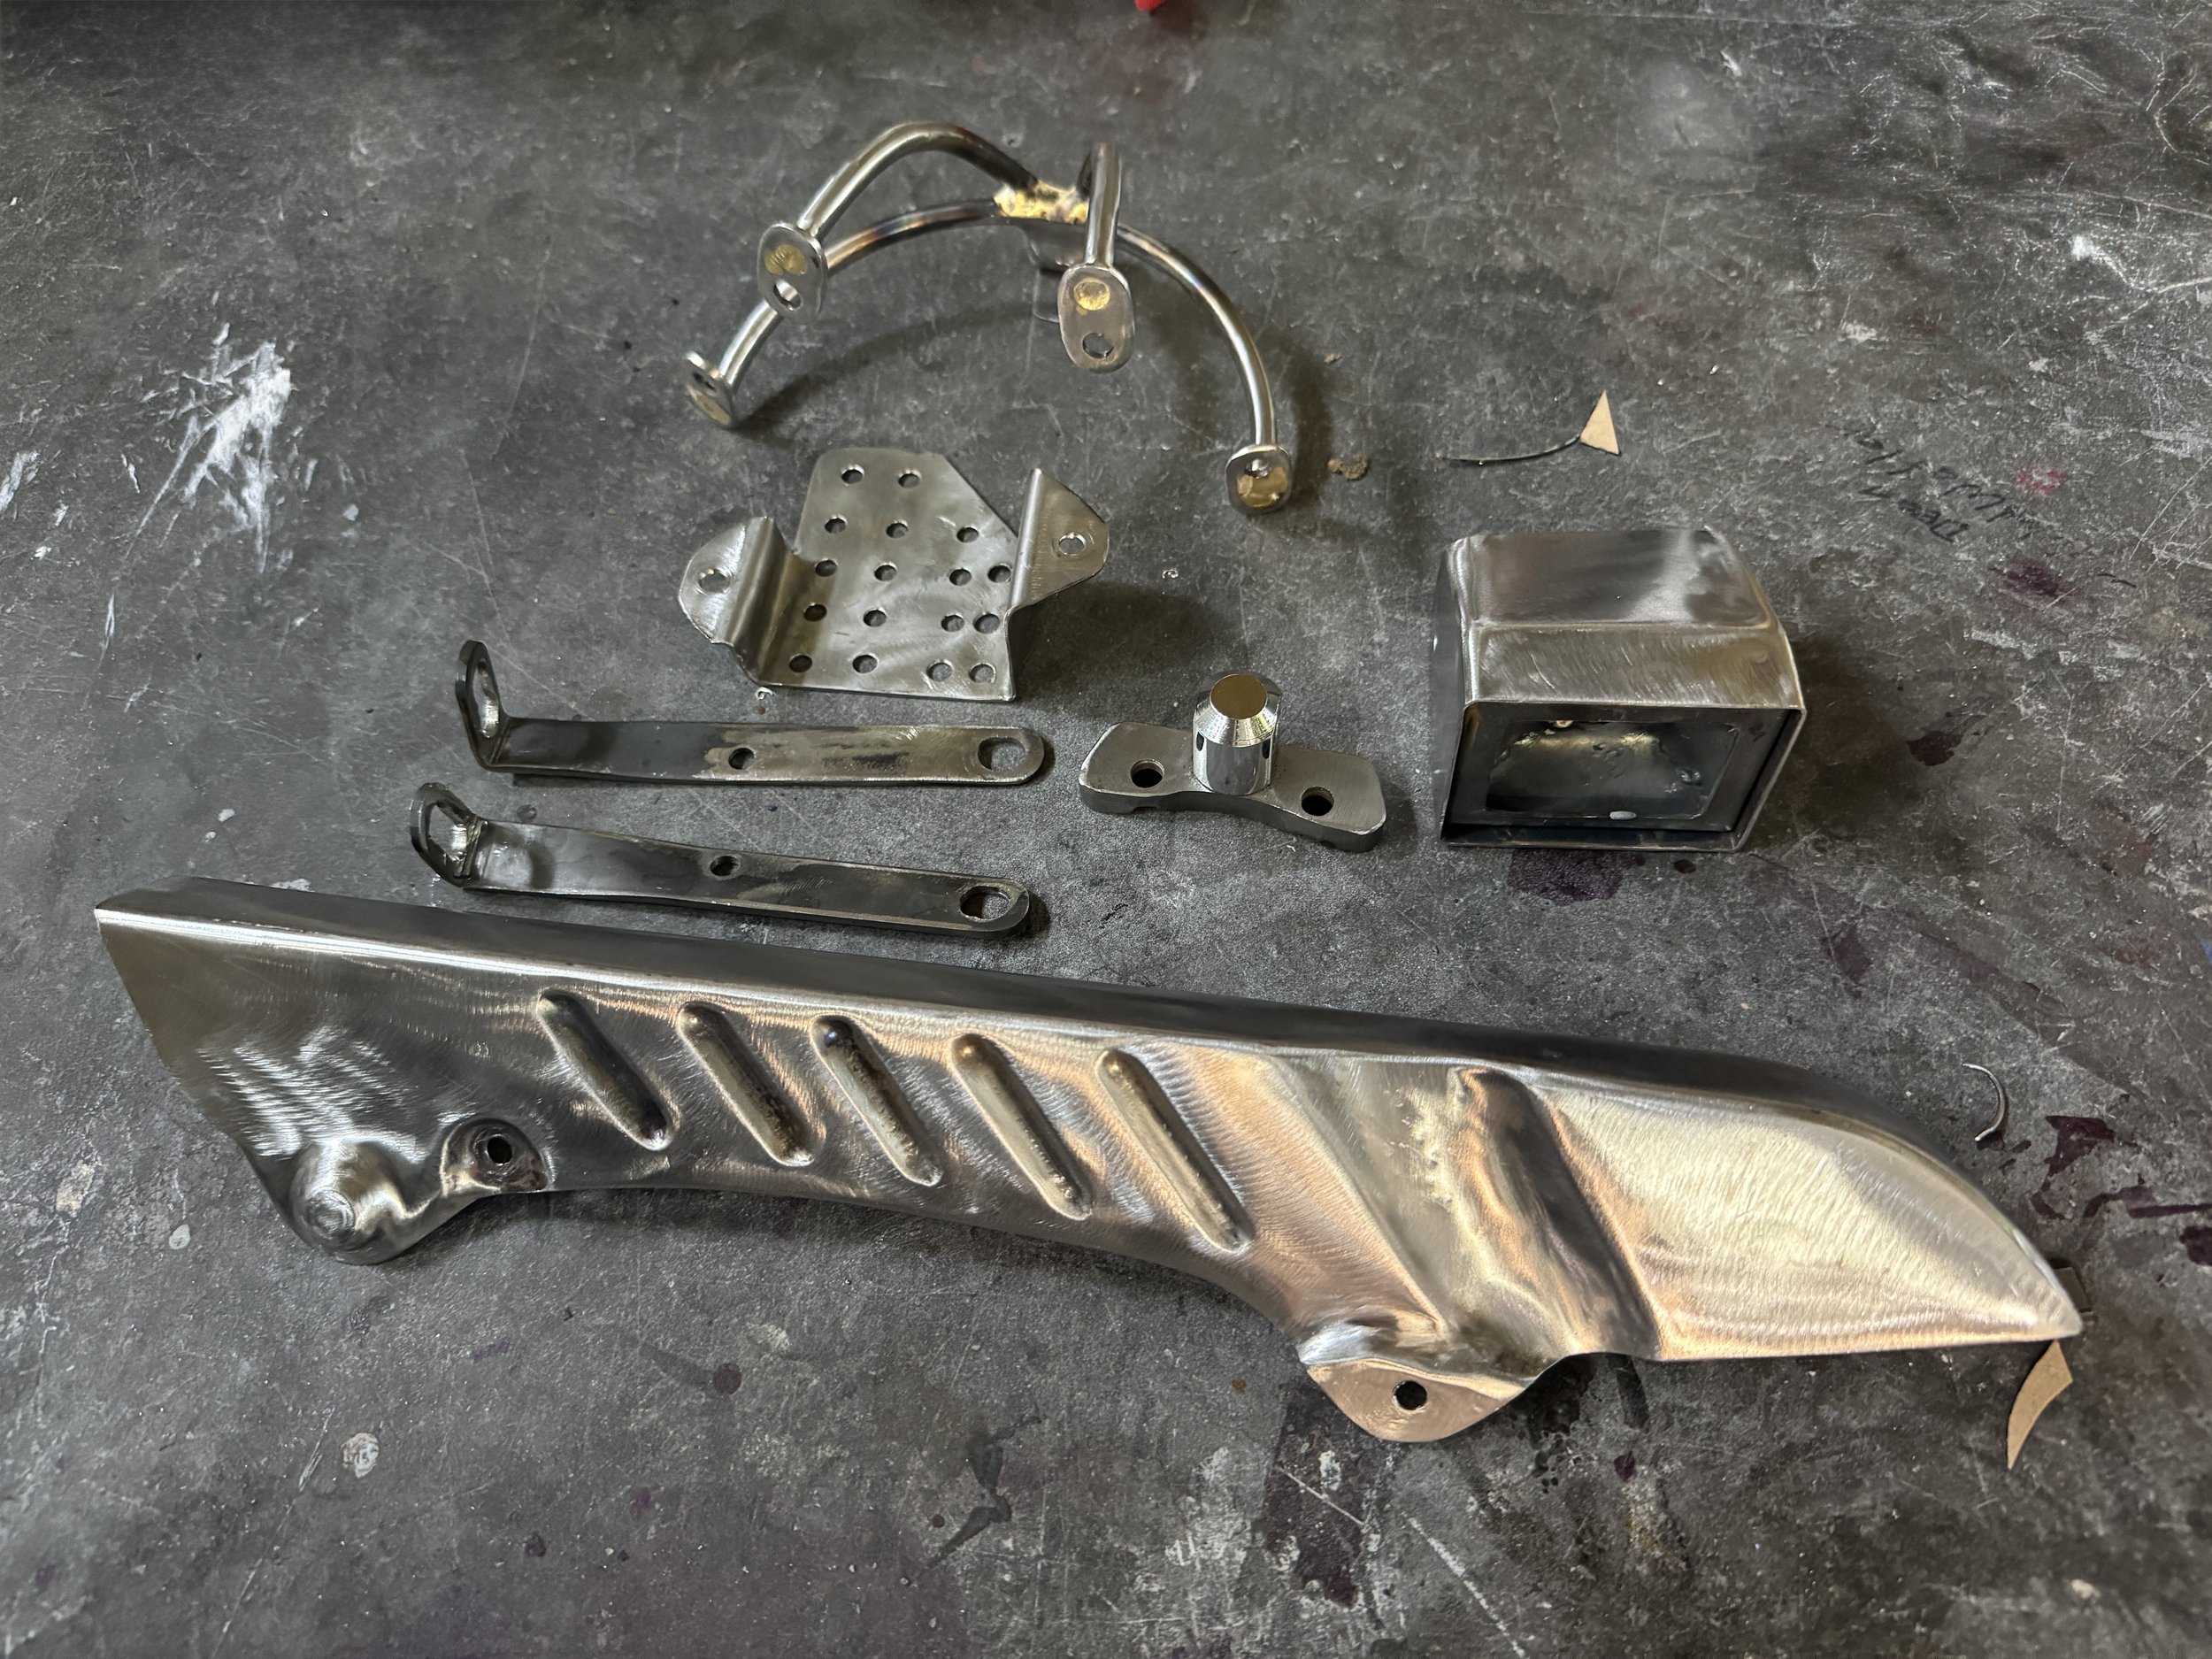
The last batch of stuff for the chrome shop. The parts just behind the chain guard make up the headlight mount. when in place, the lower fender mount bolts will lock on the lower part of the mount, and the struts will provide support for the mount as well as the fairing mount. The fairing mount is at the top.of the picture. It will be interesting to see how the chain guard looks chromed. I thought about making it black to look like the original black plastic one, but I think it will look better shiny. Its a custom, after all.

With the decals on the tank, it is starting to look like a finished bike.The polished kickstart and number plate have this side pretty much done.

The gas cap looks so much better polished.

The shorty levers will probably get sanded and polished out. Just need to take a couple days off from aluminum polishing. The red and blue anodized cable adjusters are from Takegawa.