A million details. Going down the checklist of each job, working out the electrical, mechanical, and cosmetic details. Most everything is done, aside from starting and tuning the bike.
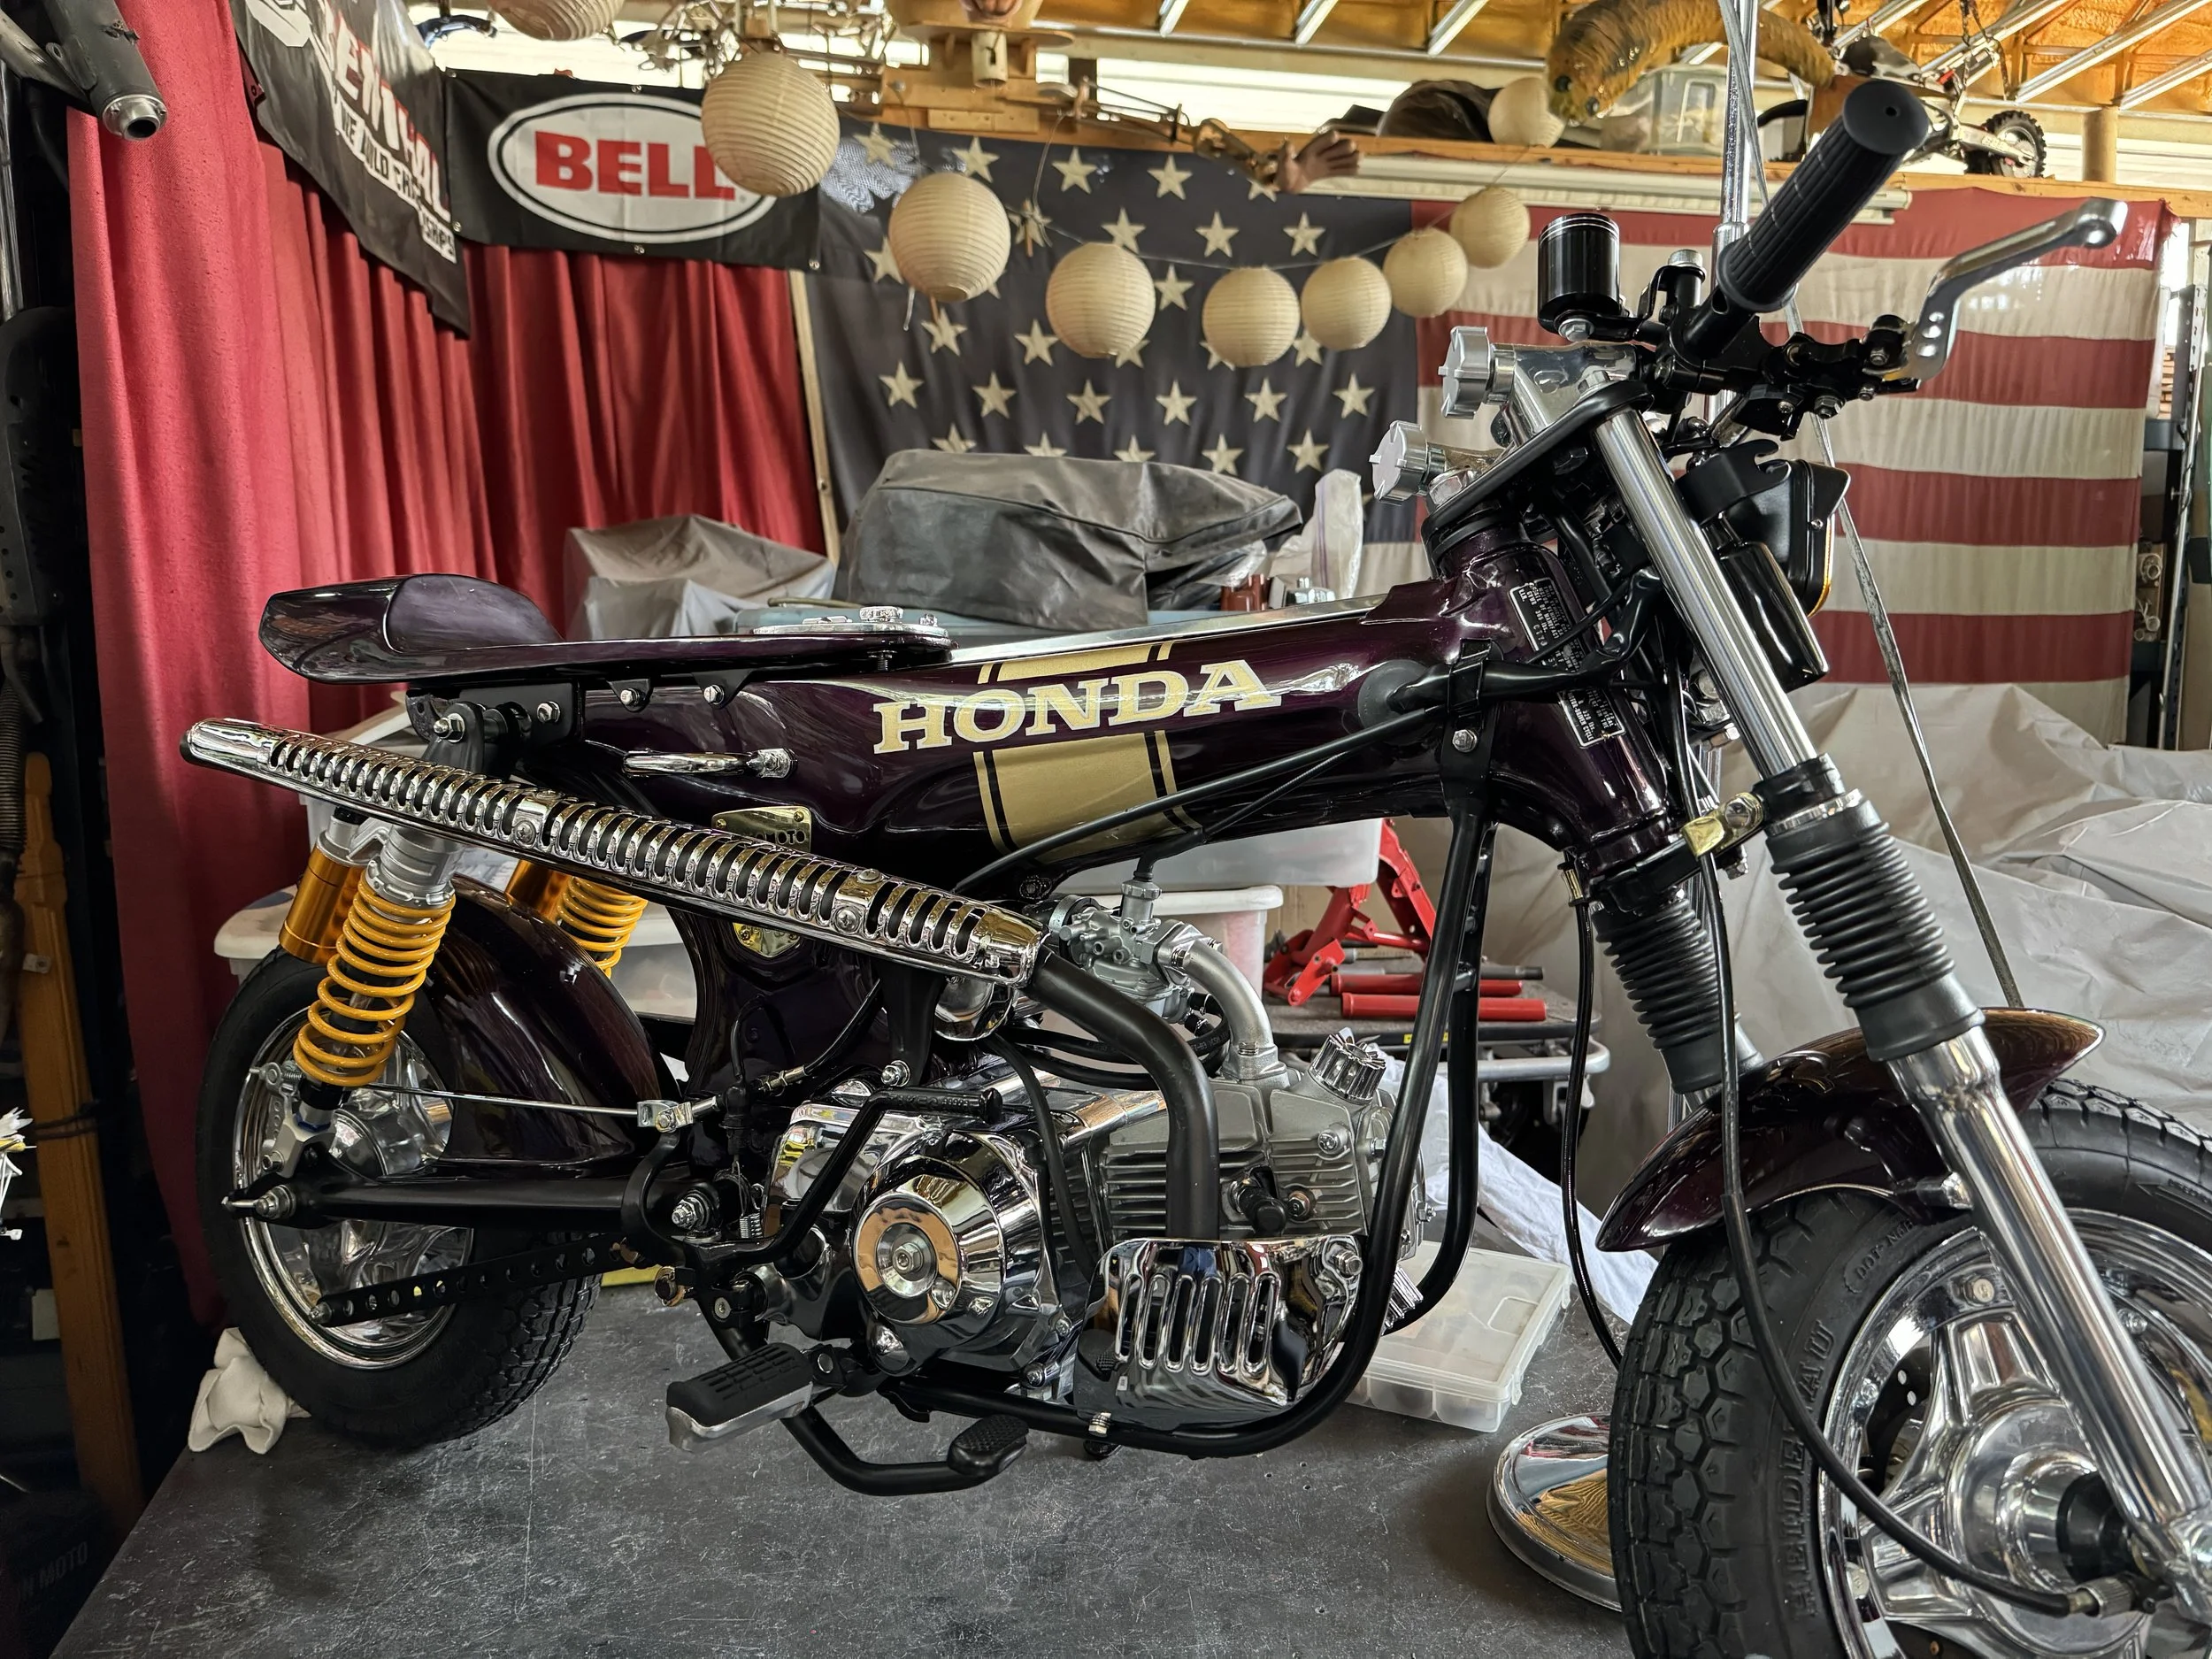
Always interesting to see the color scheme playing out. Trying to find the right balance between chrome, black, wild cherry, and gold colors was challenging. There is part of me that would like to see the gold stripe on the fairing and tail section, but it might make things a little too busy.
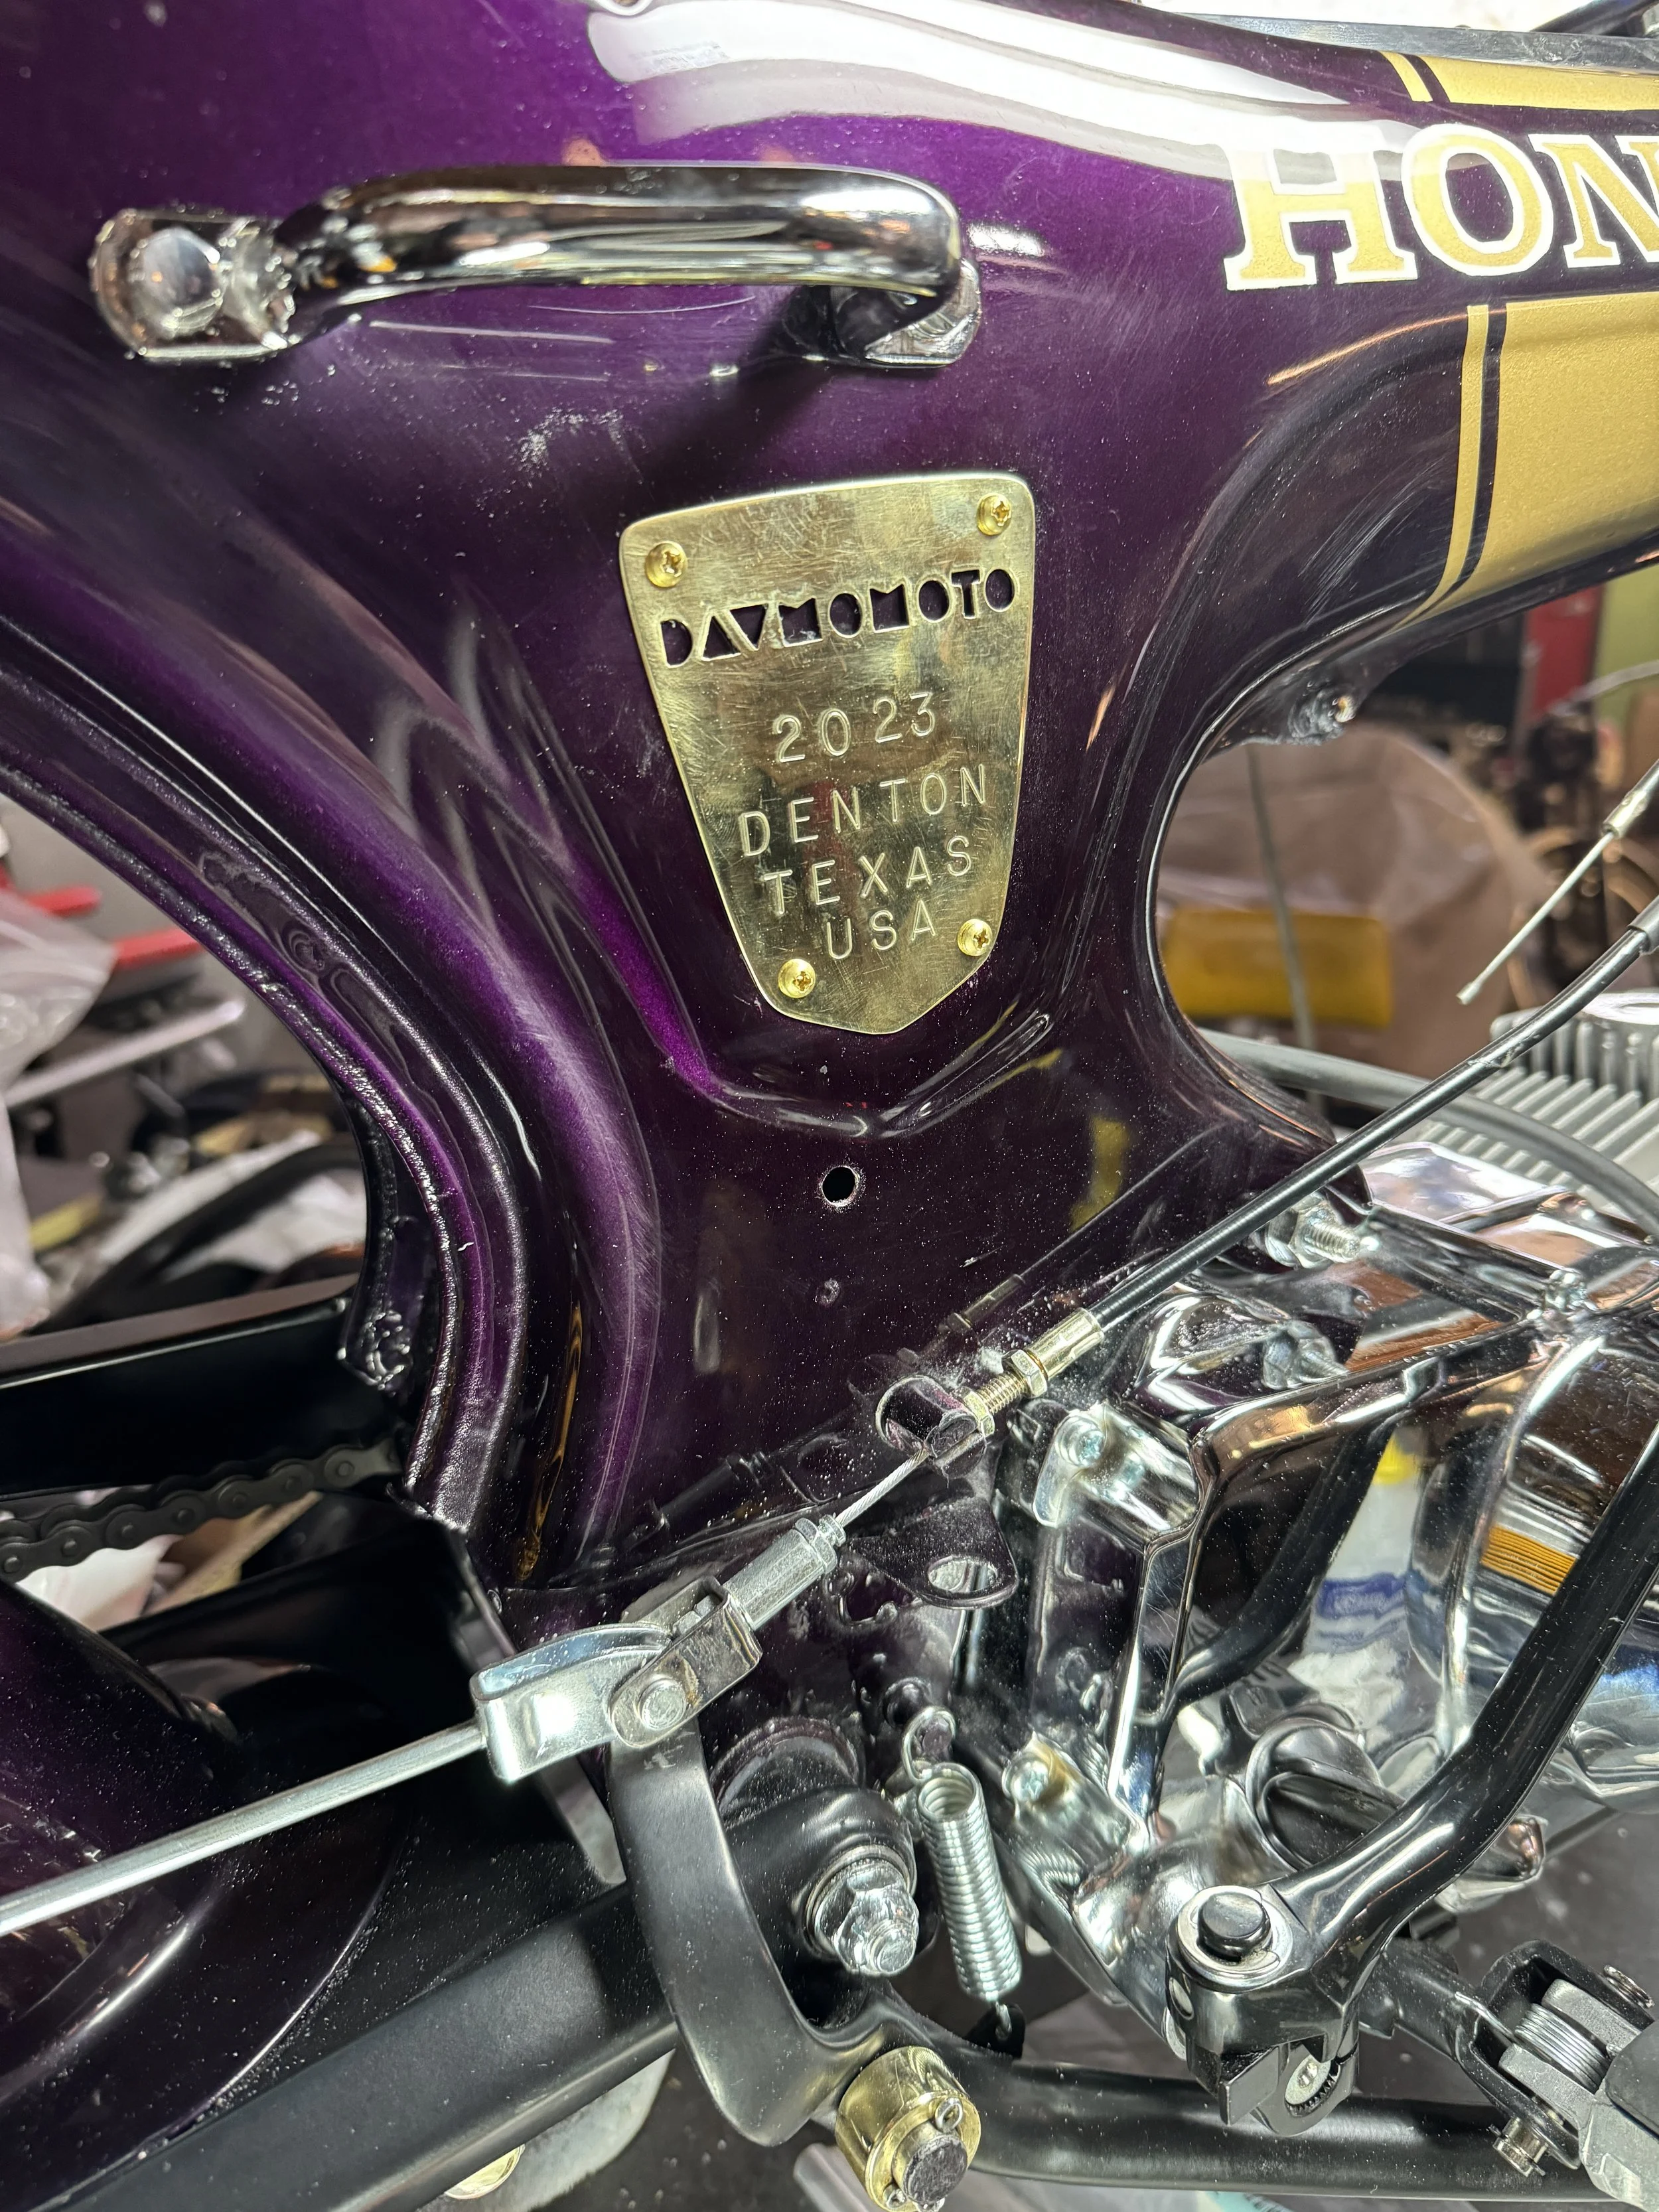
Always close to the end, the badging has to be done. There are two locations on the sides of the bikes, where the original foil sticks went, that are perfect for some badges, This is on the right side, largely concealed behind the muffler. The logo at the top was made like the badges on the CT117, piercing the metal plate to make the letters. The rest was done with simple letter stamps. A more refined one was made for the other side.

This badge was done by Master Engaver, Wade Oliver Wilson of Mansfield, Texas. He has done engraving for quite a few of my builds, and always knocks the ball out of the park. The “Dino” script is from the Ferrari model by the same name, but meant as a nod to the owner of the bike who goes by Dino. The purple paint matching Dino the Dinosaur’s color was a coincidence, but it works!
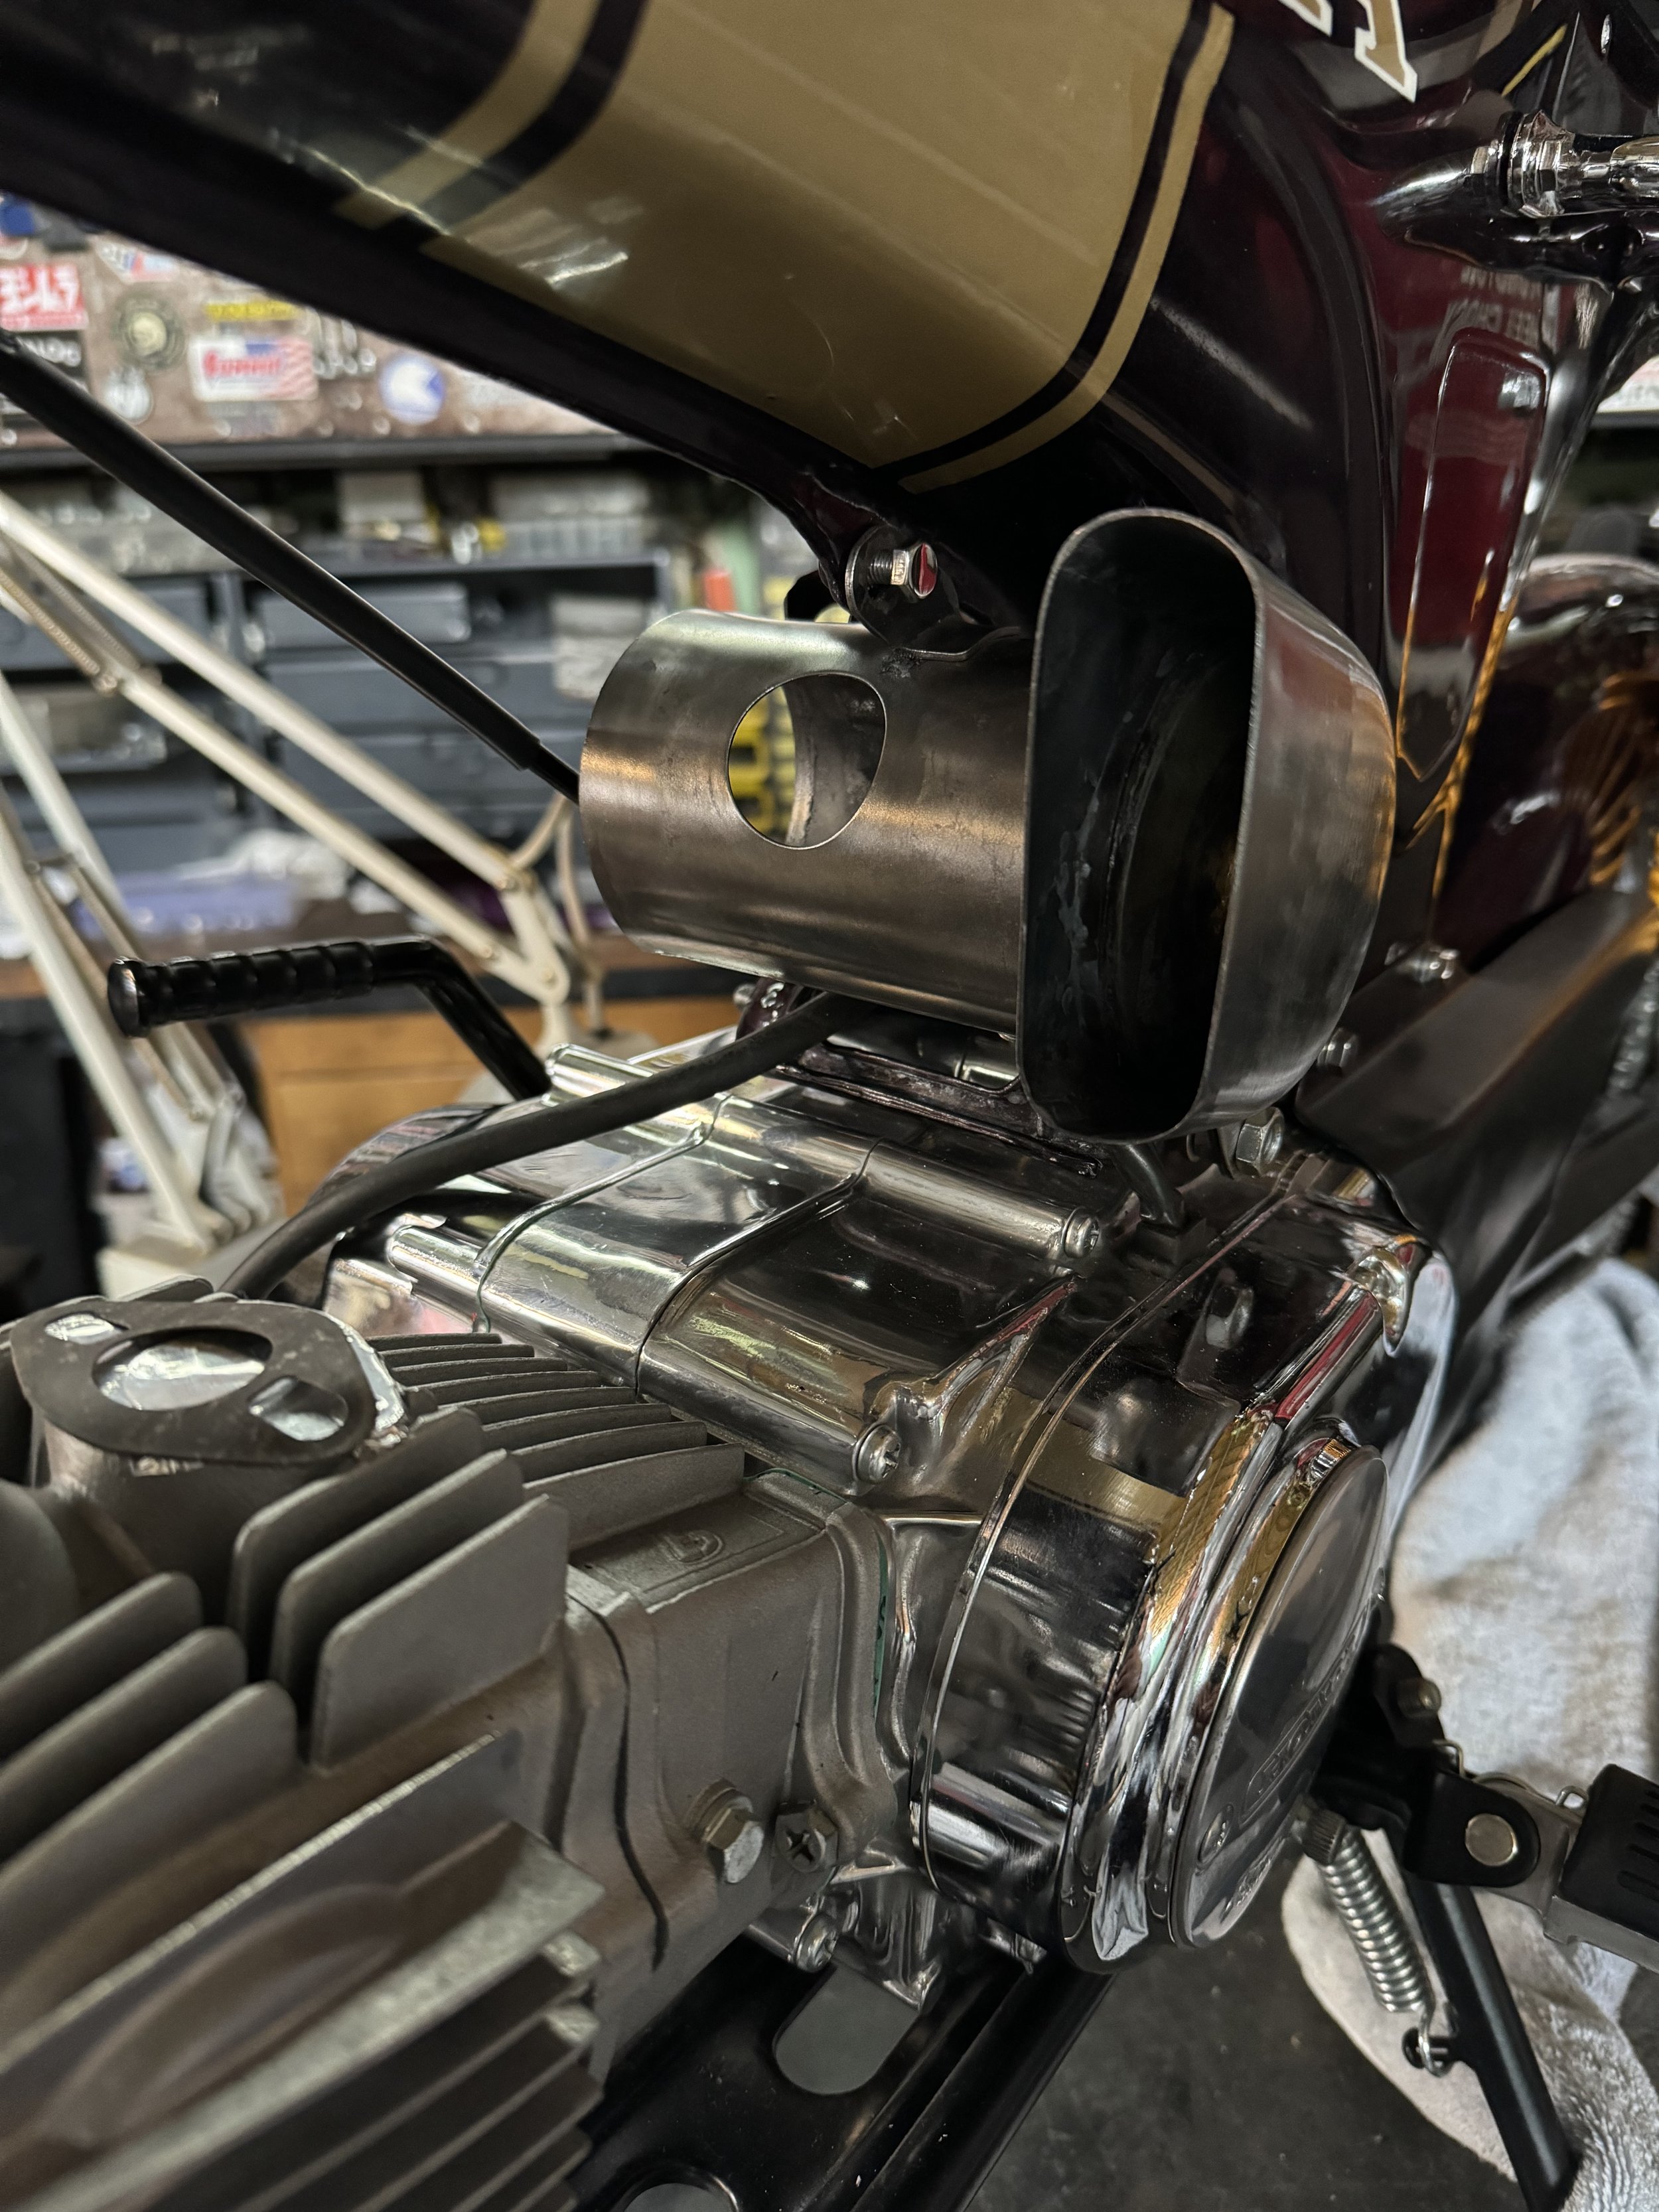
A scoop on the side of the stock airbox was a last-minute addition. Using another component reminiscent of the CT117 build was part of the reasoning, but the truth is I have been thinking about this mod for years, just didn’t have the right bike to try it out till now. The CT70 is a challenging bike to customize, in my opinion, because of the unique frame, swingarm, and oversize tires.There are clearances with the chain, rear fender and wheel that do not allow too much variation.

Prior to going to the chrome shop. The scoop fits tightly with the screw from the center of the airbox, and the bracket that goes to the usual airbox mount.

The design of the scoop was influenced by the curves of the frame. Though the angle of the scoop opening looks a little sharp and angular, it appears to be more vertical from the front.

A brass insert with mesh filter was added to complete the design. It is a friction fit and can be removed easily. once again, a little more of the gold color to accent some of the darkness.

Another detail from the CT117, the filler neck of the tank, poking through the seat.
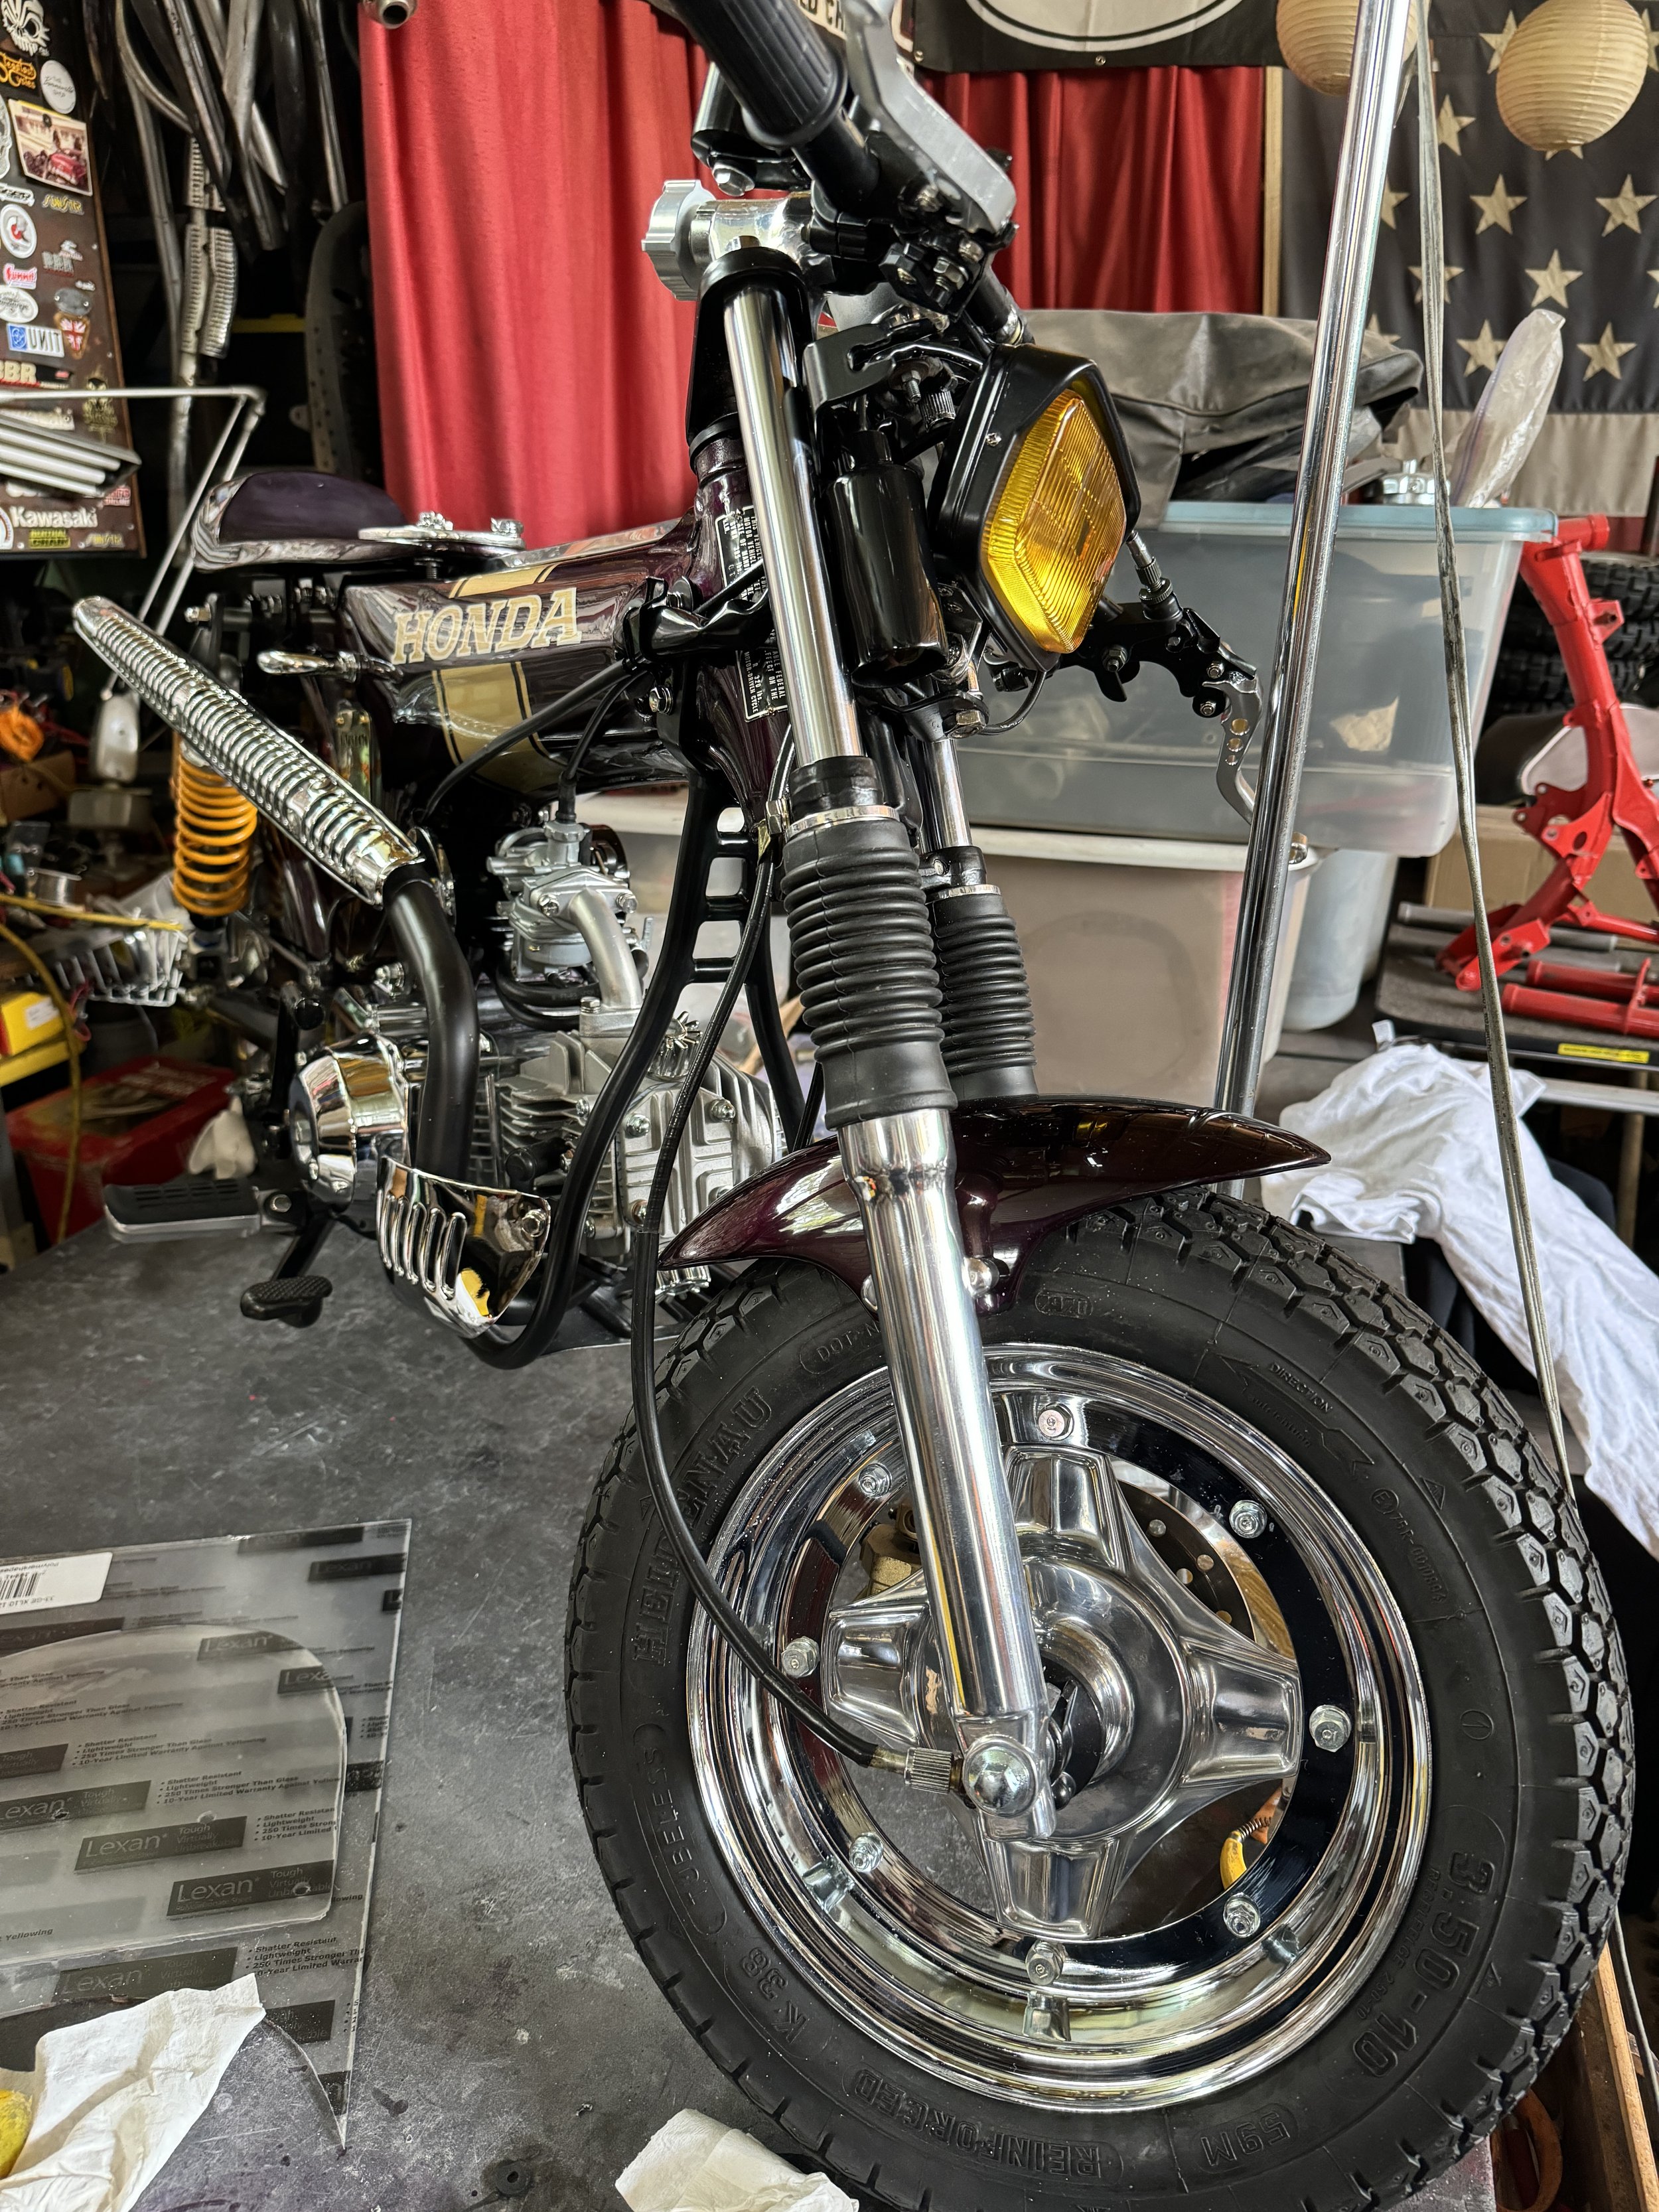
Just needing the front fairing to be complete up front.

Some of the more mundane parts of the build, the rubber packing in the original carb needed to be replaced. This is a common place for leakage. Glad to catch it now. The rest of the carb was cleaned with ultrasound and vapor honing.

Another detail that needed attention was the battery box. With the engine’s electrical system being changed over to 12 Volt, a larger battery was needed. The closest size was slightly too large, so the box was bent and cut to accommodate the larger size, plus some cushioning.
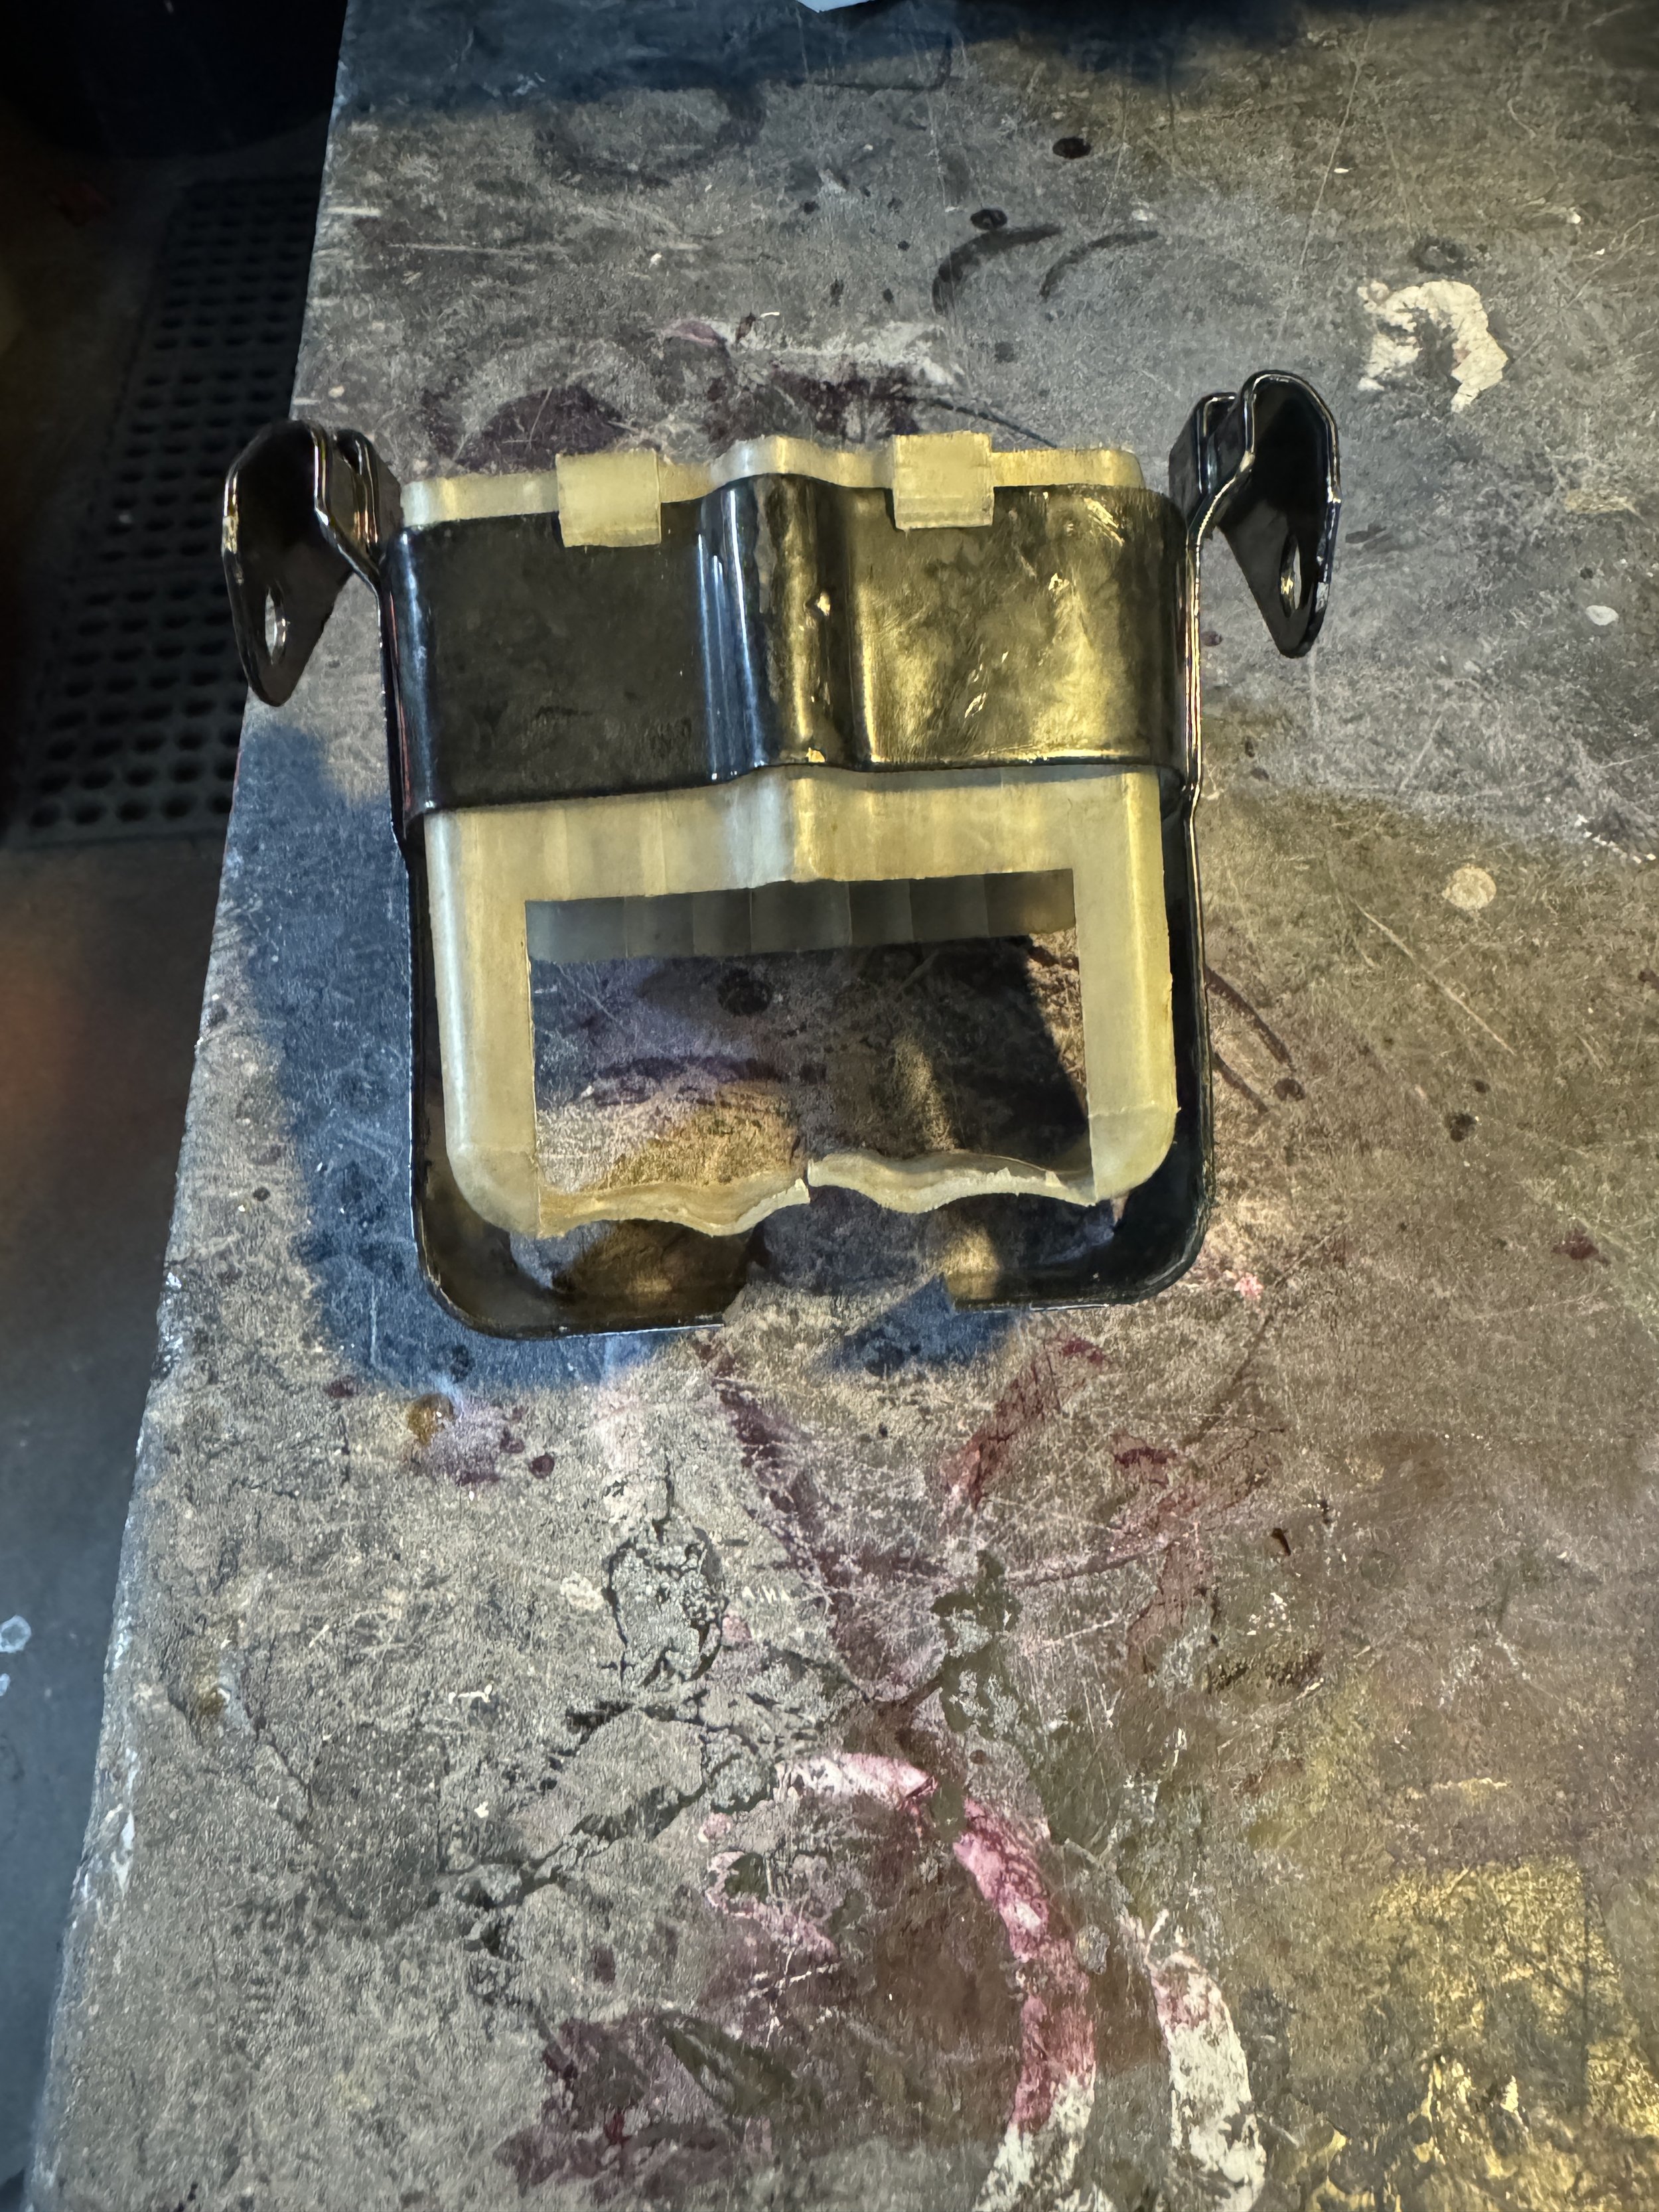
The corners of the box were rounded off on an anvil, making it wider, side to side, and longer on the bottom. The mounting brackets were also re-formed to make the wider box fit inside the frame. The overall effect was to lower the battery 3/4”, to clear the seat pan.
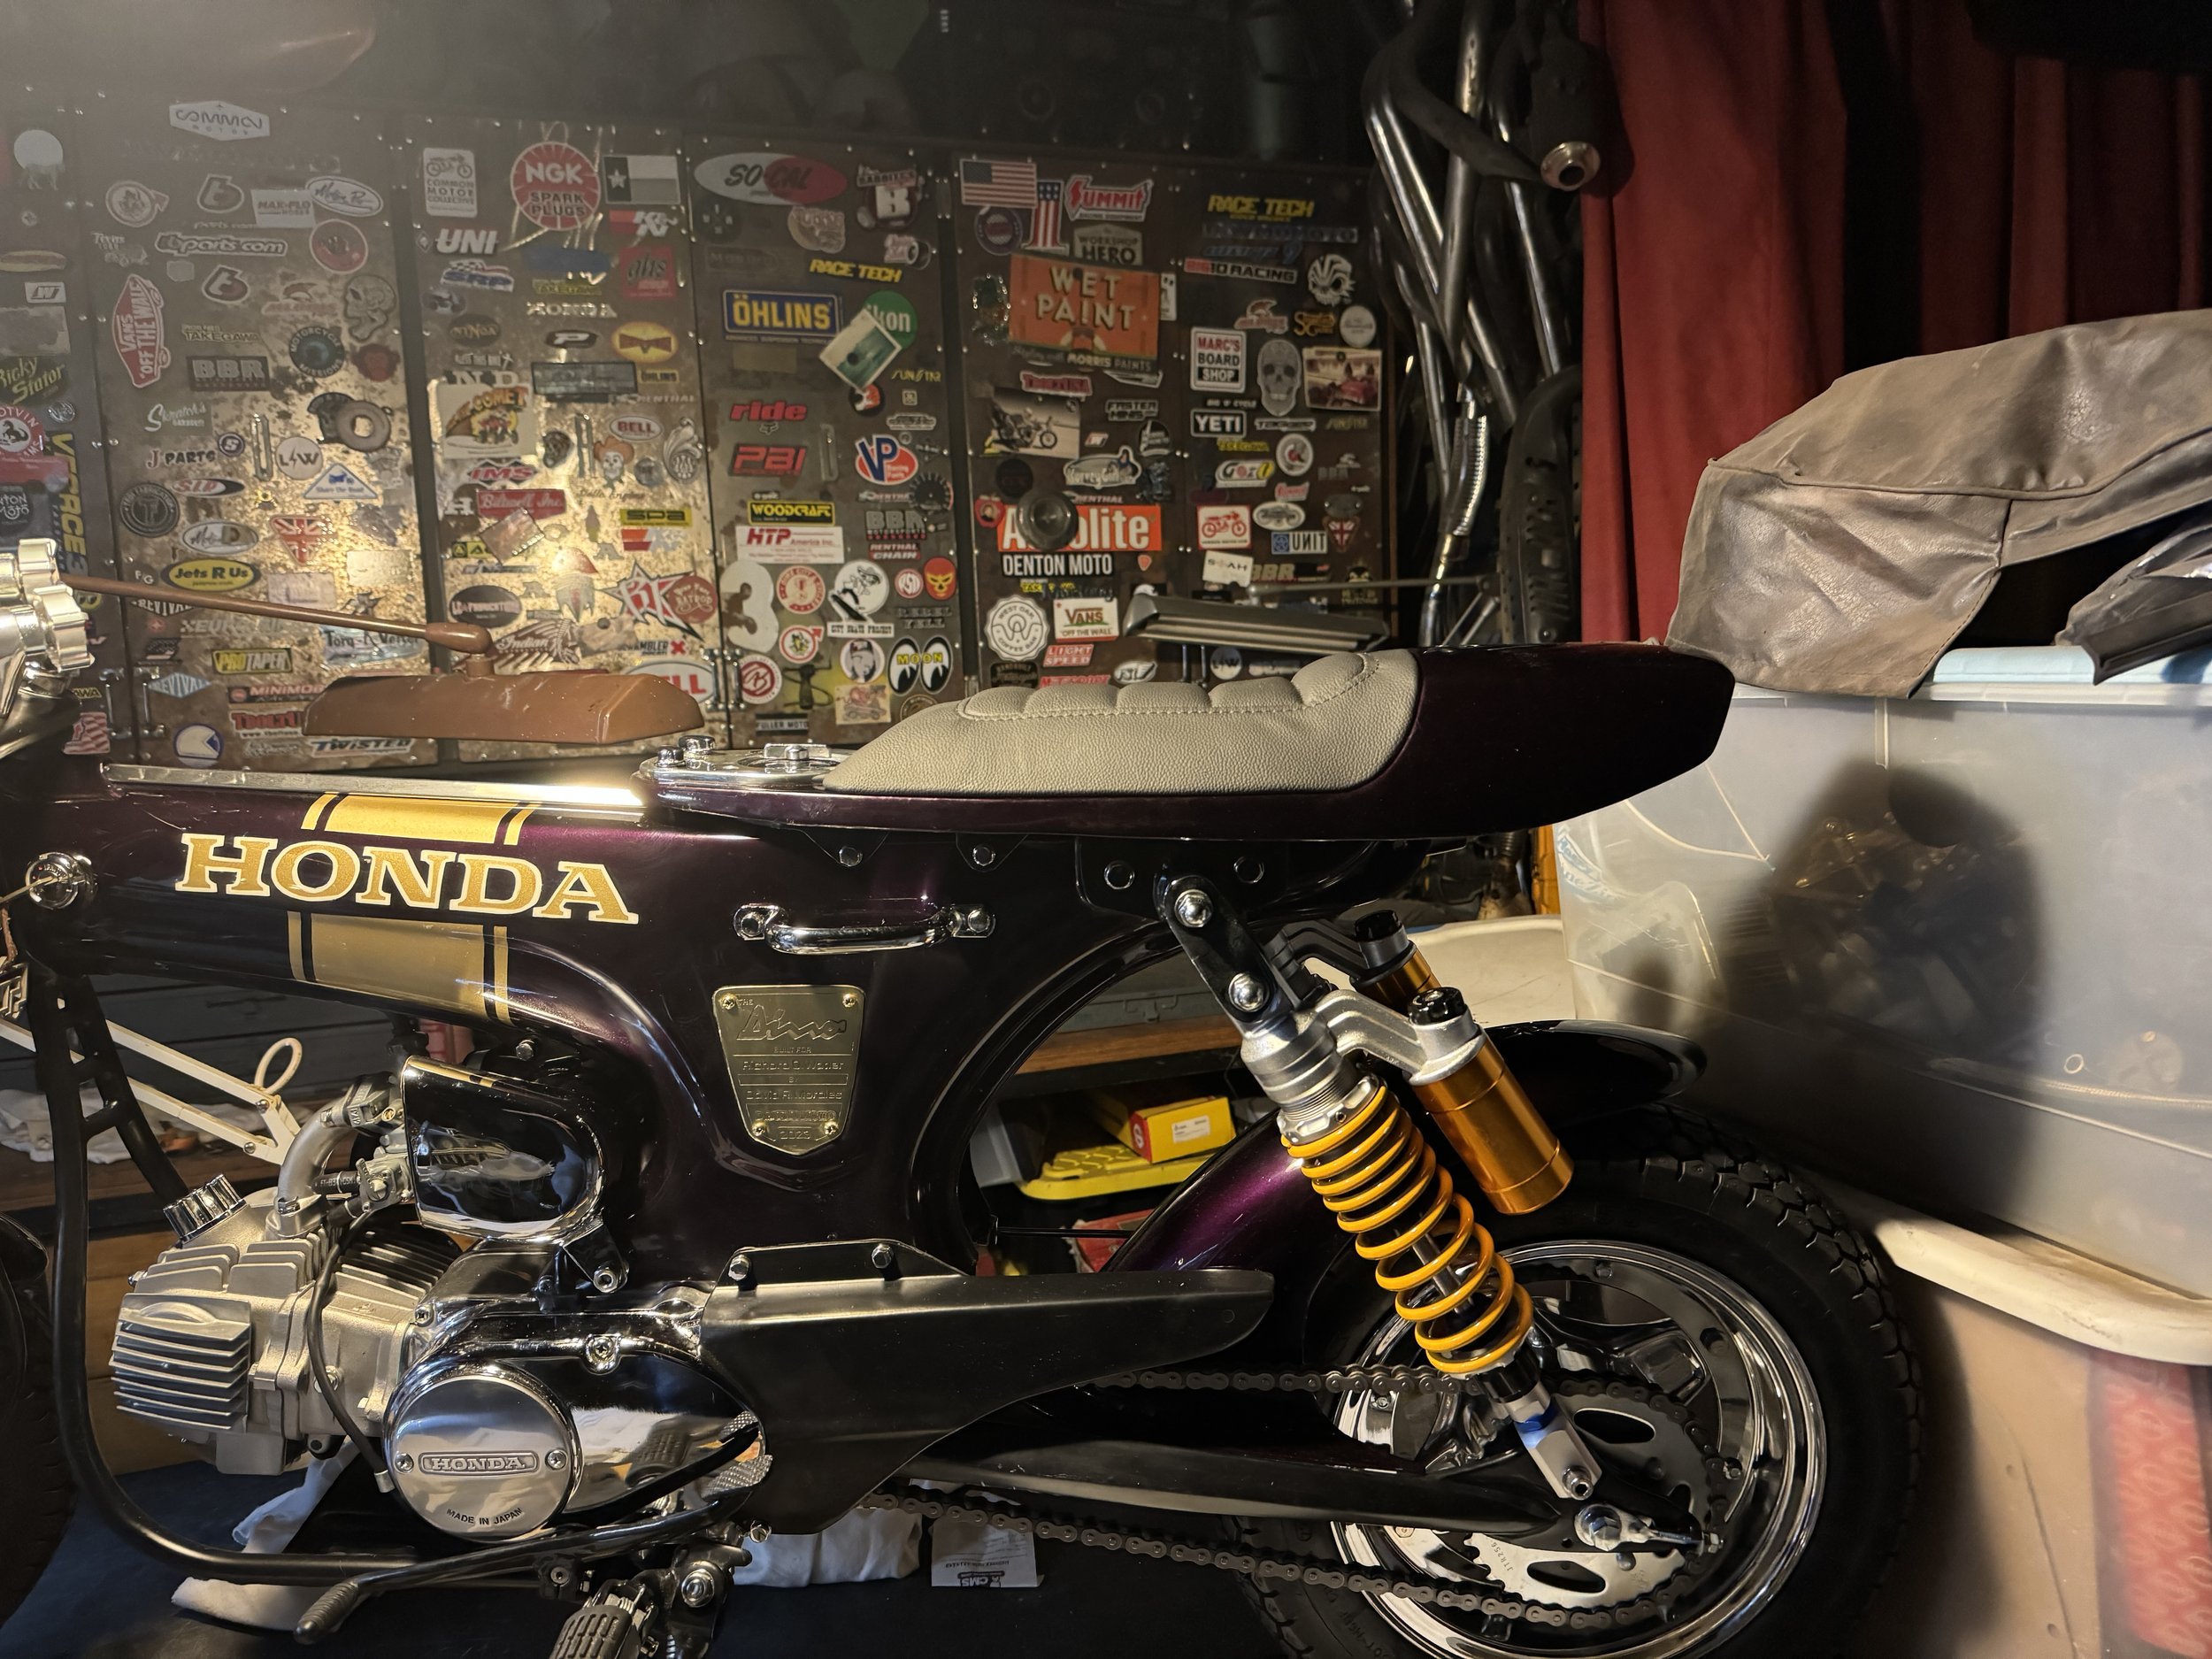
The first look at the seat cover. Still some fine tuning to get it just right, but liking the overall look. The gray color is an optical illusion from the lighting. It is actually a traditional black.

The shot from above shows the smooth transition between the body and seat lines.