1979 Honda Z50R Restoration.

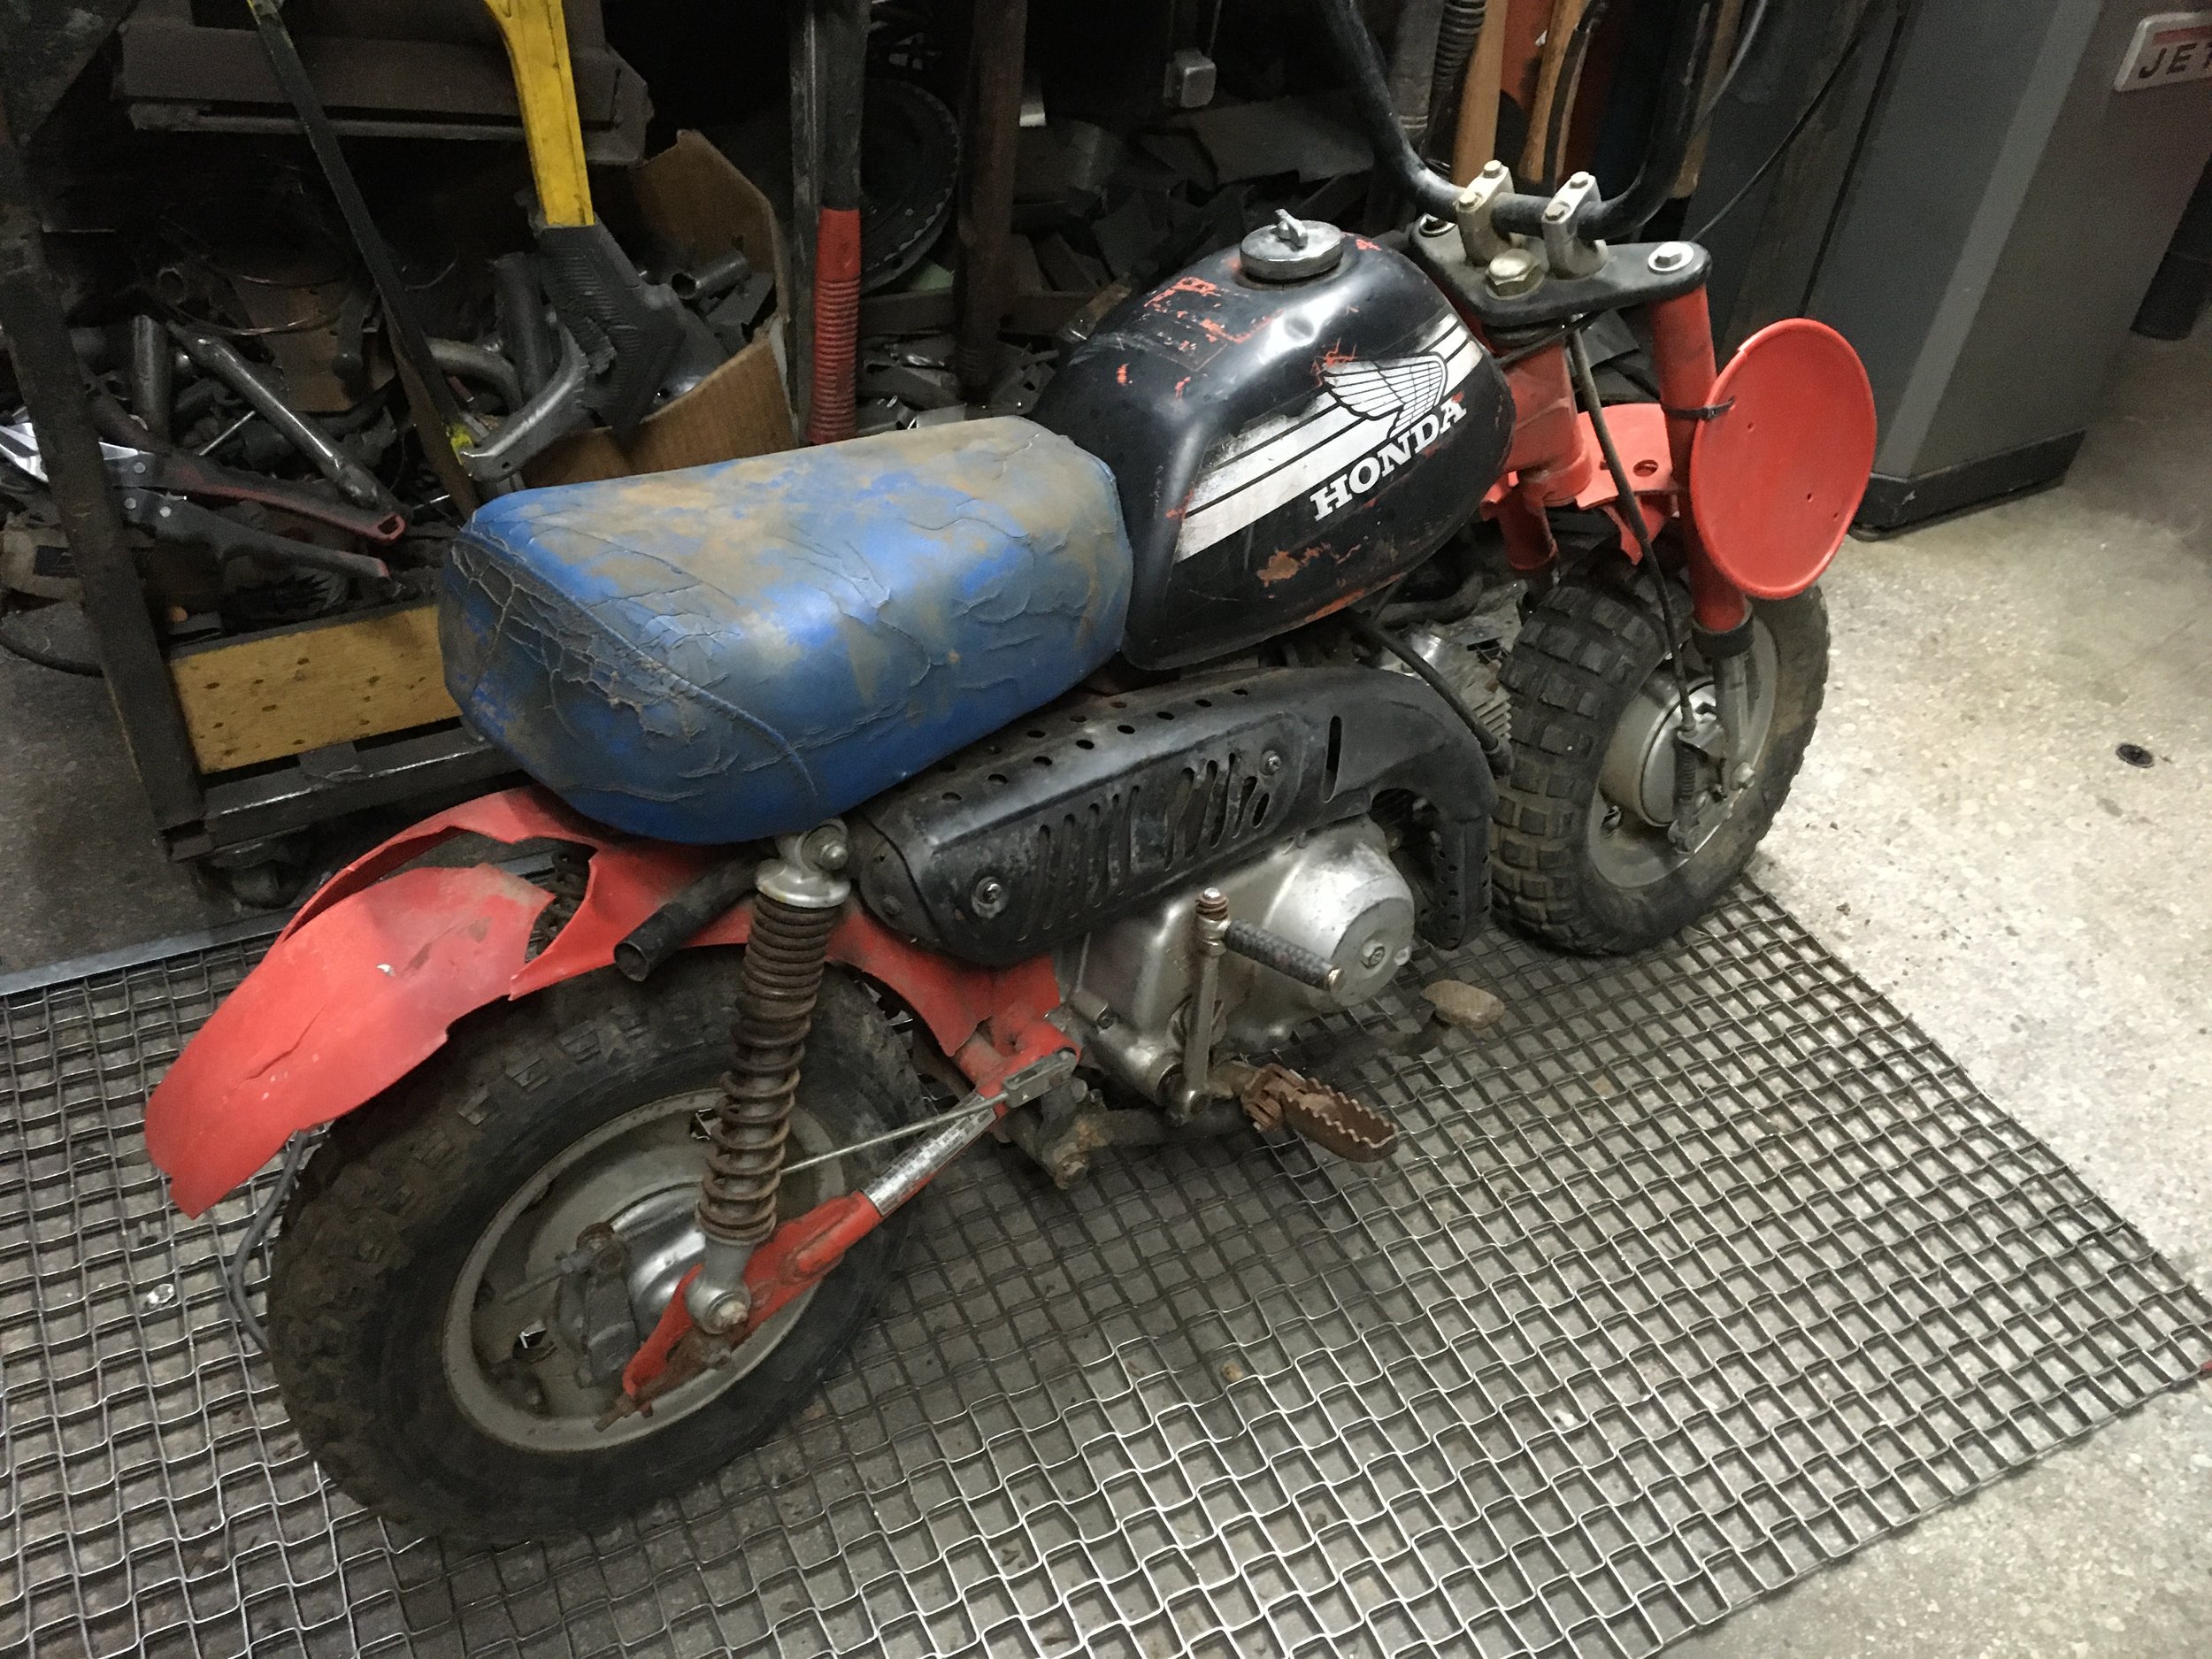
Starting with a 1979 Honda Z50R model that had been around the block more than once, and going for a complete stock restoration. The engine felt like it had some compression, but its actual condition was rather poor on further inspection. The challenge of restoring bikes like this one is always a little harder, but that makes it sweeter when it finally is done.

A previous owner had switched out the tank for a 1978 model. The seat and fenders were trashed, kickstand and chain guard missing, and the engine had yet to reveal some of its ugliness. A later model Z50R might have been something I would pass on doing a restoration, but this first year model is a favorite of mine in stock condition. It is one of the more rideable minis for an adult, with its tall bars. The 1979 also retained the larger 4- hole wheel hubs and rims from the earlier model Z50A, as well as the lighting stator, making it easy to add lights to this unit.It was also the first Honda Z50 with plastic fenders.

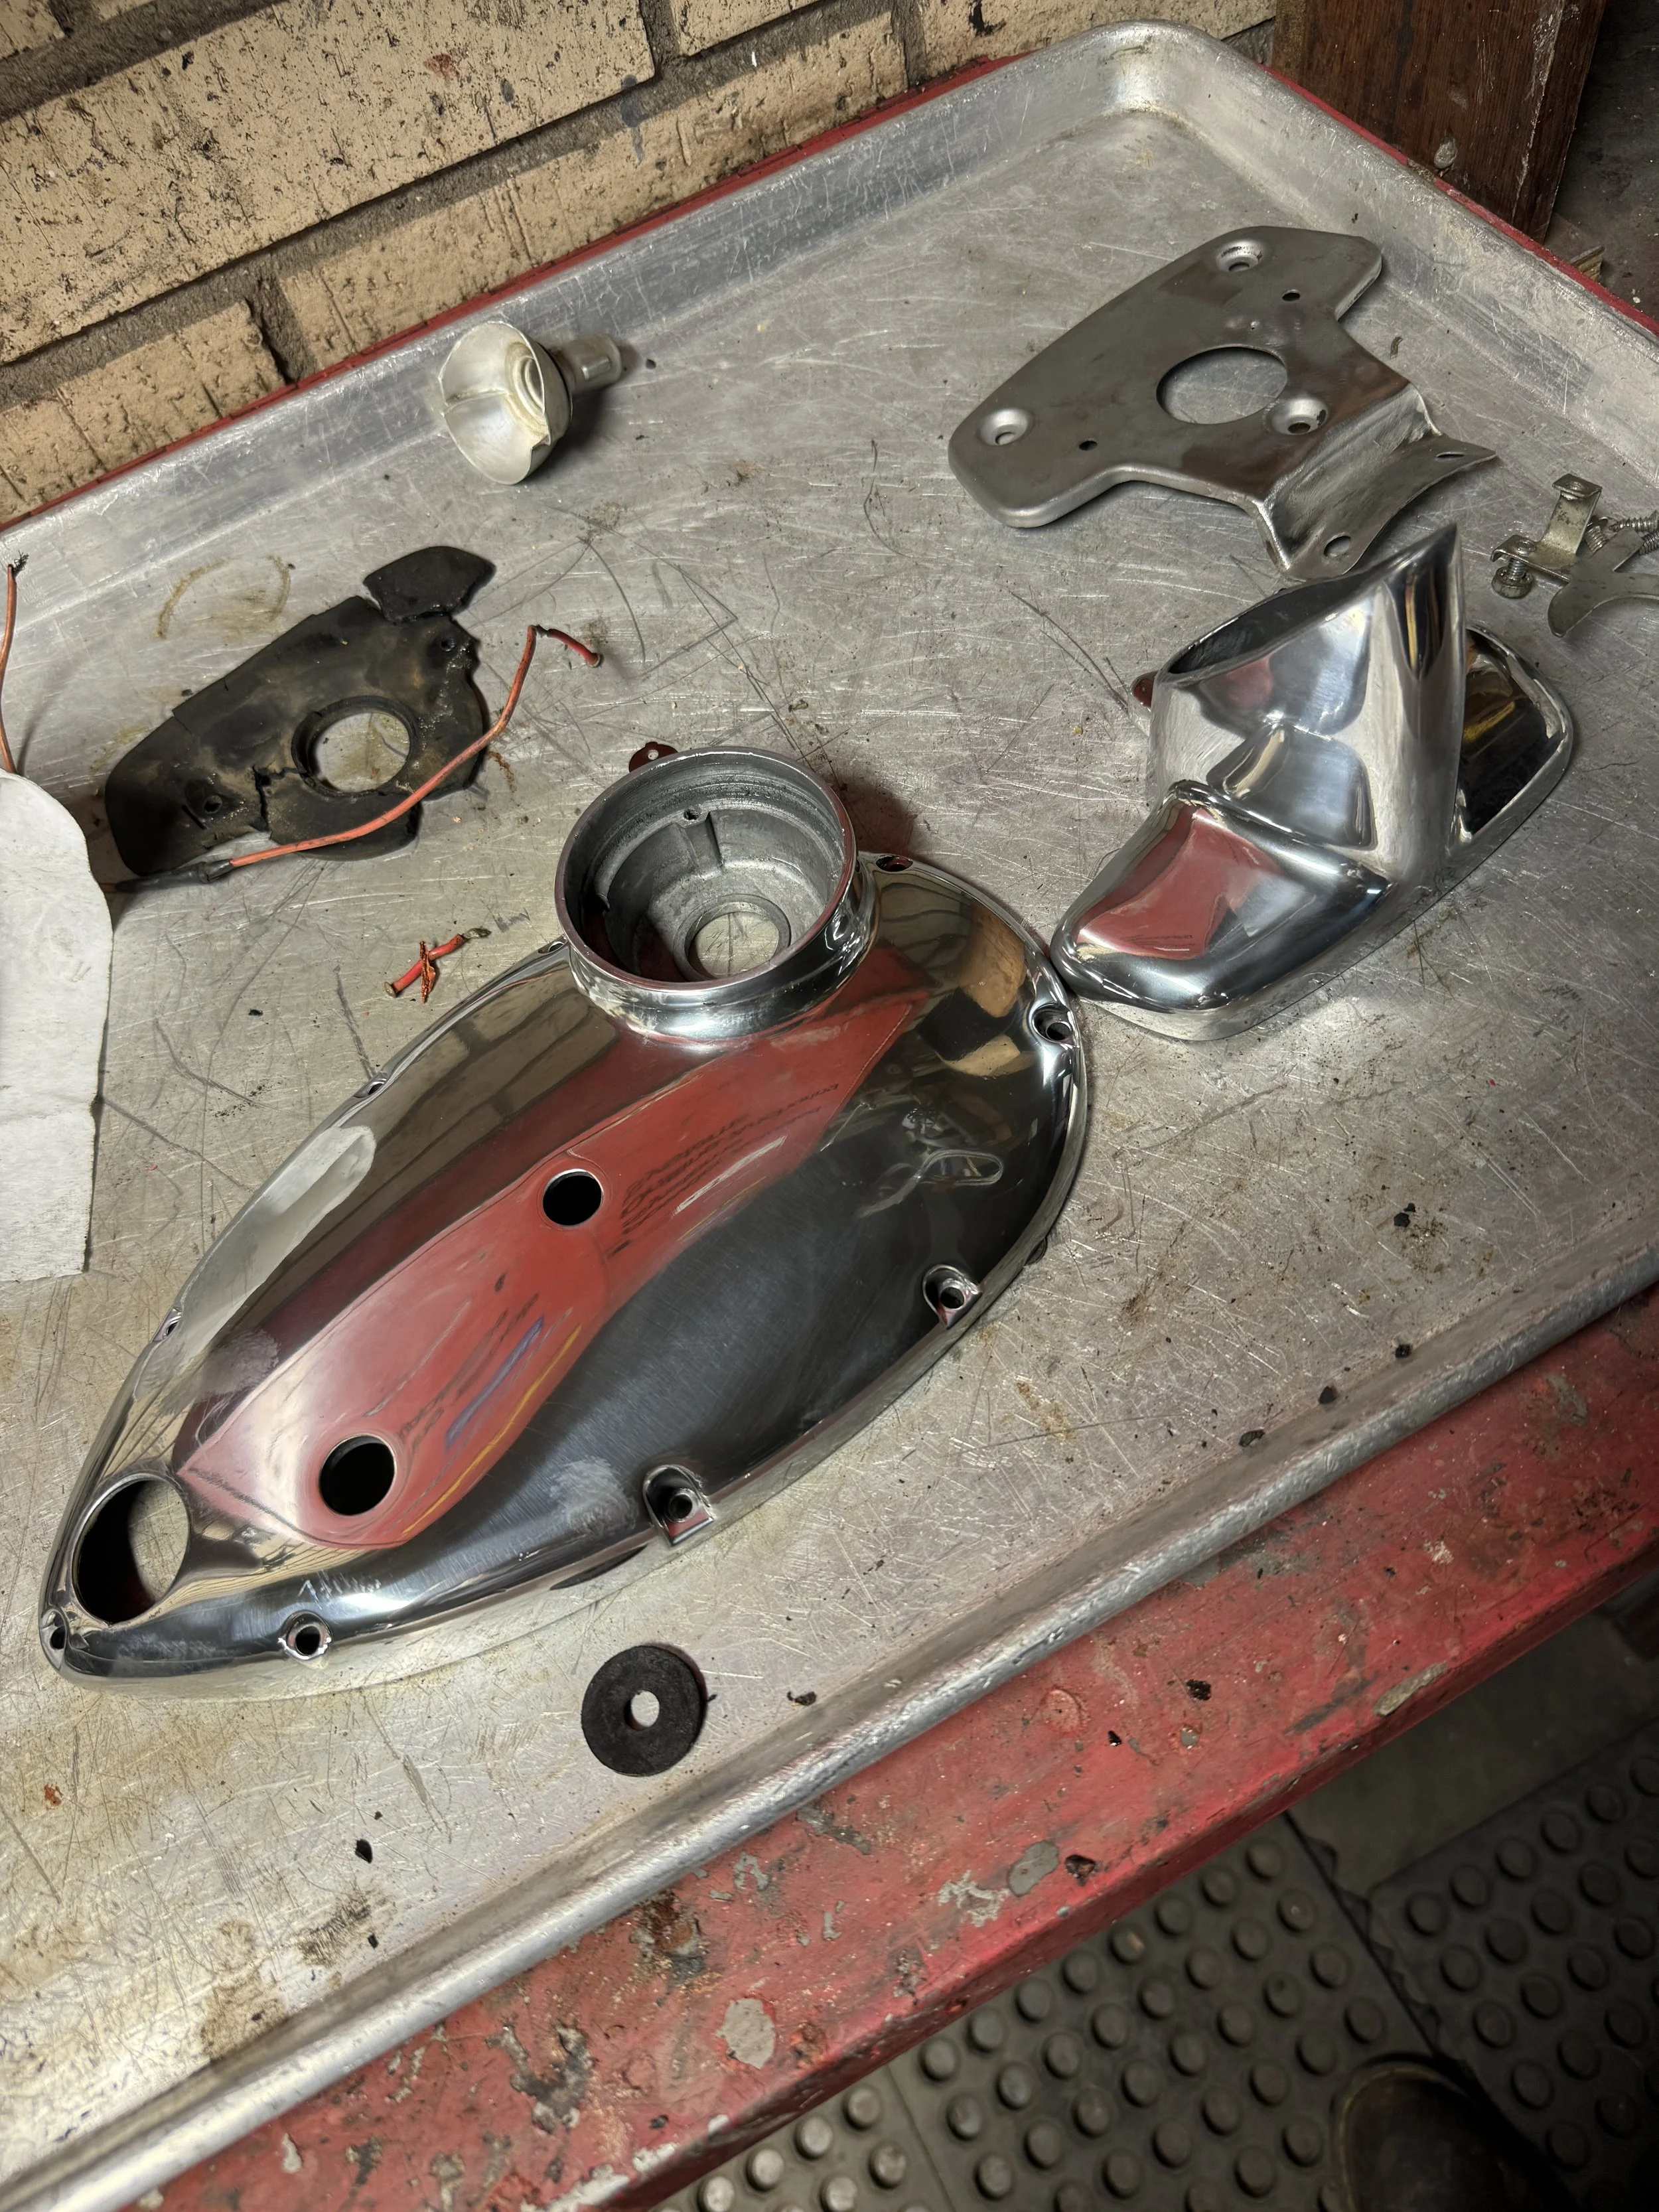
The 1979 model also had a unique muffler and heat shield, and the number plate was not used on the right side. The muffler is the same as the Z50J model, but with a larger diameter header and tail pipe. The muffler canister on this bike was showing signs of rot, so a good used one was substituted.

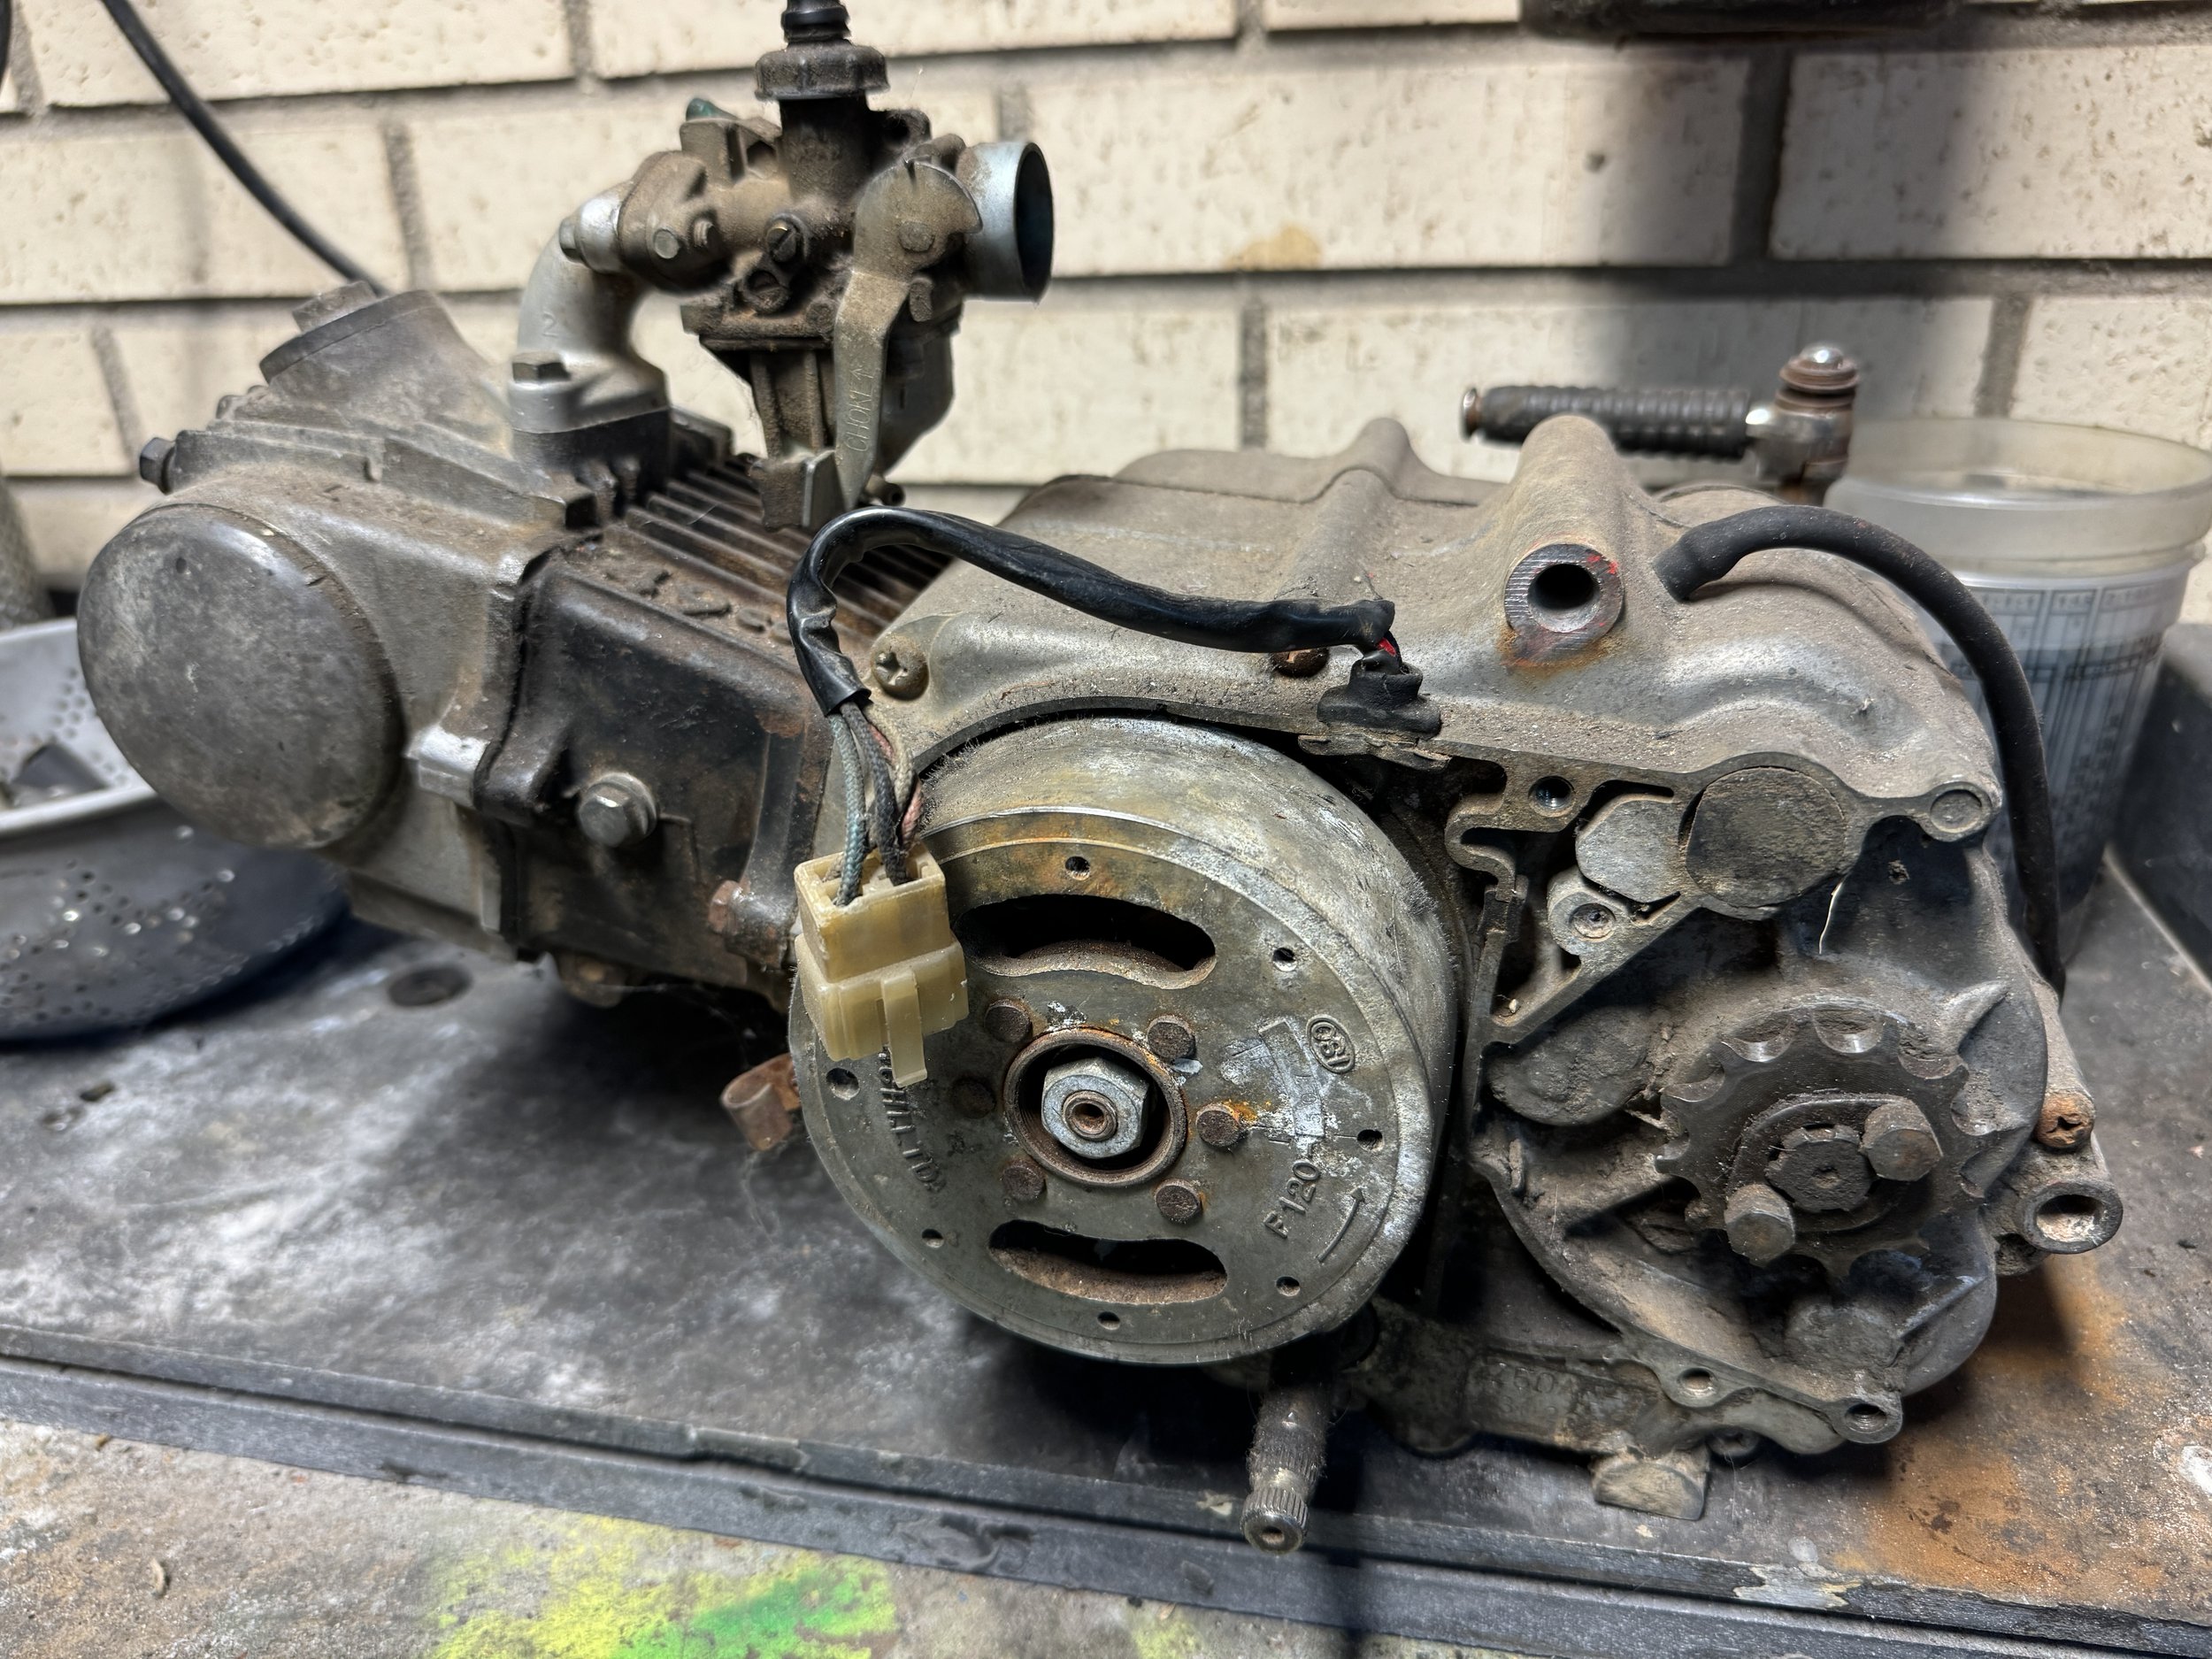
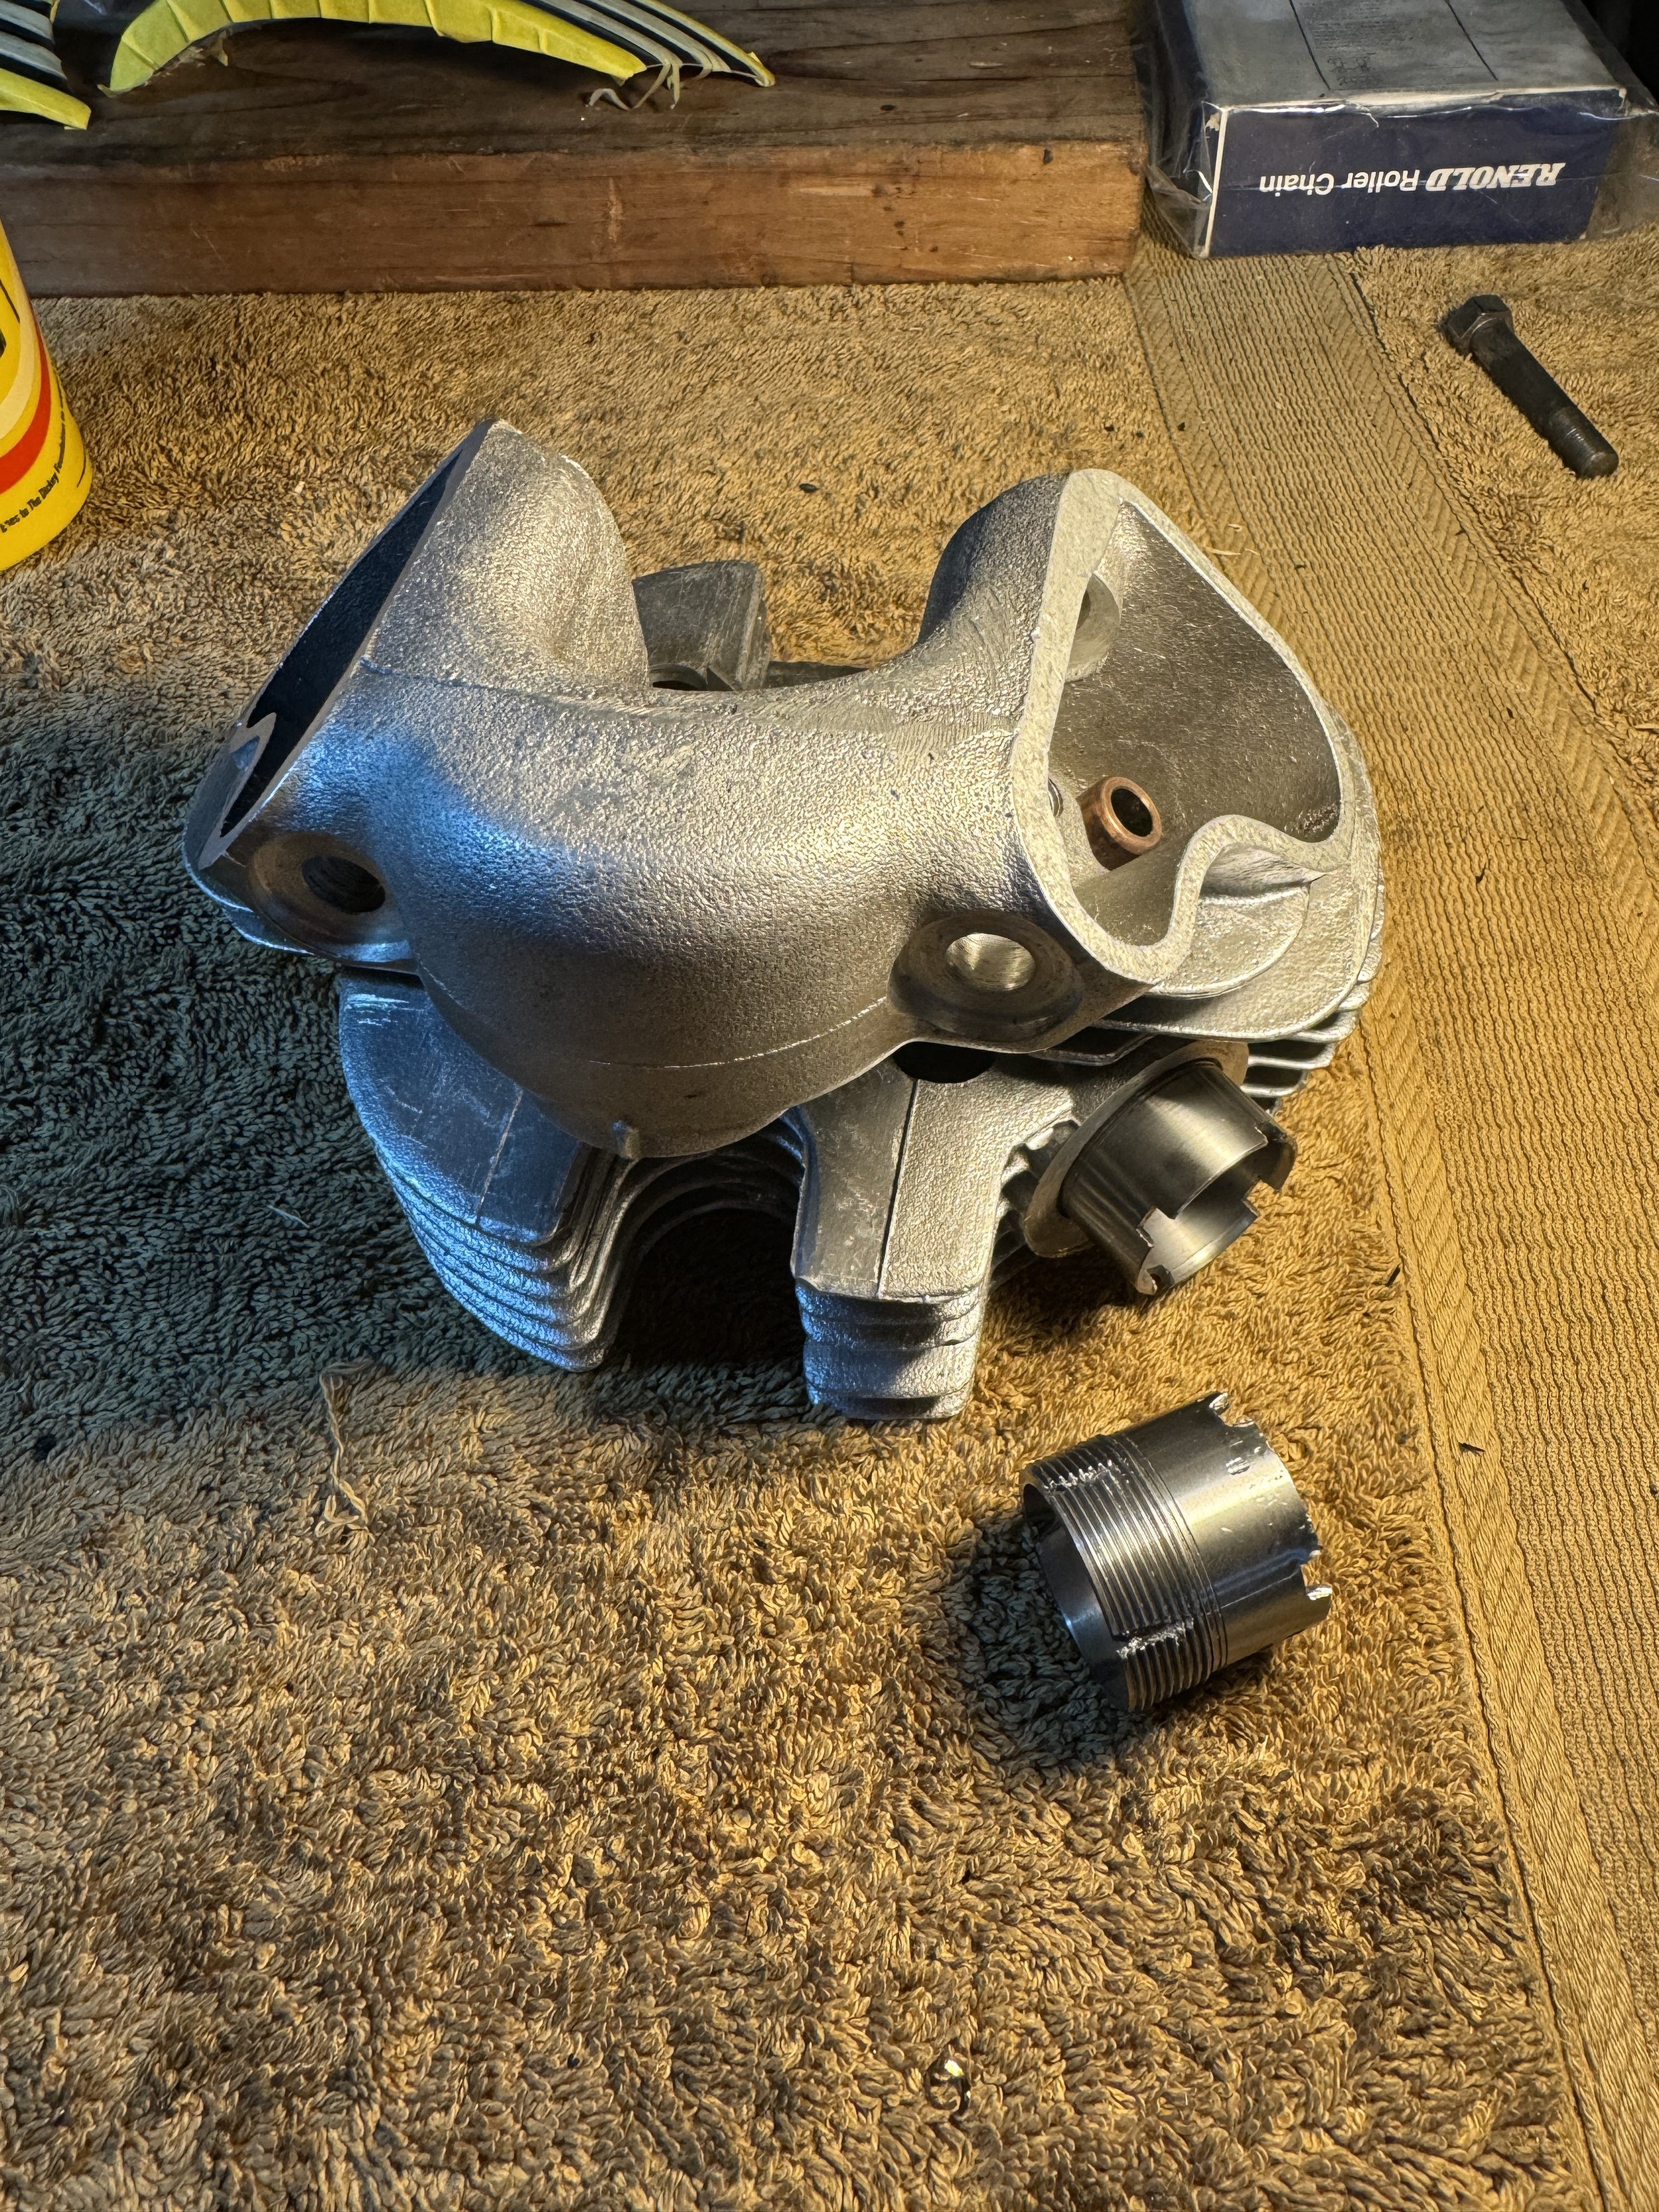
The familiar flywheel from the earlier Z50A model and the four wire pigtail. Even without any plans for lighting, it is nice to know that with a few items like an early model wire harness and a couple of switches, that it is ready to go. This engine had obviously been exposed to some moisture, but nothing too bad.

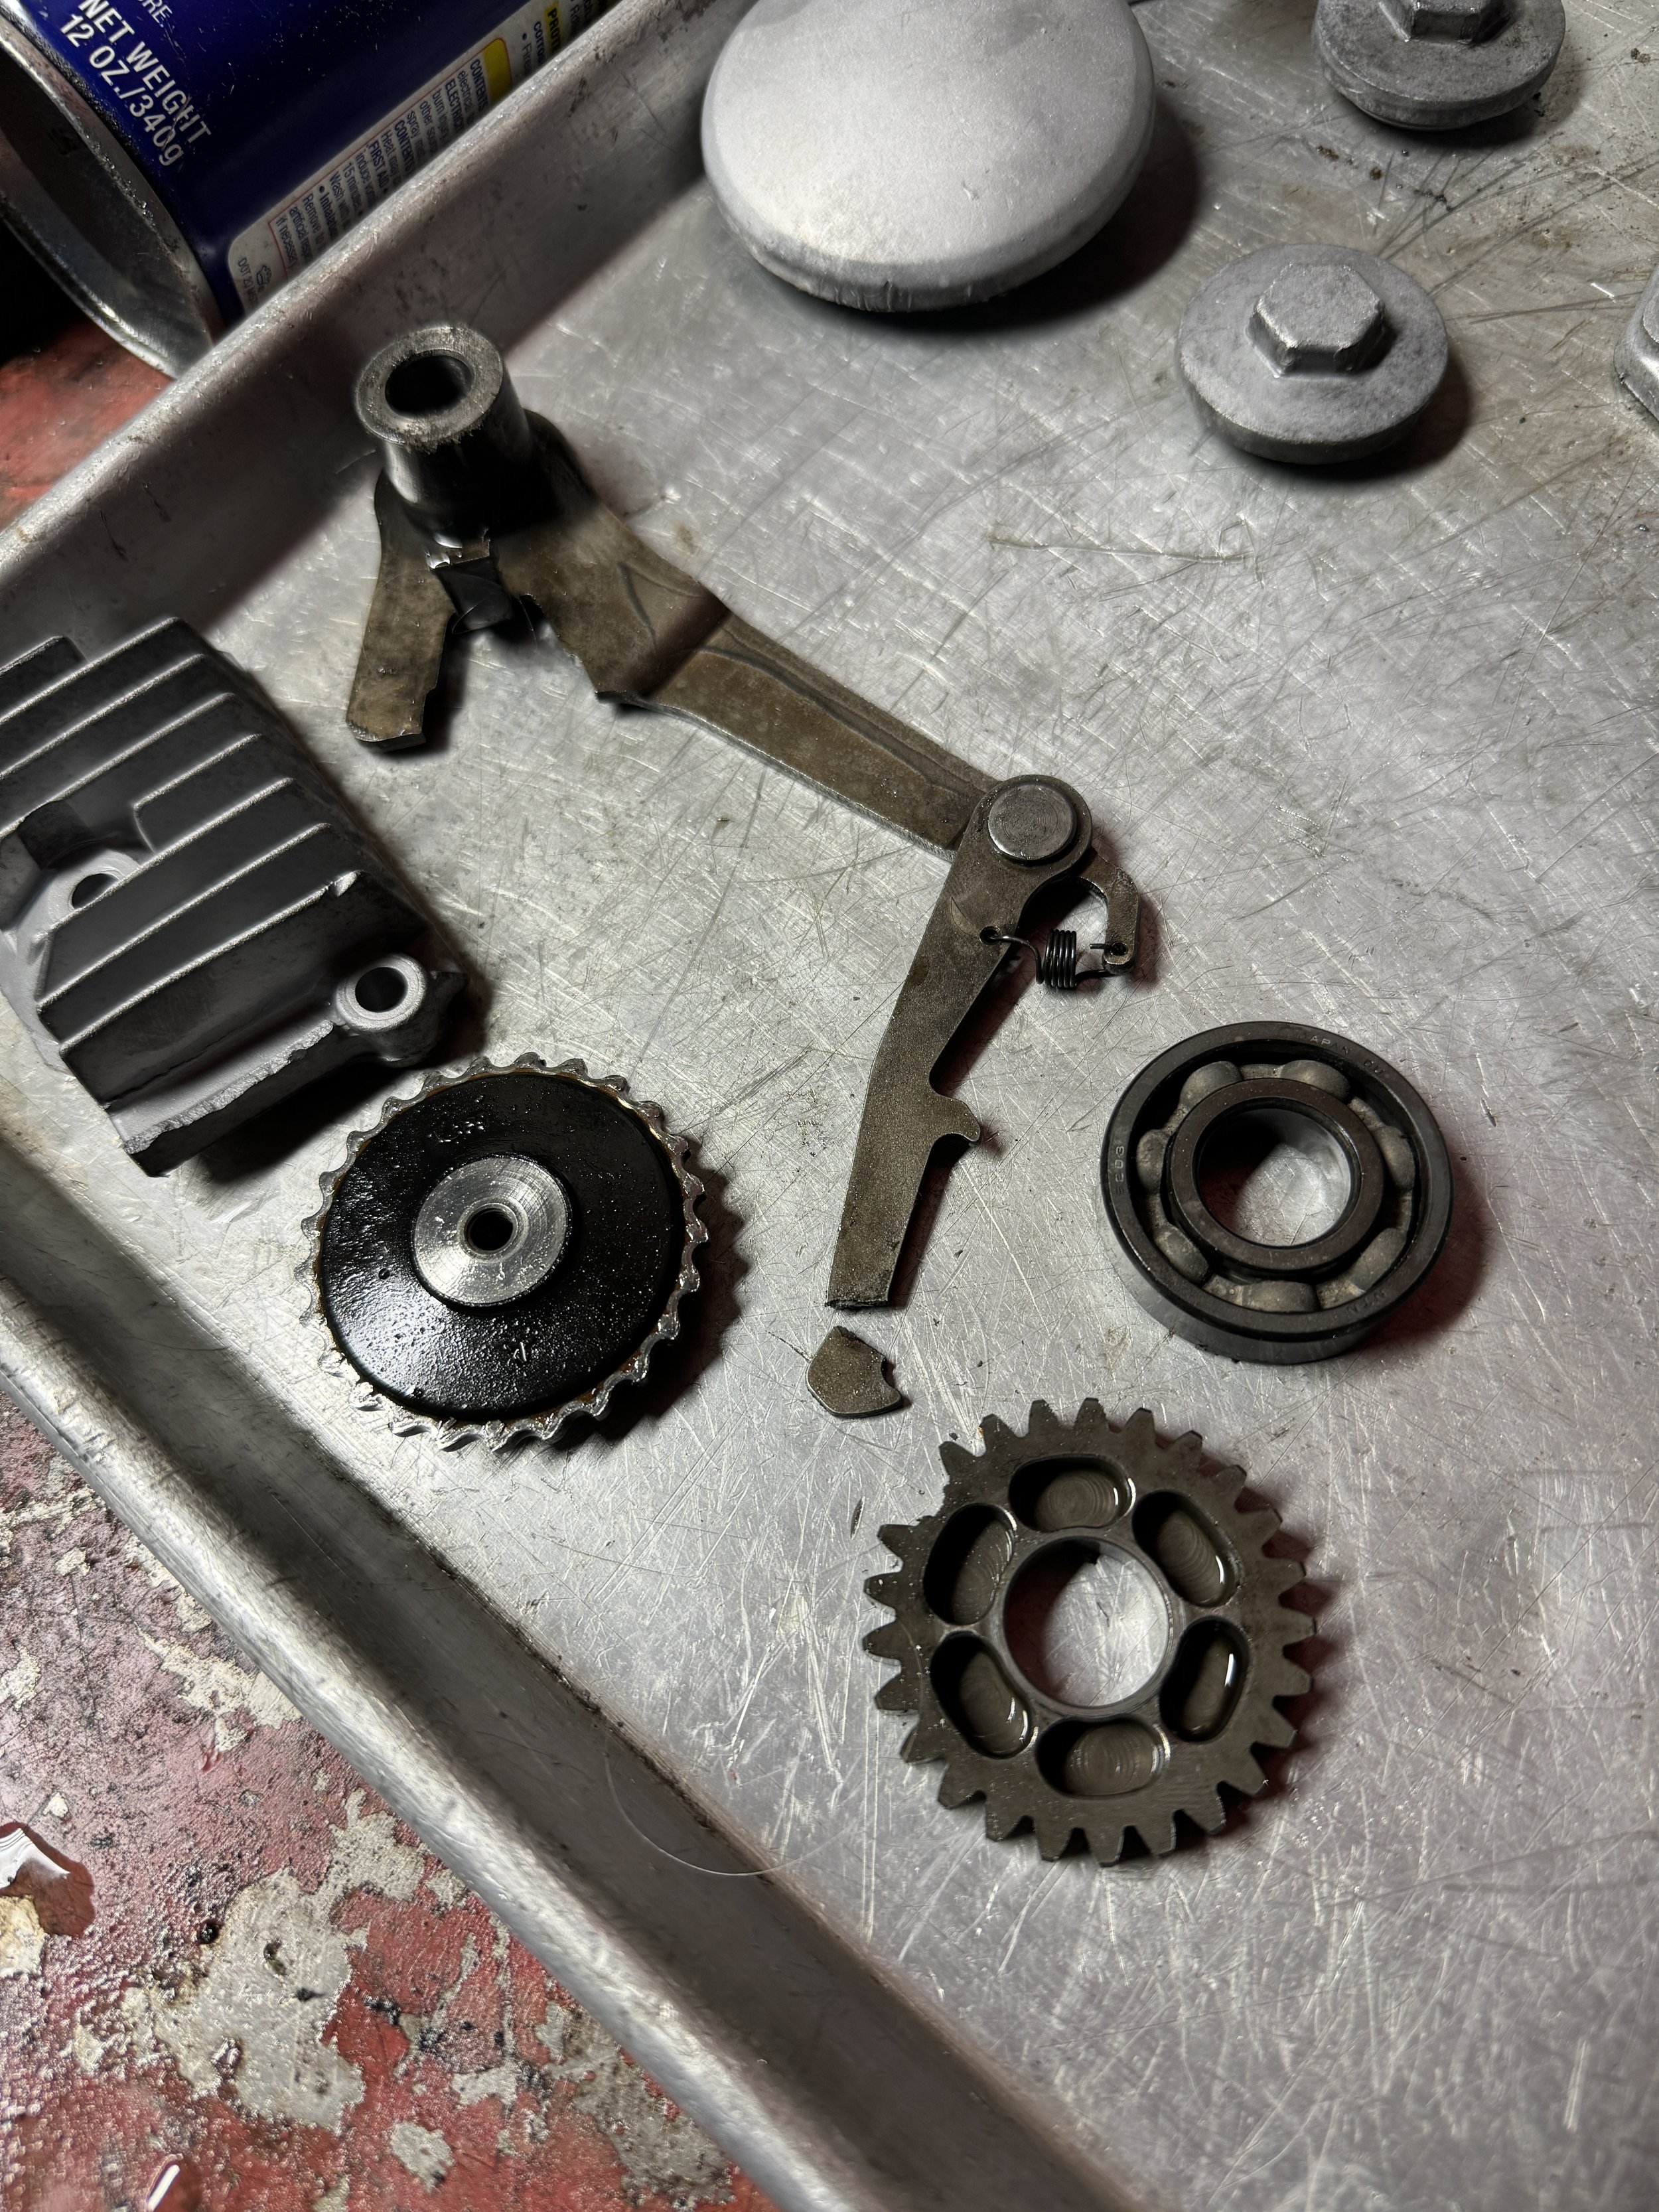
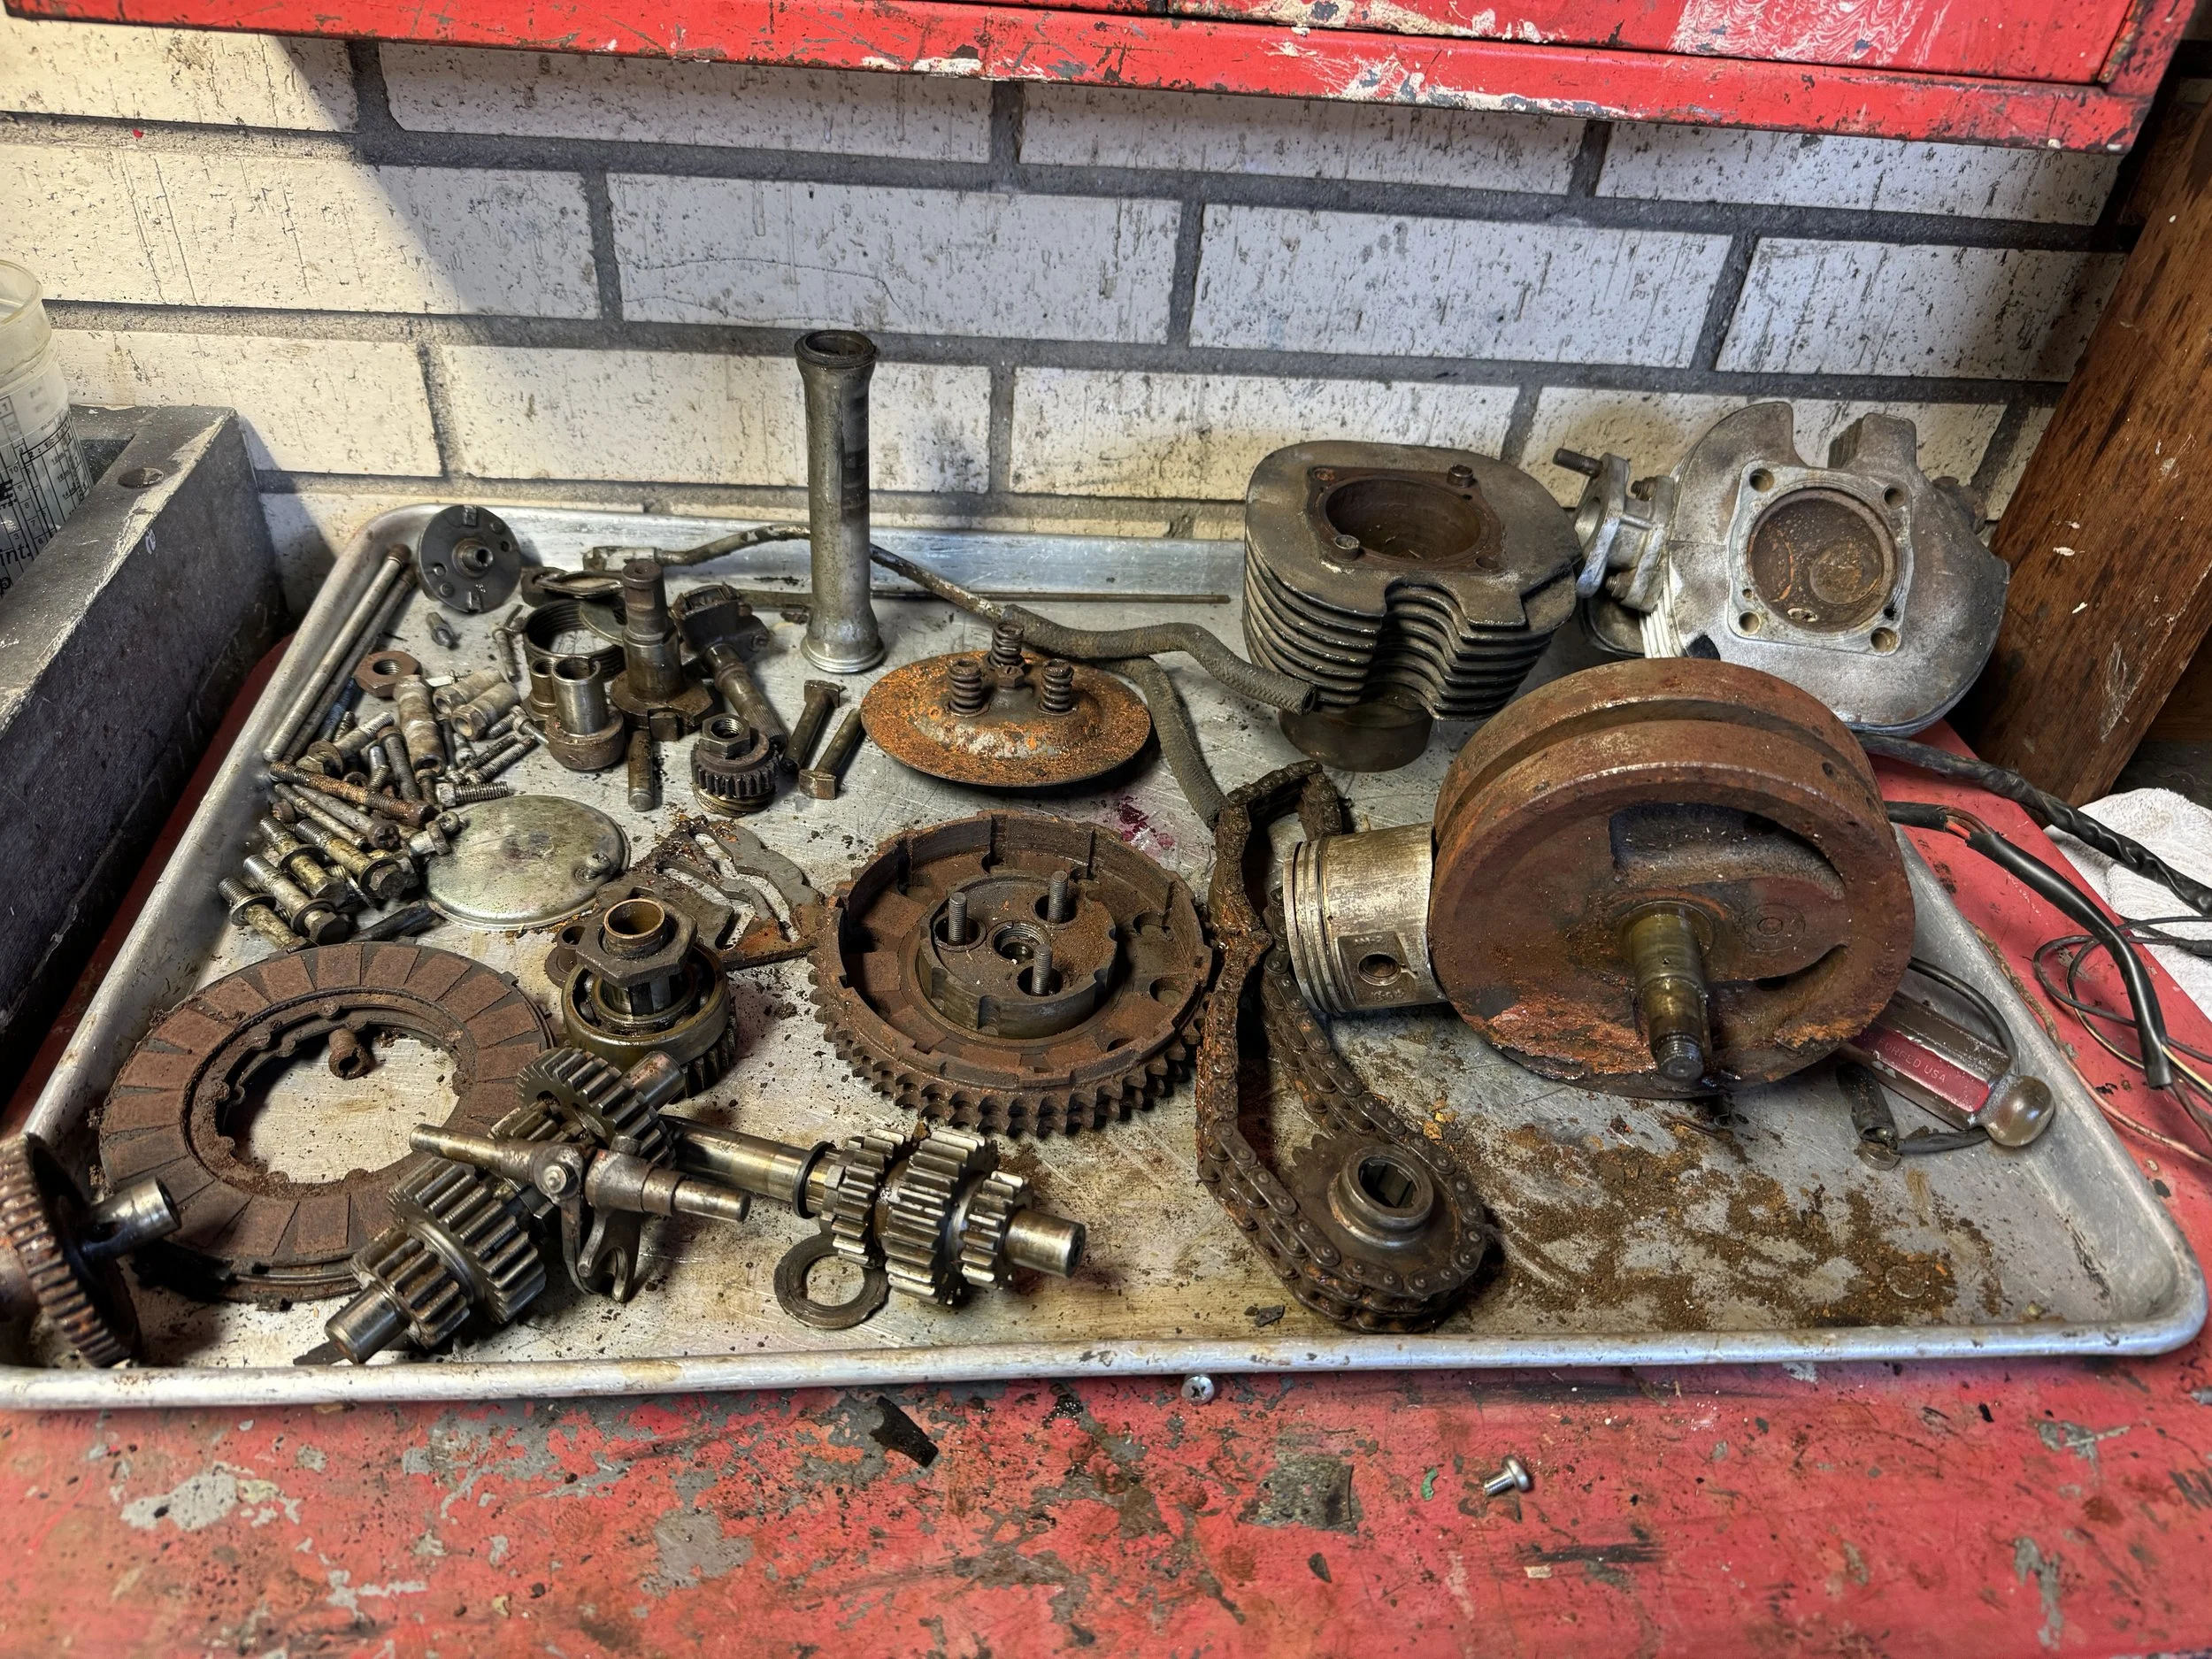
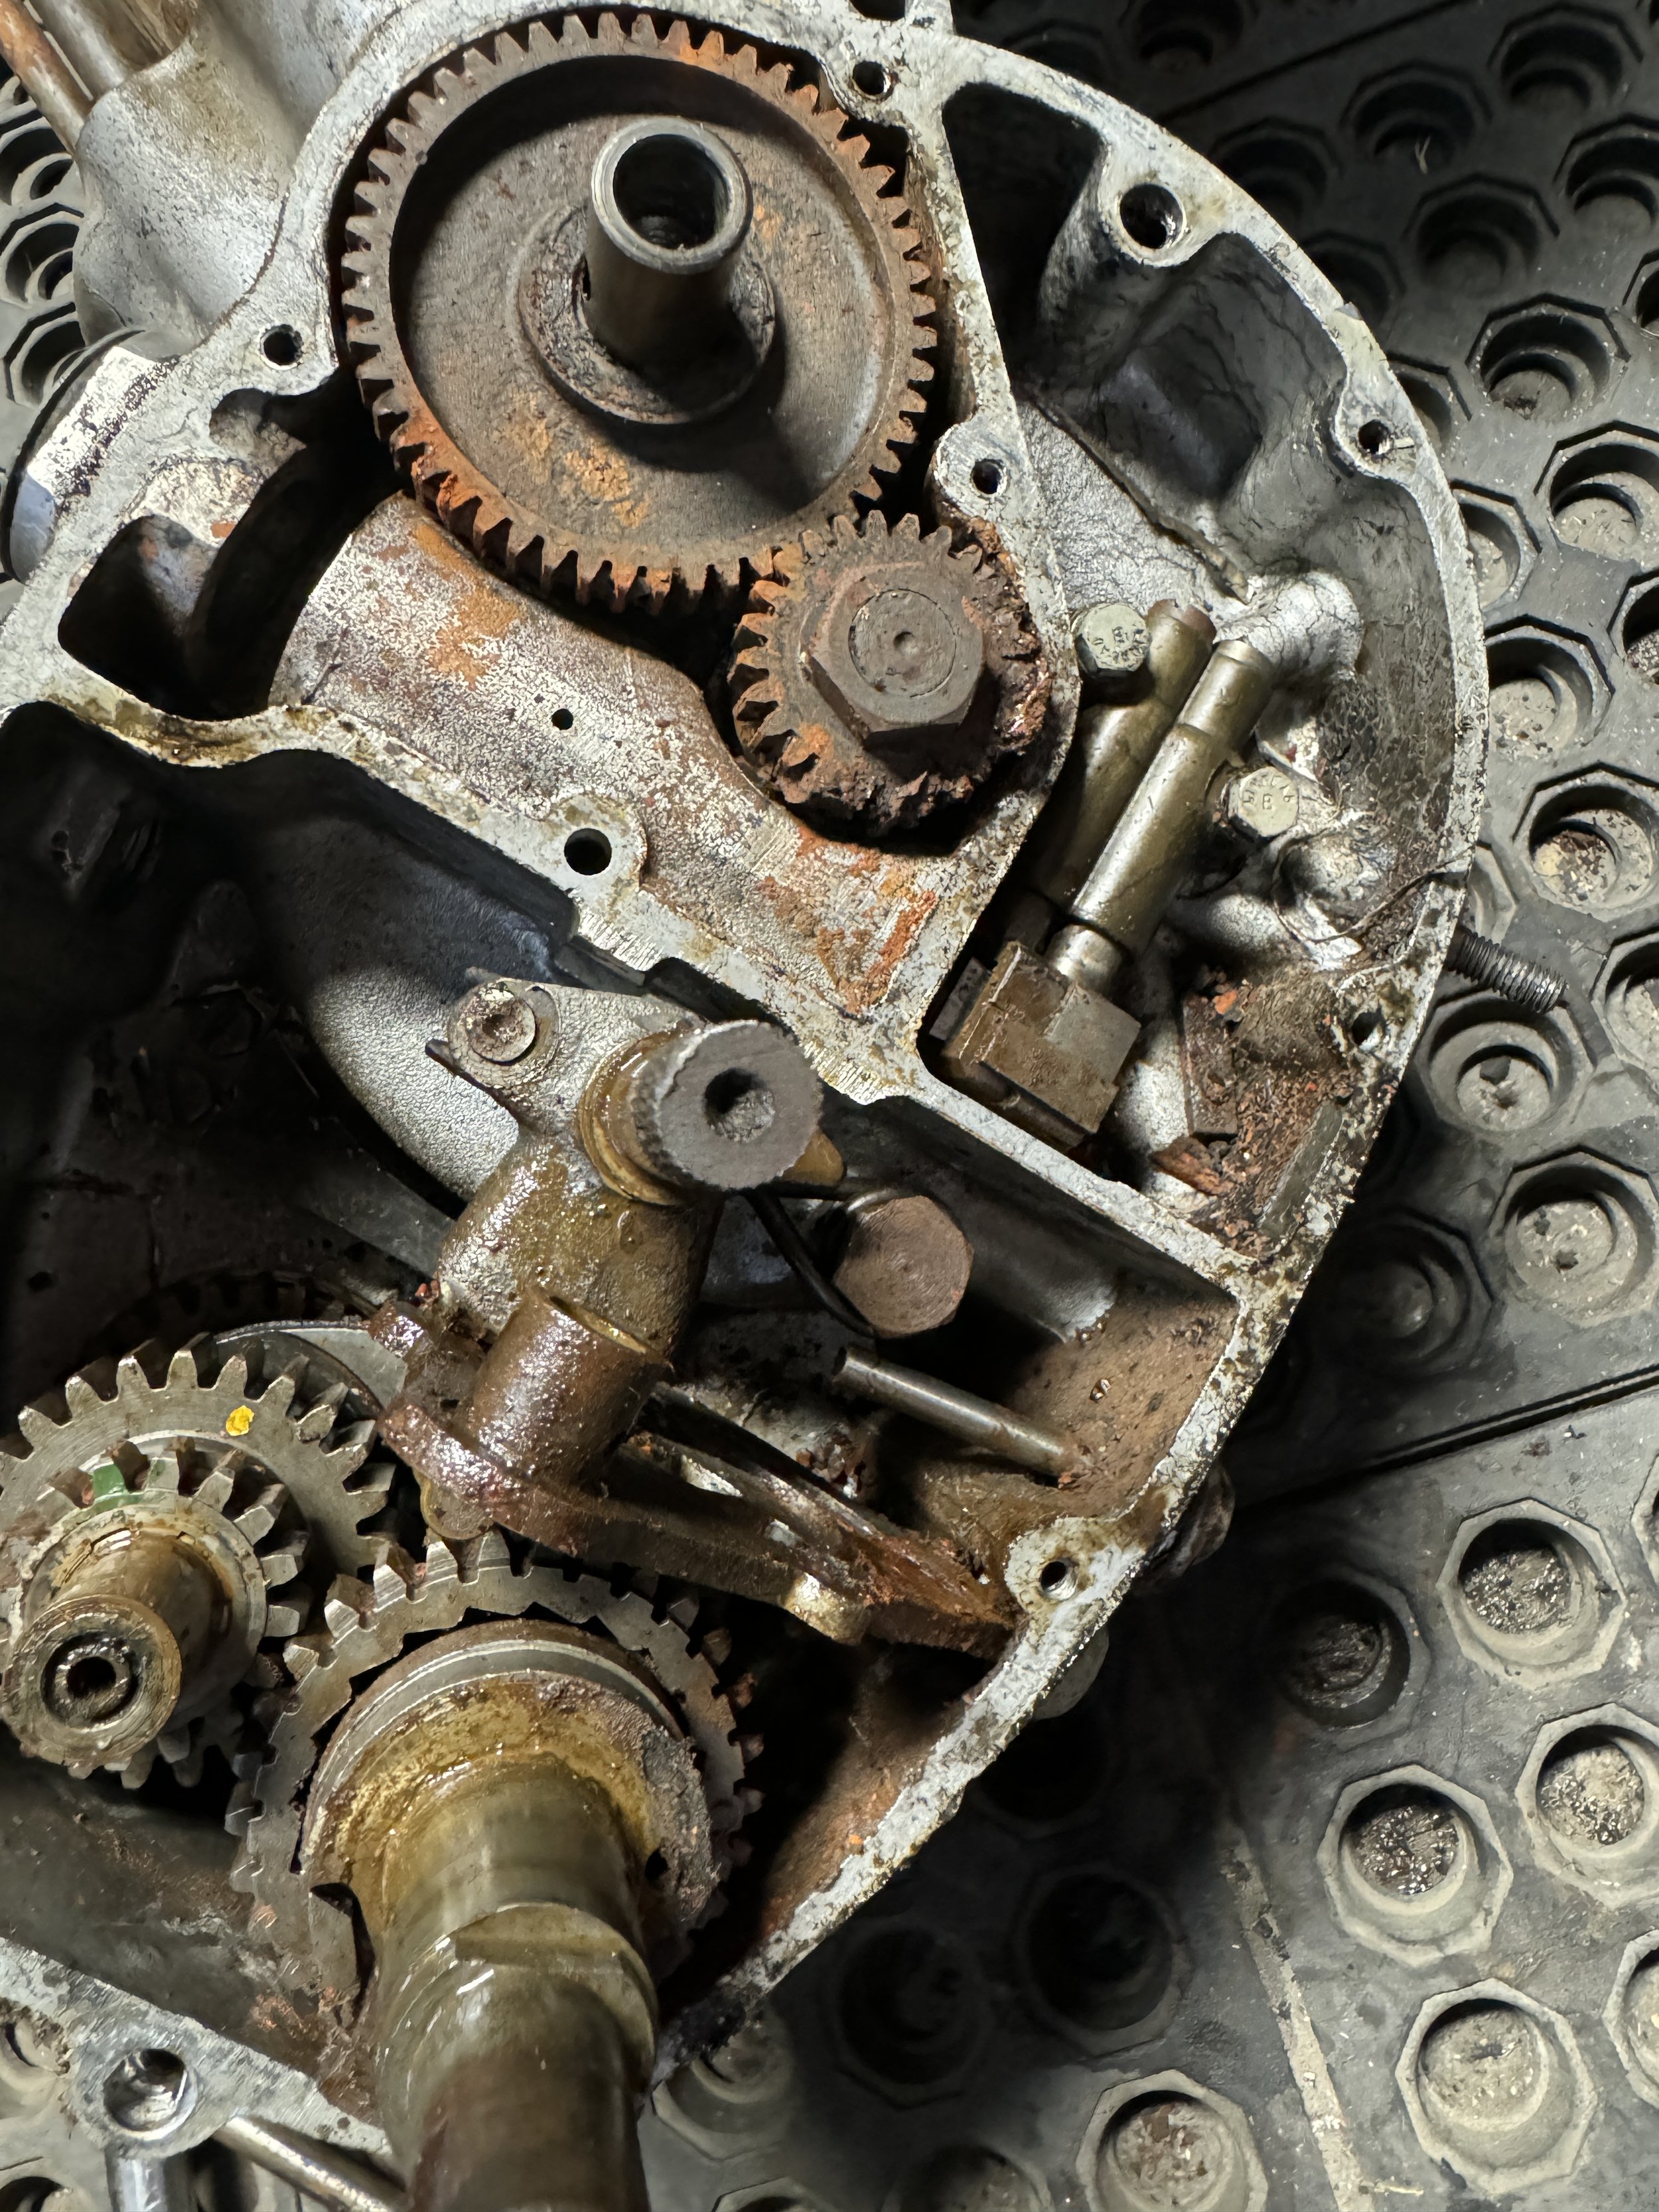
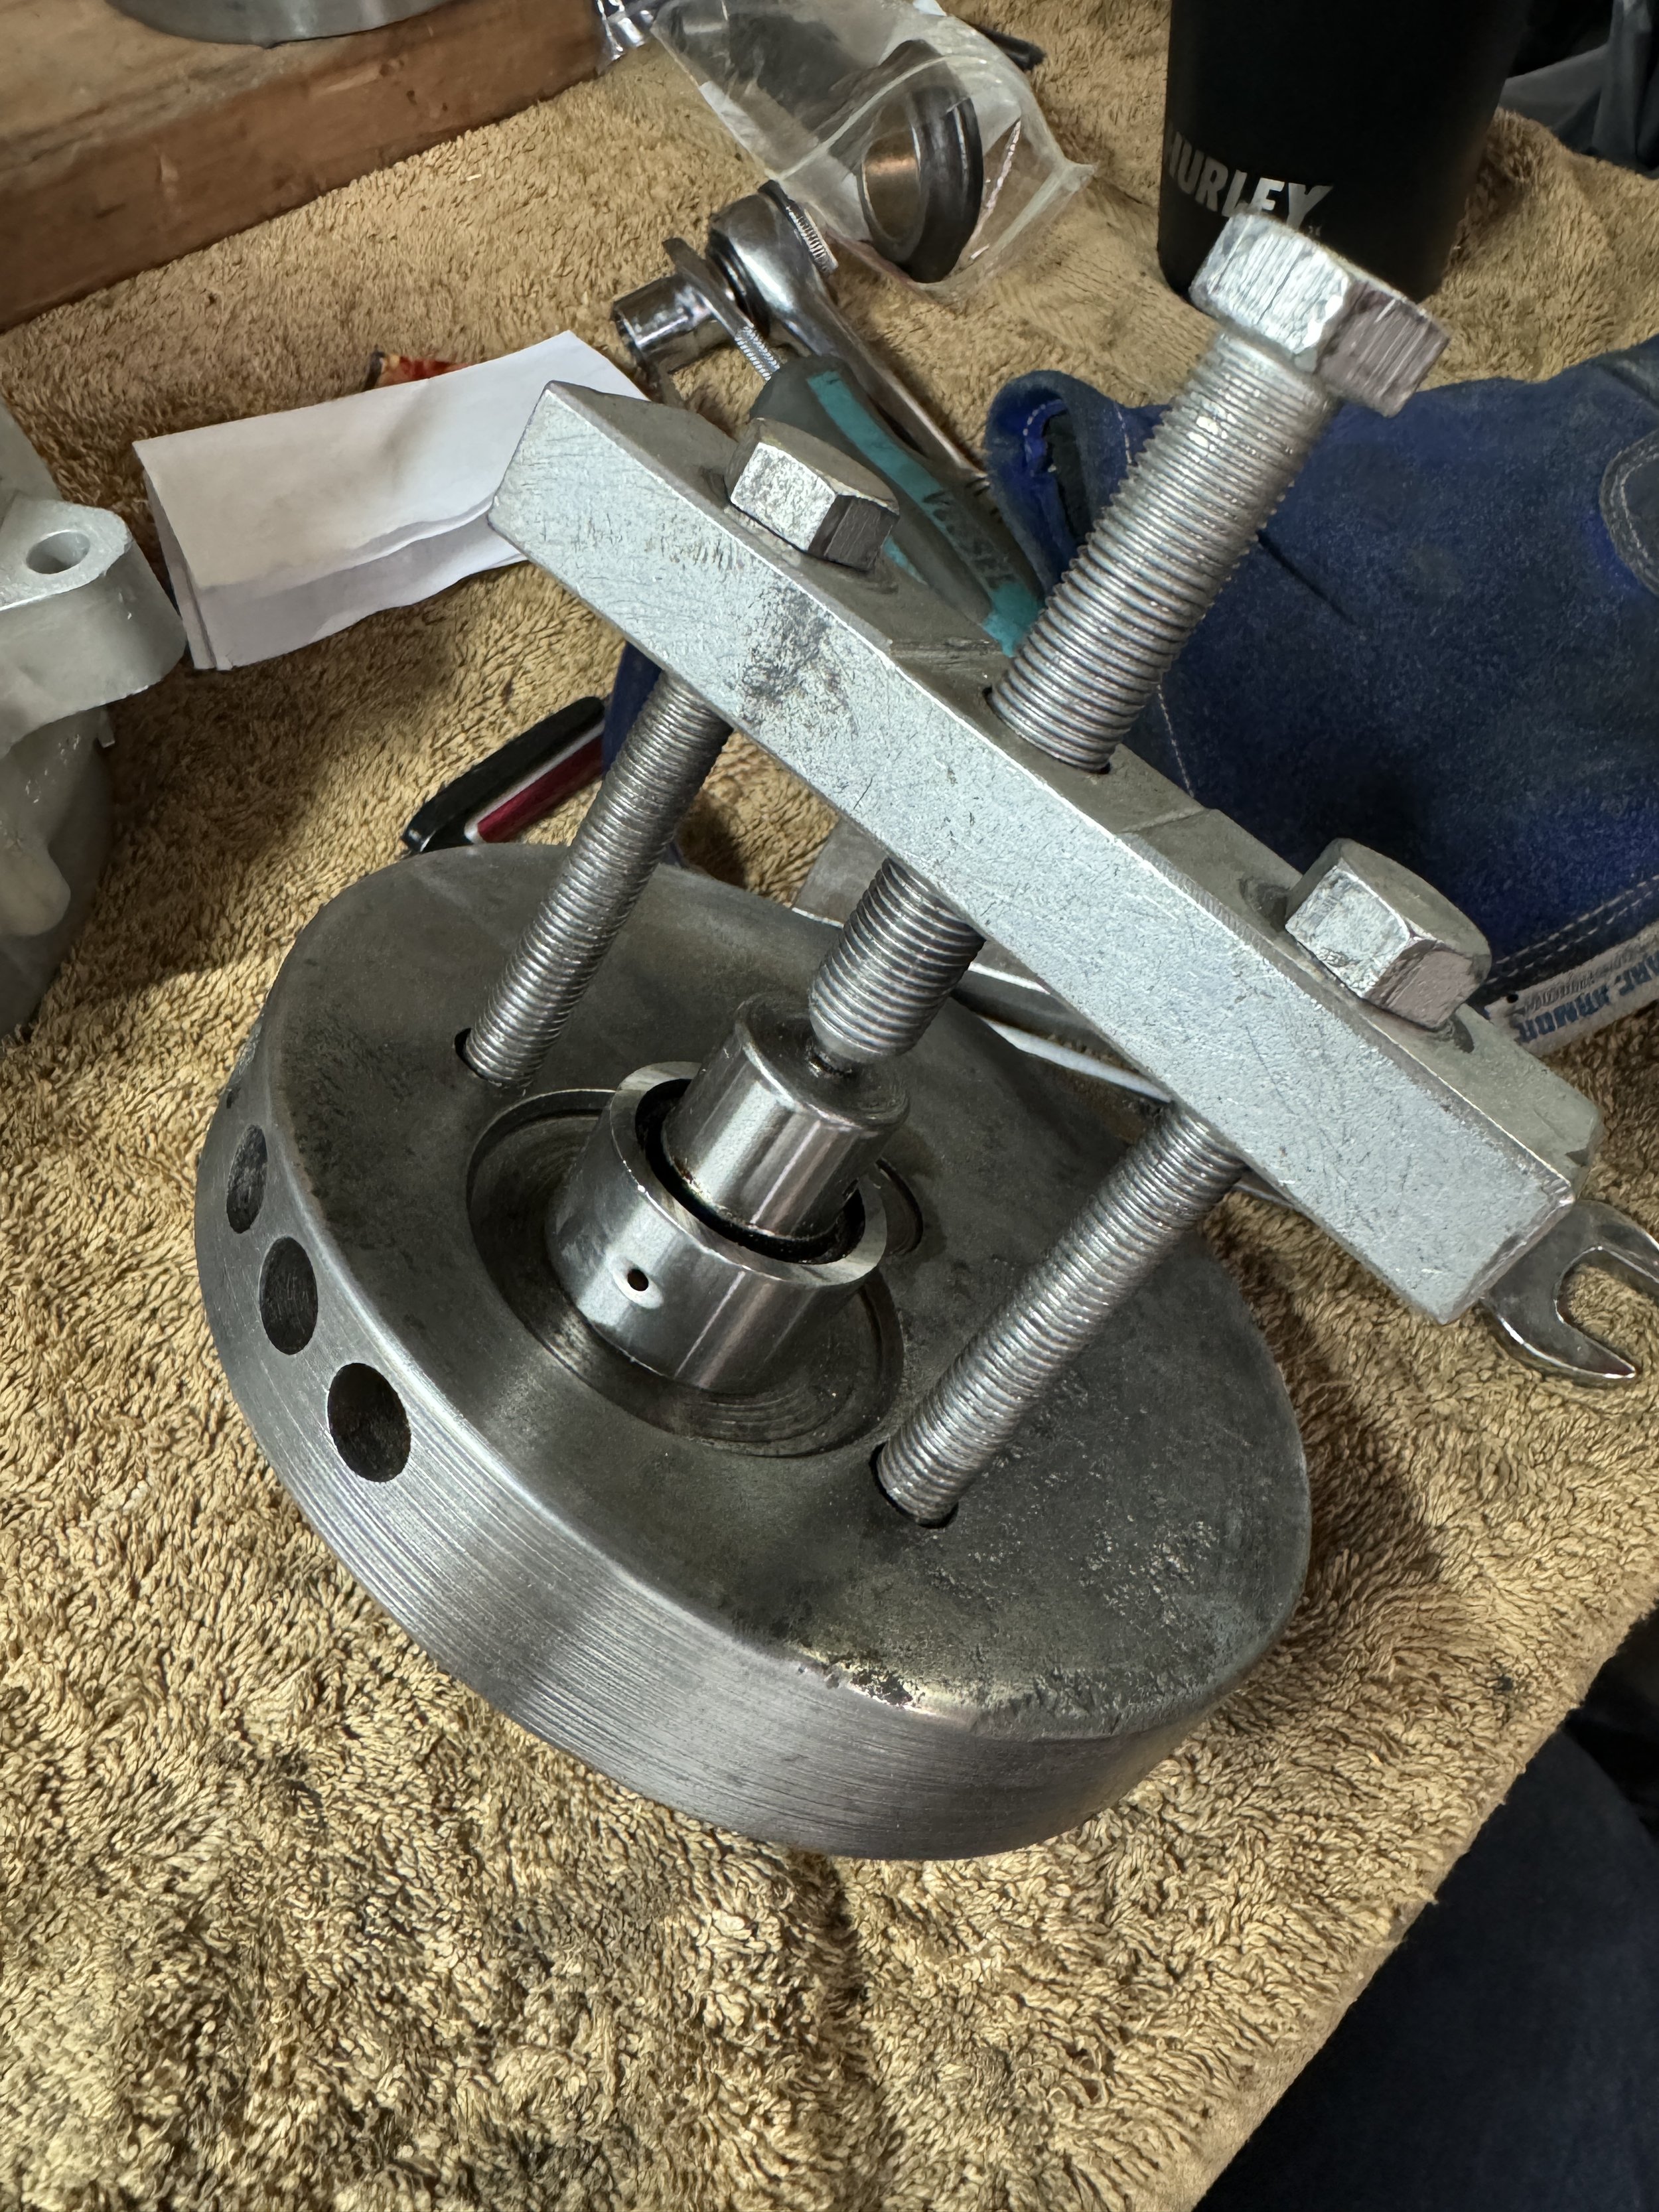
The engine carnage included a busted transmission gear, A seized output shaft bearing, a stripped oil pump drive sprocket, and a broken shift arm. The broken gear-selector arm was a new defect for me to find. Even with somewhere around seventy-five total engine restorations, you can still see something new every once in a while. A good used gear and gear selector arm were pulled from my bins, as well as a side cover for the head. The head covers change slightly over the early model years, and Honda only used the one for this bike for a couple years. I had probably two dozen of the earl style cover, and fortunately, a good correct one.

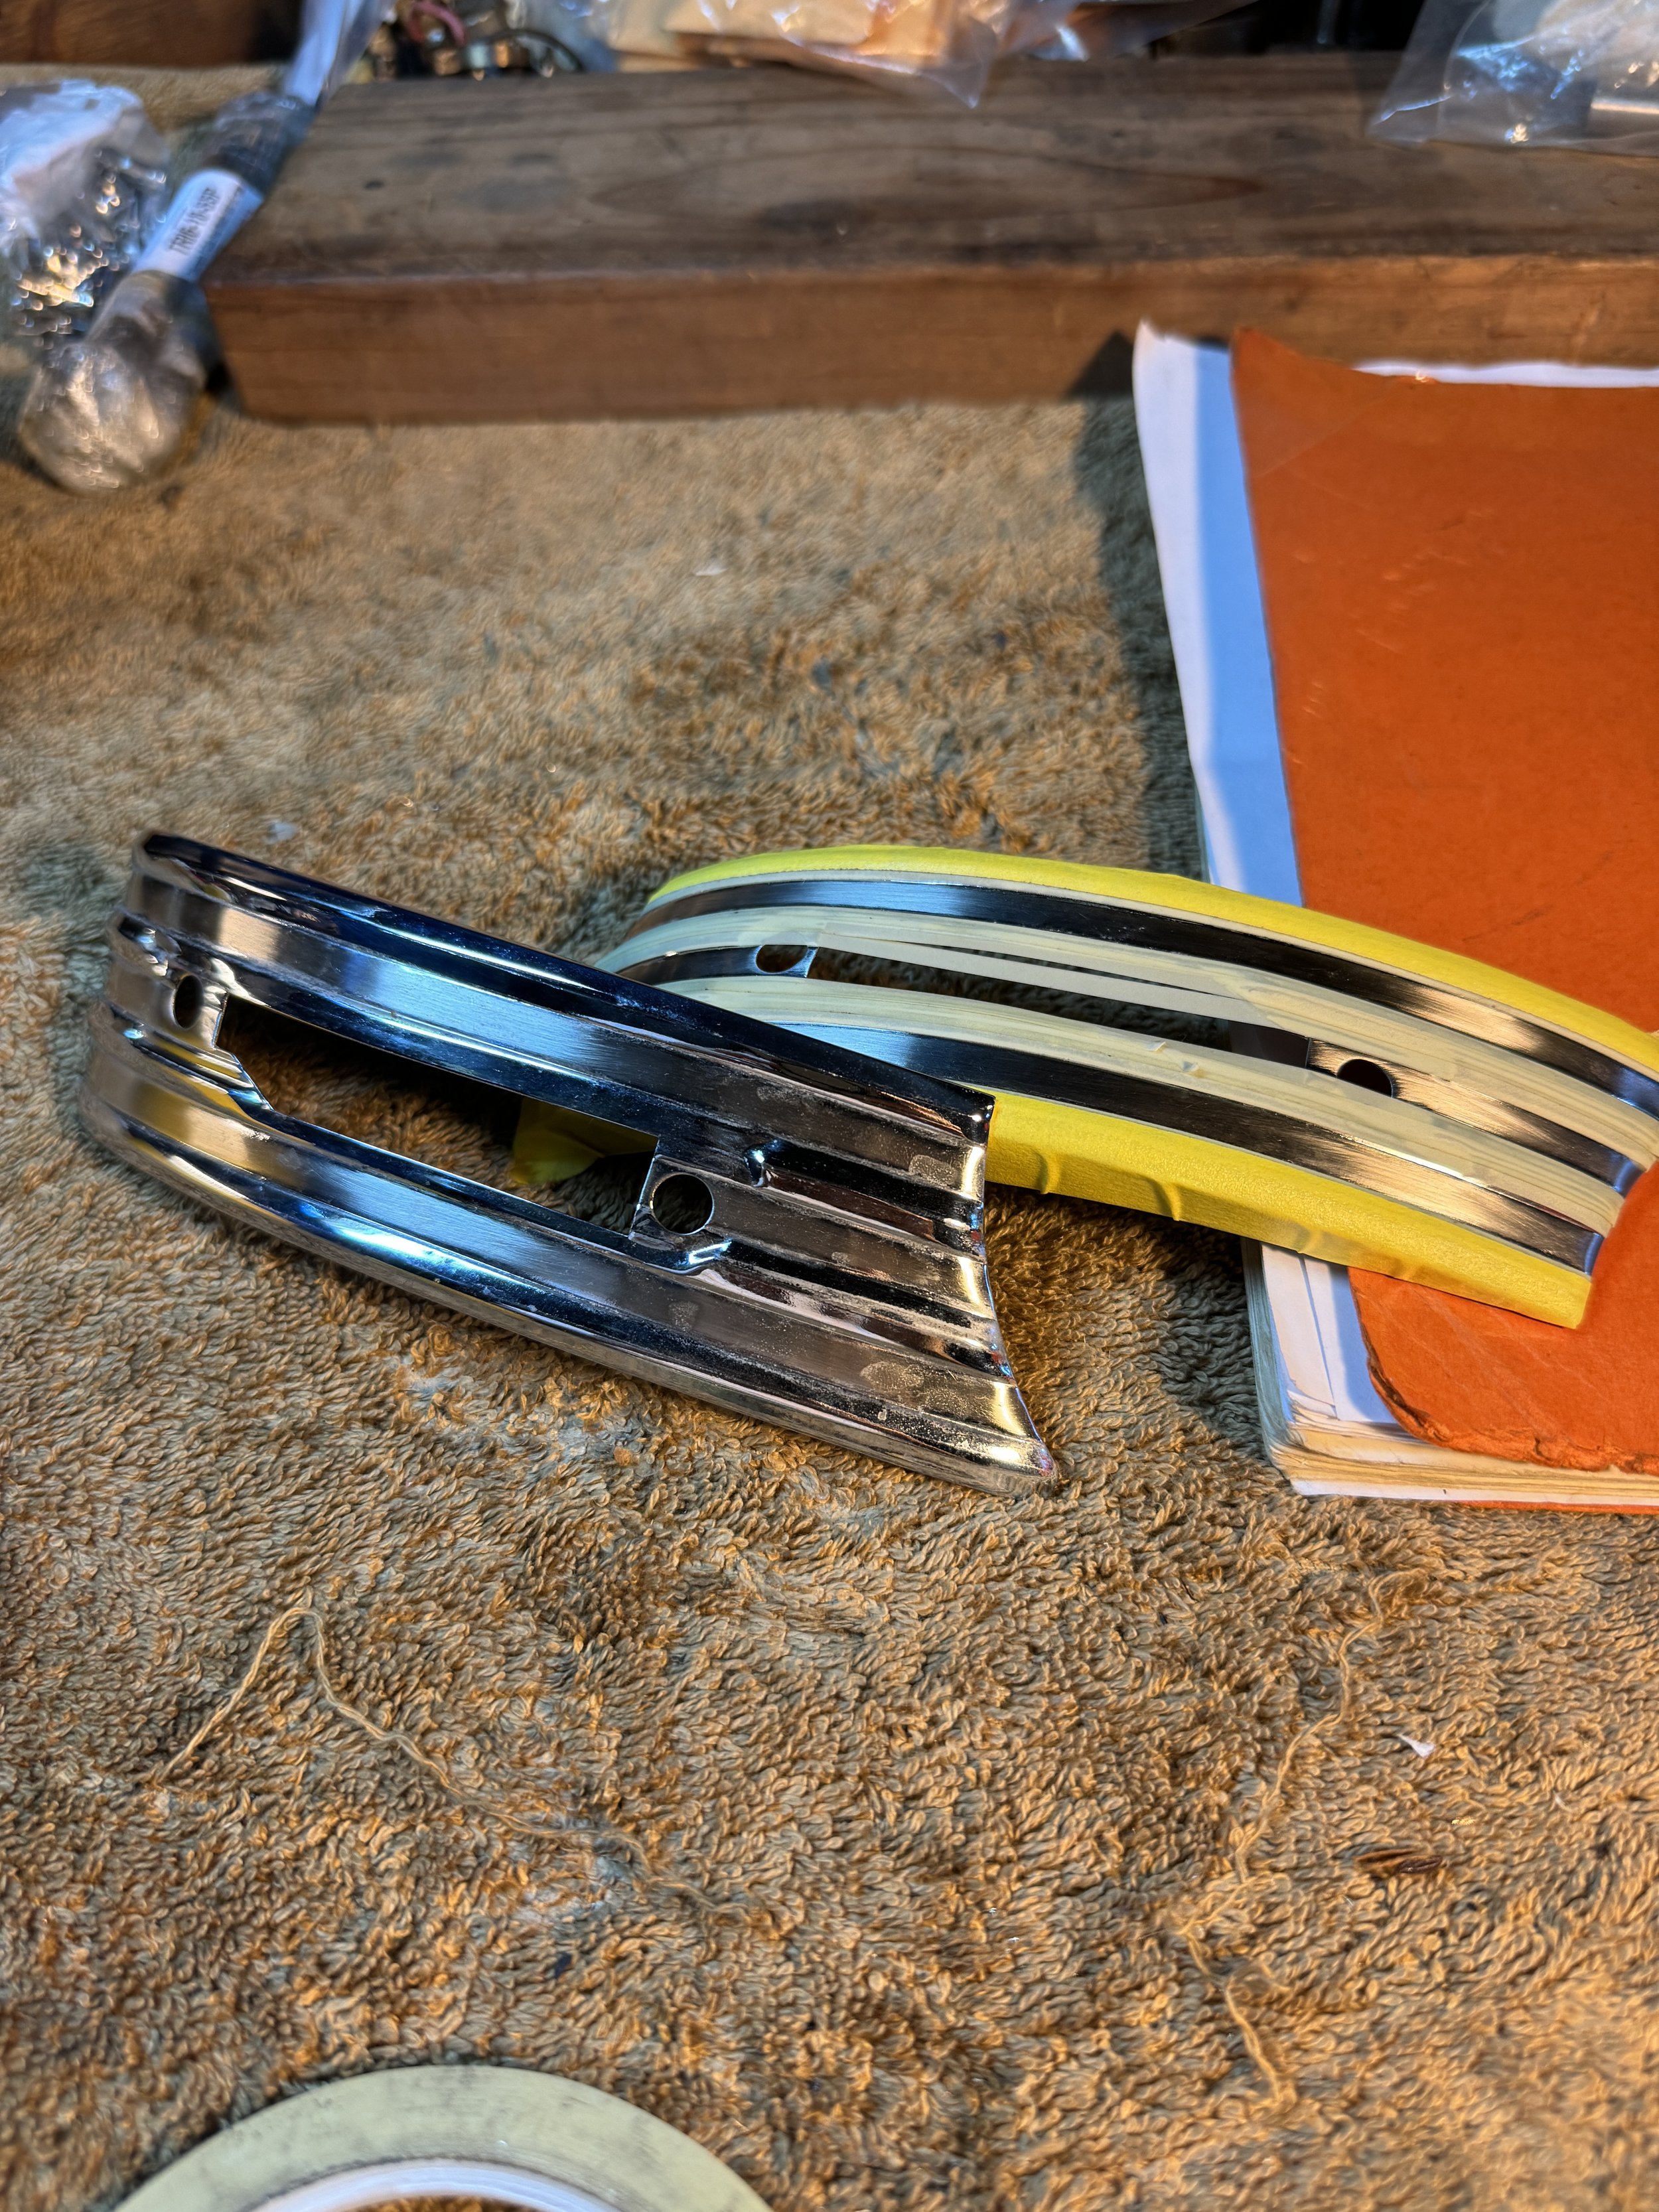
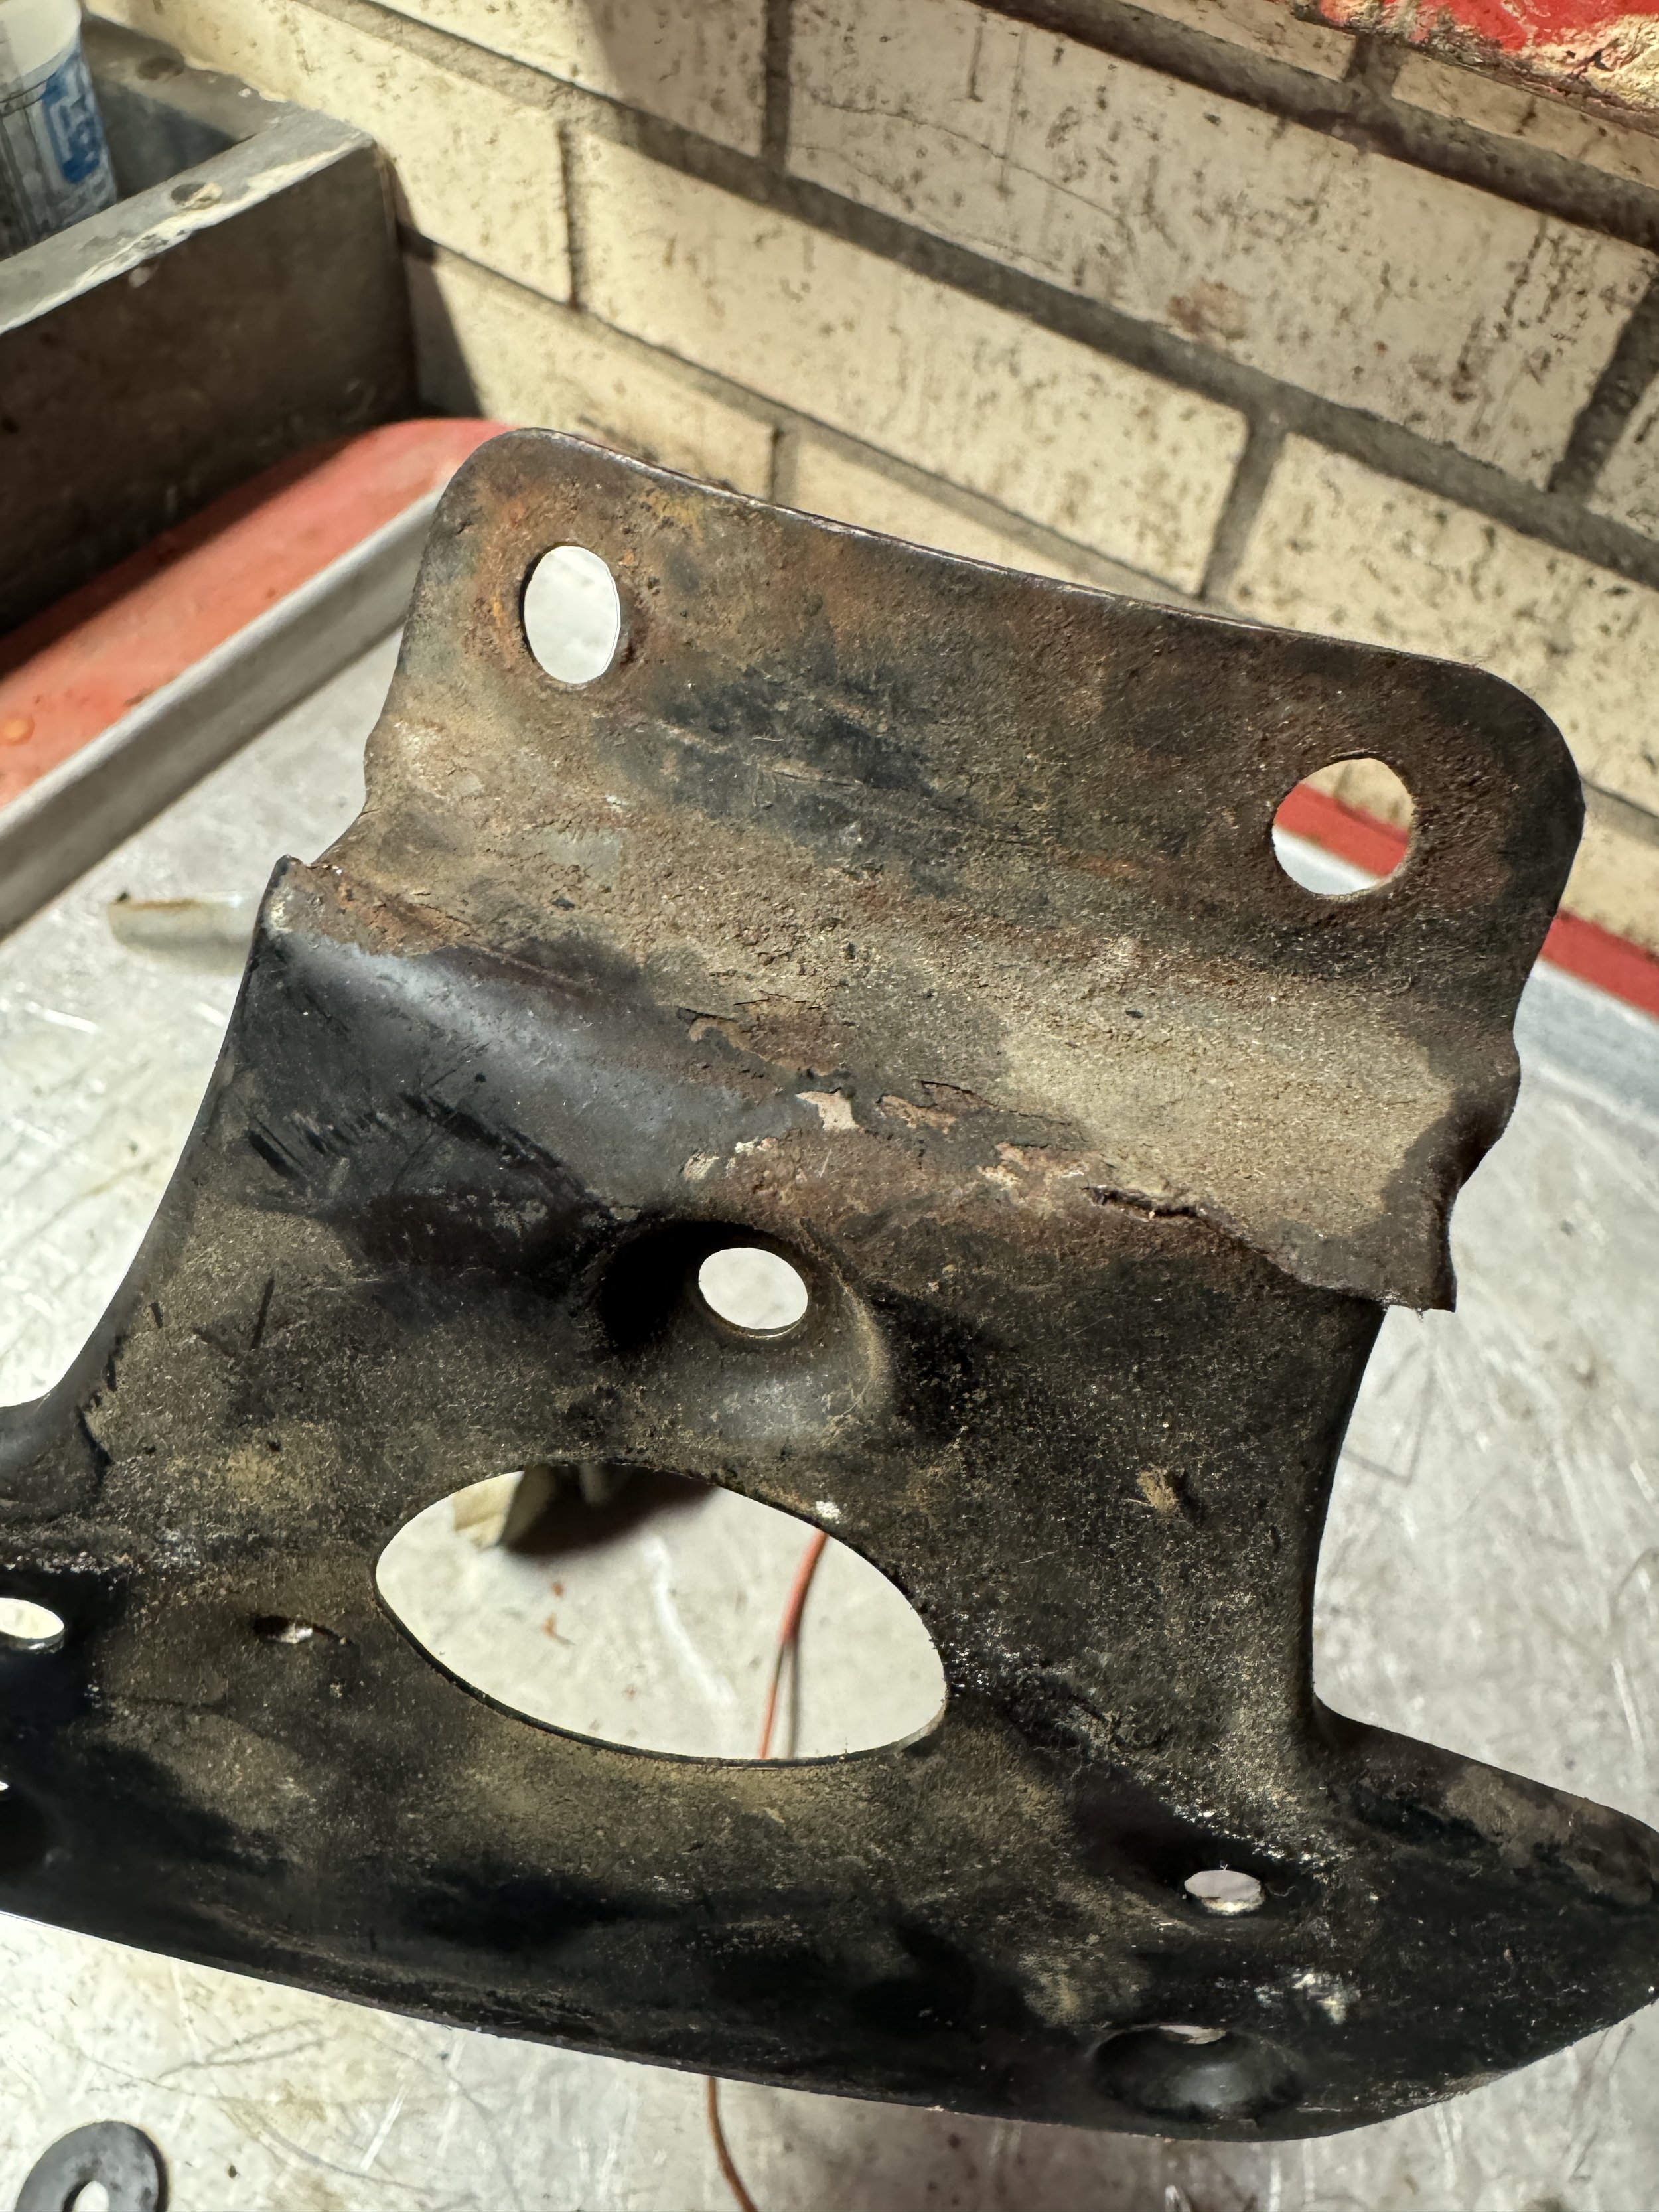
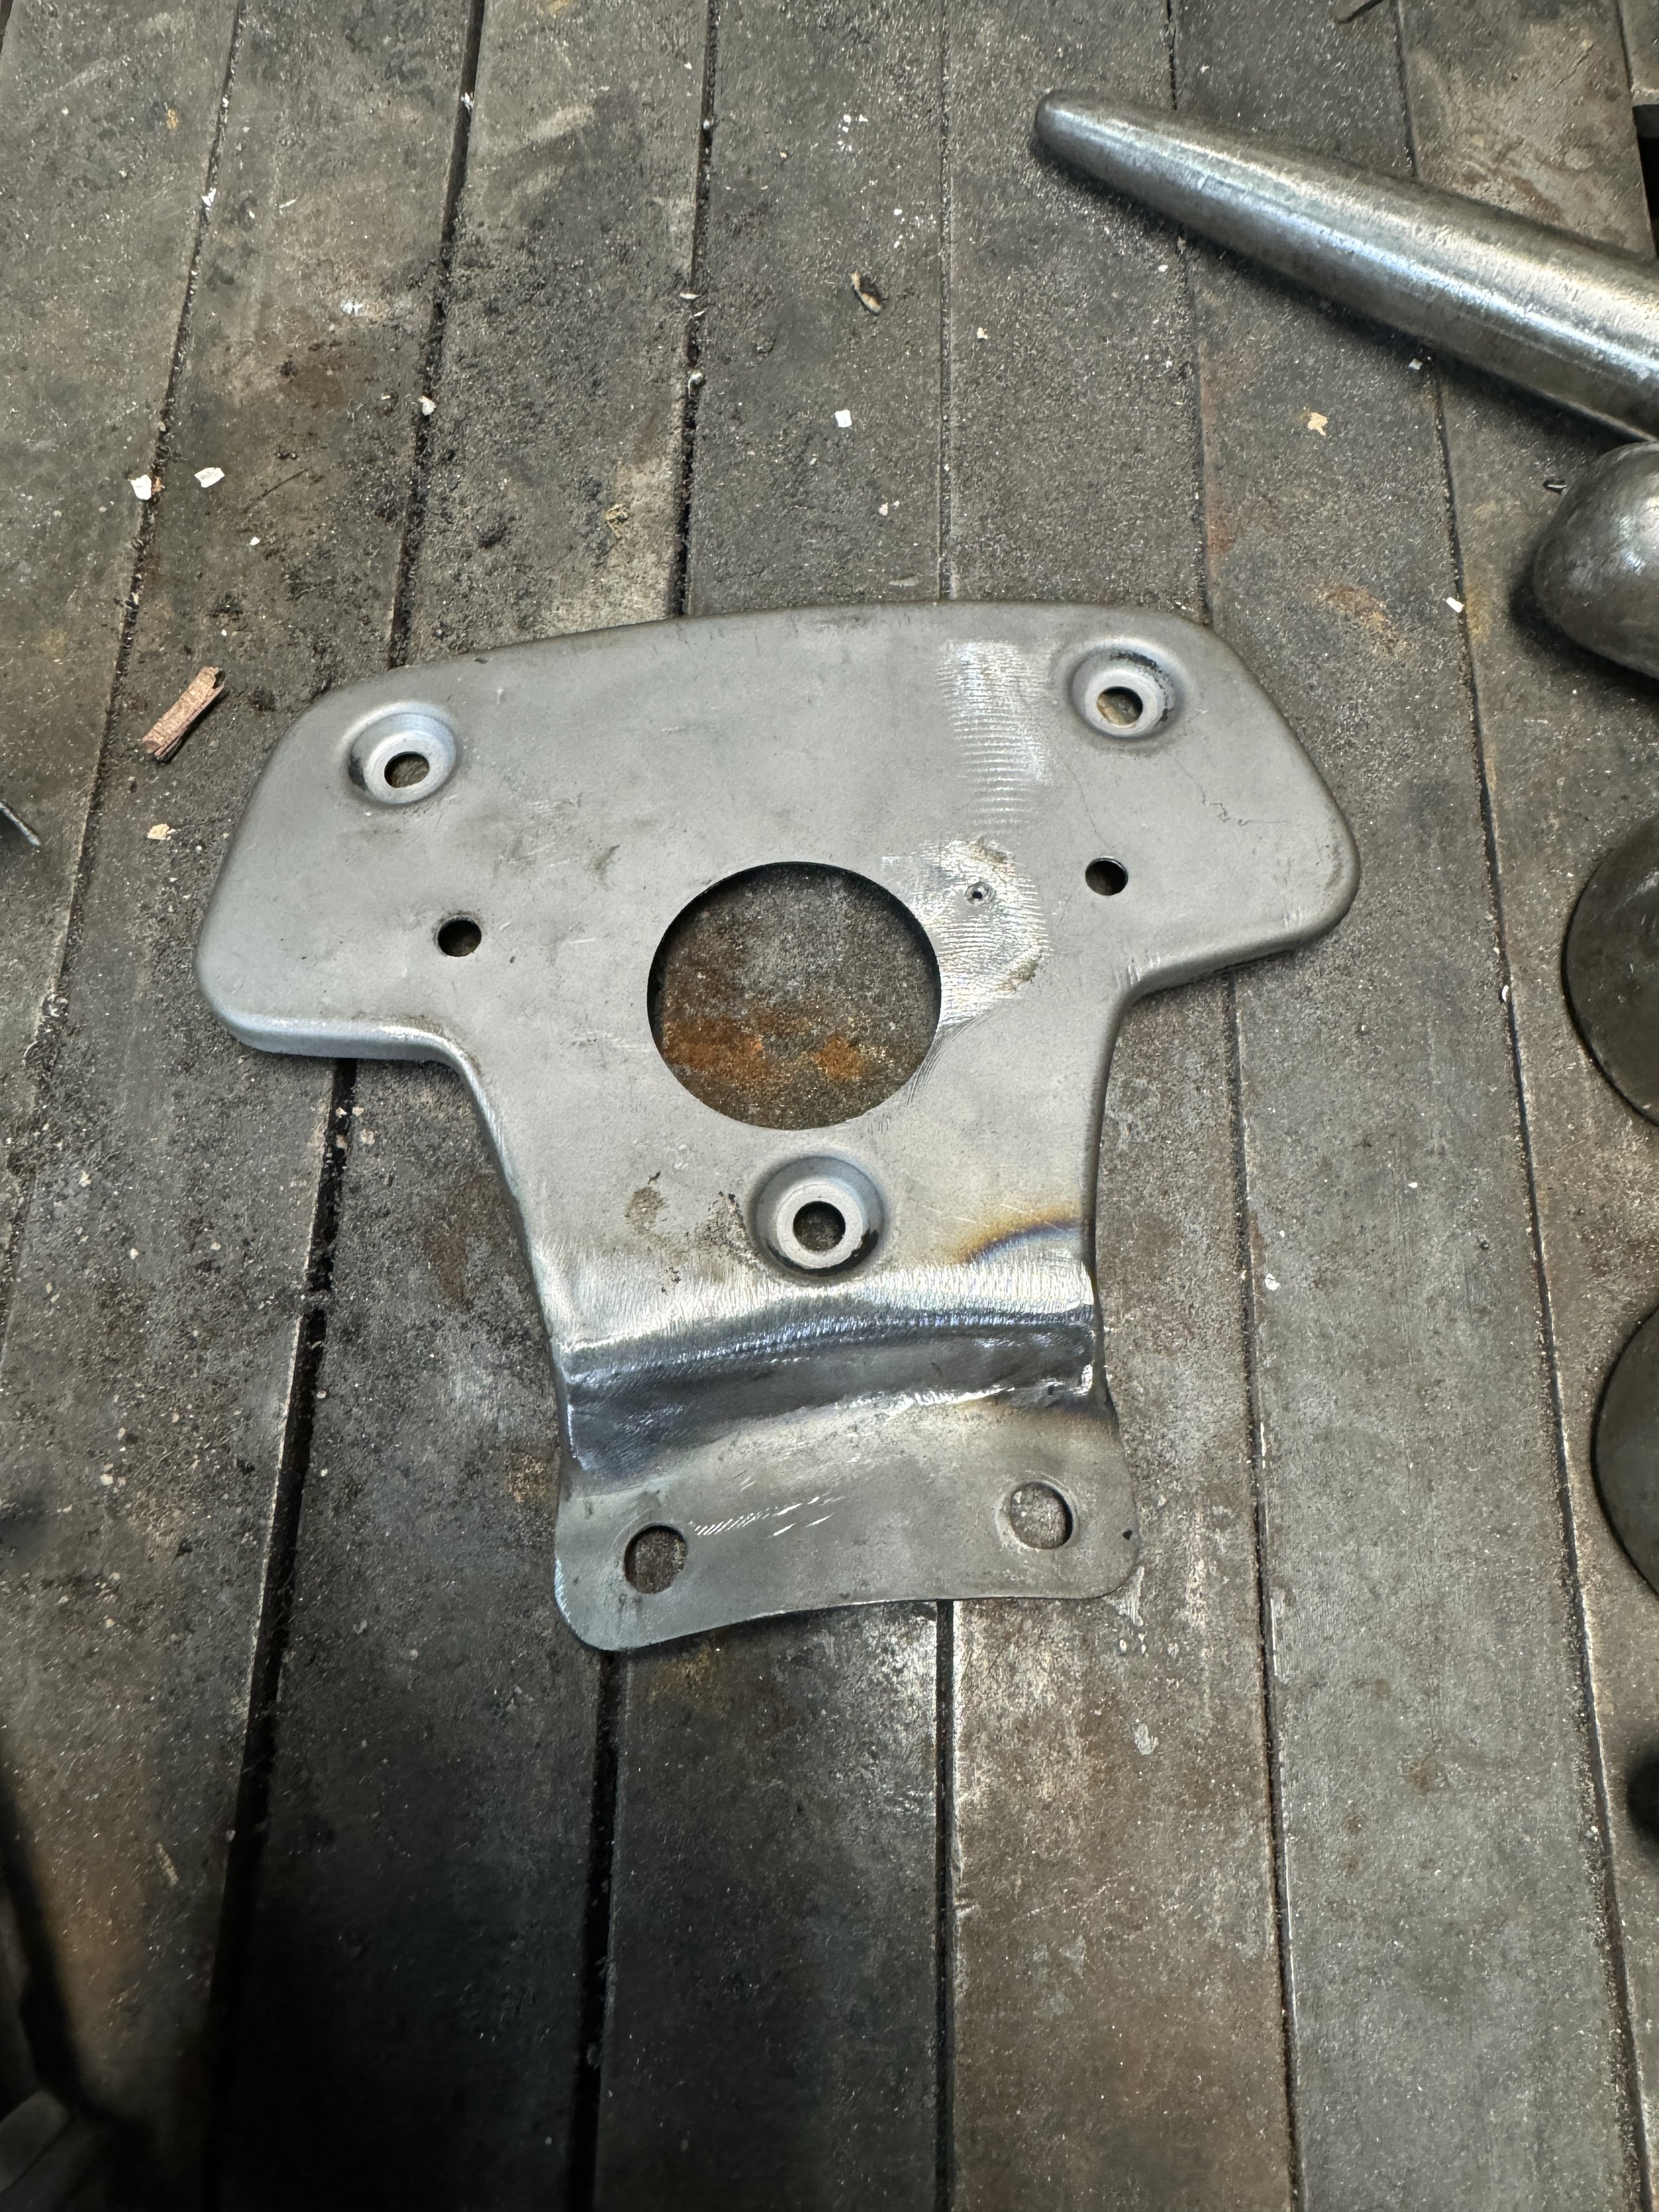
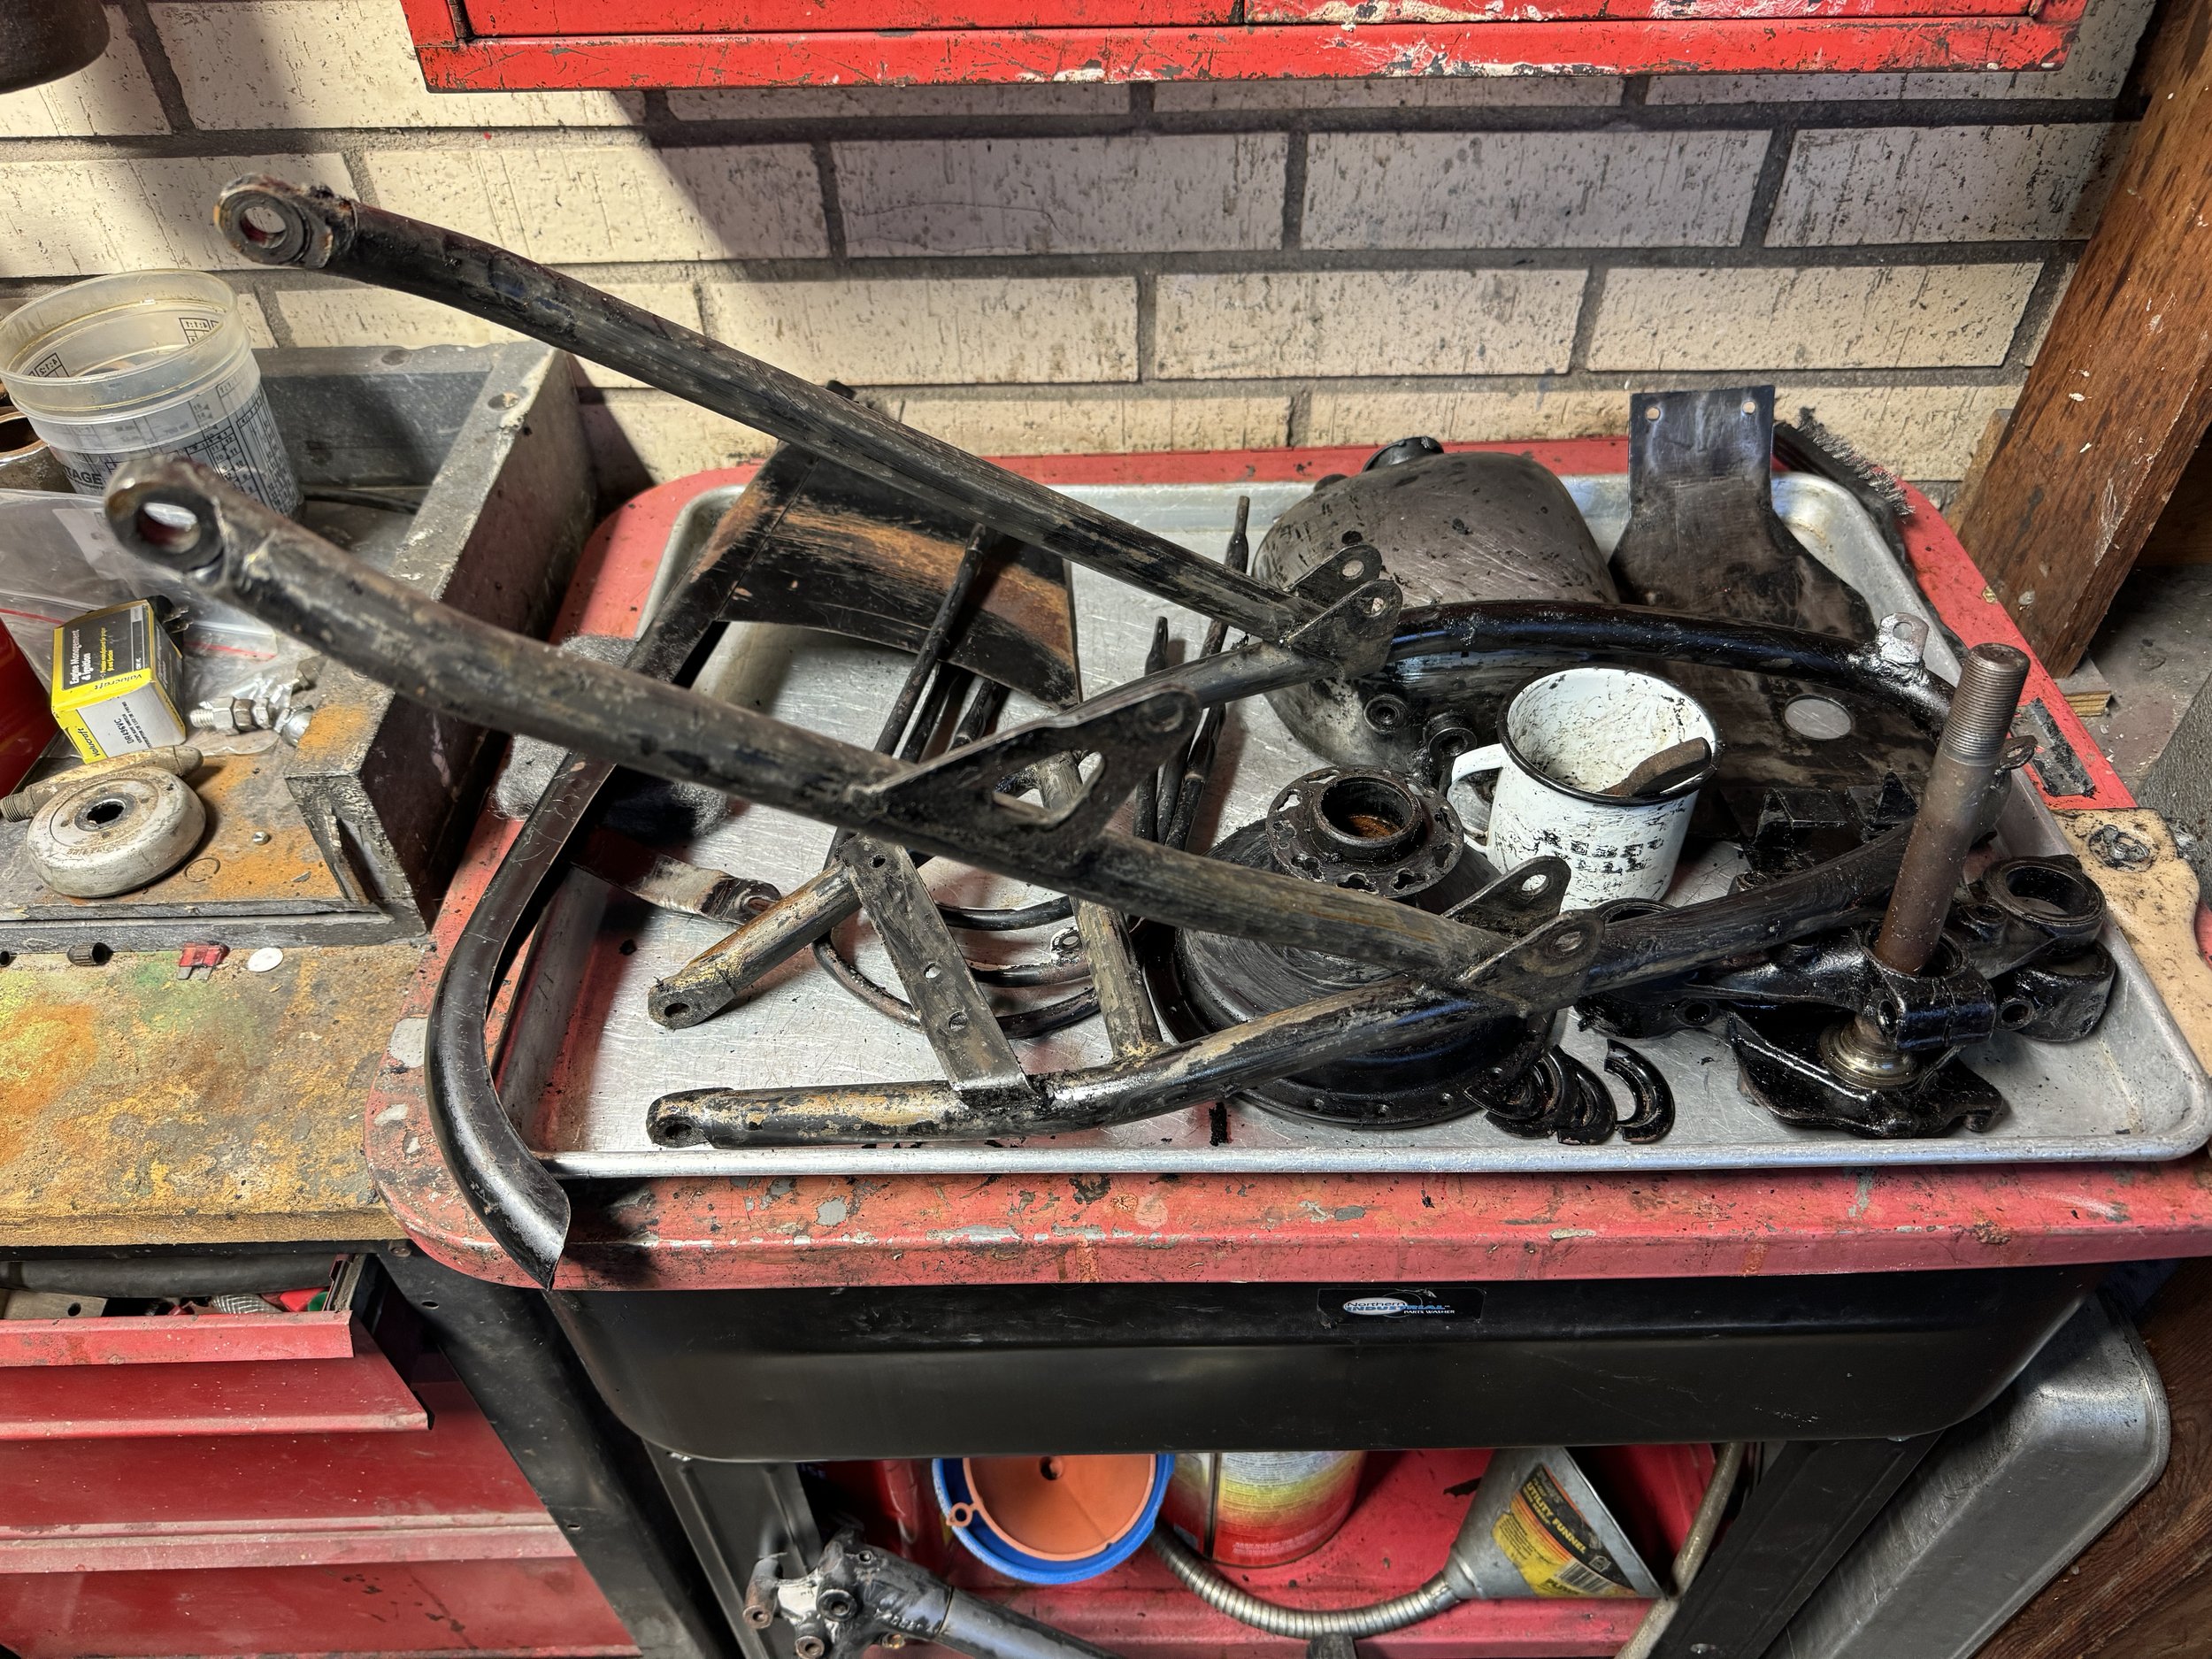
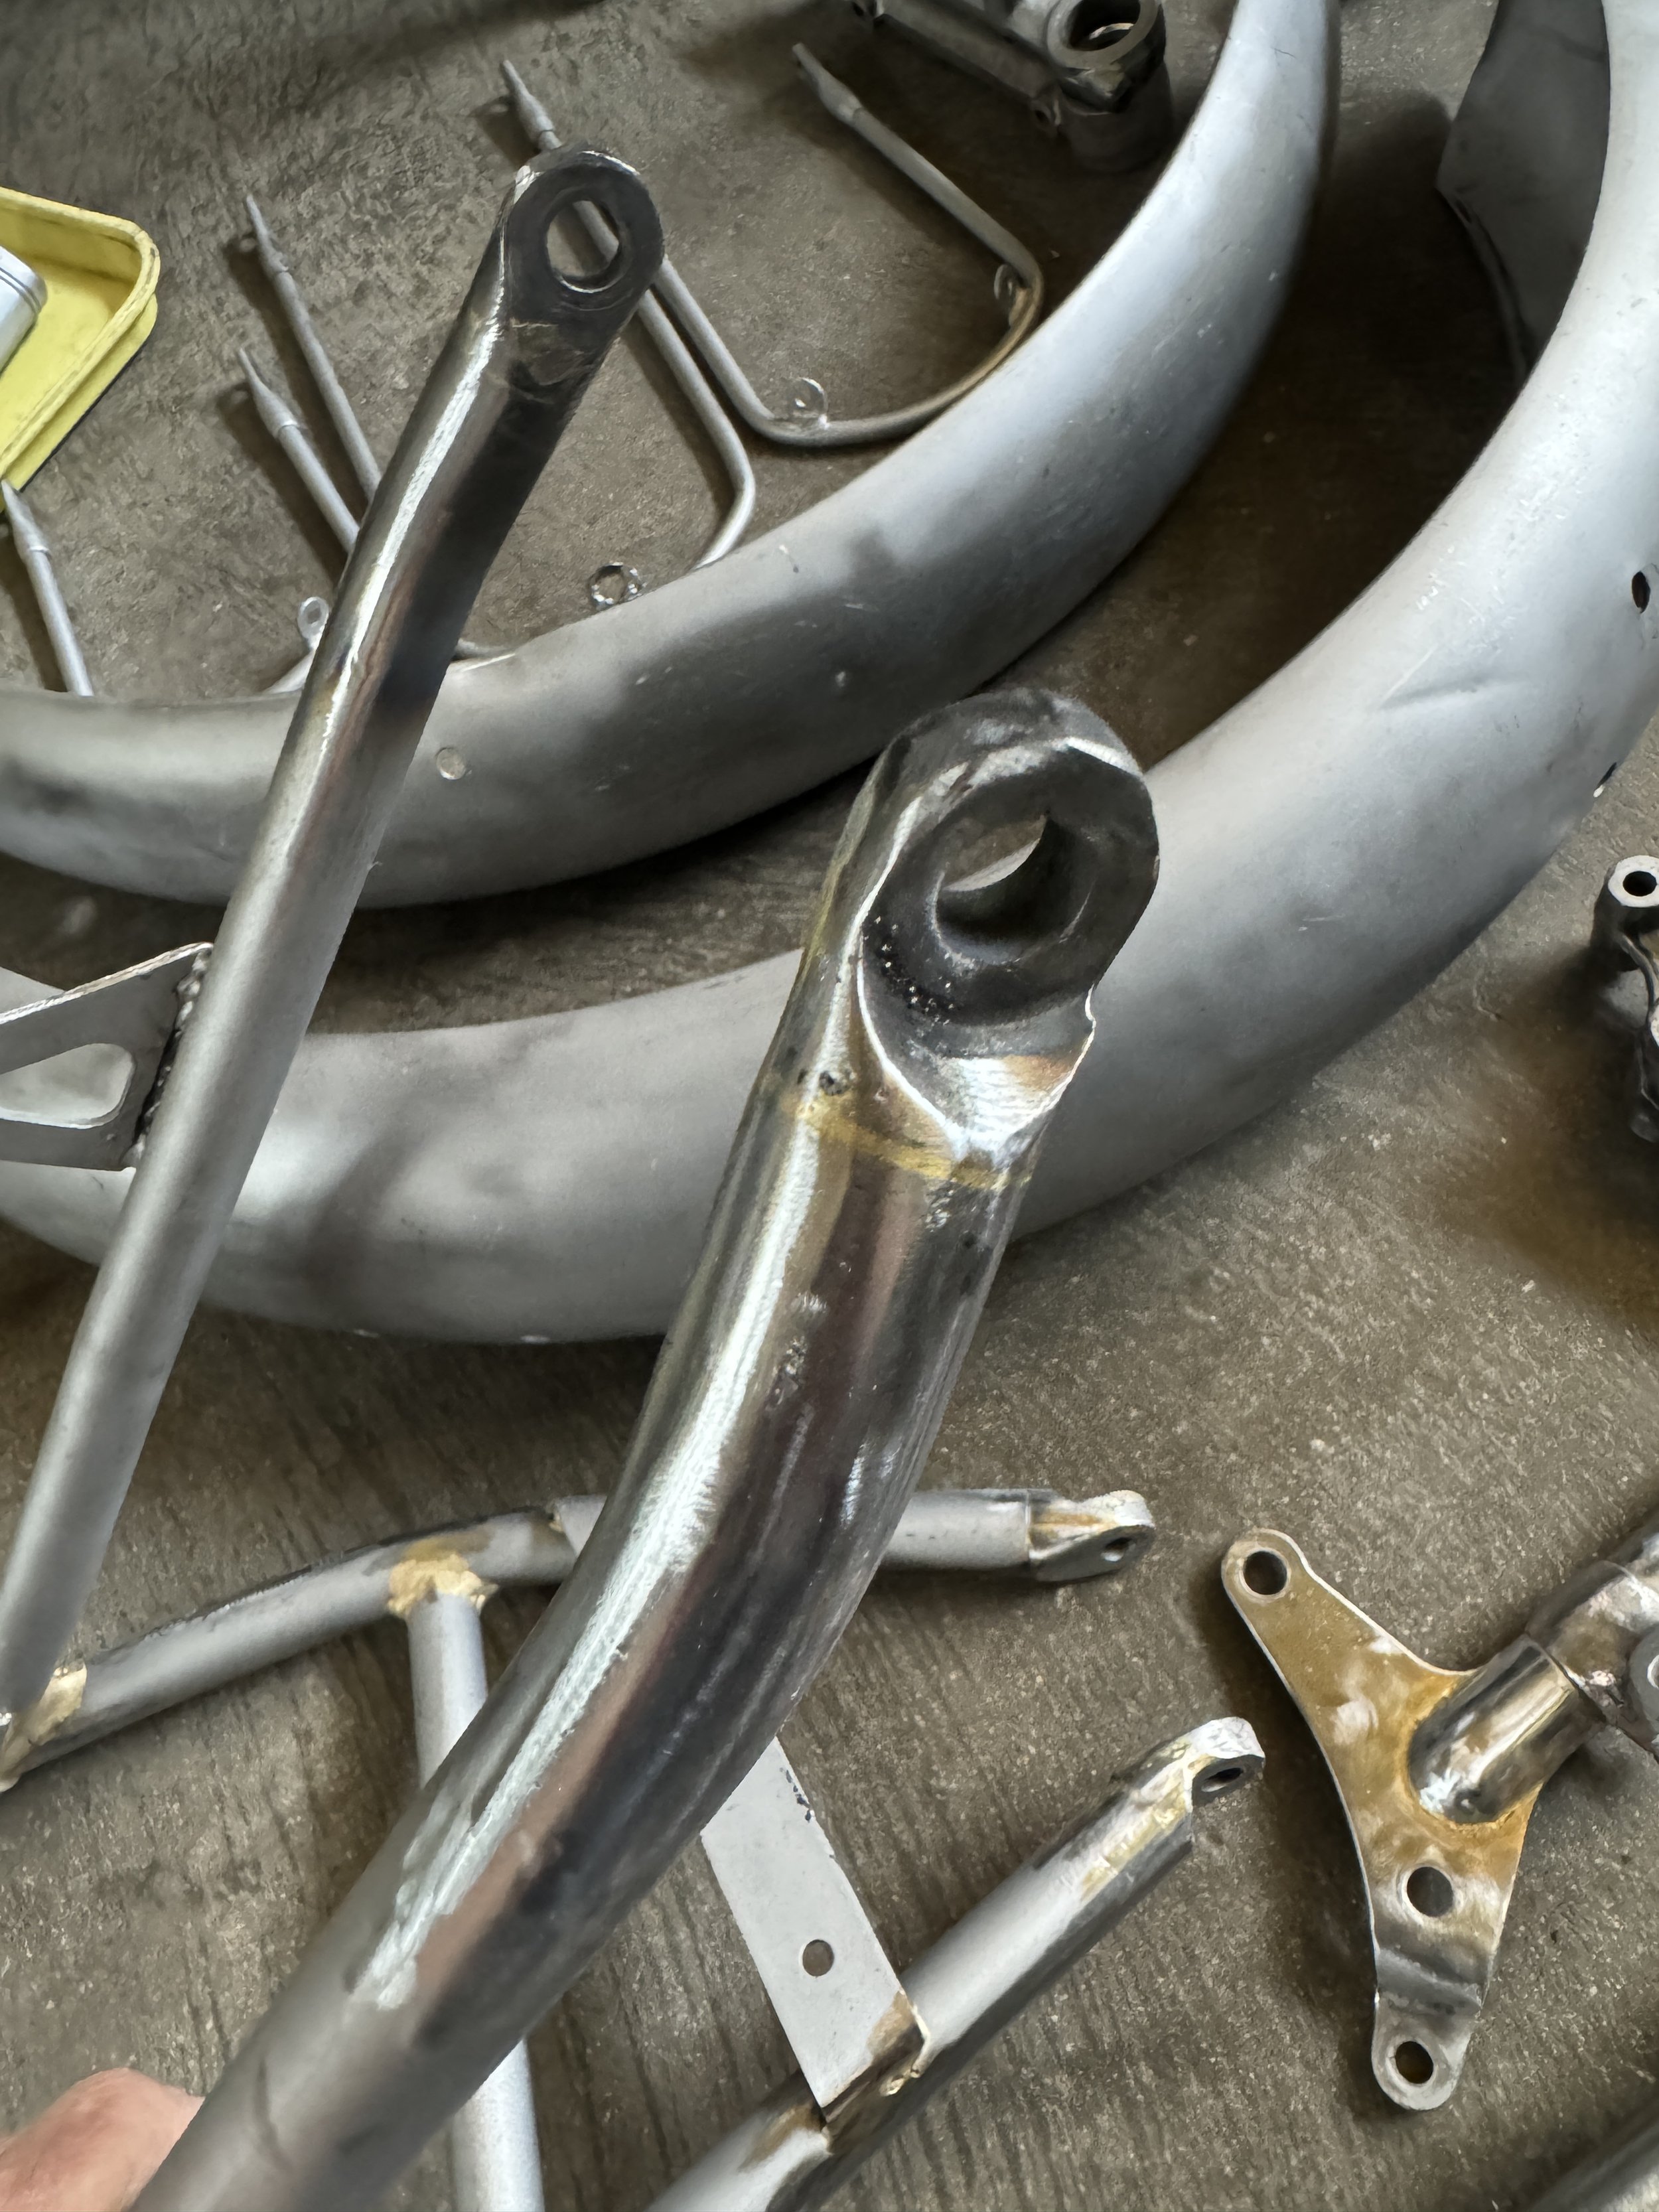
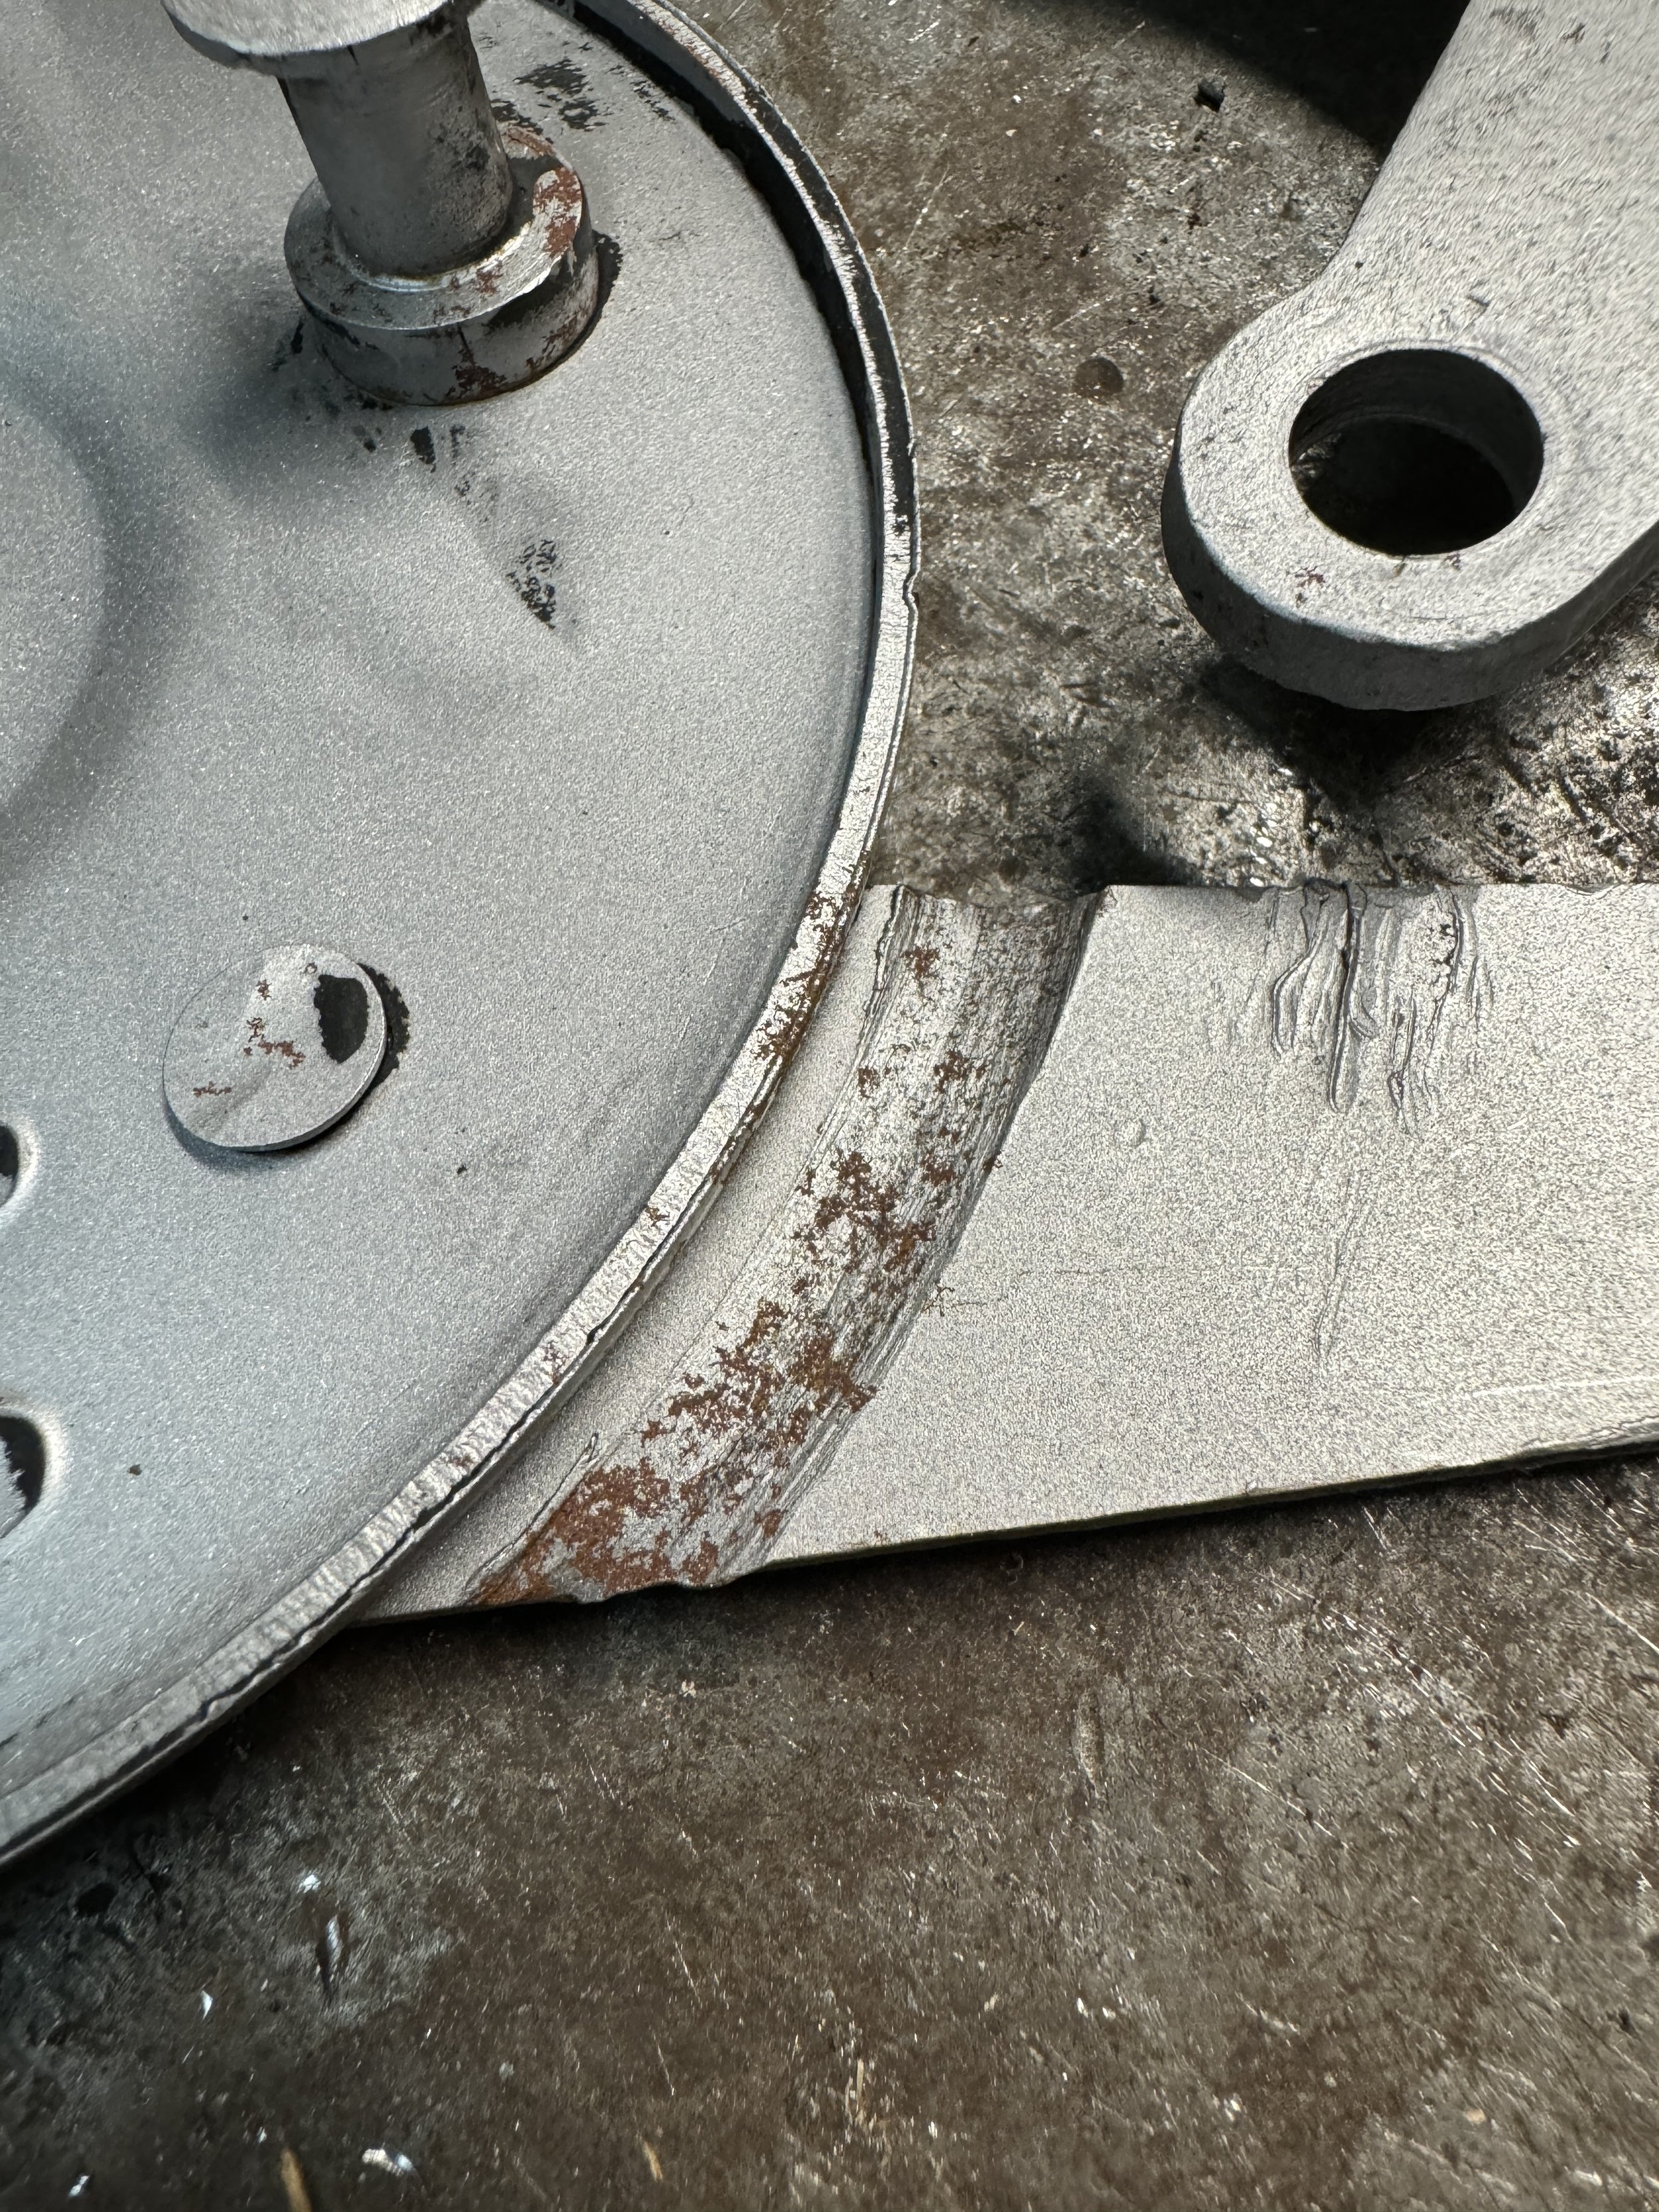
The frame was in fairly good shape, but some chain rash on the swingarm had to be repaired.

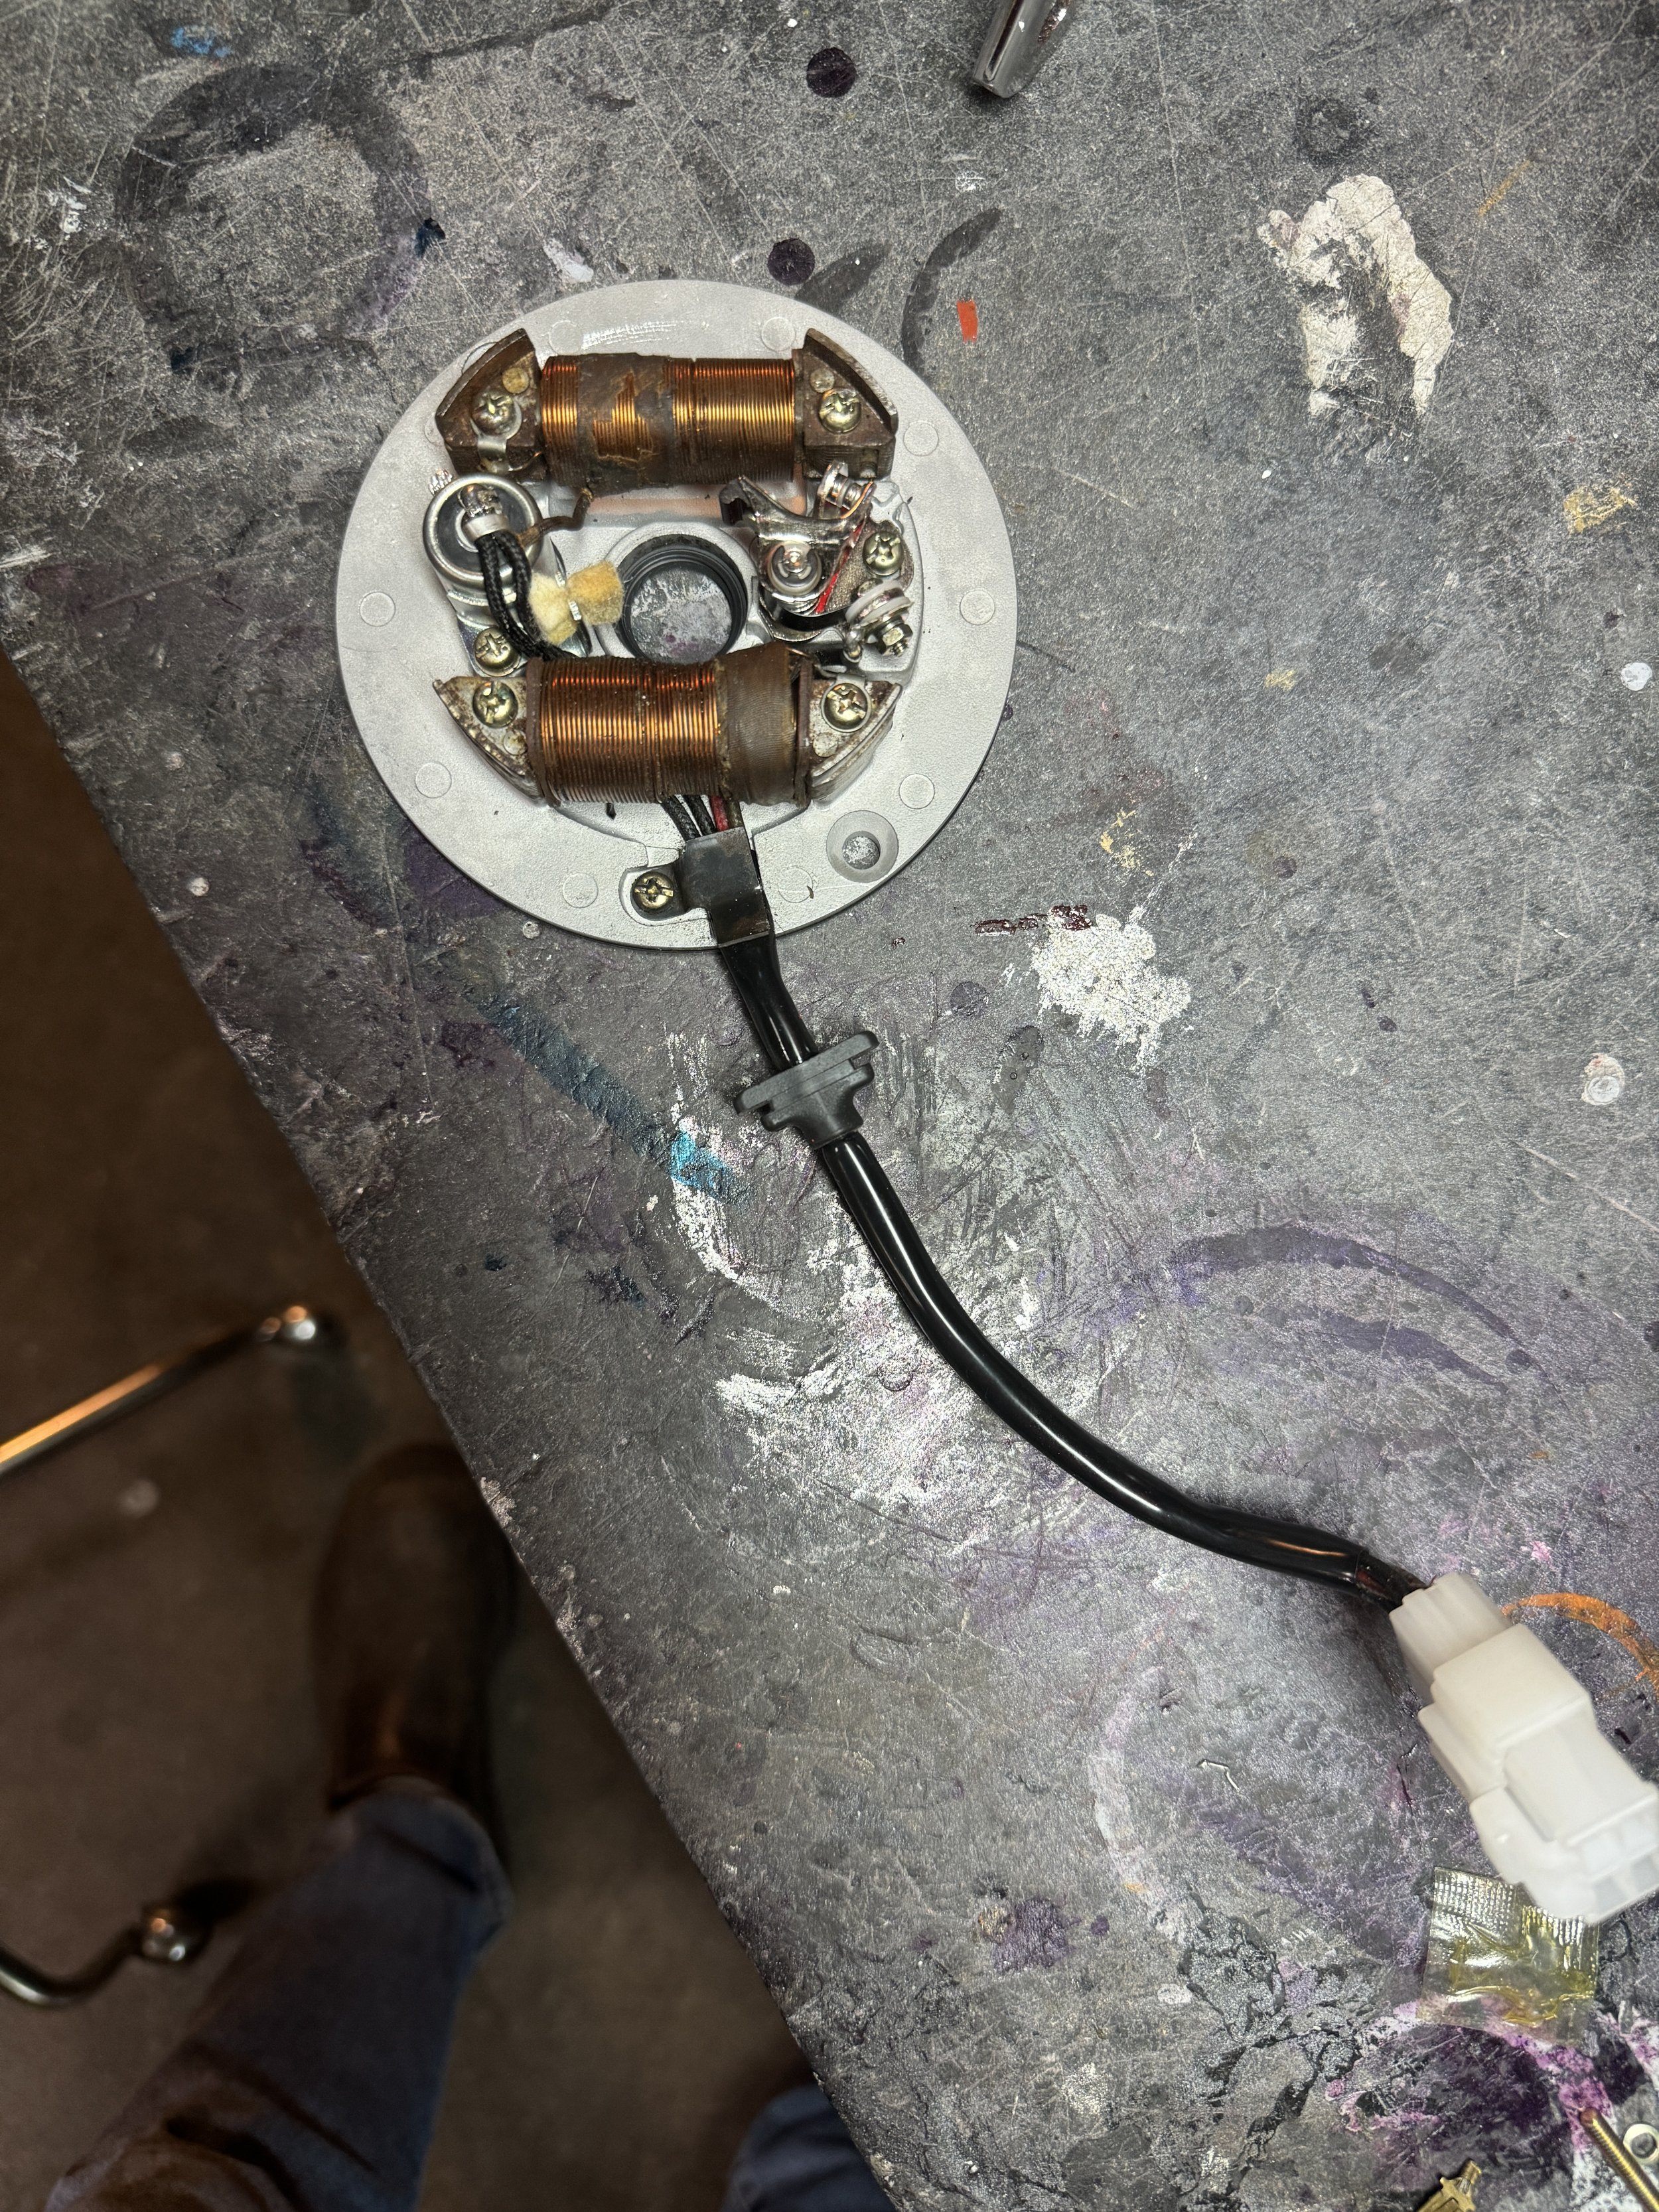
New coils, plugs,and wiring were used to get the stator plate back to new condition. The store kit and ignition coil are also HondaTB Parts pieces, and come with everything needed, even the seal for the crankshaft and stator plate rim.

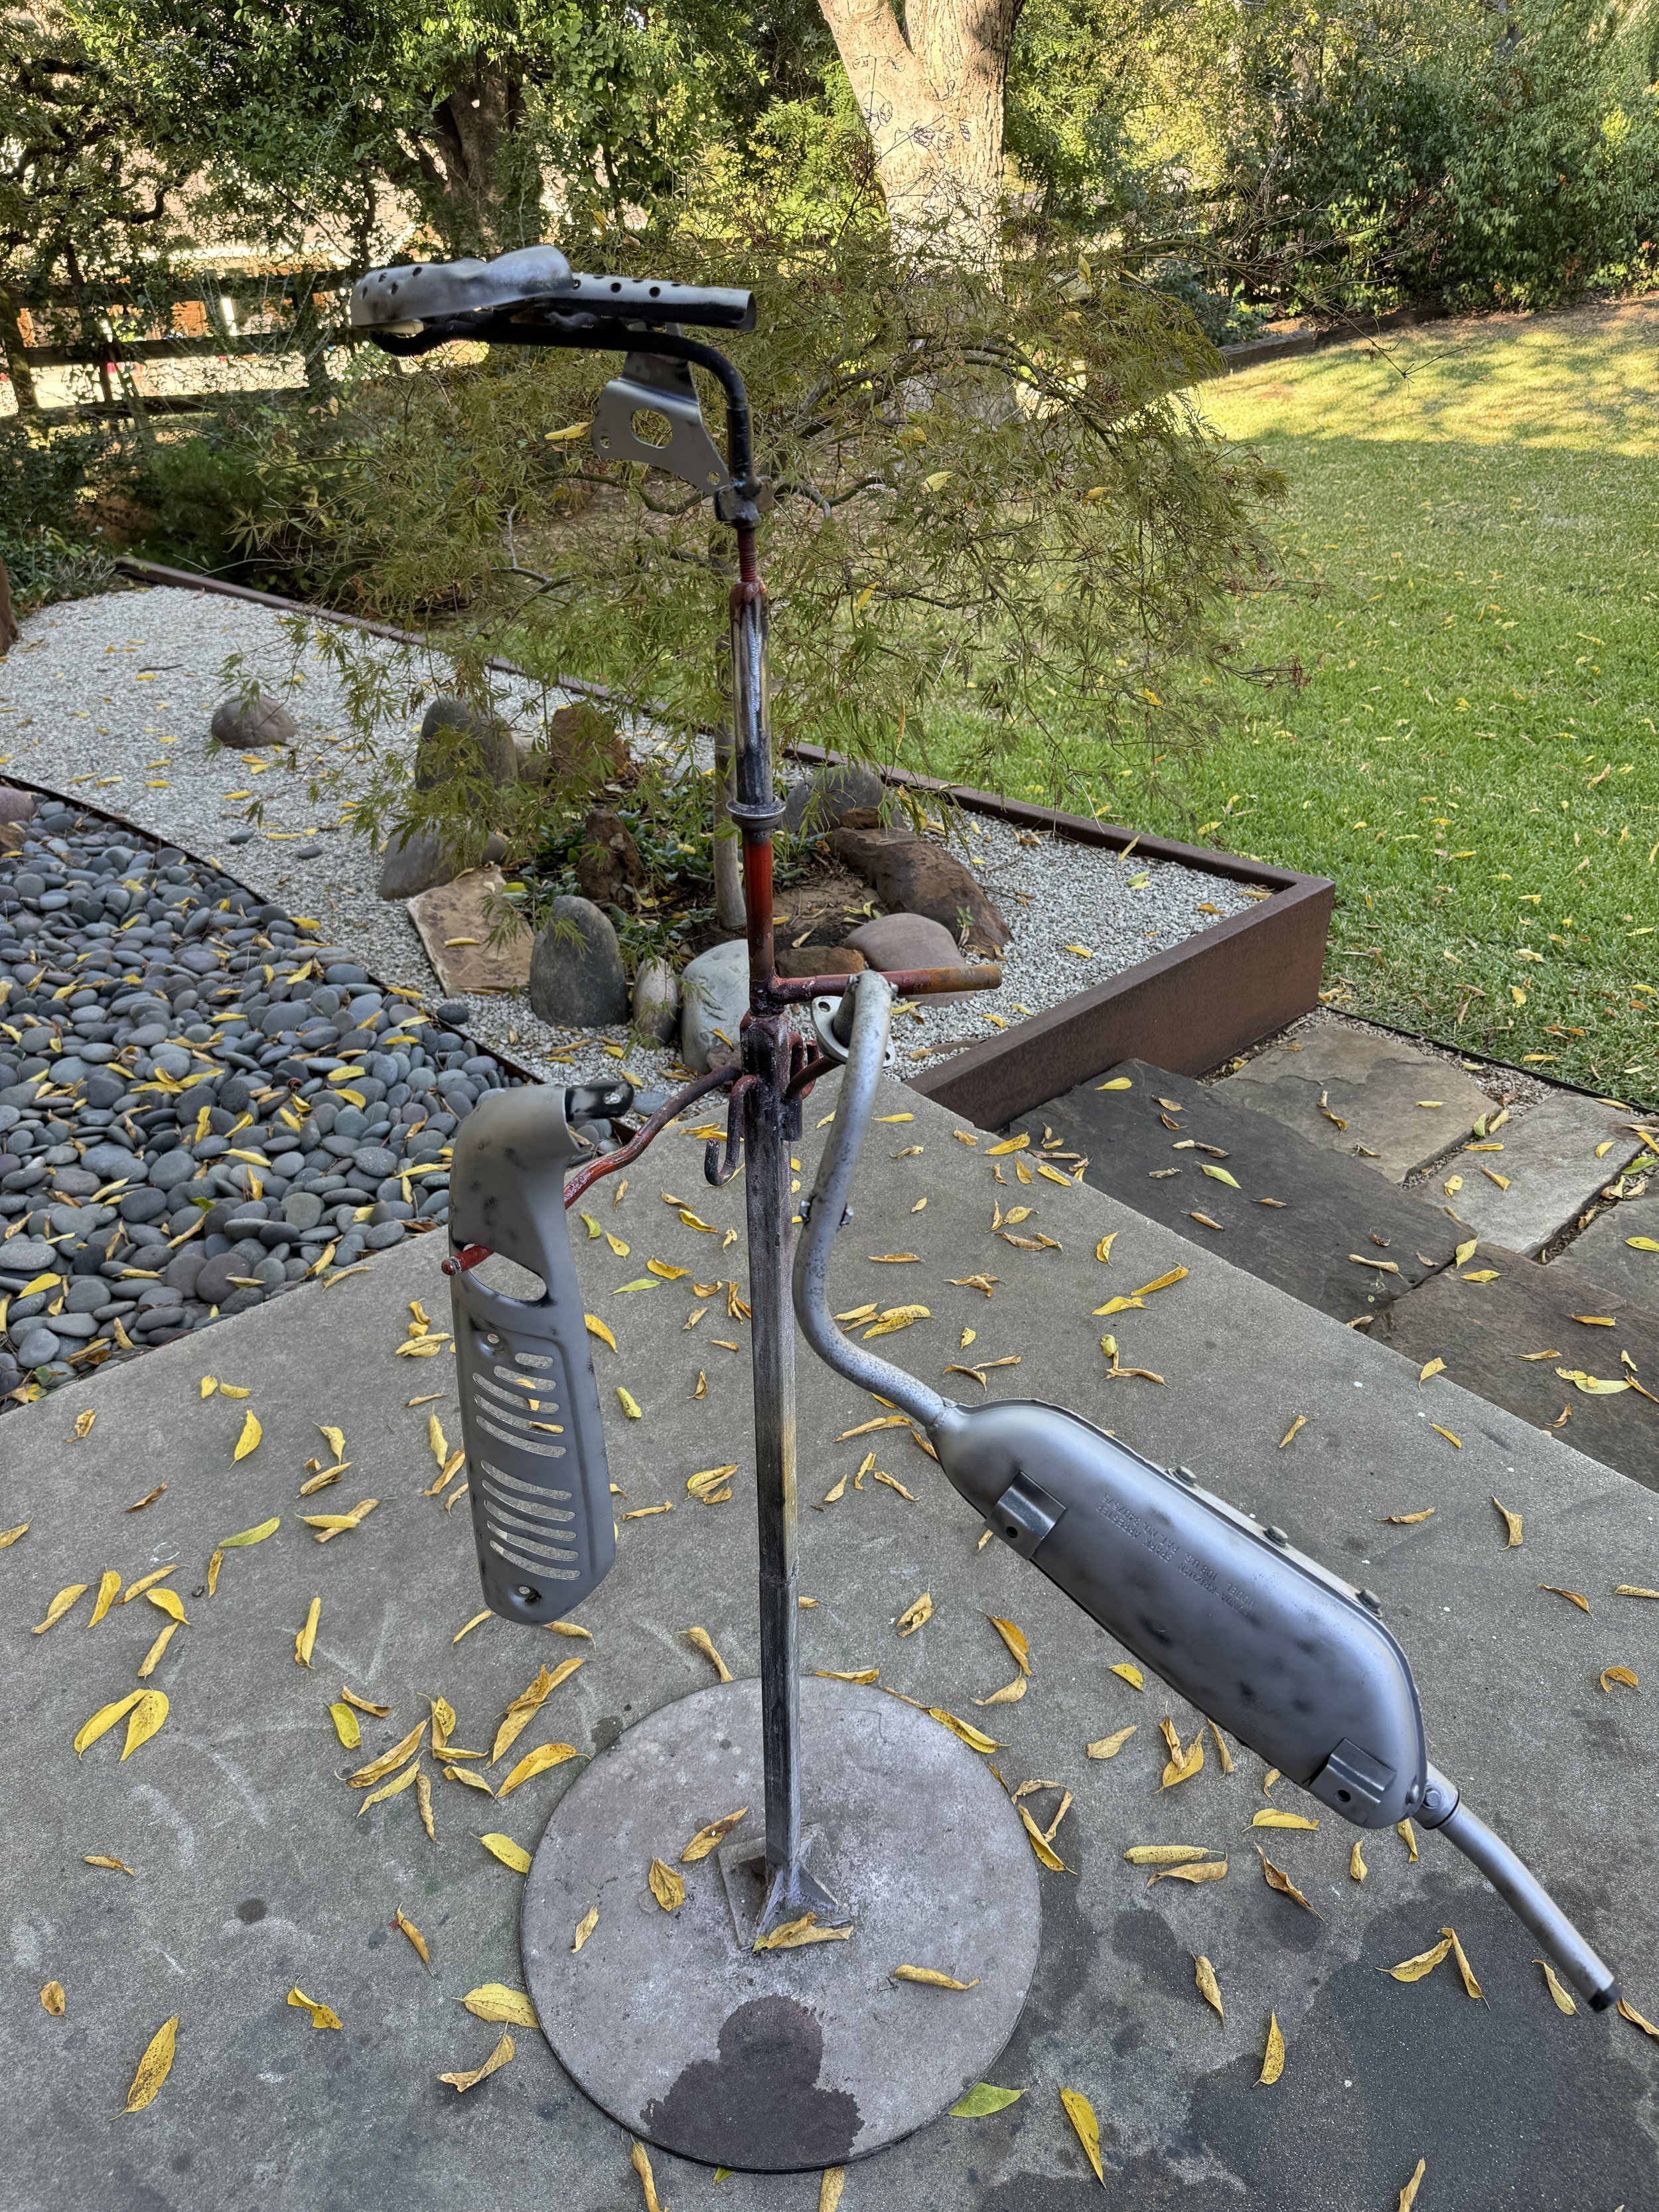
The one year only muffler and heat shields getting ready for paint.

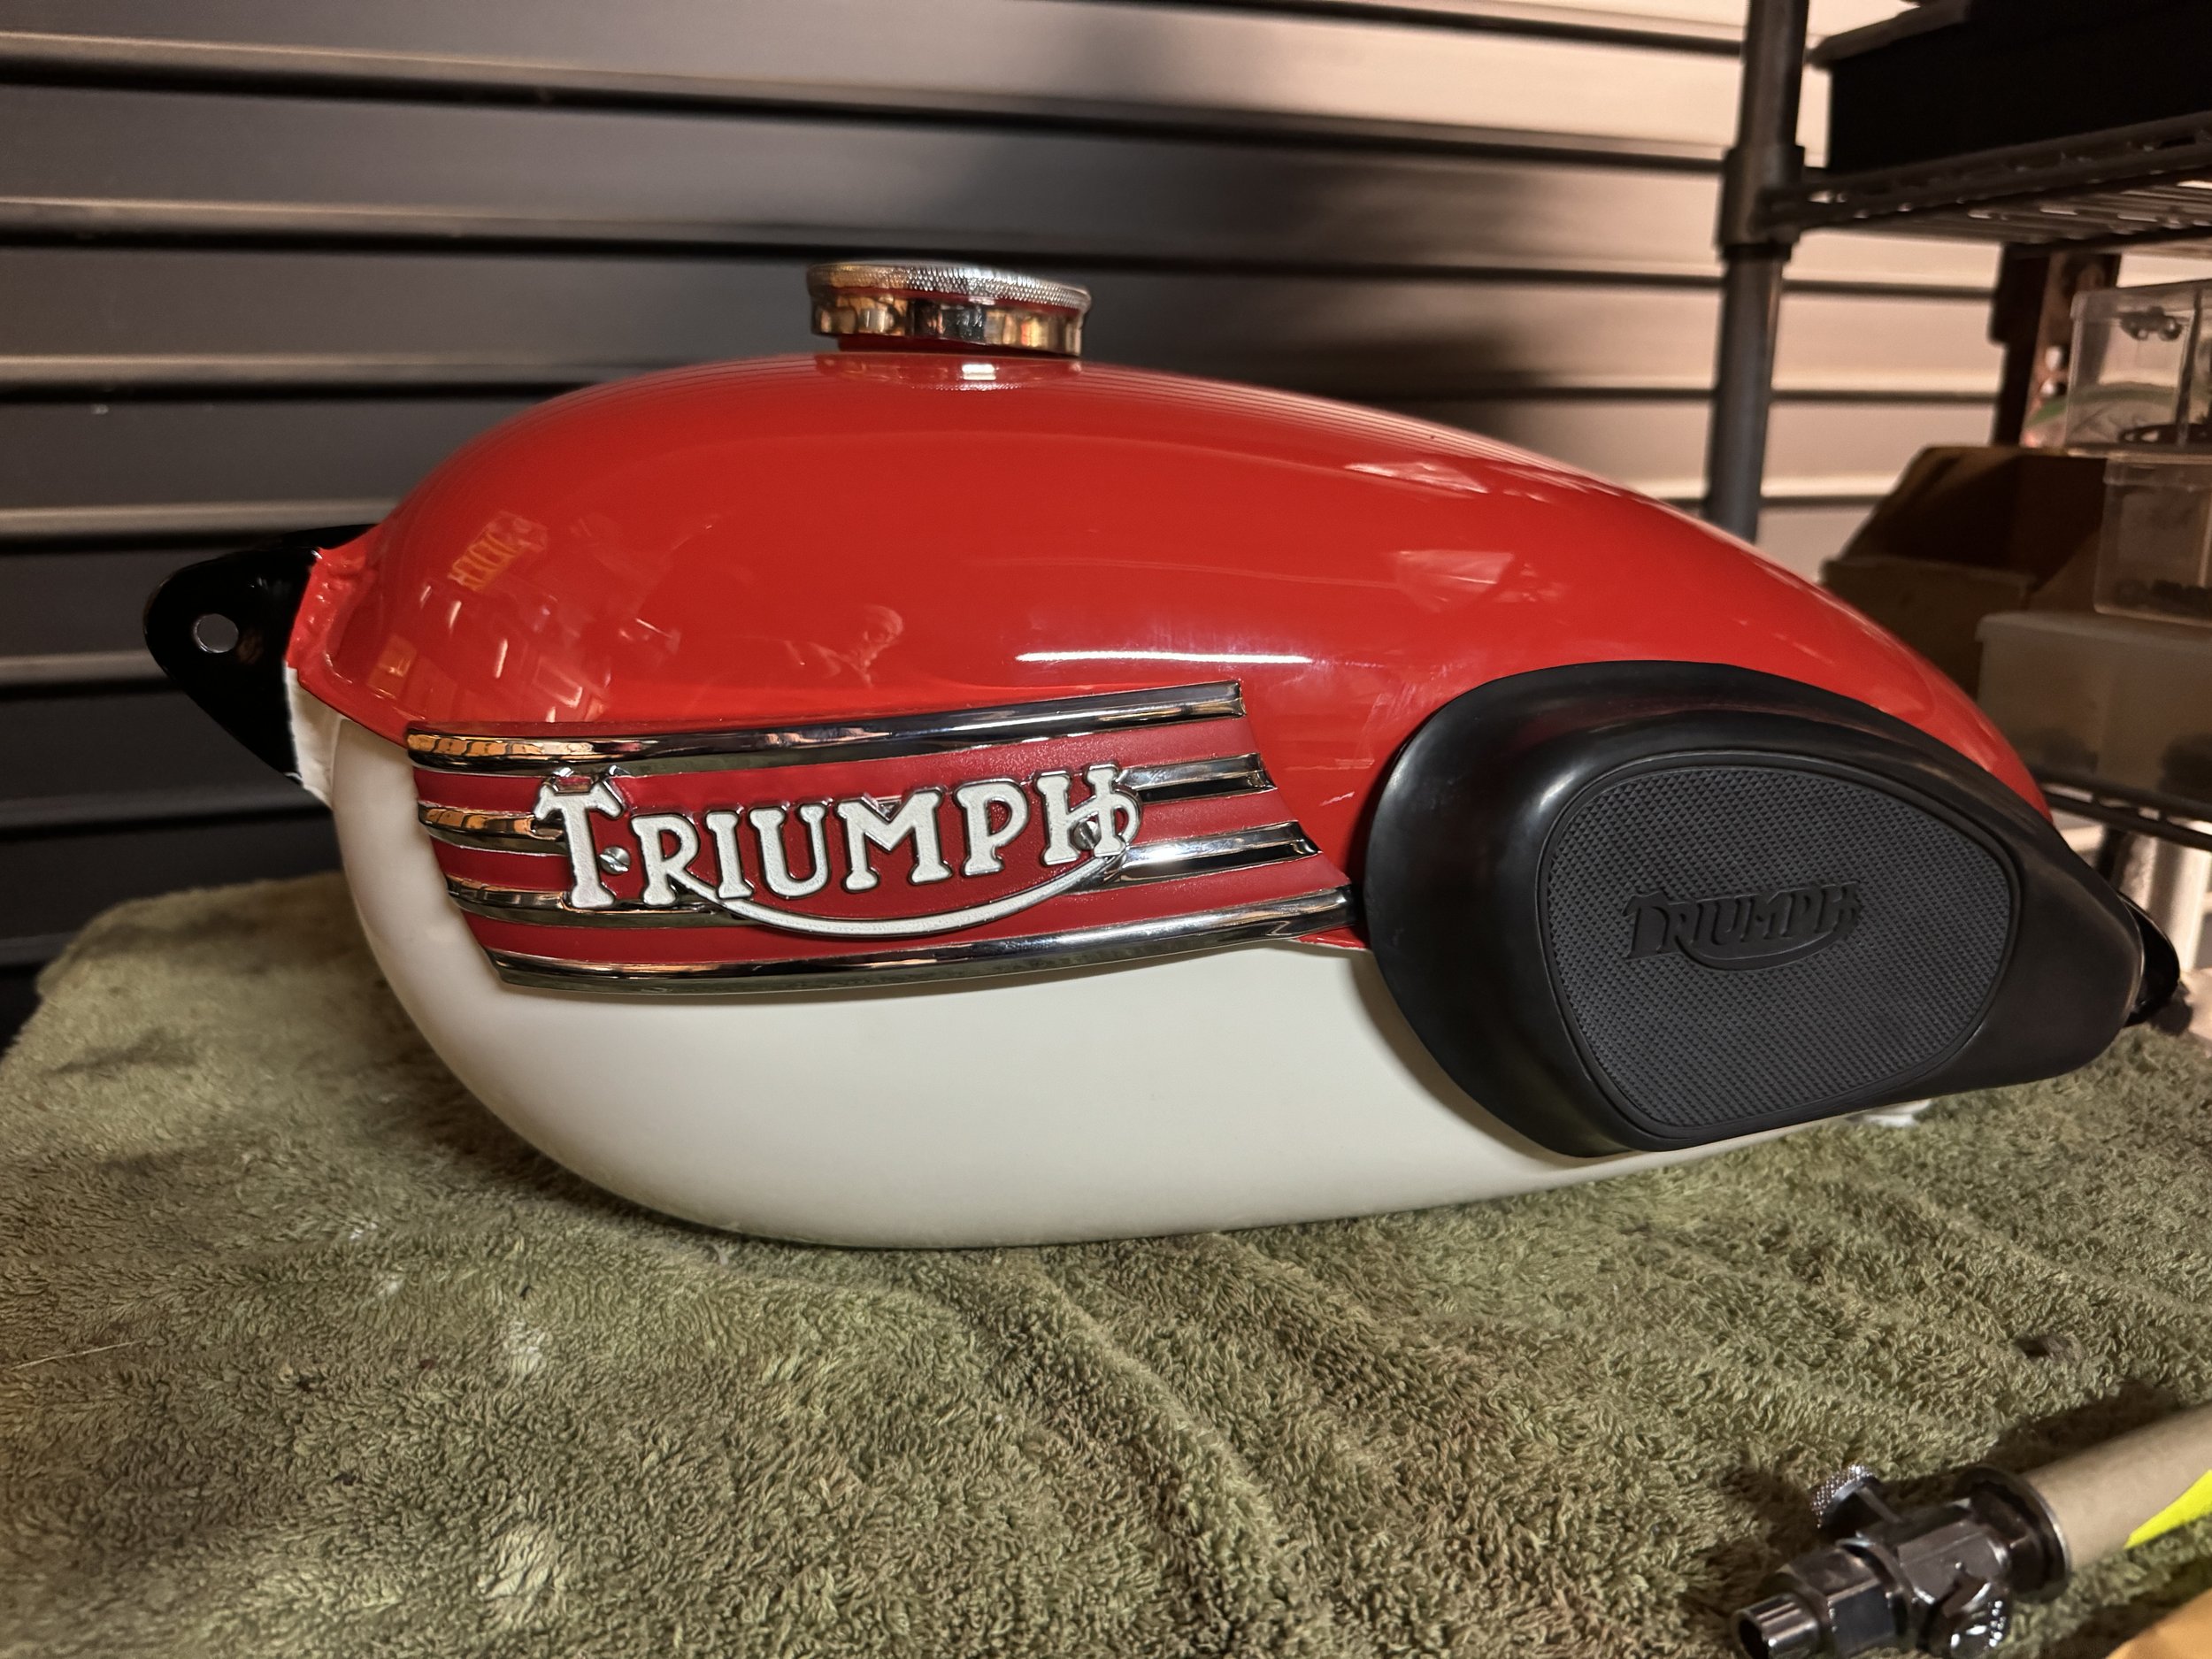
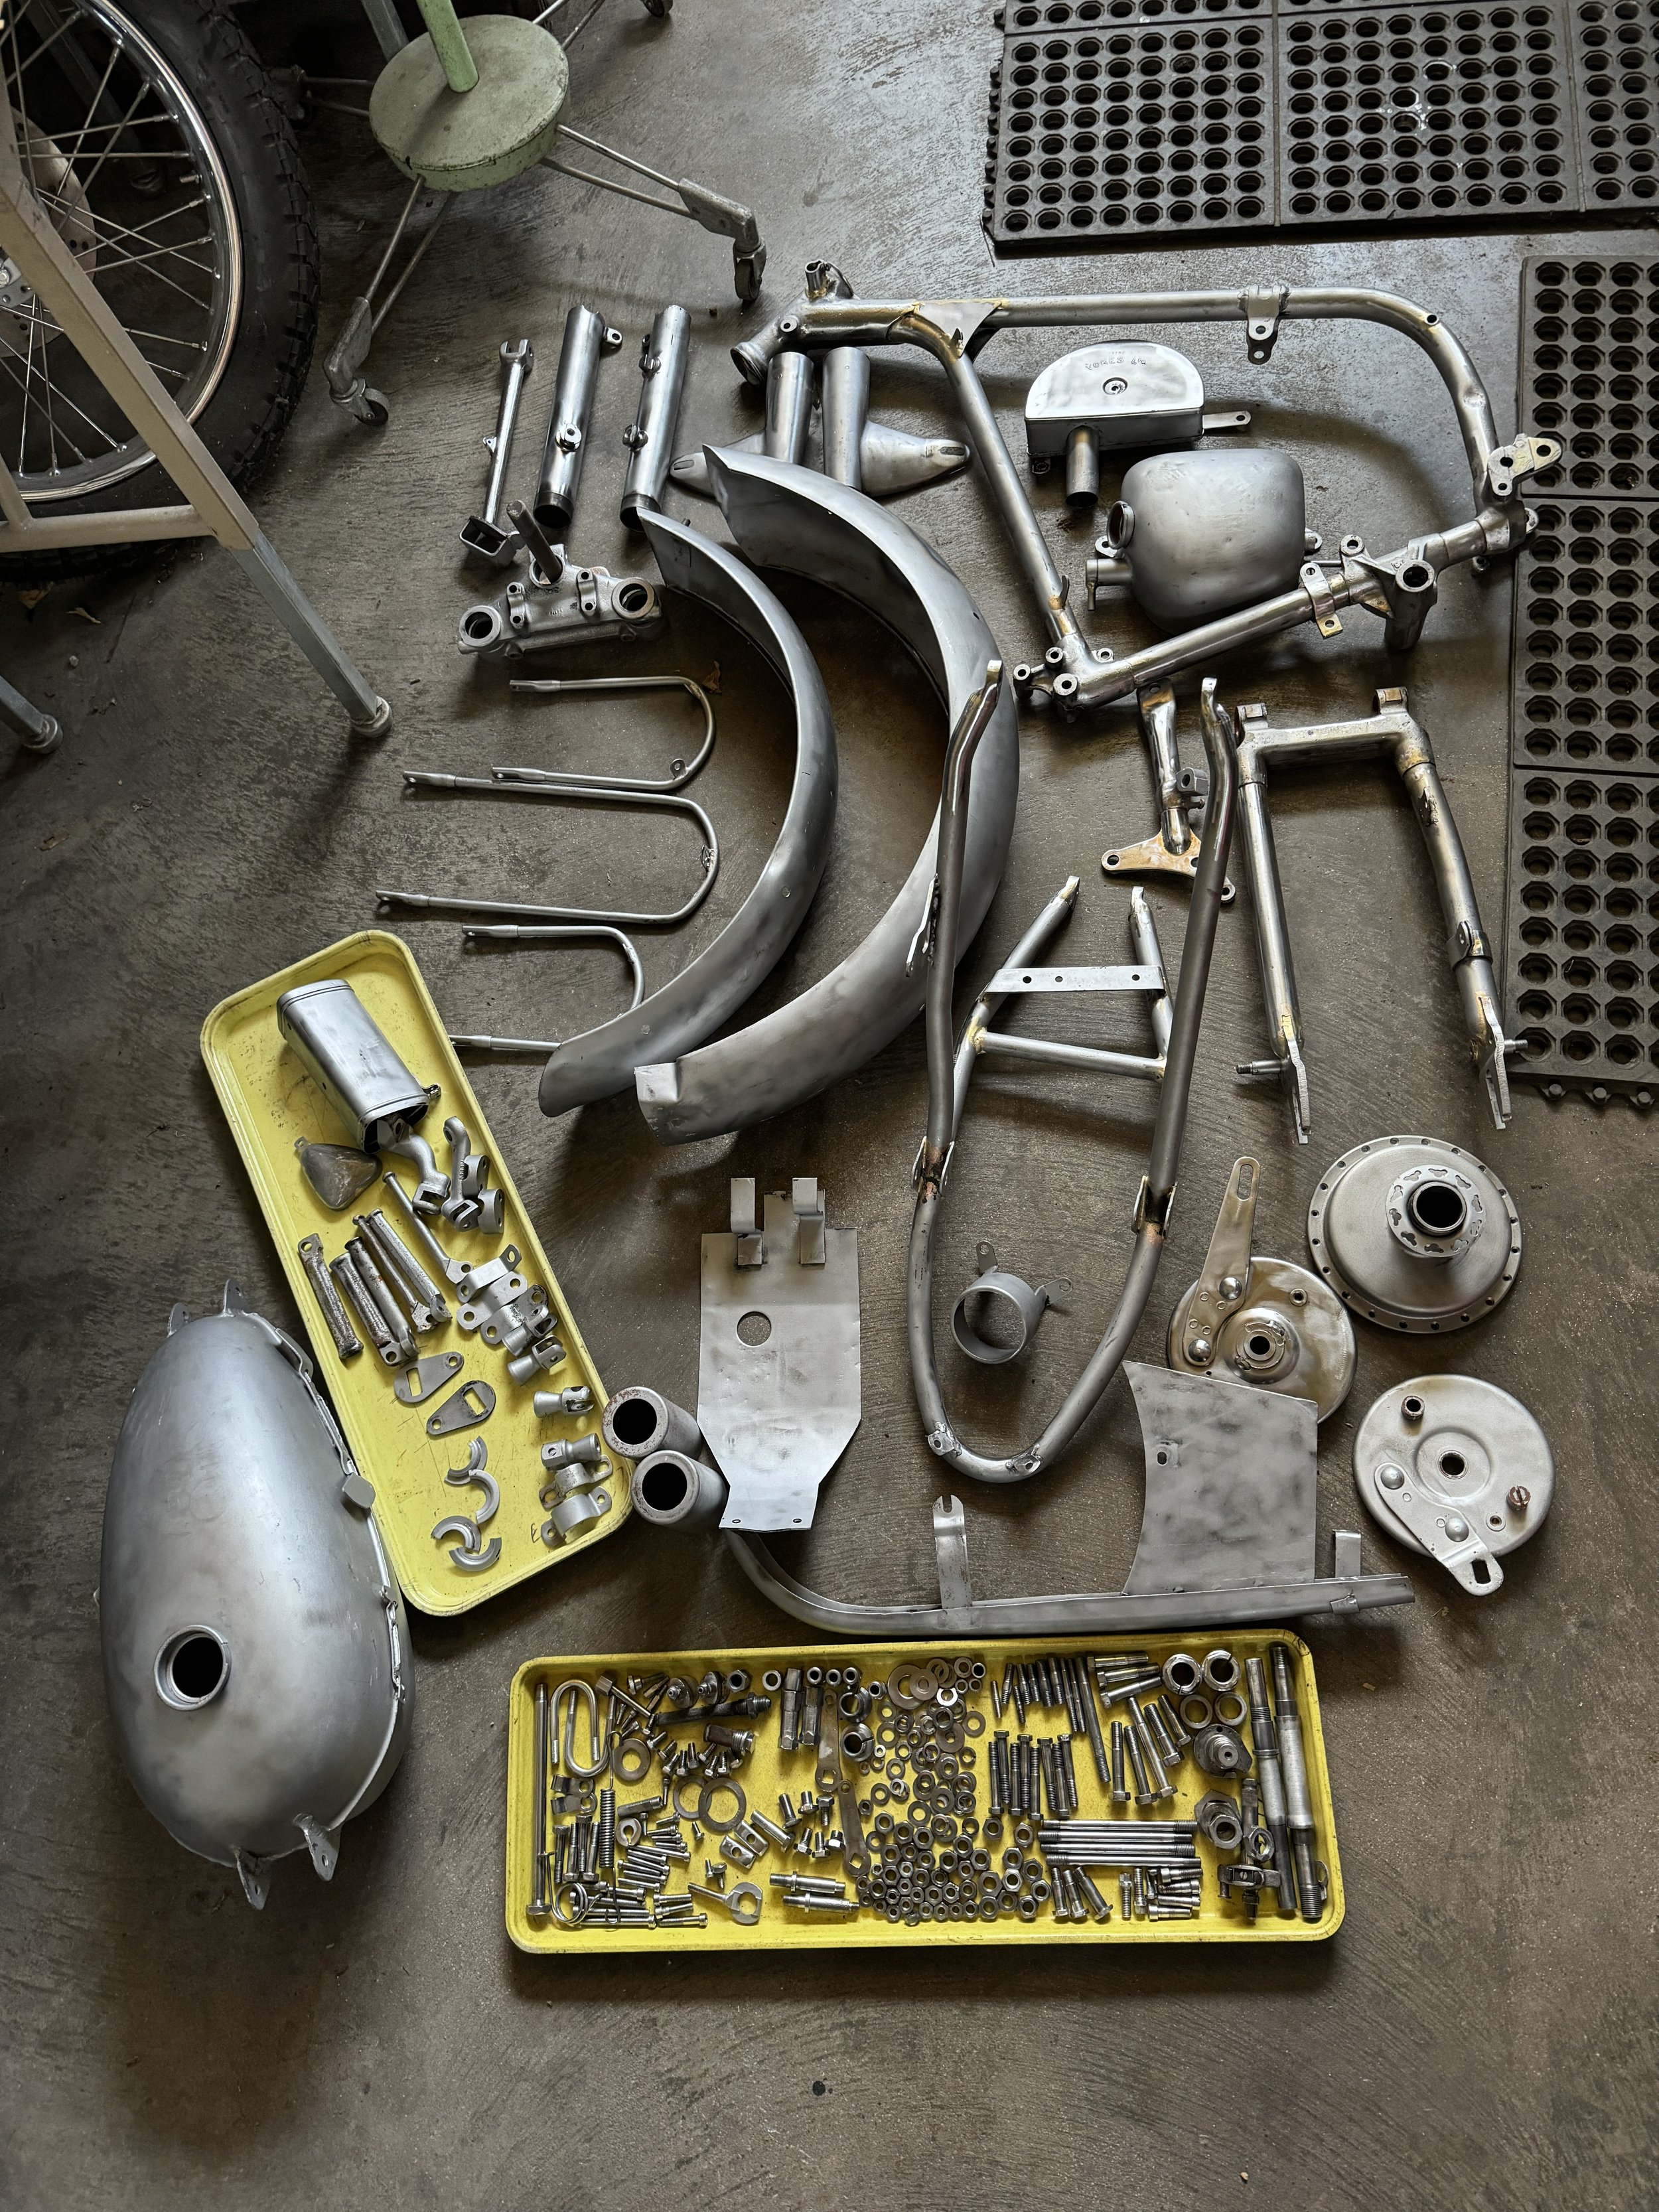
Zooming forward, the engine has been rebuilt to stock specifications, and aftermarket tank, fenders, fork legs, shocks, and seat from HondaTB Parts were used. A good used OEM air filter assembly is yet to be added, sitting in a tray in the right lower corner of the picture. The frame was painted with two-stage PPG paint, aquired from Marble Motors, in the Tahitian Red color used on the first couple years of the R model.

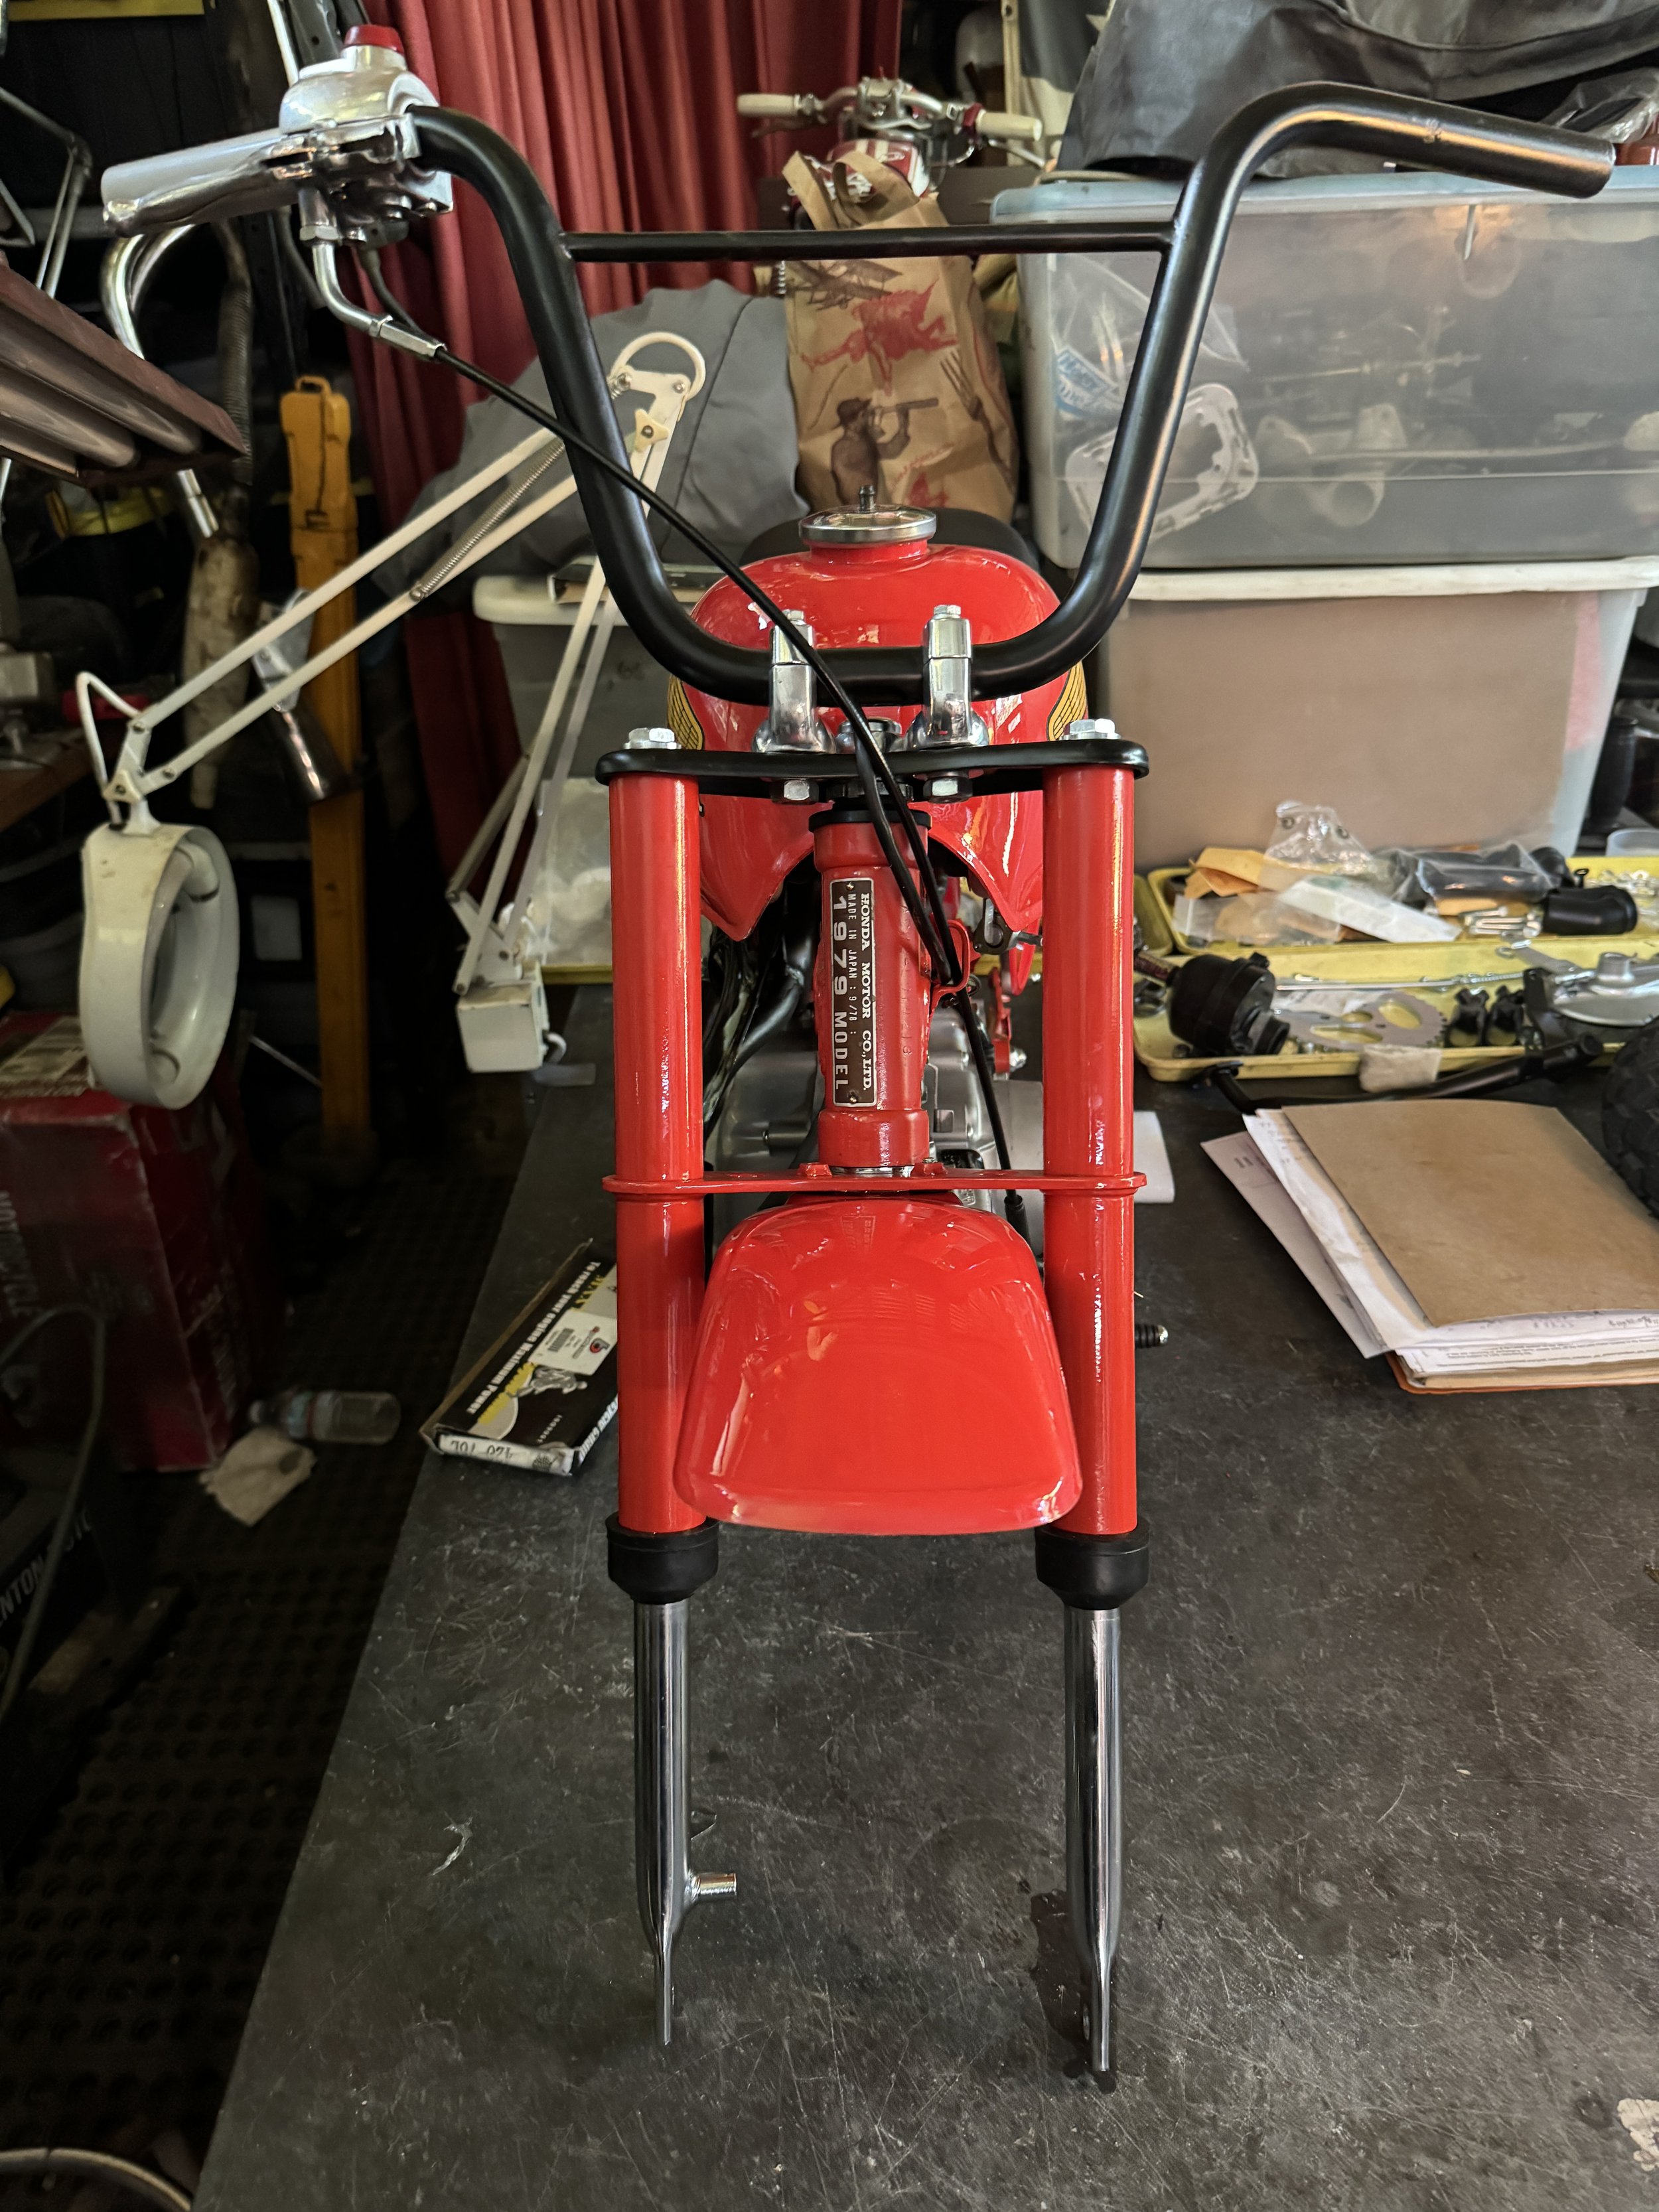
The HondaTB Parts fenders and tank match the Tahitian red fairly well. The handle bar cross bar was slightly loose and bent, and had to be straightened and re-brazed prior to powder coating.

A kickstand was made to replace the missing one. The footpeg mount and kickstand as well as the brake pedal are also holdovers from the earlier Z50A models. The one year only handlebar mounts were also common to other small Honda models, and allow for them to be switched out. A year later, the handlebars were fixed in place, and too low for adult riders.

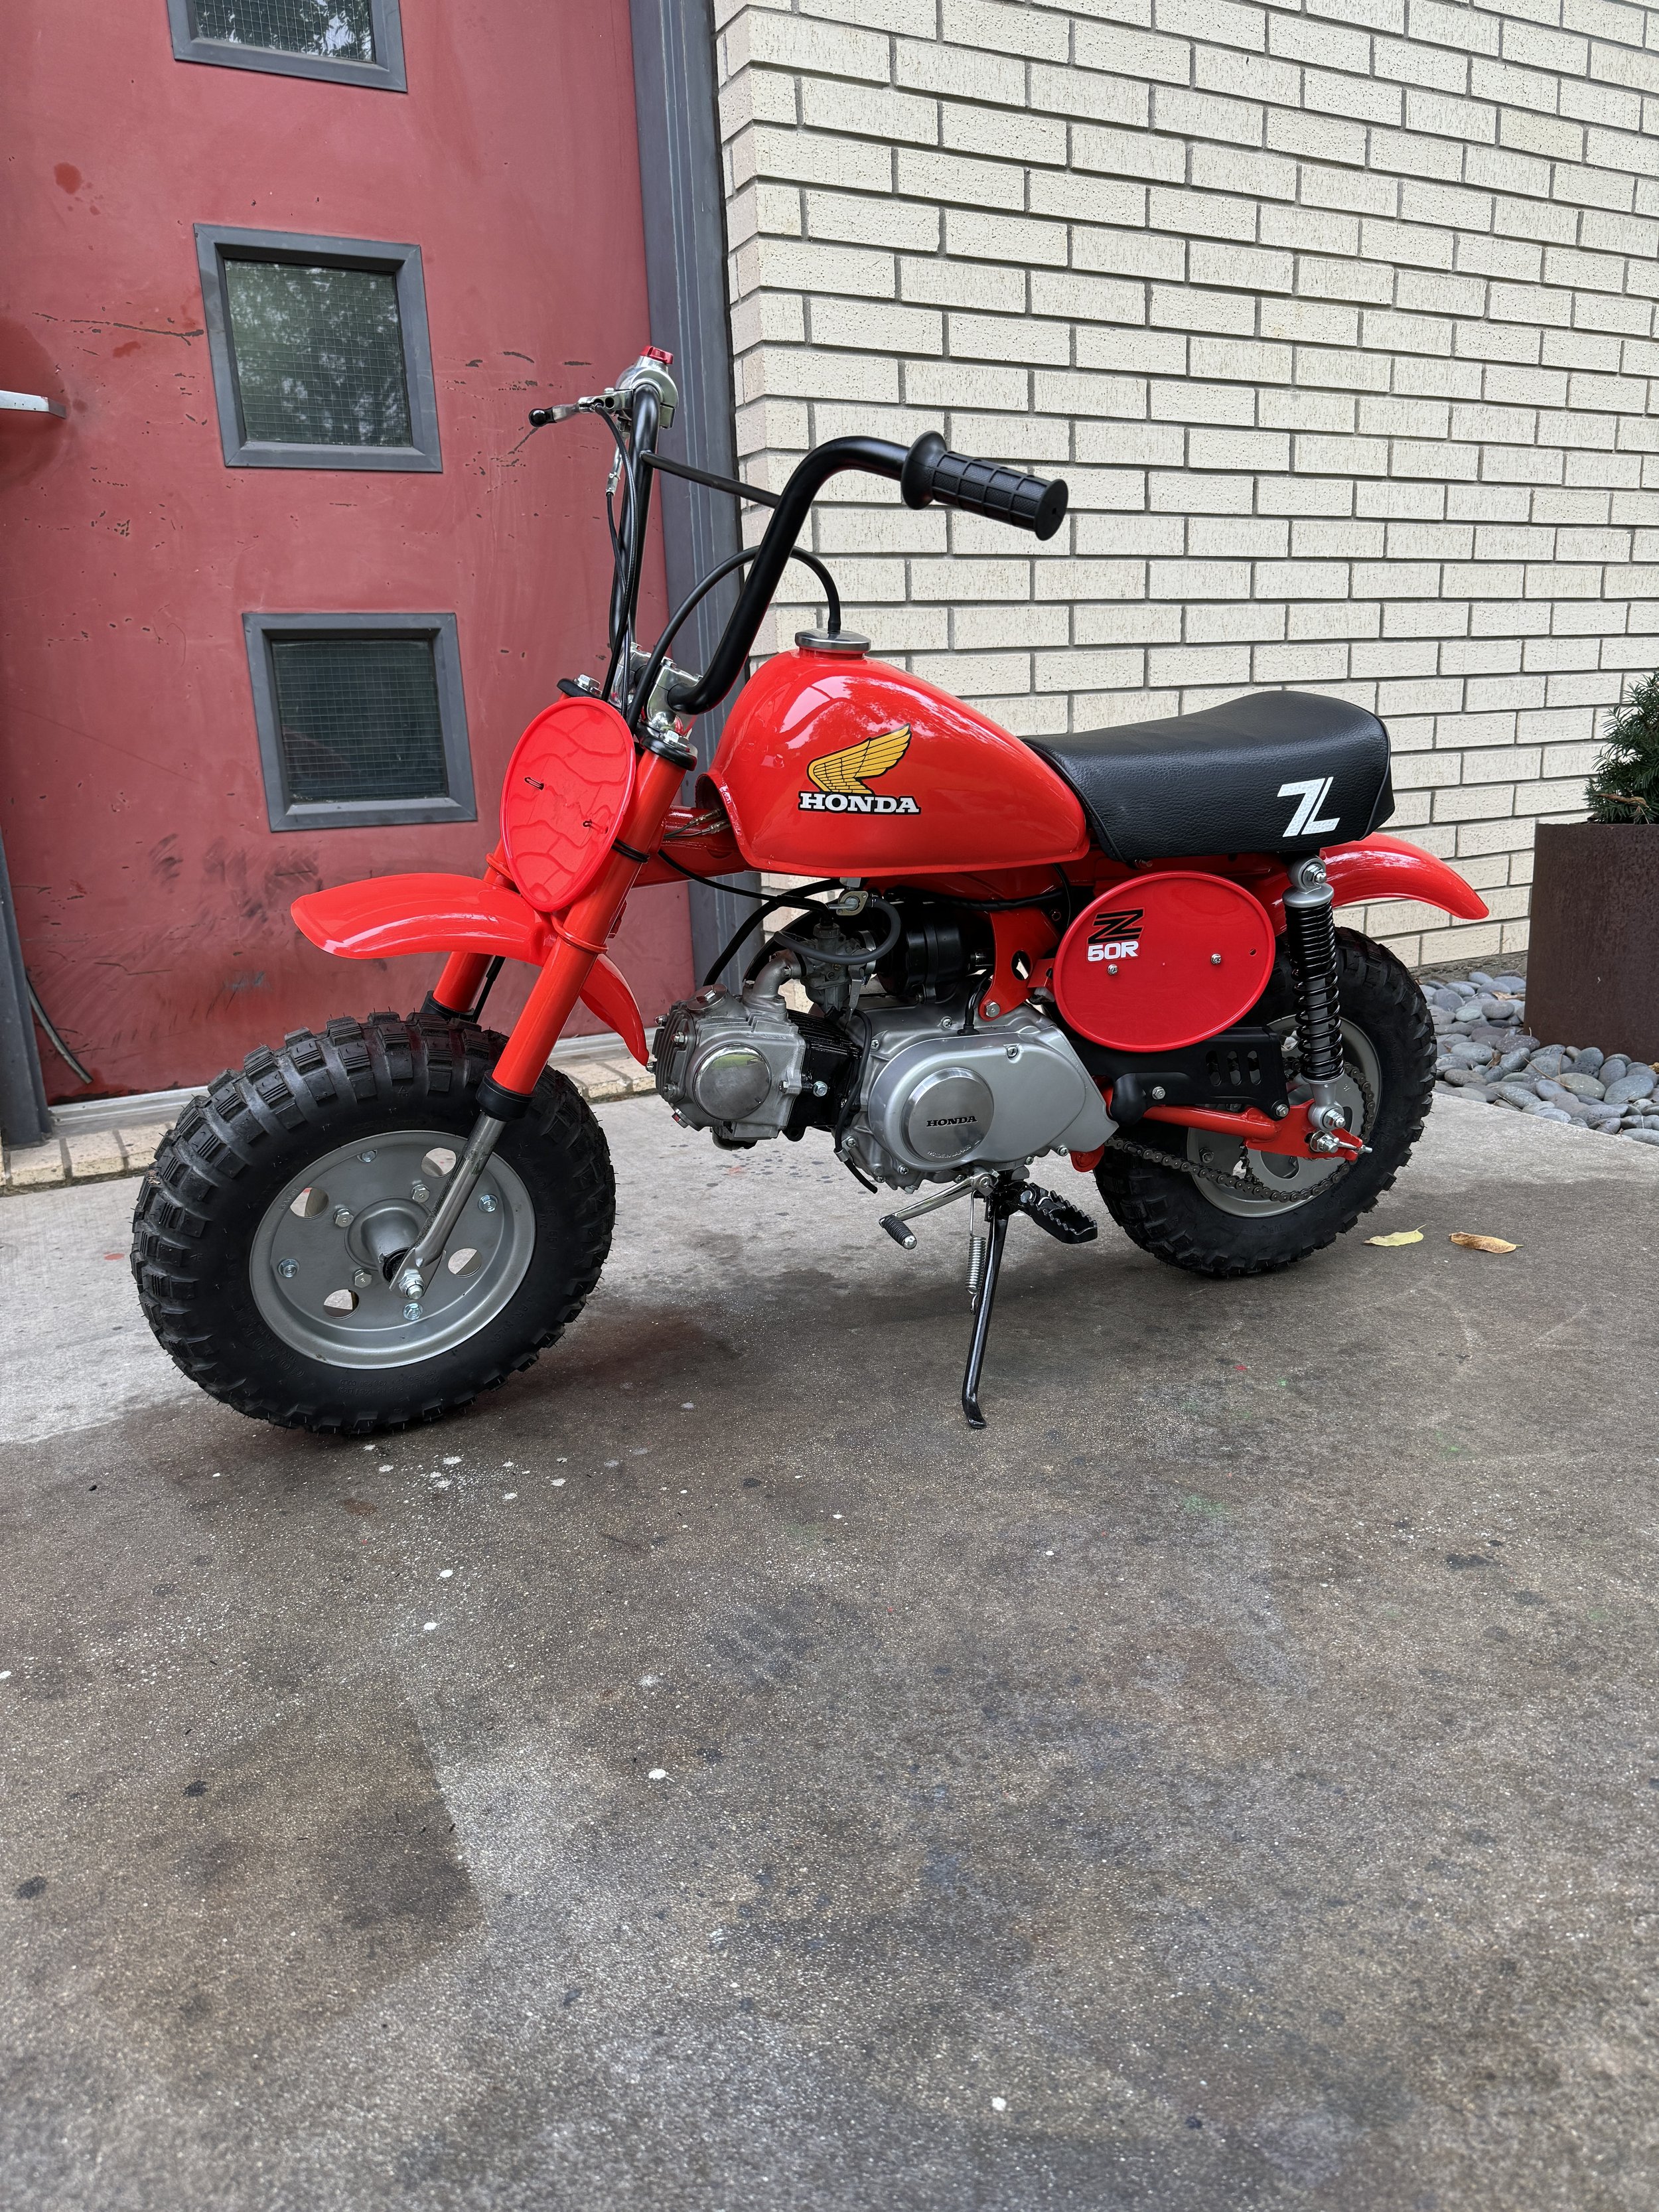
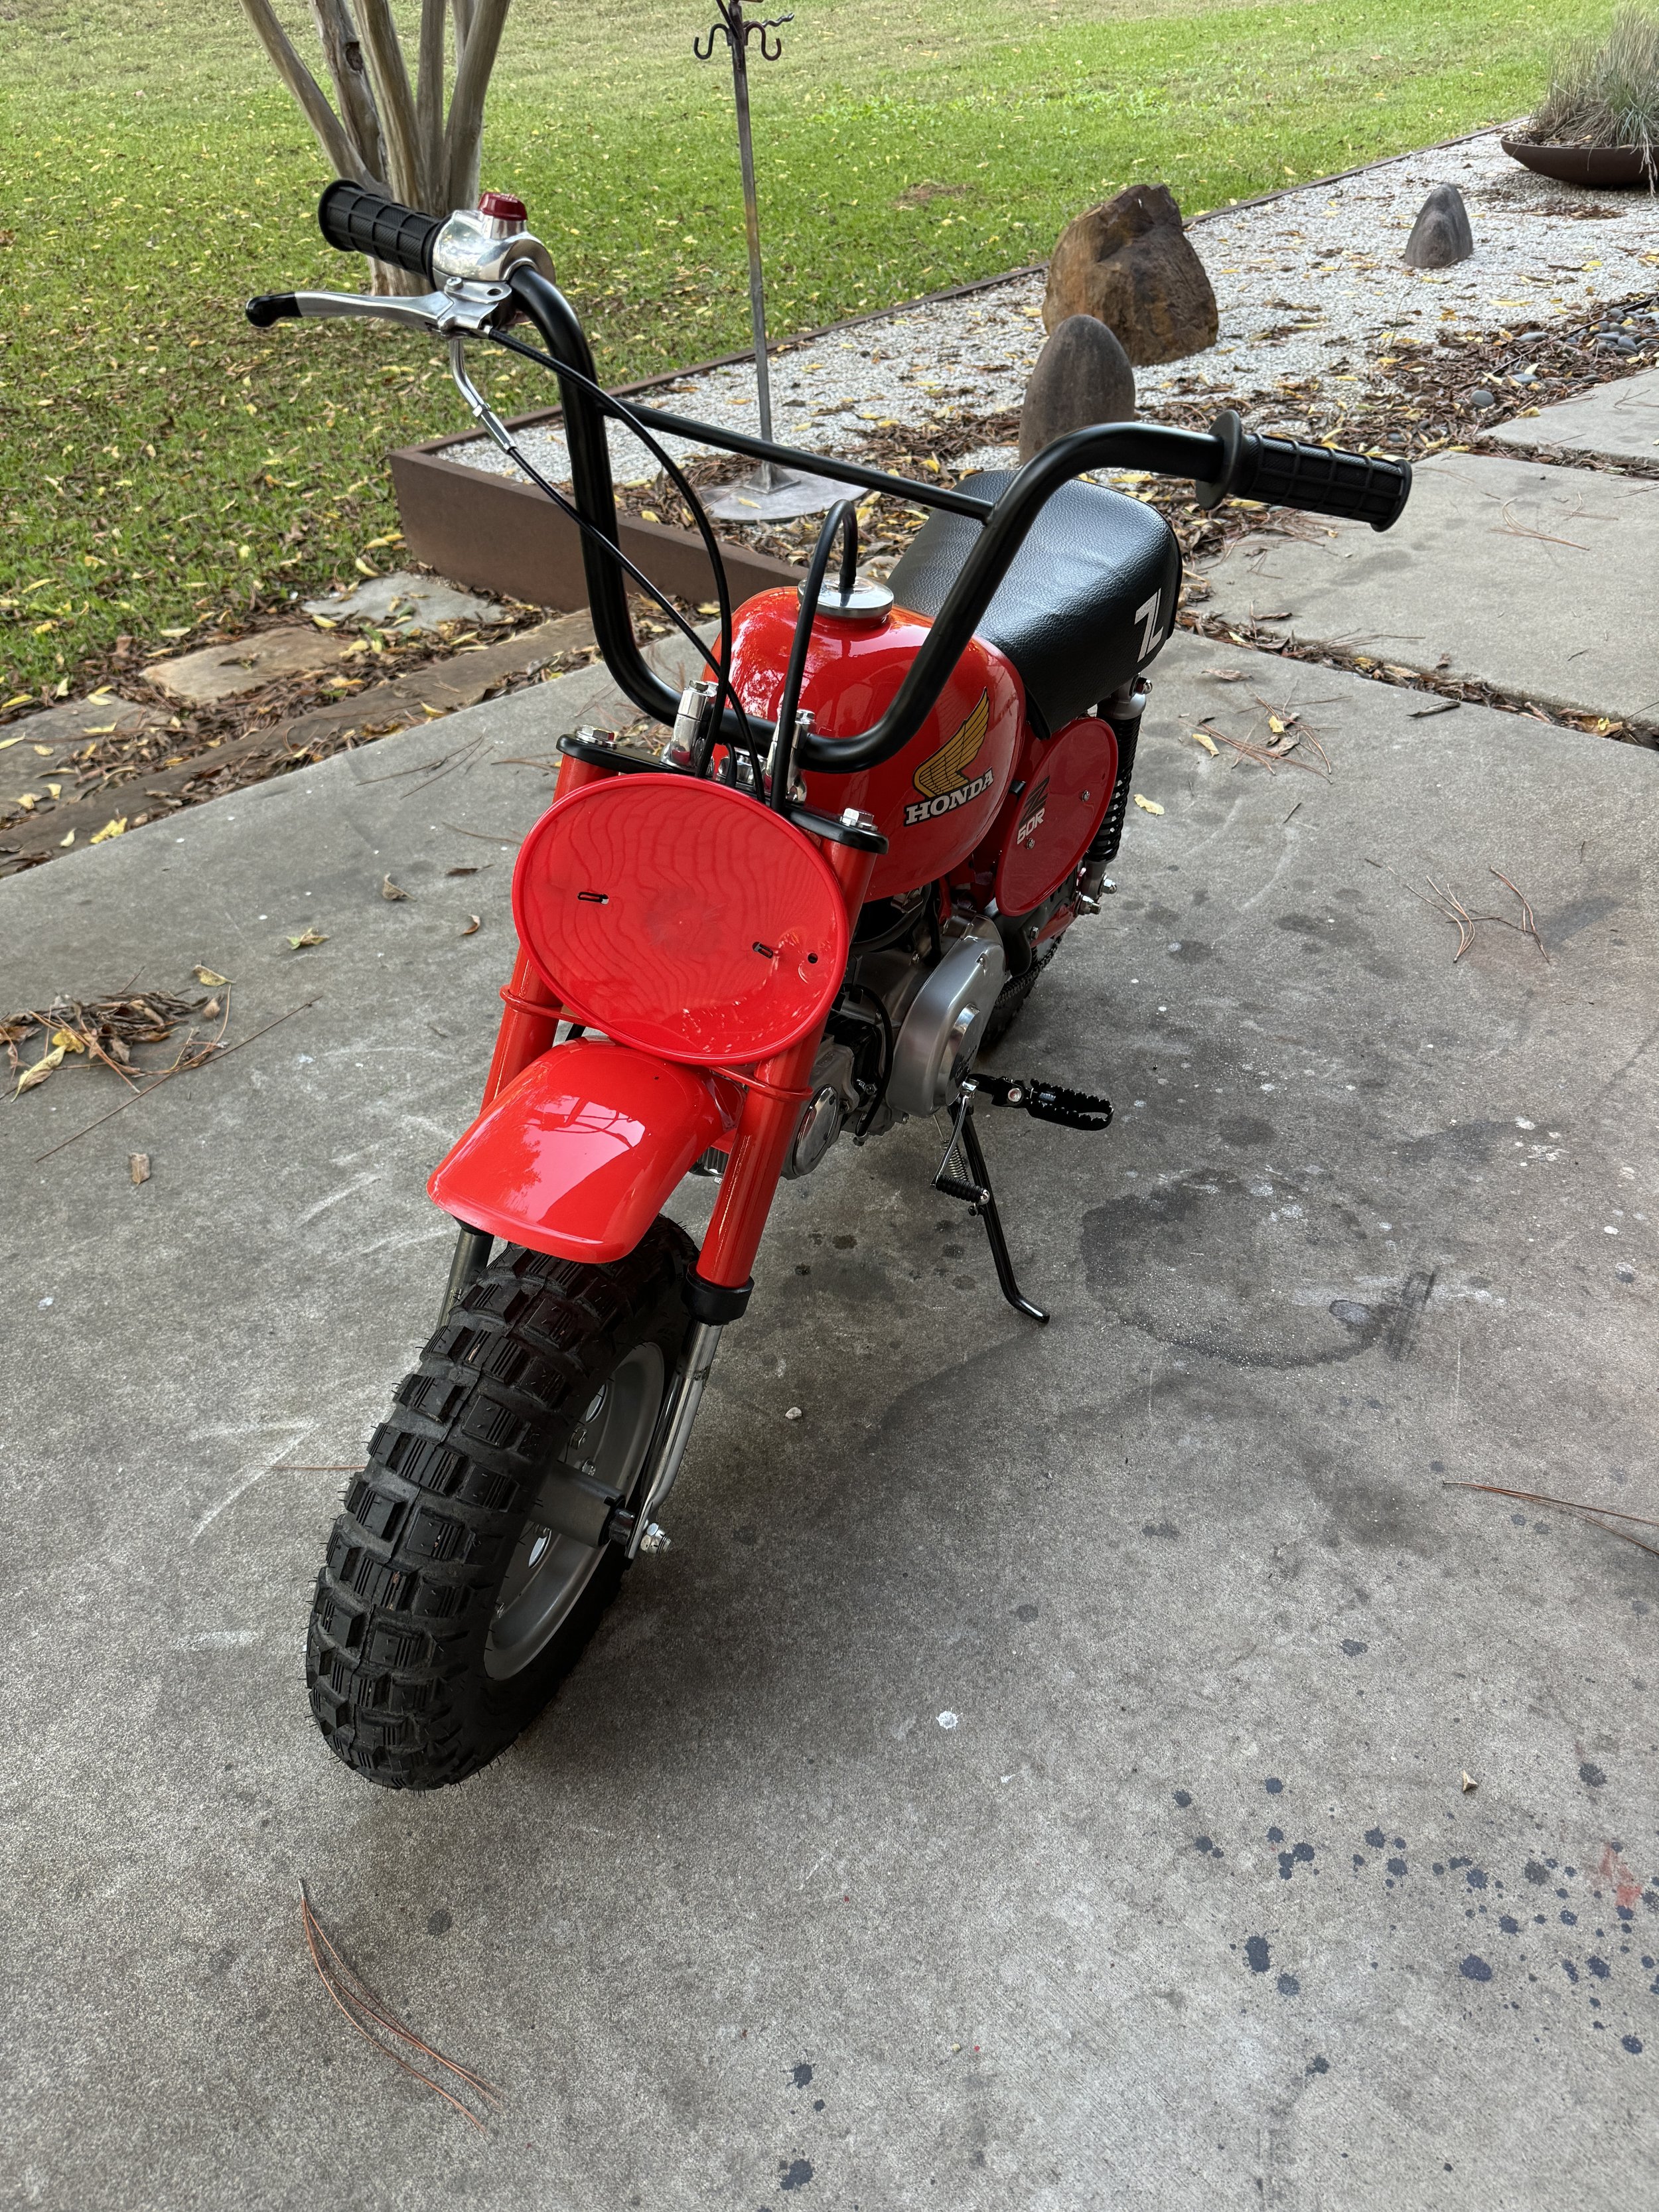
The final product. She starts easy like a Honda should, and runs well. One of the give-aways that this is the early points ignition engine, is the magneto cover. The R model switched to a CDI ignition, using a CDI box, different flywheel, stator, and cover, in the early eighties.

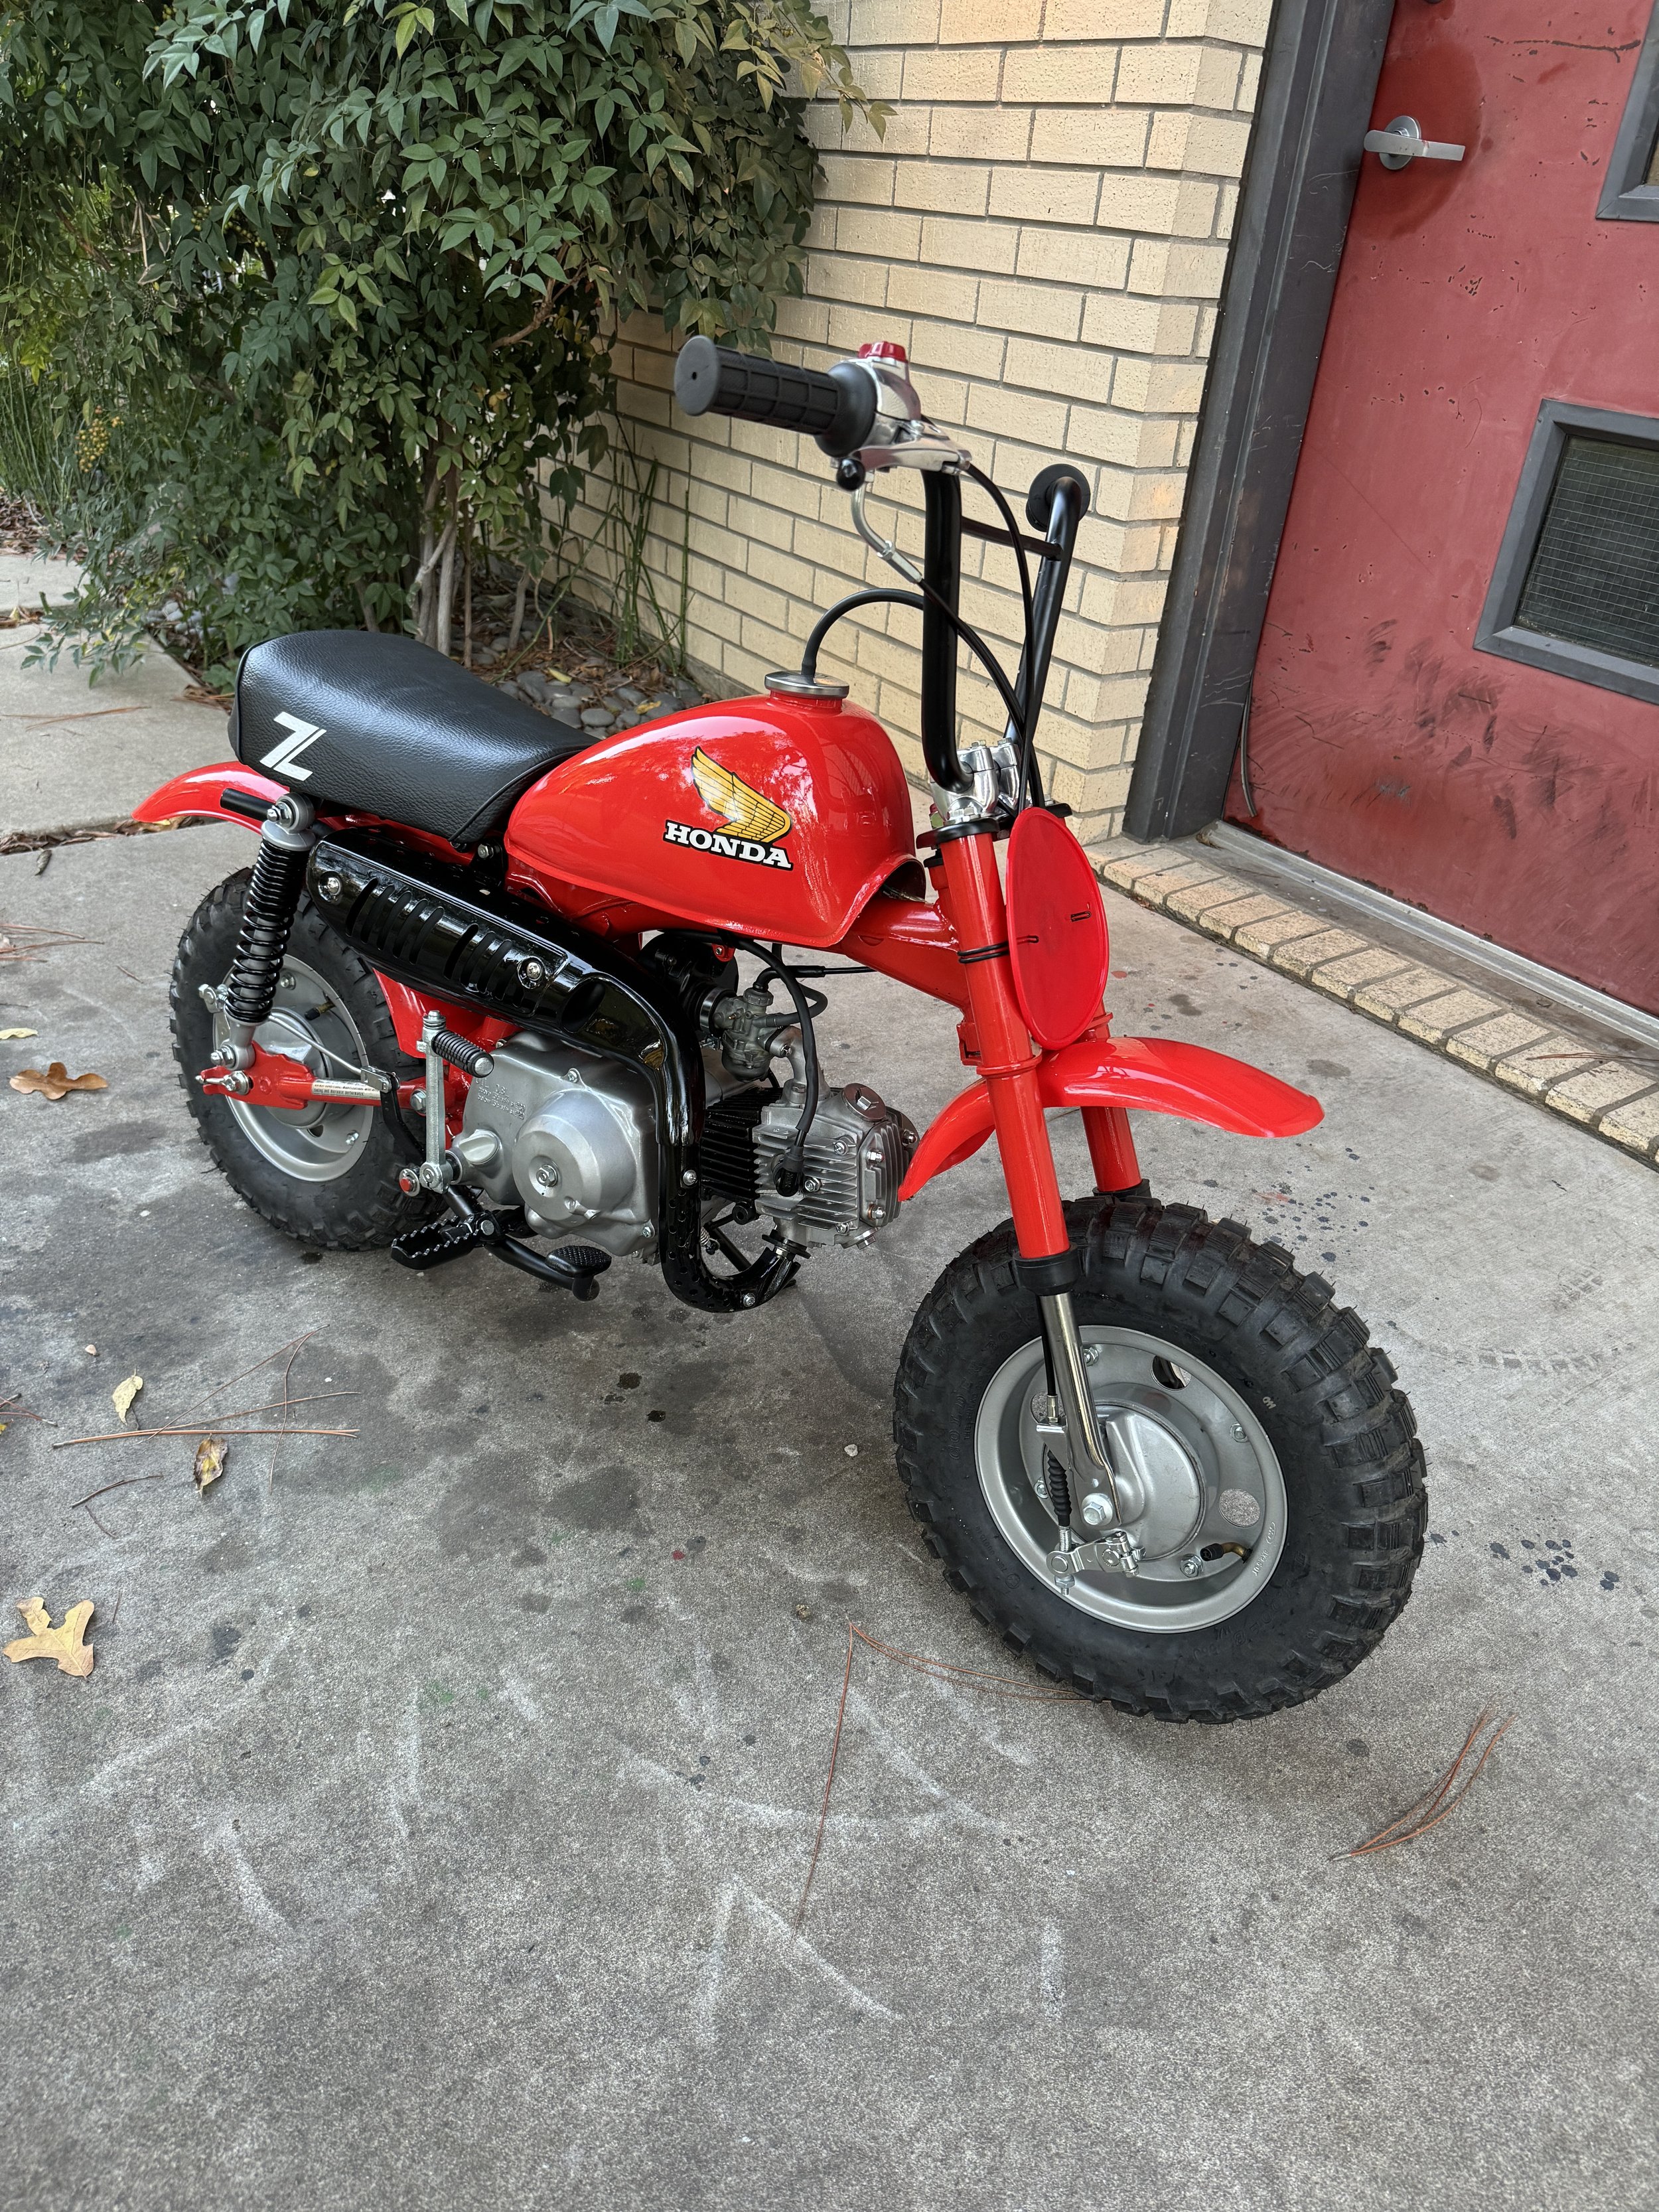
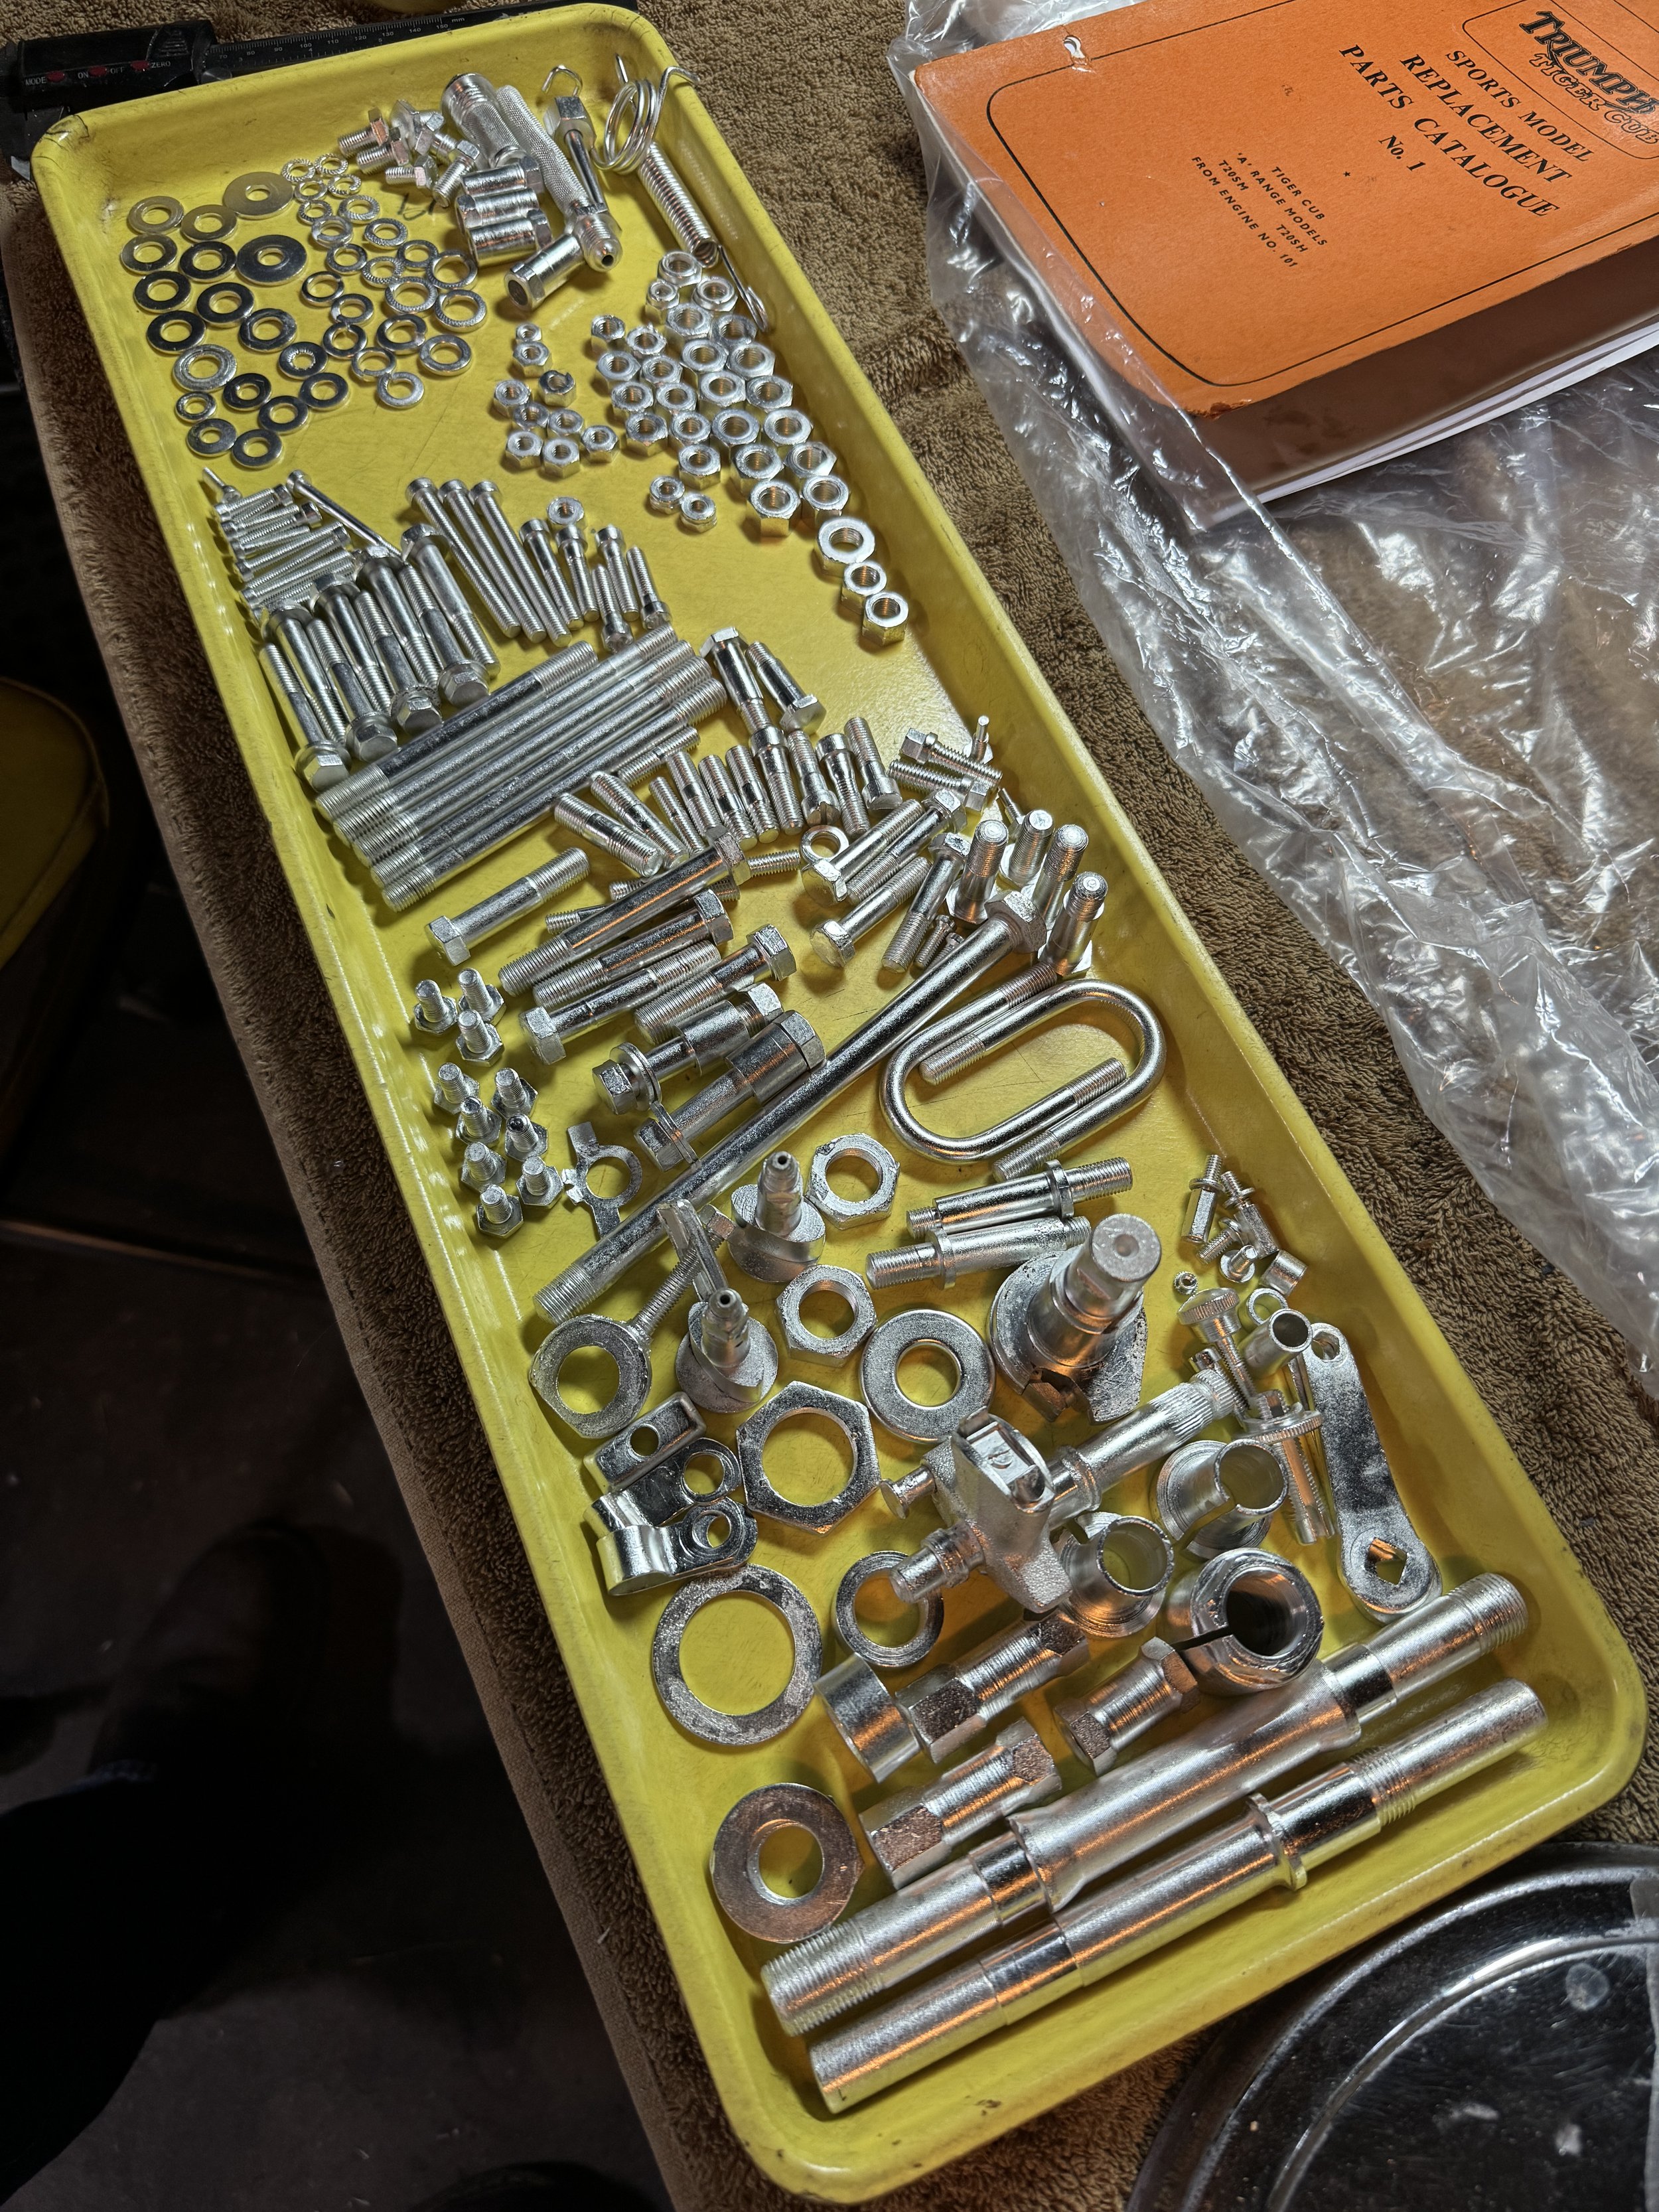
Everything is nice and fresh. All the original hardware was re-plated, and new OEM Honda hardware was used for any missing or mangled pieces.

Finishing the 1967 Triumph Mountain Cub Restoration

The complete restoration of the 1967 Triumph T20M Mountain Cub was finished recently. A year ago, a friend and I were at Big D Cycle. I thought I was getting ready to buy this bike as the basket case it was, when my friend asked my intentions with it. My reply was that I would just put it on a shelf, thinking someone might want it someday. My buddy said he was that someone, and asked if I was interested in rebuilding it for him. Having recently completed another Mountain Cub, I thought it would be a similar experience, but that did not prove to be the case. The wreckage and rust in the engine shown in the previous post, along with some hard to find parts, slowed down the process. A few curveballs, like ill-fitting new parts, a bent sub frame and swinger, and an incorrect points plate added to the frustration. In the end, she is a running, riding example of the stock Mountain Cub.

A lot of small details go into a restoration. New badges had to have the tank colors painted into them.

To paint the tank badge recesses, they had to be masked a couple times: once to scuff them up, and a second time for paint.

The finished Badges, re-plated cap, and kneepads have the tank looking done. The paint was done by Jason Small, of Dallas, Texas.

The original side cover and tail-light mount pieces were in decent shape and were polished up.

The primary cover was said to be NOS when purchased online, but it had a dent in need of some persuasion. The dent was carefully tapped out, followed by a good polishing.

The aforementioned points plate. In retrospect, I should have known it was bogus, given the skill level of the last person to work on this. In the end, a used plate was sourced from Klemph’s British Parts, along with the correct set of points.

The new Lucas stator and fresh cadmium plated hardware have the primary cover looking done, but the factory sheathing on the pigtail, beside being imprinted with white lettering, is oversized, and does not fit through the exit hole. A smaller unmarked sheathing was found, and the original wires were fished through it. Thinking the larger sheathing is not an issue on other larger bikes.The cub has Triumph ET ignition, also found on larger bikes. The new sheathing can be seen in the pictures of the finished bike.

Stainless steel rims and spokes were sourced from Devon Rims in the UK.

Everything starting to go together. The forks were completely rebuilt, with the top fork caps once again requiring three different sets purchased till the “right” ones were found. I say” right” ones, because while one threaded easily, the other one took three hours to fit into the tops. The threads were not quite right, probably as a result of the chrome plating process, and had to be cleaned before a smooth fit was achieved.

With the cam and timing gear in place, ithe engine is just waiting on the push-rod tube, and the head can be torqued down, and the side covers put on.

Getting the timing worked out.

One of the curveballs in the build was misalignment of the rear frame. In this picture, the difference is being worked out using a spacer on the left side. the subframe was taken off and straightened a little bit, allowing the fender to line up.

The finished bike. The oil stains on the concrete were from the first start-up. Yet another curveball, a pinhole revealed itself in the steel oil pipe coming out of the oil pump.

The hole in the oil line was small, but with the oil pump’s pressure, it was a squirt gun. Prior to re-plating, there was no significant rust on the outside of the pipes, suggesting it rusted from the inside out. Kind of unusual, but given the rust in the engine, it now makes sense.

Three miles on the odometer, the bike has been started, ridden, and is going through several heat cycles.

Big change from the before pictures seen in the last post.

Ready for fall.

Have always appreciated the beauty of these engines designed by Ed Turner.

The entire headlight assembly was missing, and was built from an aftermarket shell, and a lot of NOS Lucas Electric parts.

The bike being put together to make it a roller at Big D Cycles in Dallas, Tx. prior to the rebuild. The journey began at Big D, and ended….

…at Big D Cycles! Here in their parking lot, after my buddy’s first ride.

Another 1967 Triumph Mountain Cub in the shop

A 1967 Triumph T20M Mountain Cub has been working its way through the shop. Bought as a roller with a bucket of parts and a locked up engine, I had no idea what I was getting myself into. The availability of parts for these bikes is slim at best, with some items near impossible to find without some luck, or paying dearly. A lot of new old stock parts went into the build, particularly the electrical system. A number of parts were missing, or in unusable shape, and had to be found. The bike is near completion as of now, but there have been challenges…

As the bike came to me. Most of it is there, but the missing  headlight, carb, and oil feed were costly or difficult to find. I had seen an ad online from Big D Cycles, offering the bike in pieces, and stating it would be taken to the Barber Vintage Motorcycle swap meet, if no taker was found. I thought about it a week or so, and called them, only to find it already on the road to Barber. I told them if it came back, I wanted it, and they said they would call if that was the case. Three weeks later, I walked into Big D Cycles for another unrelated bike, and they told me the cub had returned from Barber unsold only a few hours before! A deal including an NOS coil was made, and the build was begun.

Everything was well worn and some things downright abused. As bad as it all looks, the muffler, brake pedal, and airbox in this pic were all usable.

Some serious water vapor damage. The rusty standing waterline can be seen on the inside of the side cover. Luckily, the water level never reached the crank shaft or transmission shafts, but some of the vapor caused some pitting. Most all of the primary was rebuilt, with the clutch basket and hub rebuilt, and all new chain, plates, springs, cushions, posts, bearings, and outer pressure plate. The ignition stator was replaced with a new Lucas brand unit, made for Triumph ET ignition systems..

With the engine locked up, it took more than a few hours to break it down to this point.

Fortunately, the crank ends were pristine. 

The cam was  badly pitted, and the lack of a replacement forced other options to be considered. A shop in the North West of the country was found that could recondition it and the followers.

After return from Delta Cams in Spokane, Washington, The welded and re-ground lobes look great. 

The entire rear wheel aside from the repaired brake panel was scrapped. The bosses for the sprocket were chipped up, and drilled out, with through bolts holding the sprocket on. Definitely a hardware store fix. Finding a new hub was a little challenging, but after finding one, a second in even better shape was found. The shocks were shot and were replaced with Hagon brand units with NOS springs added by Mitch Klemph of Klemph’s British Parts.

The original hardware before stripping. After a hot degreaser ultrasound bath, they are vapor honed, burnished on a wire wheel, and then cadmium plated at Texas Precision Plating in Garland, Texas. There were quite a few missing, damaged, and incorrect replacement nuts, washers, screws, and bolts. I actually did two batches of stuff because it took a while to find some parts, and I didn't want to delay the build waiting till everything was collected.

A fresh tray of cad plated hardware is so satisfying.

The tail light assembly had been whacked at some point, denting the fender, and bending and tearing this plate. The bends were easy enough to smooth out, and the tears were aligned and welded.

The finished tail light face after welding. It will get sanded a little smoother and then sent off for powder coat.

The inside of the engine shows how water coming through a removed valve cover went down the pushrod tube and onto the timing gears and cam. The timing gears were replaced with NOS pieces, and all bushings bearings and seals were renewed.

Things look a lot better with all the new parts. A new layshaft and two gears, shift plate, quadrant pawls, and selector rod were put in along with the new oil pump.

The head was also in such poor shape, it was scrapped. The valves were so thoroughly stuck, that two different valve compressors were bent trying to press them out.

An NOS head was found in pristine condition. The guides were already pressed in and reamed, and the new valves slipped in perfectly. The exhaust spigot had never been mounted, and needed sone tapping out. Lacking the proper tap, another spigot was fashioned into a tap by some notching. It took a bit if time, but in the end, it worked just fine. All new springs, valves, clips, and retainers were used in the assembly.

After some clean-up, sludge trap replacement, and a new crankshaft pin placed in, the crank was re-assembled, and aligned.

The cushions for the clutch hub were replaced. They were somewhat difficult to source, which is what I have come to expect from a Cub restoration.

One end of the frame member supporting the kickstand and brake lever was ripped,  where it had been welded to the swingarm bolt and frame sub member. The frame member was replaced with a decent used one. The brake pedal was badly bent, and was heated and re-formed.

Everything after degreasing, prior to paint stripping. The parts are then run through the vapor hone machine prior to repair.

The used replacement member had some extra holes drilled through the tube, and some brass around all the brazed joints. The front fender stay also needed some repair on the screw hole.

The sub-frame where it had been welded. This was obviously a bush fix by someone inexperienced. The brass in the joints will make for weld contamination, and porous wells. It also looked like some of the brass was melted out by the heat of the weld.

After some welding and brass brazing, it looks a lot better. Some additional touch-up was done on the steel, and then off to powder coat. On the bottom right, the other frame member can be seen after the extra holes were welded up, and the brass along the brazed joints cleaned up. Behind the fenders, the front fender screws hole repair can be seen peeking over the edge.

Another repair was necessary on the rear brake panel due to gouging from the sprocket screws.

After repair.

Quite a bit of work to get to this point. The frame parts and front wheel hub were sent to Triad Specialty Coating in Lewisville, Texas for the gloss black powder coat.  There was also a second batch of powder coat done later in the build after a rear wheel hub was found, and some fender brackets fabricated. The painted parts will be done by Jason Small, and the hardware sent off for plating.