The 1974 Honda CT70 Dax custom gets painted.

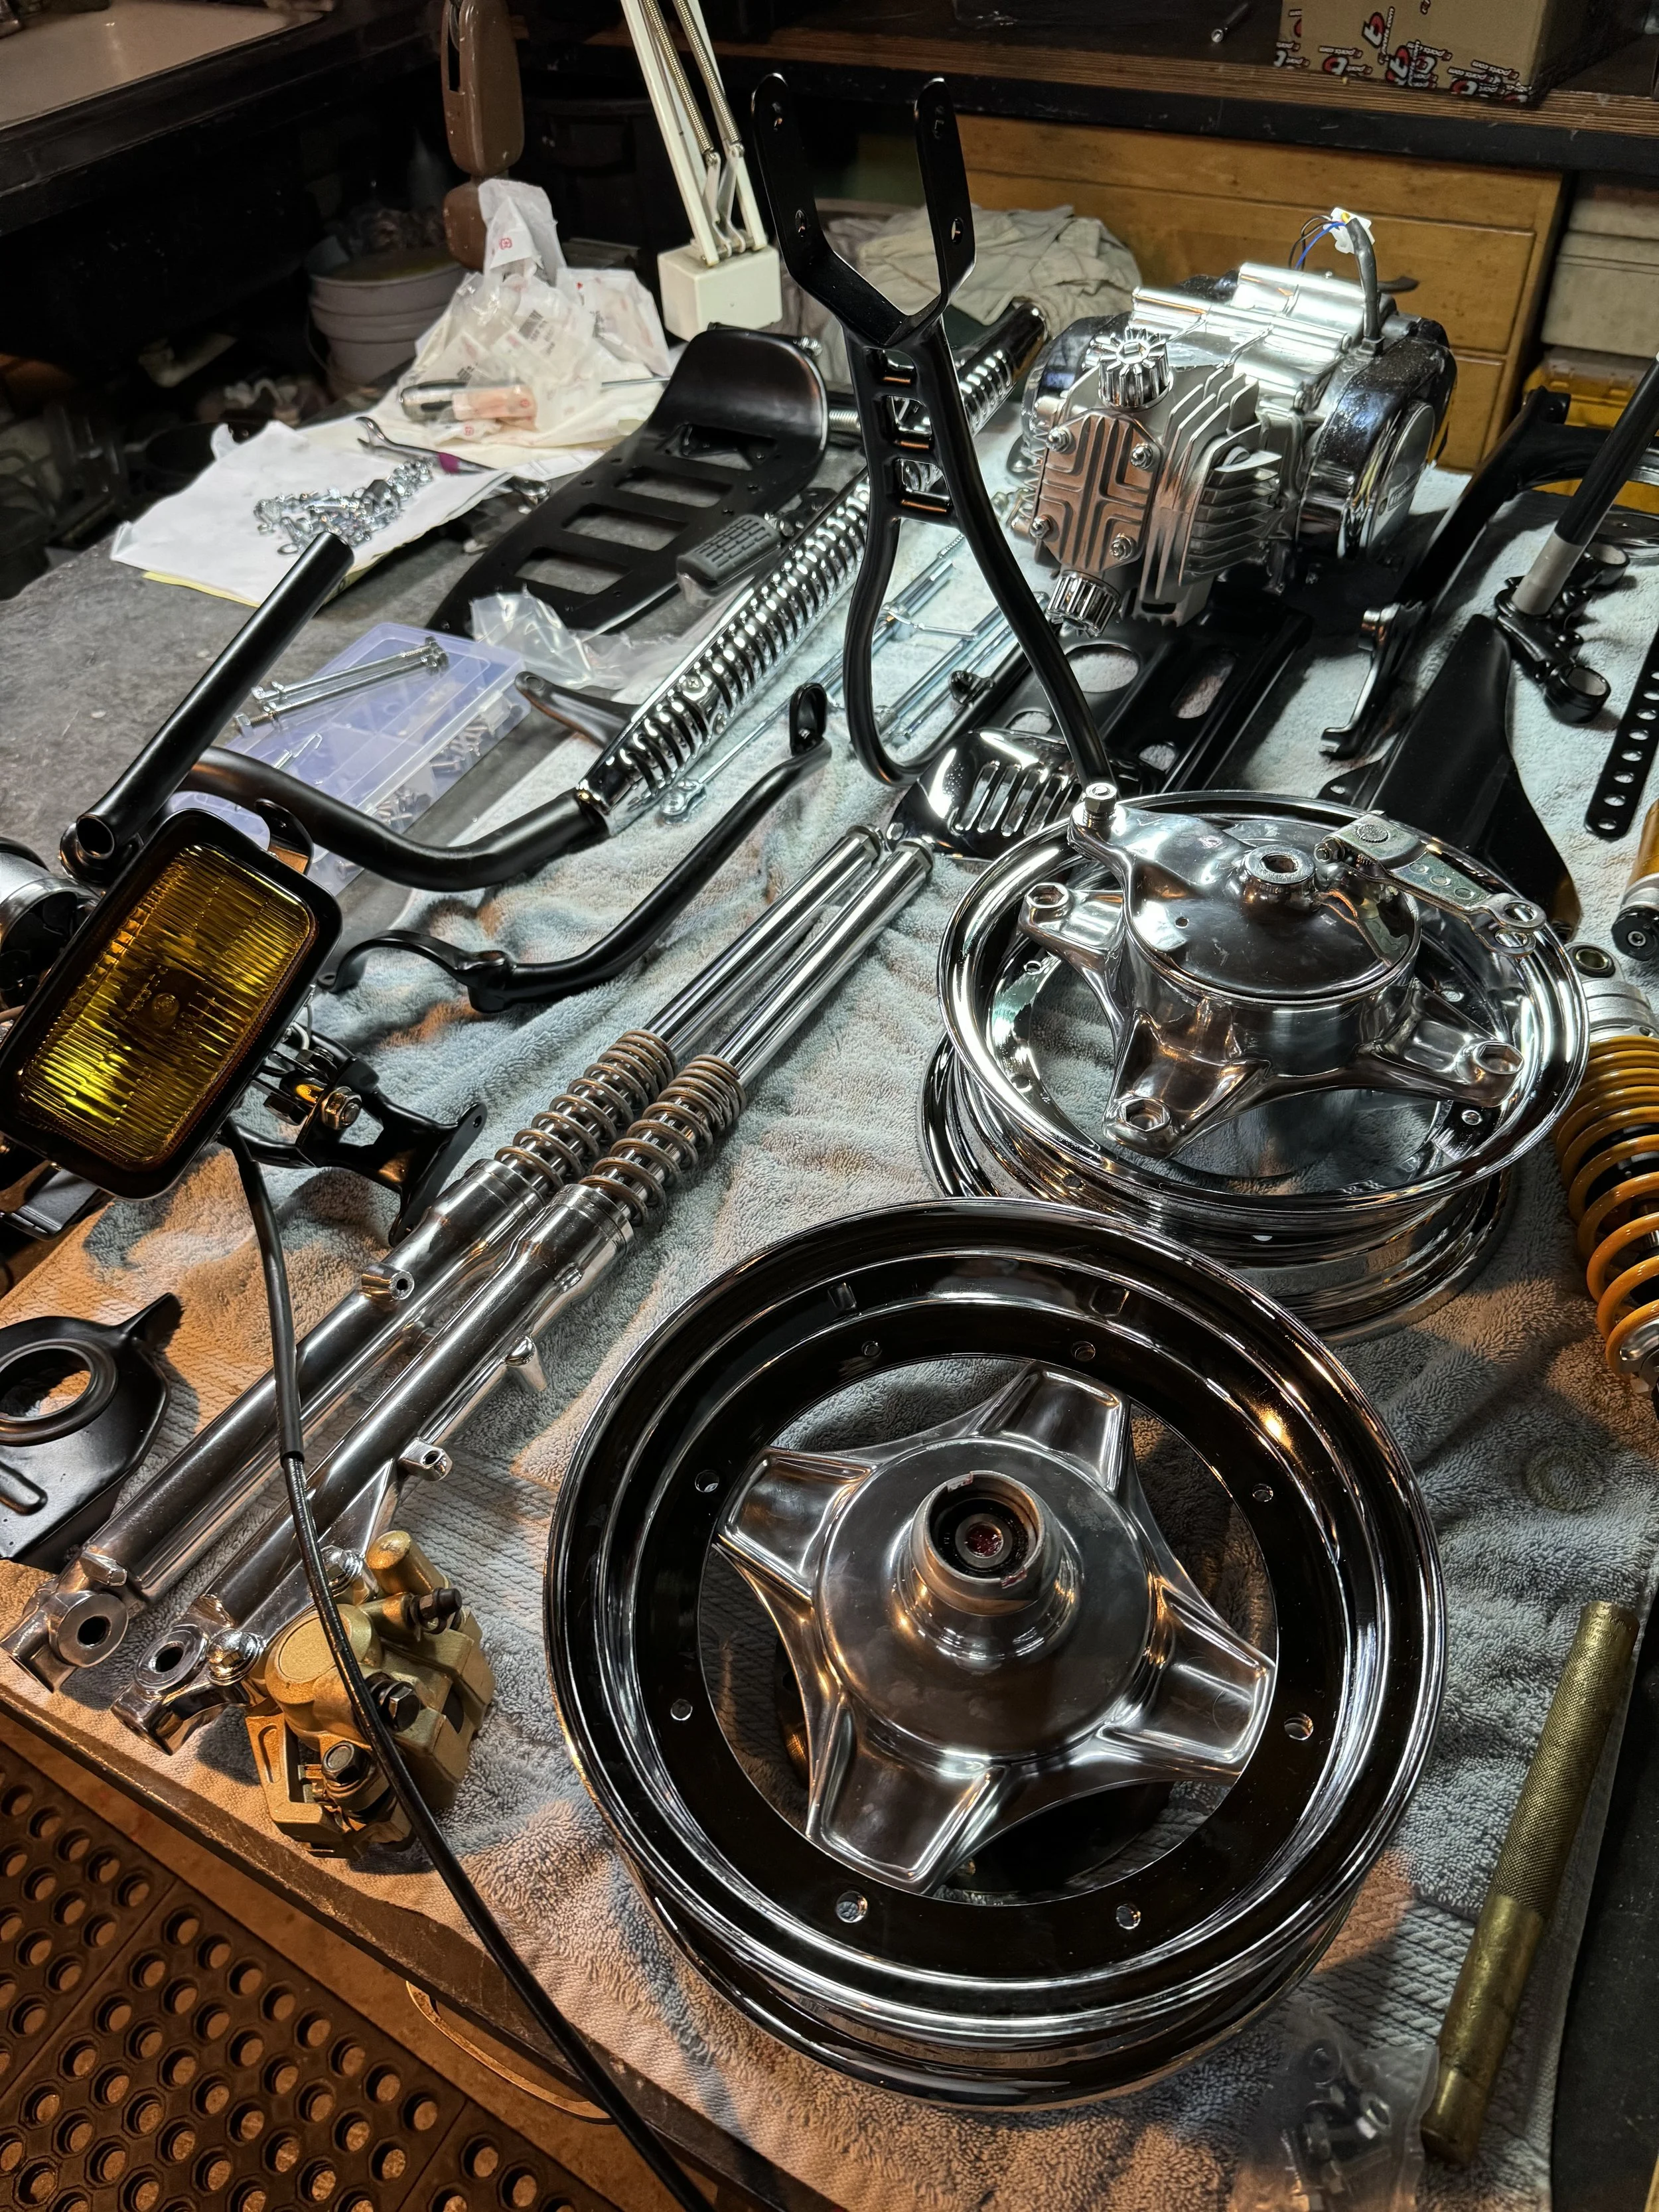
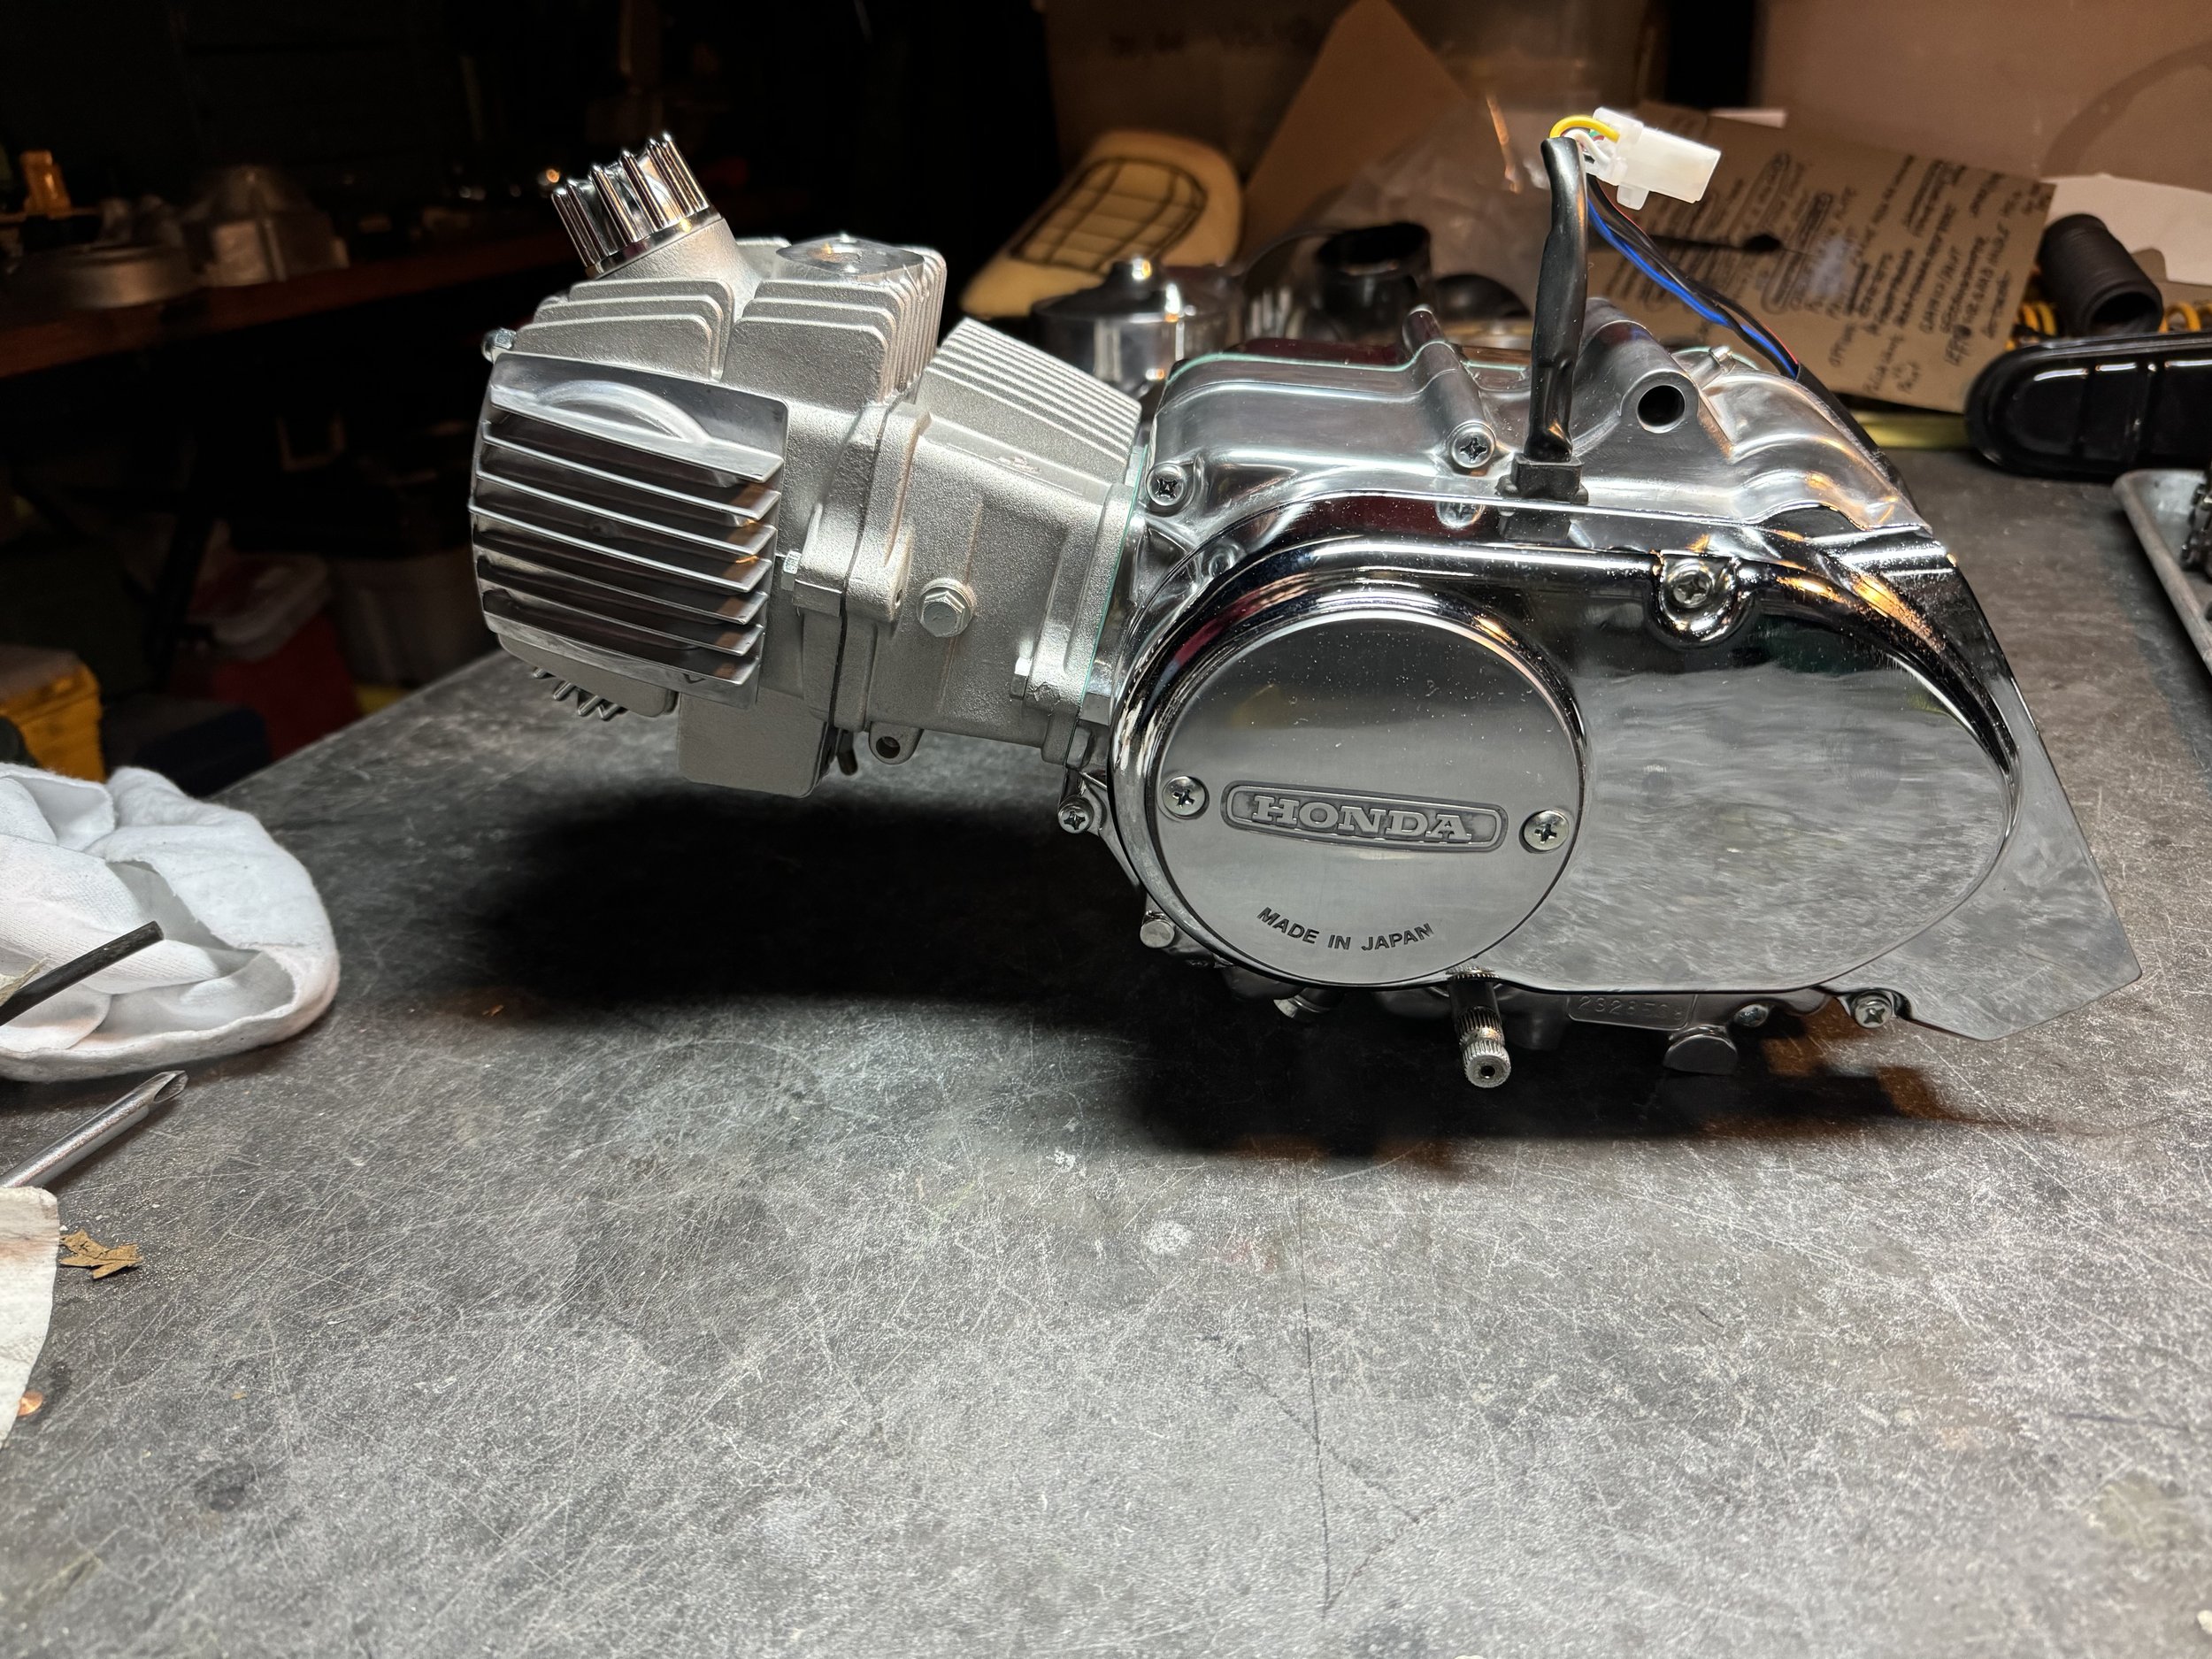
Painting time at the shop! The 1974 CT70 Dax custom bike received a coat of a rich, deep purple House of Kolor “Wild Cherry” over black base. Still stacking on some layers of clear and blocking in between, but the color is starting to get deep. The original plan was to paint the lower part of the bike white, like the CT117, but the color is so sleek, it is giving me second thoughts. There are still graphics to be added: a “Honda” logo will be going on the neck. The guy who owns the bike picked this color to match his early Ford Bronco. Good choice!

The color really accents some of the contour nicely.

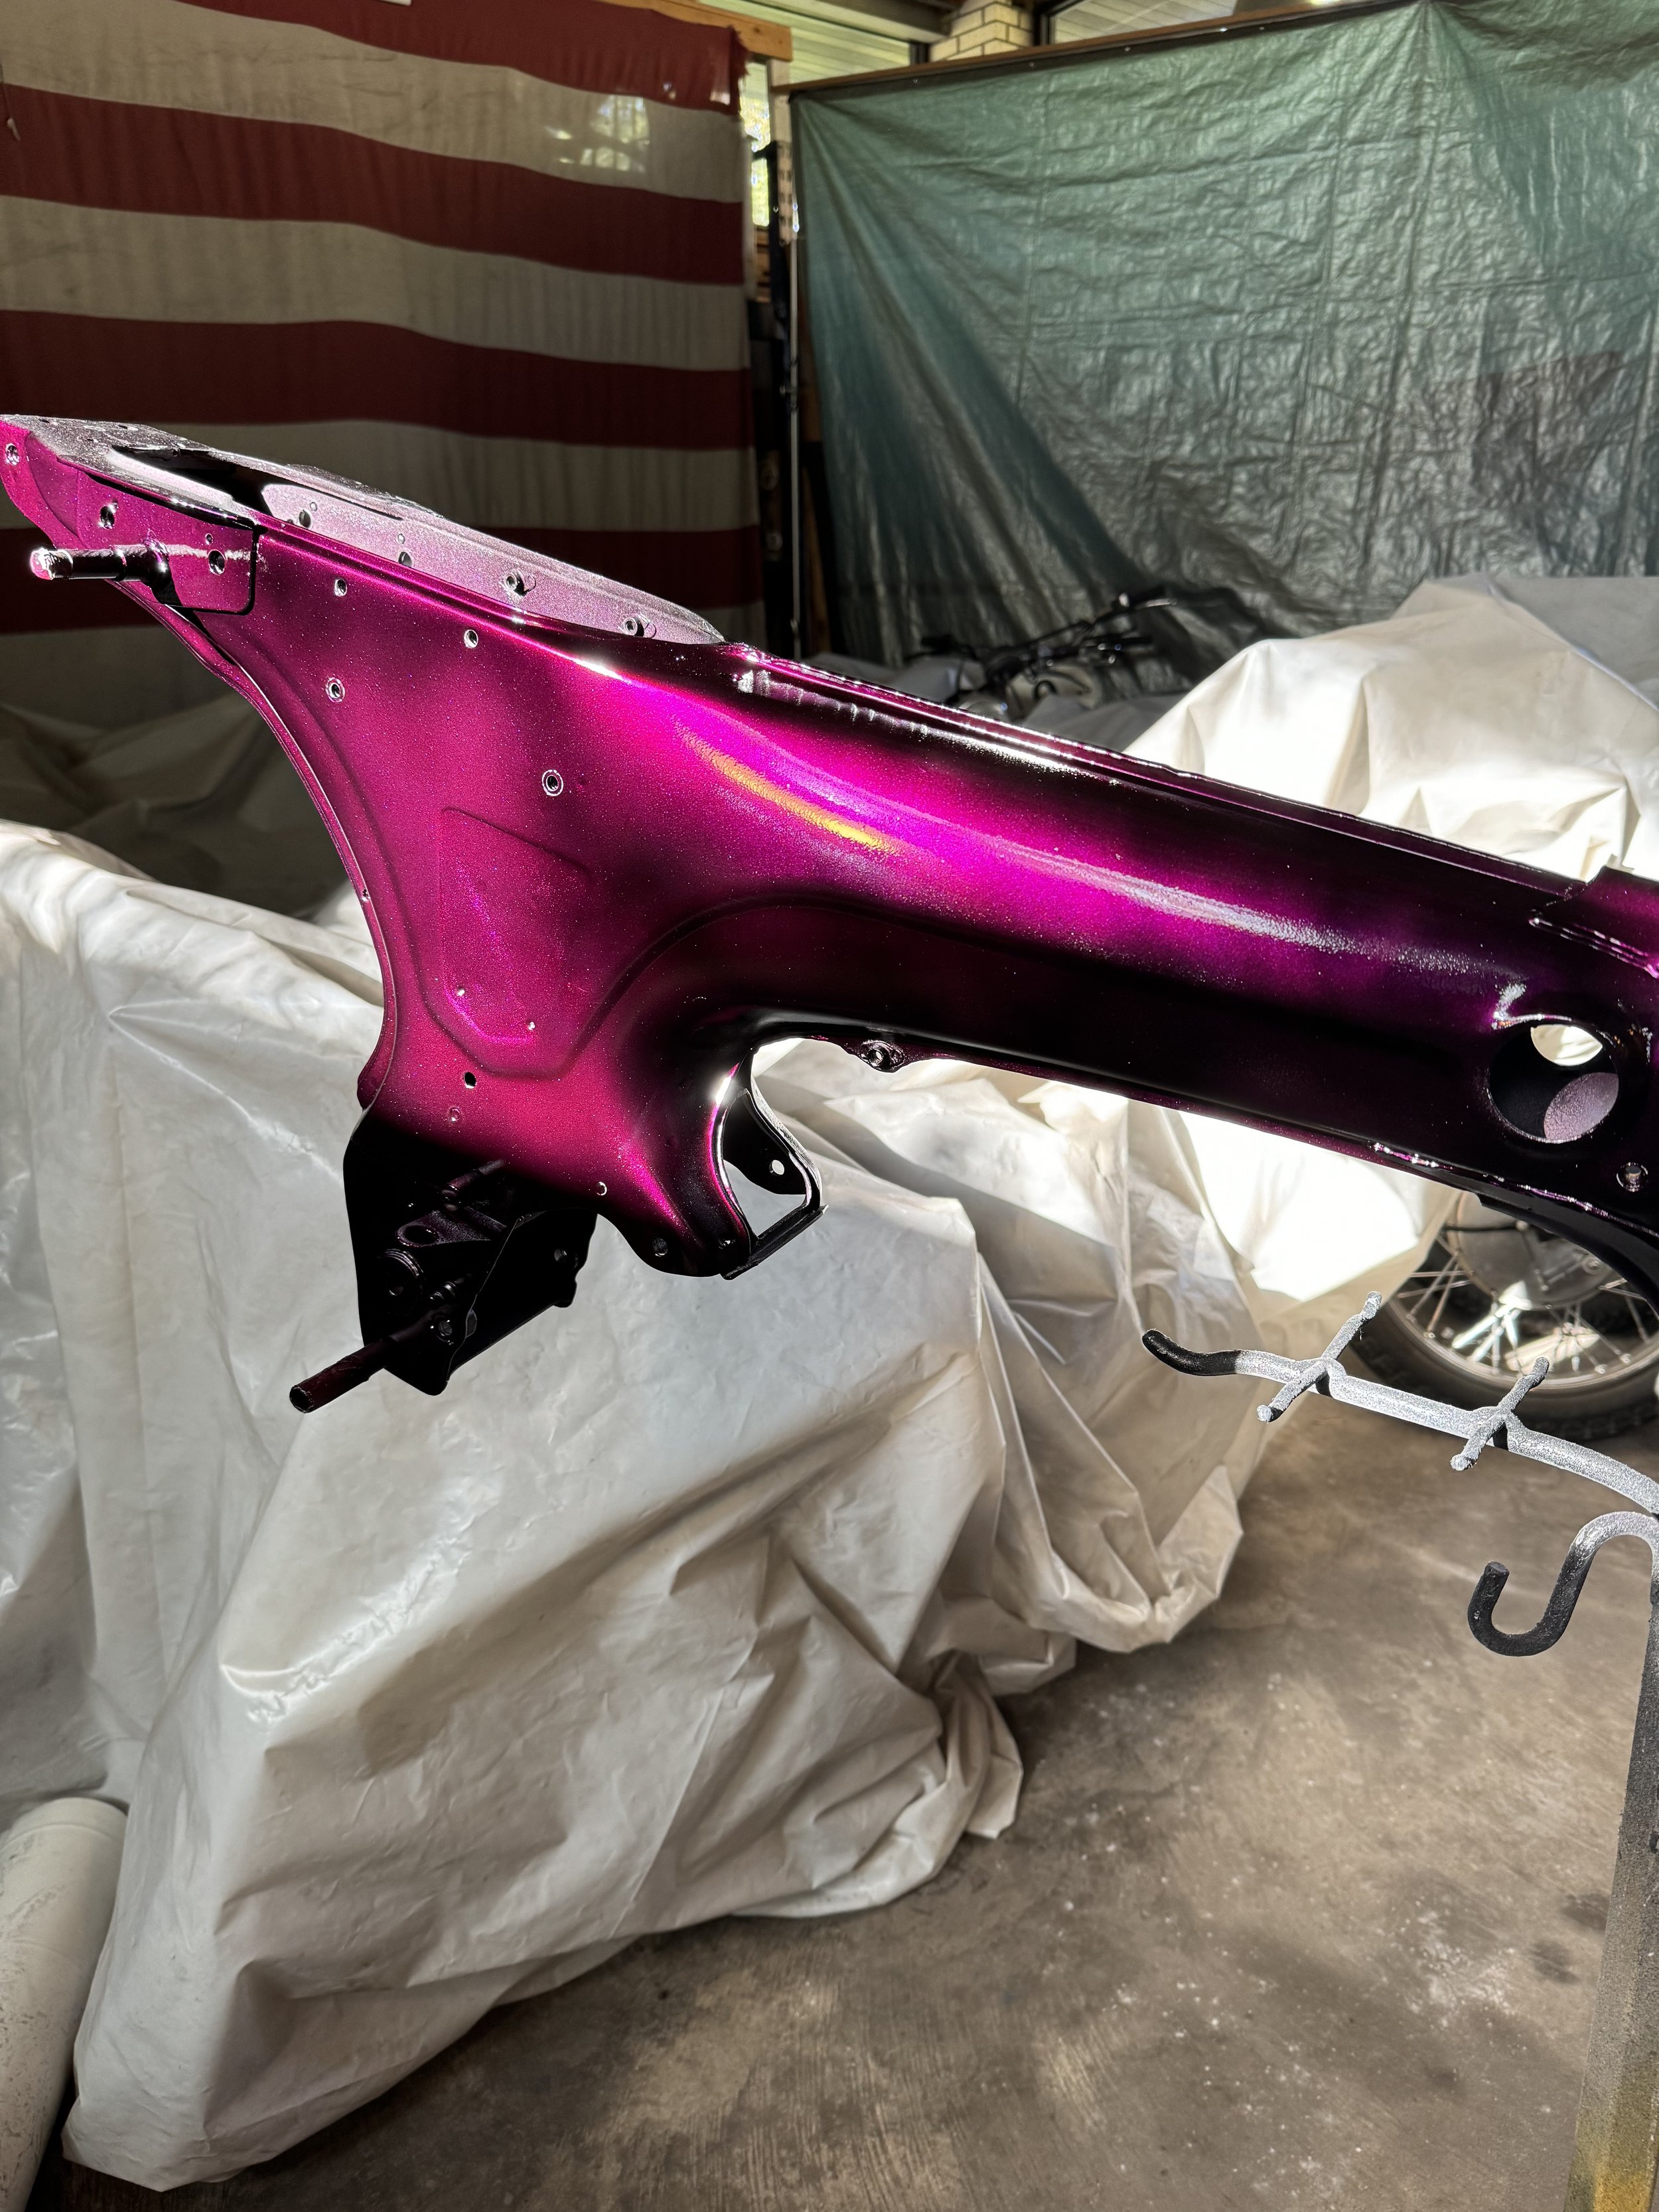
When the sun shines directly on the paint, it takes on more red to pink shades. The metal flake in the candy coat really pops out as well.

In lower light, the color goes to a dark wine color, even looking black in some instances.

The paint chip was ever present, to keep the match as close as possible.

With a single coat of clear, it looks a little less rich.

A little orange peel on the first clear coat. Each layer is blocked out smooth before the next coat goes on.

New chrome, powder coat, zinc plate and custom parts for the 1974 CT70 Dax Custom.

The saying is: the last 10 percent takes 90 percent of the time to do the job. That is an exaggeration, perhaps, but a lot of little details have to be done, and in custom building, some of that means making parts. A set of fork spring cups for the top of the springs was turned on the lathe to finish the fork assembly. The powder coated parts are back, and look great. Sub-assemblies are going together like the fork components, wheels, muffler, and footpegs.

The spring cups were turned out of aluminum, and in addition to being a place for the top of the spring to rest, it has a groove that secures the top of the fork gaiters

Honda makes a part that holds the top of the fork gaiters, but they are made to be used with fork covers. Without fork covers, they do not look quite right, or at least they don’t look as clean as these pieces do.

Most all of the aluminum polishing is done, the parts are back from chrome and zinc platers as well as the black powder coated parts. One of the jewels are the chrome plated thumb screws for the seat hold down. The muffler was painted with high heat ceramic paint, and looks really sharp with the fresh chrome plating on the heat shield. The heat shield was attached with Honda screws and heat insulating washers. Even though the bike is anything but stock, when it comes to assembly of these parts, a lot of care goes into using as much of the original style hardware as possible.

Another sub-assembly getting attention was the handlebars and fork top clamp. The headlight assembly uses the bolts coming from the bottom of the handlebar clamp to hold the top of the bracket in place. The throttle was rebuilt using all new parts from Honda. A set of aluminum knobs were used in place of the original rubber ones.

The chrome plated wheel rims are from TB Parts, and look perfect! I tried out the aluminum rims, but the polish on those rims was nowhere as nice as these chrome ones.

Several sets of shocks are on hand to find the best match with all the final finishes. The yellowing gold reservoir shocks used in mock-up could still get the nod, but I am leaning toward the chrome ones.

Another 330mm shock, this DNM brand set will be an interesting one to try. More an off-road shock than street, it will probably end up on another build.

Some of the Honda bags, saved and photographed to keep track of supplies.

Inching a little close every day.

A set of Heidenau K-38 tires and some Michelin S-83 tires were considered for the build. I have used the Heidenau tires on multiple builds, and love their performance and looks.

It was hard not to pick the Heidenau’s. They look great with the assembled wheel rims and hubs. Even though there are stainless steel fasteners used on other parts of the build, I went with new OEM hardware when it came time to mount the hubs to the rims.

All ready for assembly!

In other news, some brass covers were made for the horns on the Tijuana Trike. With all the stuff going on on the front of the trike, it was more about safety than the need for another ornament. Brass discs were punched, domed, and soldered together to make the balls, and a simple cone was made from the same sheet, and soldered to the balls.

The finished product, safety-wired on with stainless wire.

The fire scale and excess solder were left alone for the patina.

The 1974 Honda CT70 Dax Custom gets an engine rebuild.

With parts still out for finishes, attention was turned to the engine. The plan was to give it some more power with an 88cc bore kit, and race head and cam. This is a familiar upgrade, and delivers the extra punch needed to move a full-sized adult. Some bling was added as well, with polished engine cases and chromed side covers. The stator was upgraded to a 12Volt system with CDI ignition. A high volume oil pump and heavy duty clutch round out the internal upgrades. Wear items, seals and gaskets were replaced, and all hardware was either new or replated OEM.

The 88cc big bore kit and race head are from Hondatrailbikes.com, as are the heavy duty clutch and high volume oil pump. The chromed clutch and magneto covers were ones I had saved for a personal build, but decided to let go for this one. With the black of the brush guard, chain guard, footpeg assembly, and exhaust, and the deep dark tone of the paint, something was needed to balance it out. The heat shields on the muffler and brush guard are being chromed as well, to keep the dark colors from dominating too much. The extra wires coming out of the engine harness are for the CDI module.

Without a doubt, the dirtiest oil filter I have ever seen on over sixty rebuilds of these small Honda horizontals. Normally, this screen is see-through, and often with little or no debris even on high milage engines. This almost impenetrable screen would have been starving out the clutch and head portion of the engine…good thing they were replaced. This kind of debris is likely to be gasket scrapings, left inside after previous work done on the engine. The center case of the engine had an aftermarket gasket, and the clutch had been removed as well, indicating the engine was completely split open at some point.

Everything on this bike had been thoroughly painted, and required stripping. The engine was no exception, having a thick, partly peeling clear coat-base coat job. Normally, the case halves are unpainted from the factory, and the side covers are painted. The glued-in neutral contact switch can be seen in the upper left corner of the picture.

Just waiting on body parts to be painted. A lot of times, I build linearly, stopping at various points to do the polishing or engine building. It is nice to have these jobs done and waiting. Hopefully, final assembly will be quicker because of it.

A lot of work to get to this point, the center cases were extensively cleaned and polished, using hot ultrasonic degreasing done three times, to get the built-up sludge and polishing compound removed. Although it is hard for cast aluminum to take on a shine equal to chrome, it is shiny enough to see your reflection.

The HondaTB Race head is similar to the original domed head of the 1974 CT70, but the cam upgrades make it superior. The cam cover is like the later Honda type, with different castings that allow the use of a two-hole cam sprocket. There are round ones like the original, but this type head allows use of this cool finned one still available from Honda. A correct pristine magneto inspection cover was found to replace the one that came with the bike.

The engine case halves starting to be reassembled. They are sitting on the engine board, a tool for assembly and disassembly, made to hold the parts securely, with minimal marring. Some of the internal wear parts replaced were the transmission ball bearings, and shift pins. A replaced kick-start shaft was substituted at this time, as well.

All the take-off parts. With the oil starvation to the head, there is a chance the cam bearing surfaces and valve guides received excess wear, making it suspect for use without complete reconditioning. In the end, the new head is cheaper, and uses a ball bearing on the cam ends, an improvement on the flat journals molded into the aluminum on the original head. There were other small surprises, like a glued-in neutral contact switch, and a busted c-clip on the kick start shaft.

Other busy work. Stainless steel hardware for the body parts were high-polished after sanding off the numbering on the bolt tops.

Some more of the ugly. This is the oil slinger inside the clutch, packed with debris. The clutch uses centrifugal force to push impurities to the side recesses of the center cup, which are full in this picture. The clutch nut is chewed up by removal with a hammer and screwdriver…certainly not indicating it was work well done. The new clutch has stronger springs and heavier weights on the centrifugal clutch, for improved hook-up.

Adding to the polished parts on the “Bling Table.” Some aftermarket Webco-style valve inspection covers were used. In addition to dissipating more heat, they can be removed by hand or with the socket head on top.