• THE CONTACT
  • THE BLOG
  • THE BIKES
  • THE ABOUT
  • THE PROCESS
Menu

DAVMOMOTO

CUSTOM METAL
  • THE CONTACT
  • THE BLOG
  • THE BIKES
  • THE ABOUT
  • THE PROCESS
A seat with an integrated battery cover for Pete’s 1993 FXR is under construction. It took a couple tries to get the seat support at the right height. The supports lie on the frame tubes, locking it in place and keeping it centered. With the seat pa…

A seat with an integrated battery cover for Pete’s 1993 FXR is under construction. It took a couple tries to get the seat support at the right height. The supports lie on the frame tubes, locking it in place and keeping it centered. With the seat pan just laid on the frame, it is solid and does not move while sitting on it. A few securing screws will be placed beneath the seat support.

Making a seat mount and gas tank mods for the 1993 Harley Davidson FXR custom

February 7, 2019
Liking how the seat and tank are lining up. Fenders will be coming up next. The filler neck on the tank has been stripped in preparation of shortening.

Liking how the seat and tank are lining up. Fenders will be coming up next. The filler neck on the tank has been stripped in preparation of shortening.

This was the first version of the seat support that looked too high. Now on the scrap heap.

This was the first version of the seat support that looked too high. Now on the scrap heap.

Brackets for the rear brake master cylinder and reservoir were made. These are the stock brake components from the original bike.

Brackets for the rear brake master cylinder and reservoir were made. These are the stock brake components from the original bike.

The rear tank hold-down bracket waiting to be welded on. I usually try to get all the brackets made while the bike is in the assembly area of the shop and then get them all welded on at once, reducing the time the bike is in the metal room potential…

The rear tank hold-down bracket waiting to be welded on. I usually try to get all the brackets made while the bike is in the assembly area of the shop and then get them all welded on at once, reducing the time the bike is in the metal room potentially getting exposed to grinding dust.

Working on the template for the cover. The seat support and battery cover were made as a single unit, strengthening and stabilizing both.

Working on the template for the cover. The seat support and battery cover were made as a single unit, strengthening and stabilizing both.

Recycling old medical office folders for template making. A pile of schnitzles litters the base of the bike.

Recycling old medical office folders for template making. A pile of schnitzles litters the base of the bike.

The primary is off the bike in preparation of the 29 tooth front sprocket and belt change.

The primary is off the bike in preparation of the 29 tooth front sprocket and belt change.

Looking kind of naked without the primary drive.

Looking kind of naked without the primary drive.

The tank tunnel square opening that needed to be made to match the new frame.

The tank tunnel square opening that needed to be made to match the new frame.

A small arc of 1/8” steel was grafted in, welding only to the existing bracket, avoiding the body of the tank. The space above the tunnel opening is where a tab from the tank-top center console will attach.

A small arc of 1/8” steel was grafted in, welding only to the existing bracket, avoiding the body of the tank. The space above the tunnel opening is where a tab from the tank-top center console will attach.

There. That’s better on the tunnel, but the gas filler neck is pretty high and needs to be cut down.

There. That’s better on the tunnel, but the gas filler neck is pretty high and needs to be cut down.

I tried to strip the paint and heat the filler to see if it was perhaps silver soldered in like British bike tanks, but turns out they are welded in. In this before, the cap measures 2 3/8” tall.

I tried to strip the paint and heat the filler to see if it was perhaps silver soldered in like British bike tanks, but turns out they are welded in. In this before, the cap measures 2 3/8” tall.

The neck was cut off, weld carefully cleaned from inside the tube and around the filler insert, then silver brazed in.

The neck was cut off, weld carefully cleaned from inside the tube and around the filler insert, then silver brazed in.

1 1/2” inches now. With a pop-up screw cap, it will be even shorter.

1 1/2” inches now. With a pop-up screw cap, it will be even shorter.

Even with the stock gas cap it looks better!

Even with the stock gas cap it looks better!

Tags #bf11invitedbuilder
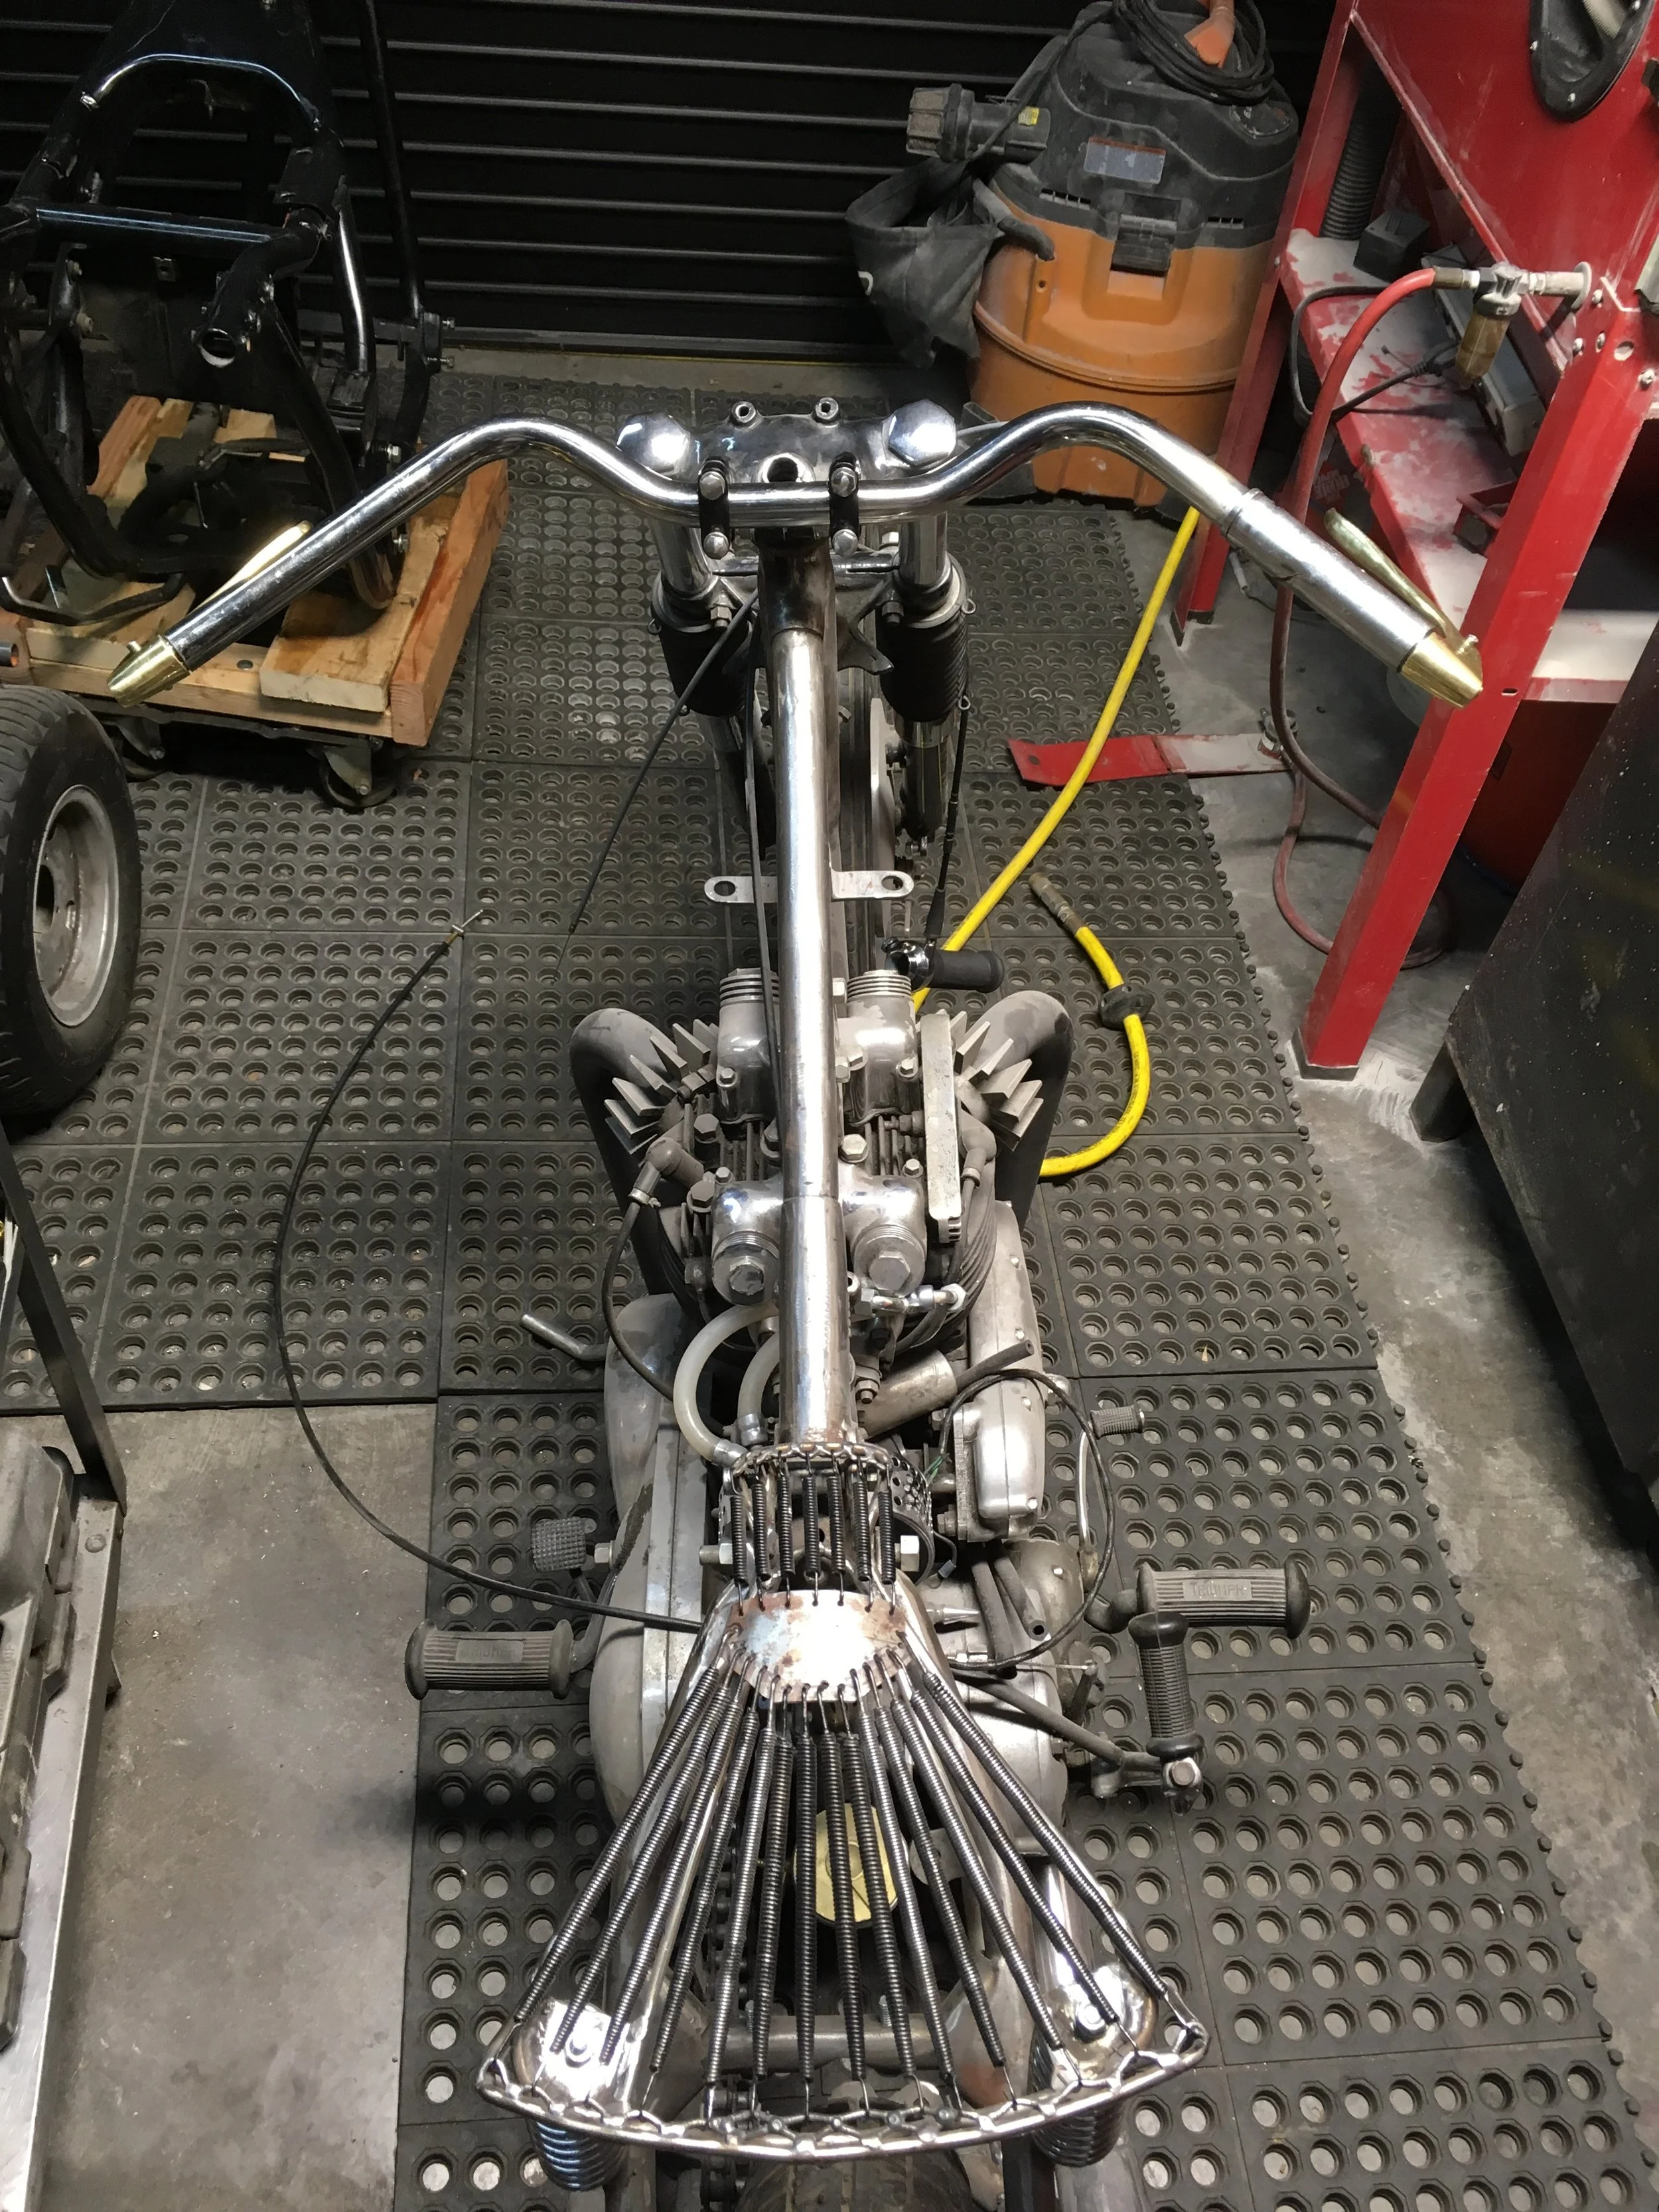
An internal cable throttle that was made for the 1957 Triumph Freebird project. The controls that were on the bike were pretty basic stock units, and a pair of reverse brake and clutch levers were chosen to replace them. With the internal cables on …

An internal cable throttle that was made for the 1957 Triumph Freebird project. The controls that were on the bike were pretty basic stock units, and a pair of reverse brake and clutch levers were chosen to replace them. With the internal cables on the levers, it will make for a clean set of bars to tuck the throttle cable inside the bar and lose the external throttle case. The bars are a 1” set of Norman Hyde mustache type that I had cut the end off to fit a 7/8” throttle a couple years back. Interestingly enough, the cut-off end was found and grafted back on to do this job.

Making an internal cable throttle for the 1957 Triumph Freebird bike.

February 2, 2019
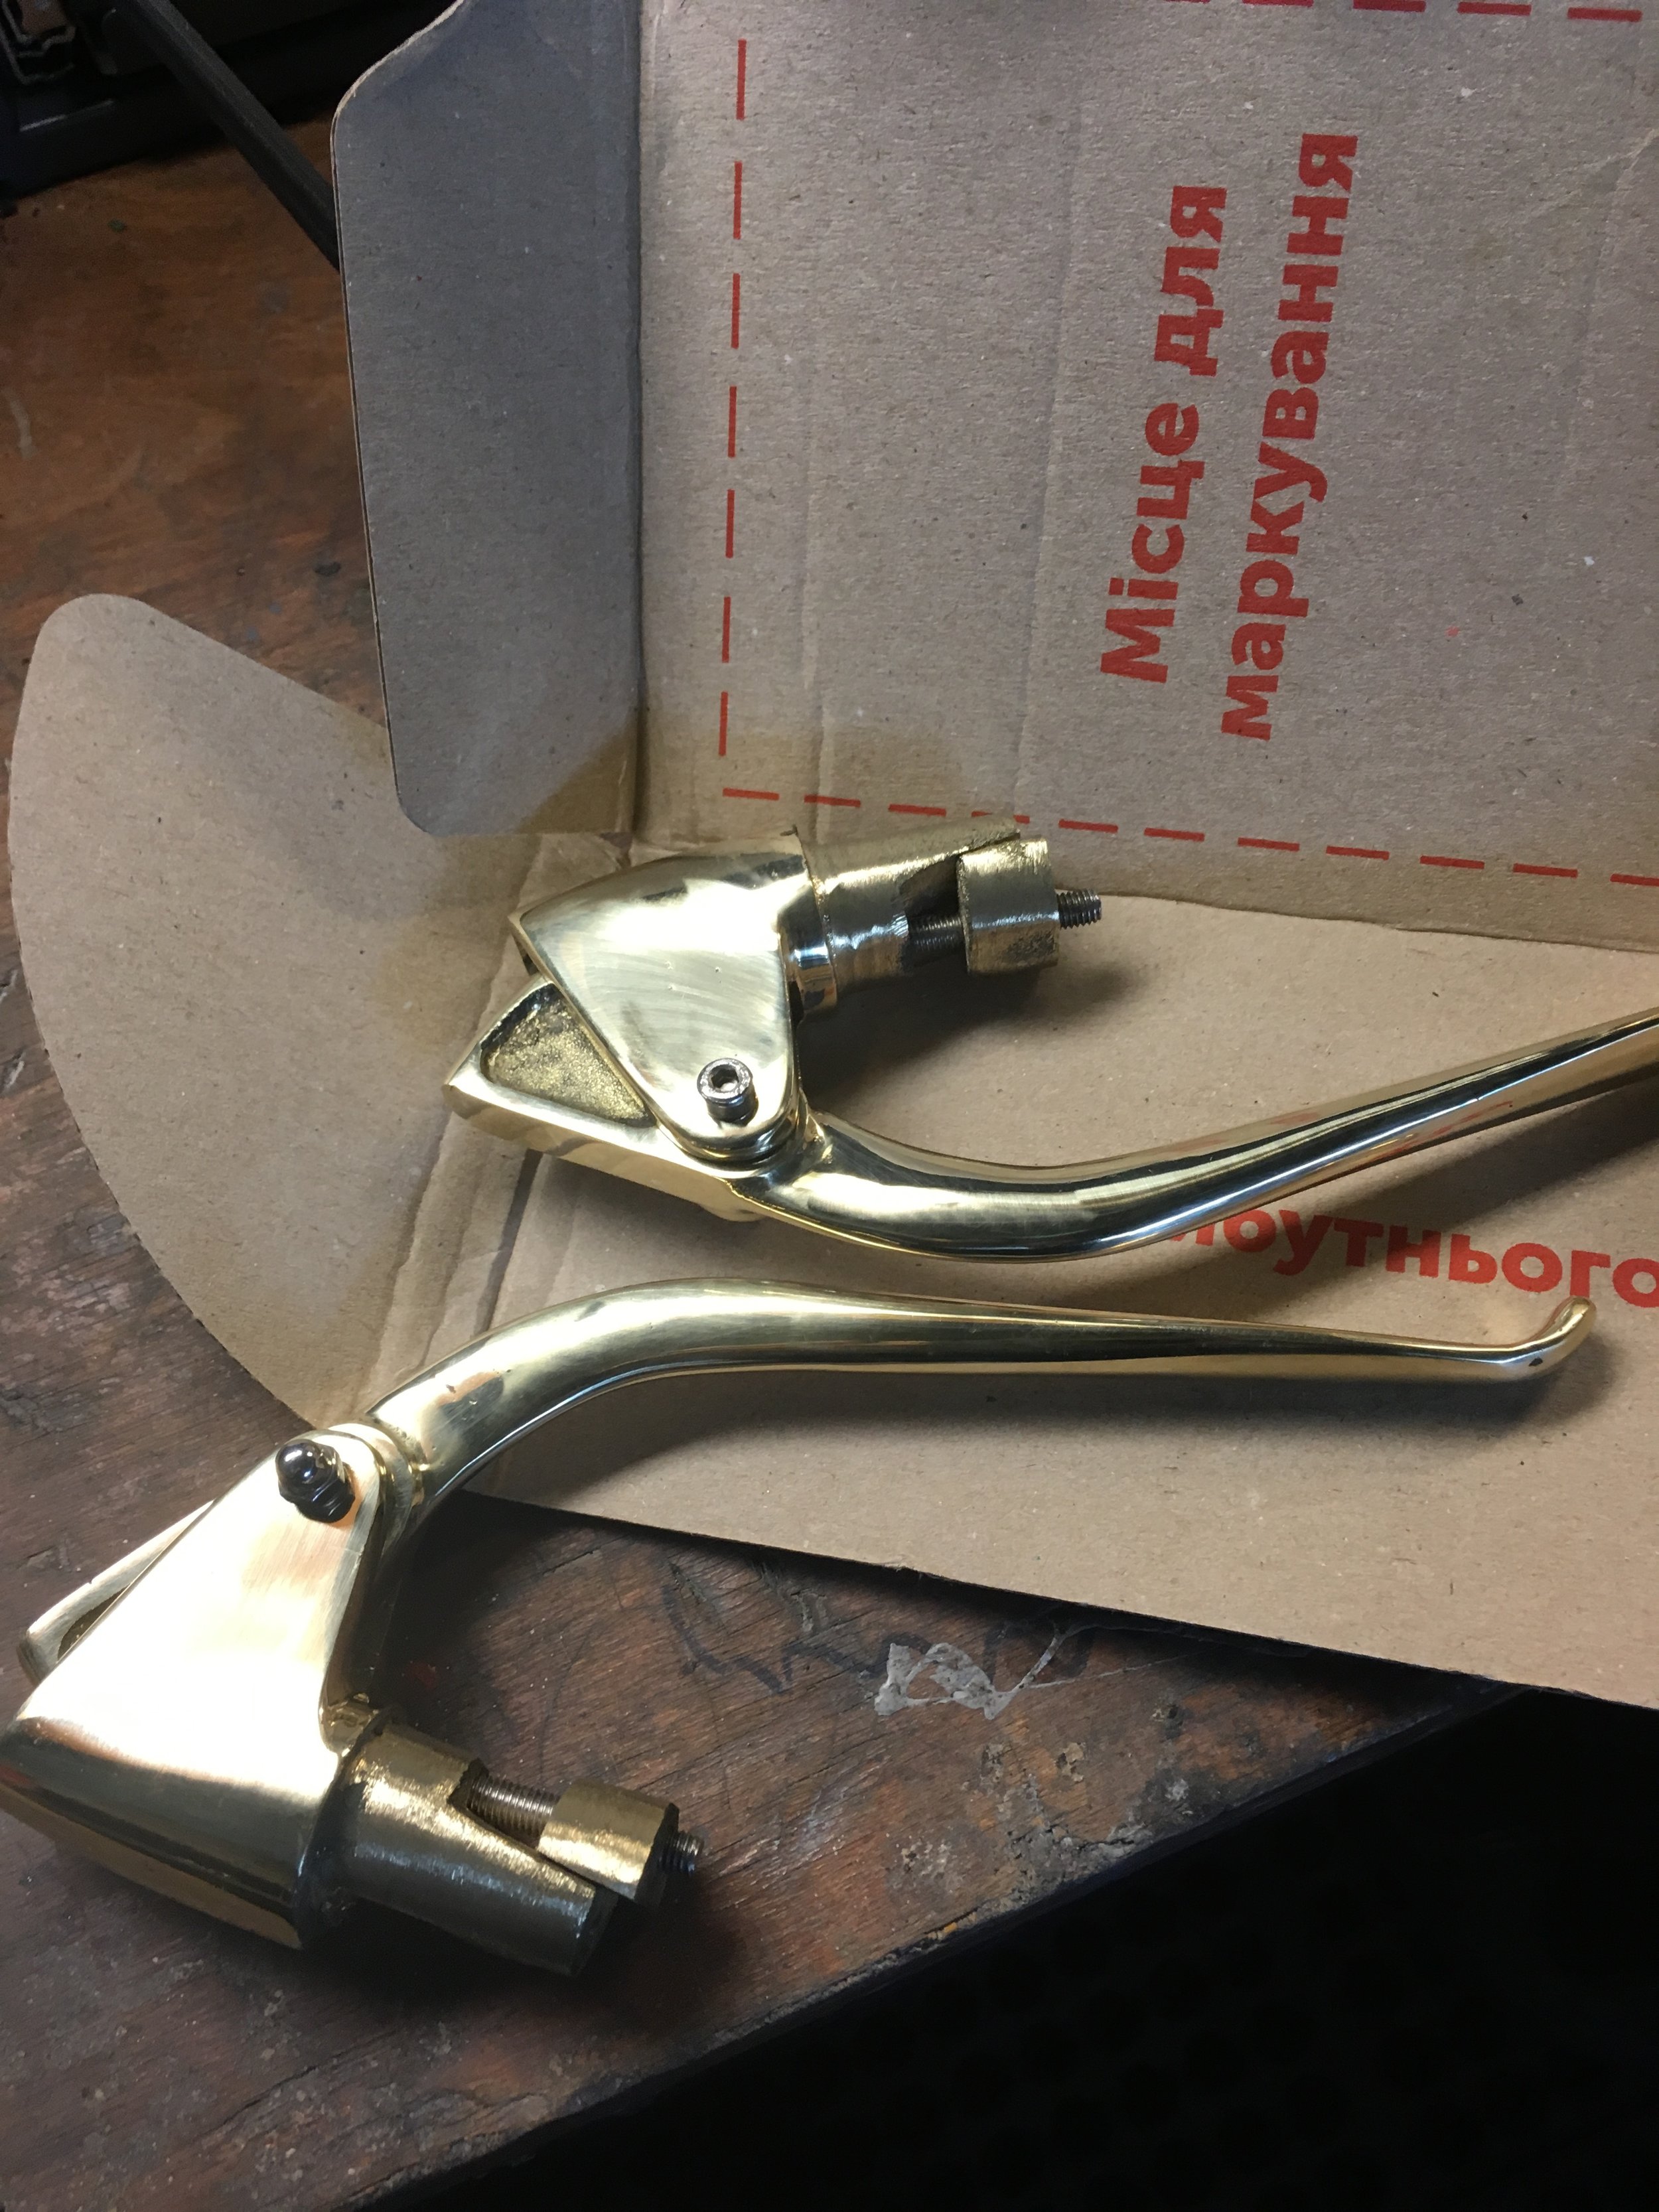
These are the brass reverse levers going on the bike. They are made by hand in Ukraine and are a BMW knock-off. The holes for the screws had to be enlarged to allow the cams to slide enough to tighten them up and the cable perches needed filing out,…

These are the brass reverse levers going on the bike. They are made by hand in Ukraine and are a BMW knock-off. The holes for the screws had to be enlarged to allow the cams to slide enough to tighten them up and the cable perches needed filing out, but hey are otherwise strong serviceable units. This particular pair was chosen because the cable exits toward the back wall of the inner handlebar, allowing room for the throttle mechanism.

The Honda components that make up the internal throttle cable mechanism. Made for a 1969 Z50 minibike, they were chosen because they leave the interior of the handlebars clear enough to get the brake cable through. The longer piece at the top of the…

The Honda components that make up the internal throttle cable mechanism. Made for a 1969 Z50 minibike, they were chosen because they leave the interior of the handlebars clear enough to get the brake cable through. The longer piece at the top of the pic is the slide that pulls the cable end, and the other piece is the cable sheath holder. The cable sheath has a threaded end that screws into the holder, making for a solid joint that can’t back out like most cable holders.

The hardest part to make was the internal spiral that drives the slide.. getting the angle of the slide was not hard, but getting the spiral to lay down perfectly flat and getting the right tolerance between the bar was tricky. Although the throttle…

The hardest part to make was the internal spiral that drives the slide.. getting the angle of the slide was not hard, but getting the spiral to lay down perfectly flat and getting the right tolerance between the bar was tricky. Although the throttle is based on the Honda design, it was changed a little by adding the ring at the bottom to act as the flange that rides against the bar. A thinner outer tube will cover the spiral.

The inner workings of the throttle mechanism can be seen in place. The cable holder is held in place a couple of different ways. There is a round keyed portion at the top of the slot that keeps the top located correctly, then a flange that slides ov…

The inner workings of the throttle mechanism can be seen in place. The cable holder is held in place a couple of different ways. There is a round keyed portion at the top of the slot that keeps the top located correctly, then a flange that slides over the bar and keeps it from being able to come out the top, and finally a screw that secures it from the bottom. The slot for the slide was cut by hand and made a few millimeters longer than the stock Honda one to accommodate the longer travel of the Amal carb slide.

This is the flange that slides over the cable holder. It also is the spacer the outer throttle tube rests on, and the ring at the end keeps it from sliding inward on the bars. A stopper screw was turned from a hex bolt. In addition to anchoring the …

This is the flange that slides over the cable holder. It also is the spacer the outer throttle tube rests on, and the ring at the end keeps it from sliding inward on the bars. A stopper screw was turned from a hex bolt. In addition to anchoring the bottom of the cable holder, it keeps the throttle tube from being able to slide off the end, and limits the range of the throttle twist. The exit hole for the cables can be seen on the underside of the bars. A shroud (seen below) was made to go around the hole to support the cable and keep it from resting on the edge of the hole.

Other than the cable for the brake, this is all that will be on the right side.

Other than the cable for the brake, this is all that will be on the right side.

That is about as clean as it gets on the handlebars.

That is about as clean as it gets on the handlebars.

The exits for the cables were given some shrouds that were brass-brazed on.

The exits for the cables were given some shrouds that were brass-brazed on.

Because there are two cables exiting the handlebars on the right side and they are not as fat as the left-side clutch cable, a thinner, taller shroud was made.

Because there are two cables exiting the handlebars on the right side and they are not as fat as the left-side clutch cable, a thinner, taller shroud was made.

Tags #bf11invitedbuilder, #bf11, #bornfree11, #freebirdbike
The CCD FXR Softail frame and the S&S 124 powerplant fit together perfectly. A new rear brake caliper bracket is needed along with seat, tank and fender mounts. The belt-drive pulleys and belt will also need replacing.

The CCD FXR Softail frame and the S&S 124 powerplant fit together perfectly. A new rear brake caliper bracket is needed along with seat, tank and fender mounts. The belt-drive pulleys and belt will also need replacing.

1993 FXR Softail custom and 1978 CB750 updates.

January 28, 2019
The lines of the backbone will give the rigid frame appearance the owner is after.

The lines of the backbone will give the rigid frame appearance the owner is after.

Using some 6mm clip-nuts on the seat brackets to hold the rear hump down. They are self-centering and hold in place nicely till they can be welded on the inside, and then the rest of the bracket can be ground off. Also nice not having to strip zinc …

Using some 6mm clip-nuts on the seat brackets to hold the rear hump down. They are self-centering and hold in place nicely till they can be welded on the inside, and then the rest of the bracket can be ground off. Also nice not having to strip zinc plating off prior to welding. The cross-piece will be used to mount the electronics tray.

Some anodized grommets dress up the rear hold-down screws.

Some anodized grommets dress up the rear hold-down screws.

The cross brace profile was kept low to keep the rear triangle open. For strength , the attachment points were kept low on the tubes and close to the swingarm and motor mounts. The owner wants to try and fit a Cognito Moto oil bag in the front of th…

The cross brace profile was kept low to keep the rear triangle open. For strength , the attachment points were kept low on the tubes and close to the swingarm and motor mounts. The owner wants to try and fit a Cognito Moto oil bag in the front of the triangle. It is placed so that the air filters are shielded from rear tire spray.

Still a long way to go, but the lines of the bike are starting to take shape.

Still a long way to go, but the lines of the bike are starting to take shape.

With the rear shock pre-load dialed up to the max, it makes for a perky tail. A 4 into 1 exhaust system is coming next, and will help fill the rear of the bike silhouette.

With the rear shock pre-load dialed up to the max, it makes for a perky tail. A 4 into 1 exhaust system is coming next, and will help fill the rear of the bike silhouette.

All welded up, the shock mounting plates run through the box and are welded internally to make a complete box.

All welded up, the shock mounting plates run through the box and are welded internally to make a complete box.

With no roadmap to make this monoshock conversion, it was meant to be over-engineered strength-wise while still leaving room for the shock reservoir.

With no roadmap to make this monoshock conversion, it was meant to be over-engineered strength-wise while still leaving room for the shock reservoir.

← Newer Posts Older Posts →

WTF is going on here?

Featured
tempImageltM4OQ.jpg
September 21, 2026
1982 Honda MB-5 Revival. Discovering how bad a bike can be made to run.
September 21, 2026
Read more →
September 21, 2026
tempImageZBqT4n.jpg
June 1, 2026
Final touches on the 1980 Chrome custom Z50R
June 1, 2026
Read more →
June 1, 2026
F154B95C-E47C-46F9-B9C1-E3BFCF373BB3.jpeg
July 21, 2025
1980 Honda Z50R Chrome Custom Electrical Upgrade.
July 21, 2025
Read more →
July 21, 2025
C83773A2-5E9B-4CF8-B87C-B3D452744B13.jpeg
July 9, 2025
1962 Honda CB77/CL72 Race Bike Completion.
July 9, 2025
Read more →
July 9, 2025
F18BB718-06B6-477B-9087-FC498F2DD7C8.jpeg
July 1, 2025
The 1980 Honda Z50R Chrome Custom completion.
July 1, 2025
Read more →
July 1, 2025
36644661-5DDF-4180-9EE6-90C6E8048FE1.jpeg
June 23, 2025
The 1980 Honda Z50R Chrome custom build update.
June 23, 2025
Read more →
June 23, 2025
E385E757-7291-4B97-87CA-B56936DEFB91.jpeg
June 21, 2025
A Tribute to the Z50RD. 1980 Honda Z50R Chrome Custom.
June 21, 2025
Read more →
June 21, 2025
B2C64FE9-ECEF-4B9D-91CC-3F4FE4F3A6E9.jpeg
April 13, 2025
1979 Honda Z50R Restoration.
April 13, 2025
Read more →
April 13, 2025
EB3E3EF3-D618-473C-92B6-A22B4EF424F2.jpeg
December 1, 2024
Finishing the 1967 Triumph Mountain Cub Restoration
December 1, 2024
Read more →
December 1, 2024
tempImageqULr0Y.jpg
October 10, 2024
Another 1967 Triumph Mountain Cub in the shop
October 10, 2024
Read more →
October 10, 2024


XXXXXXXXX