The Tijuana Trike makes her Debut.

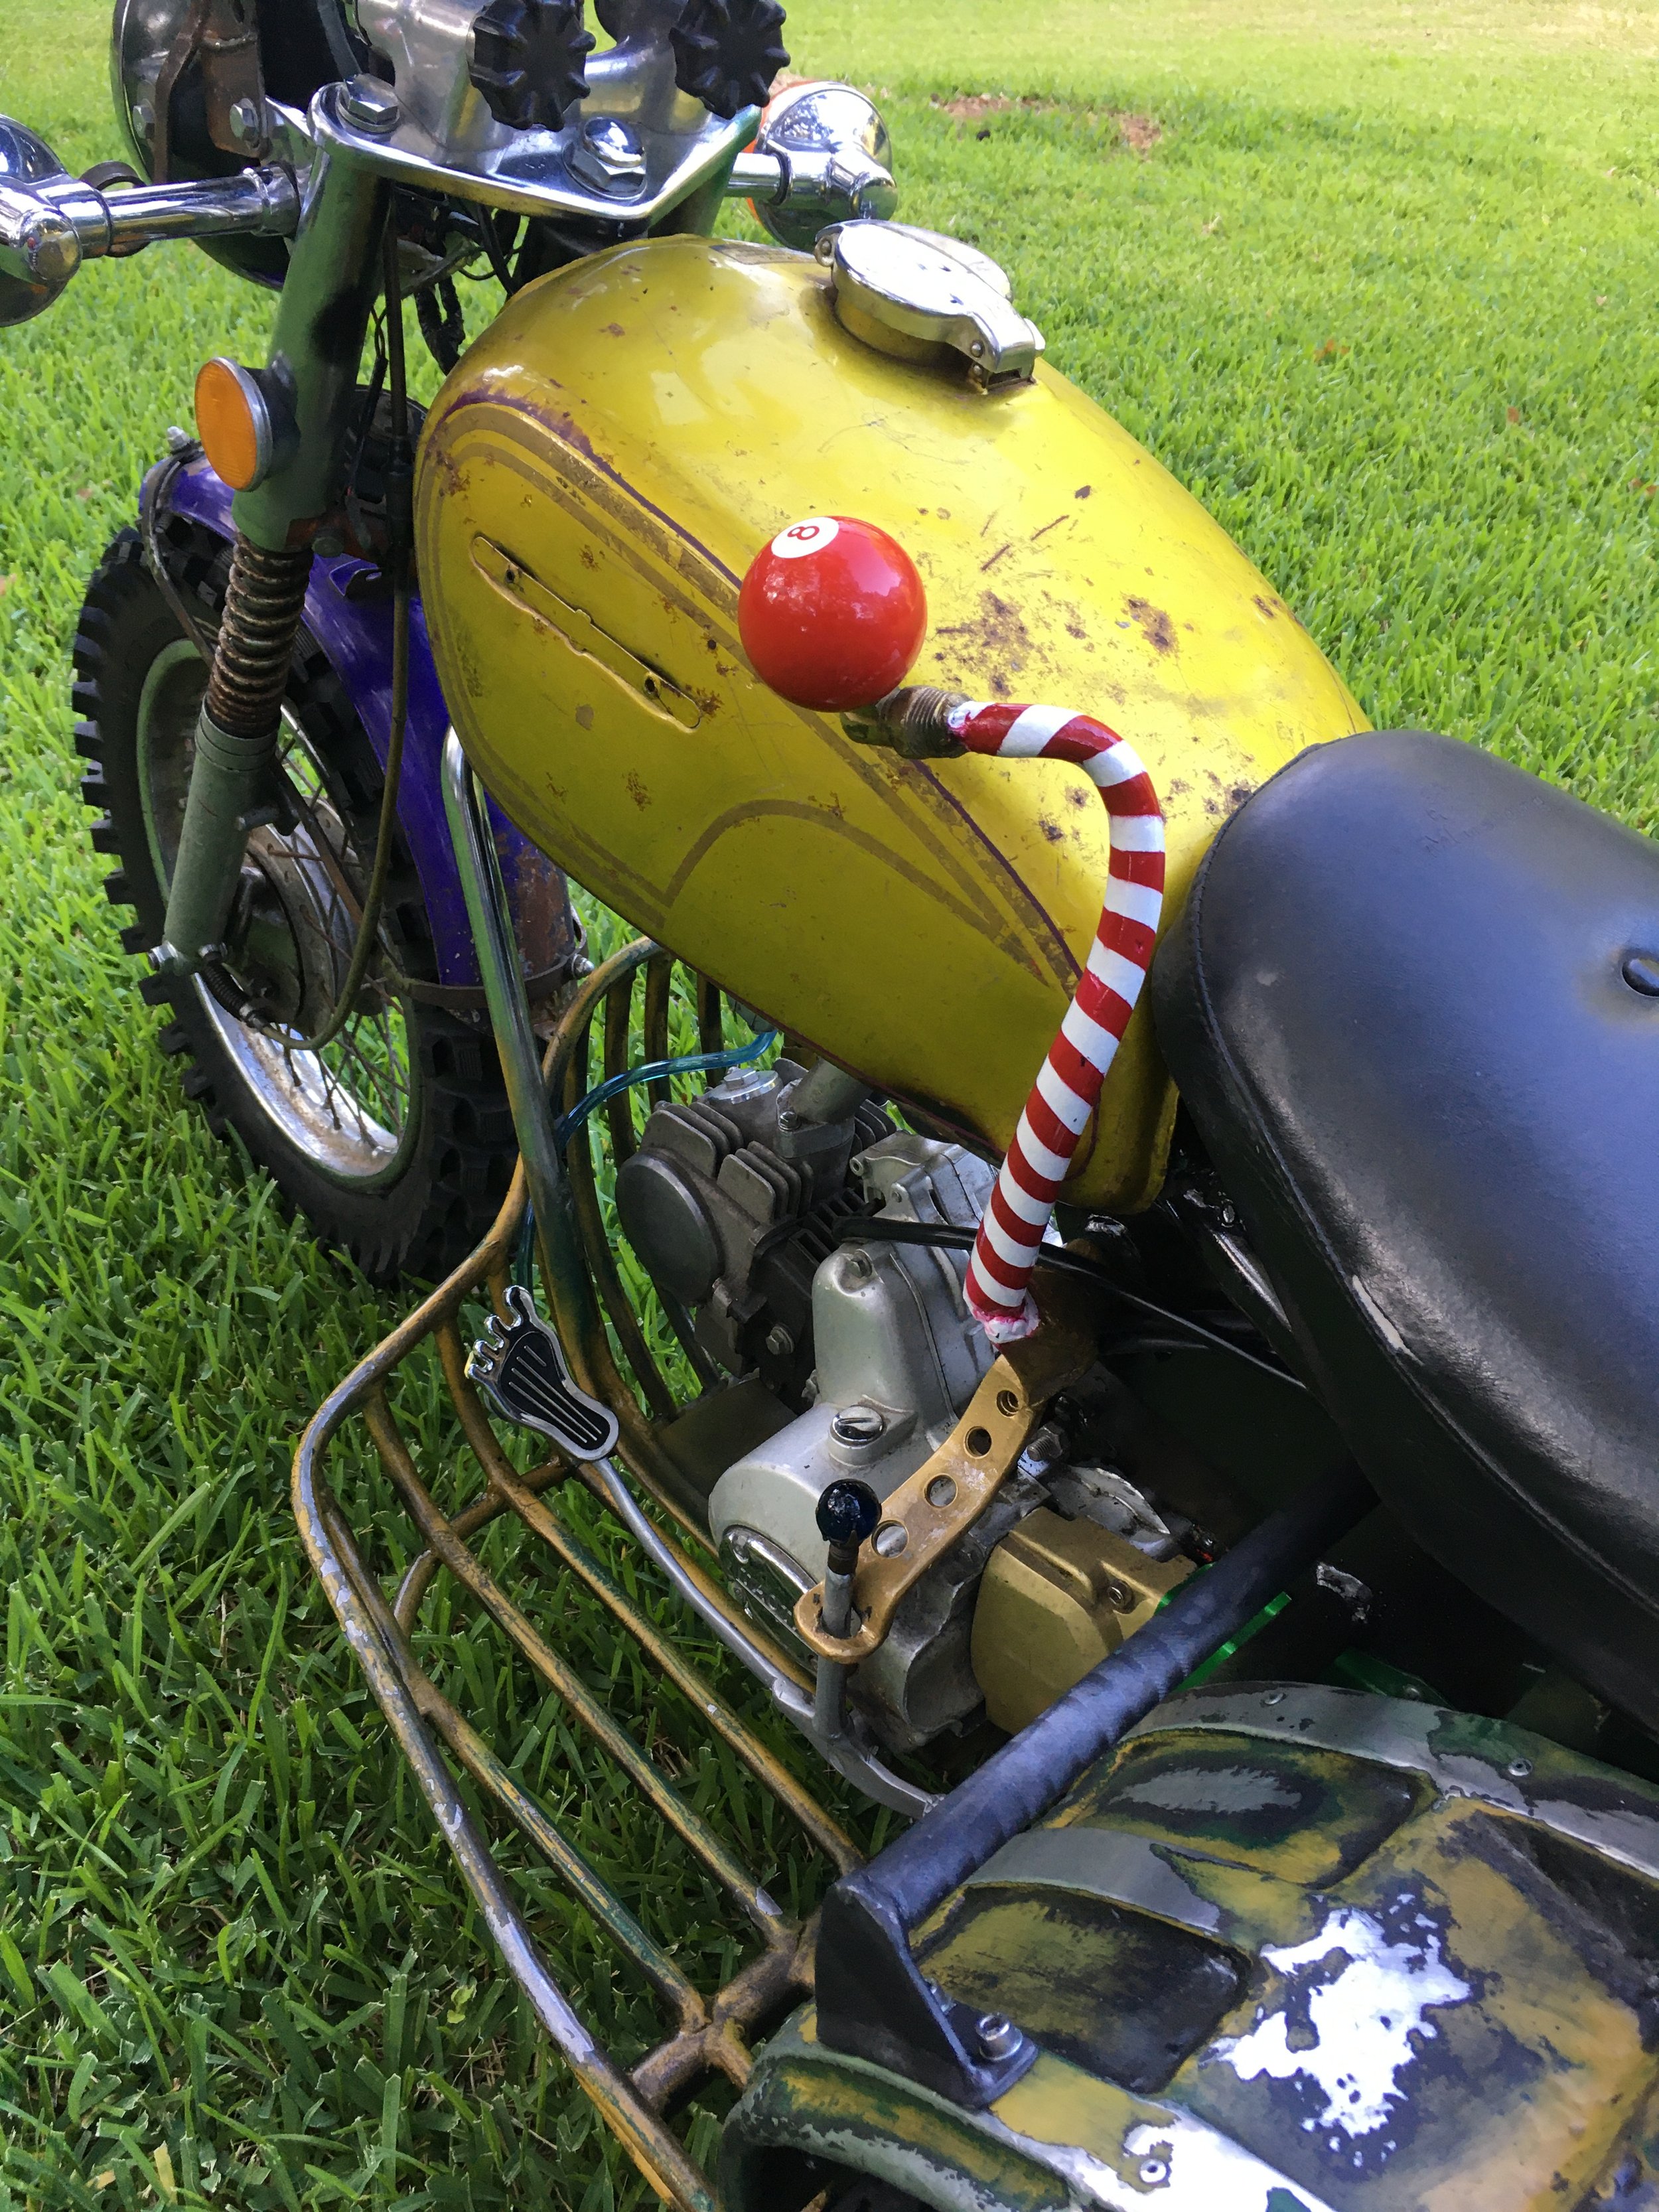
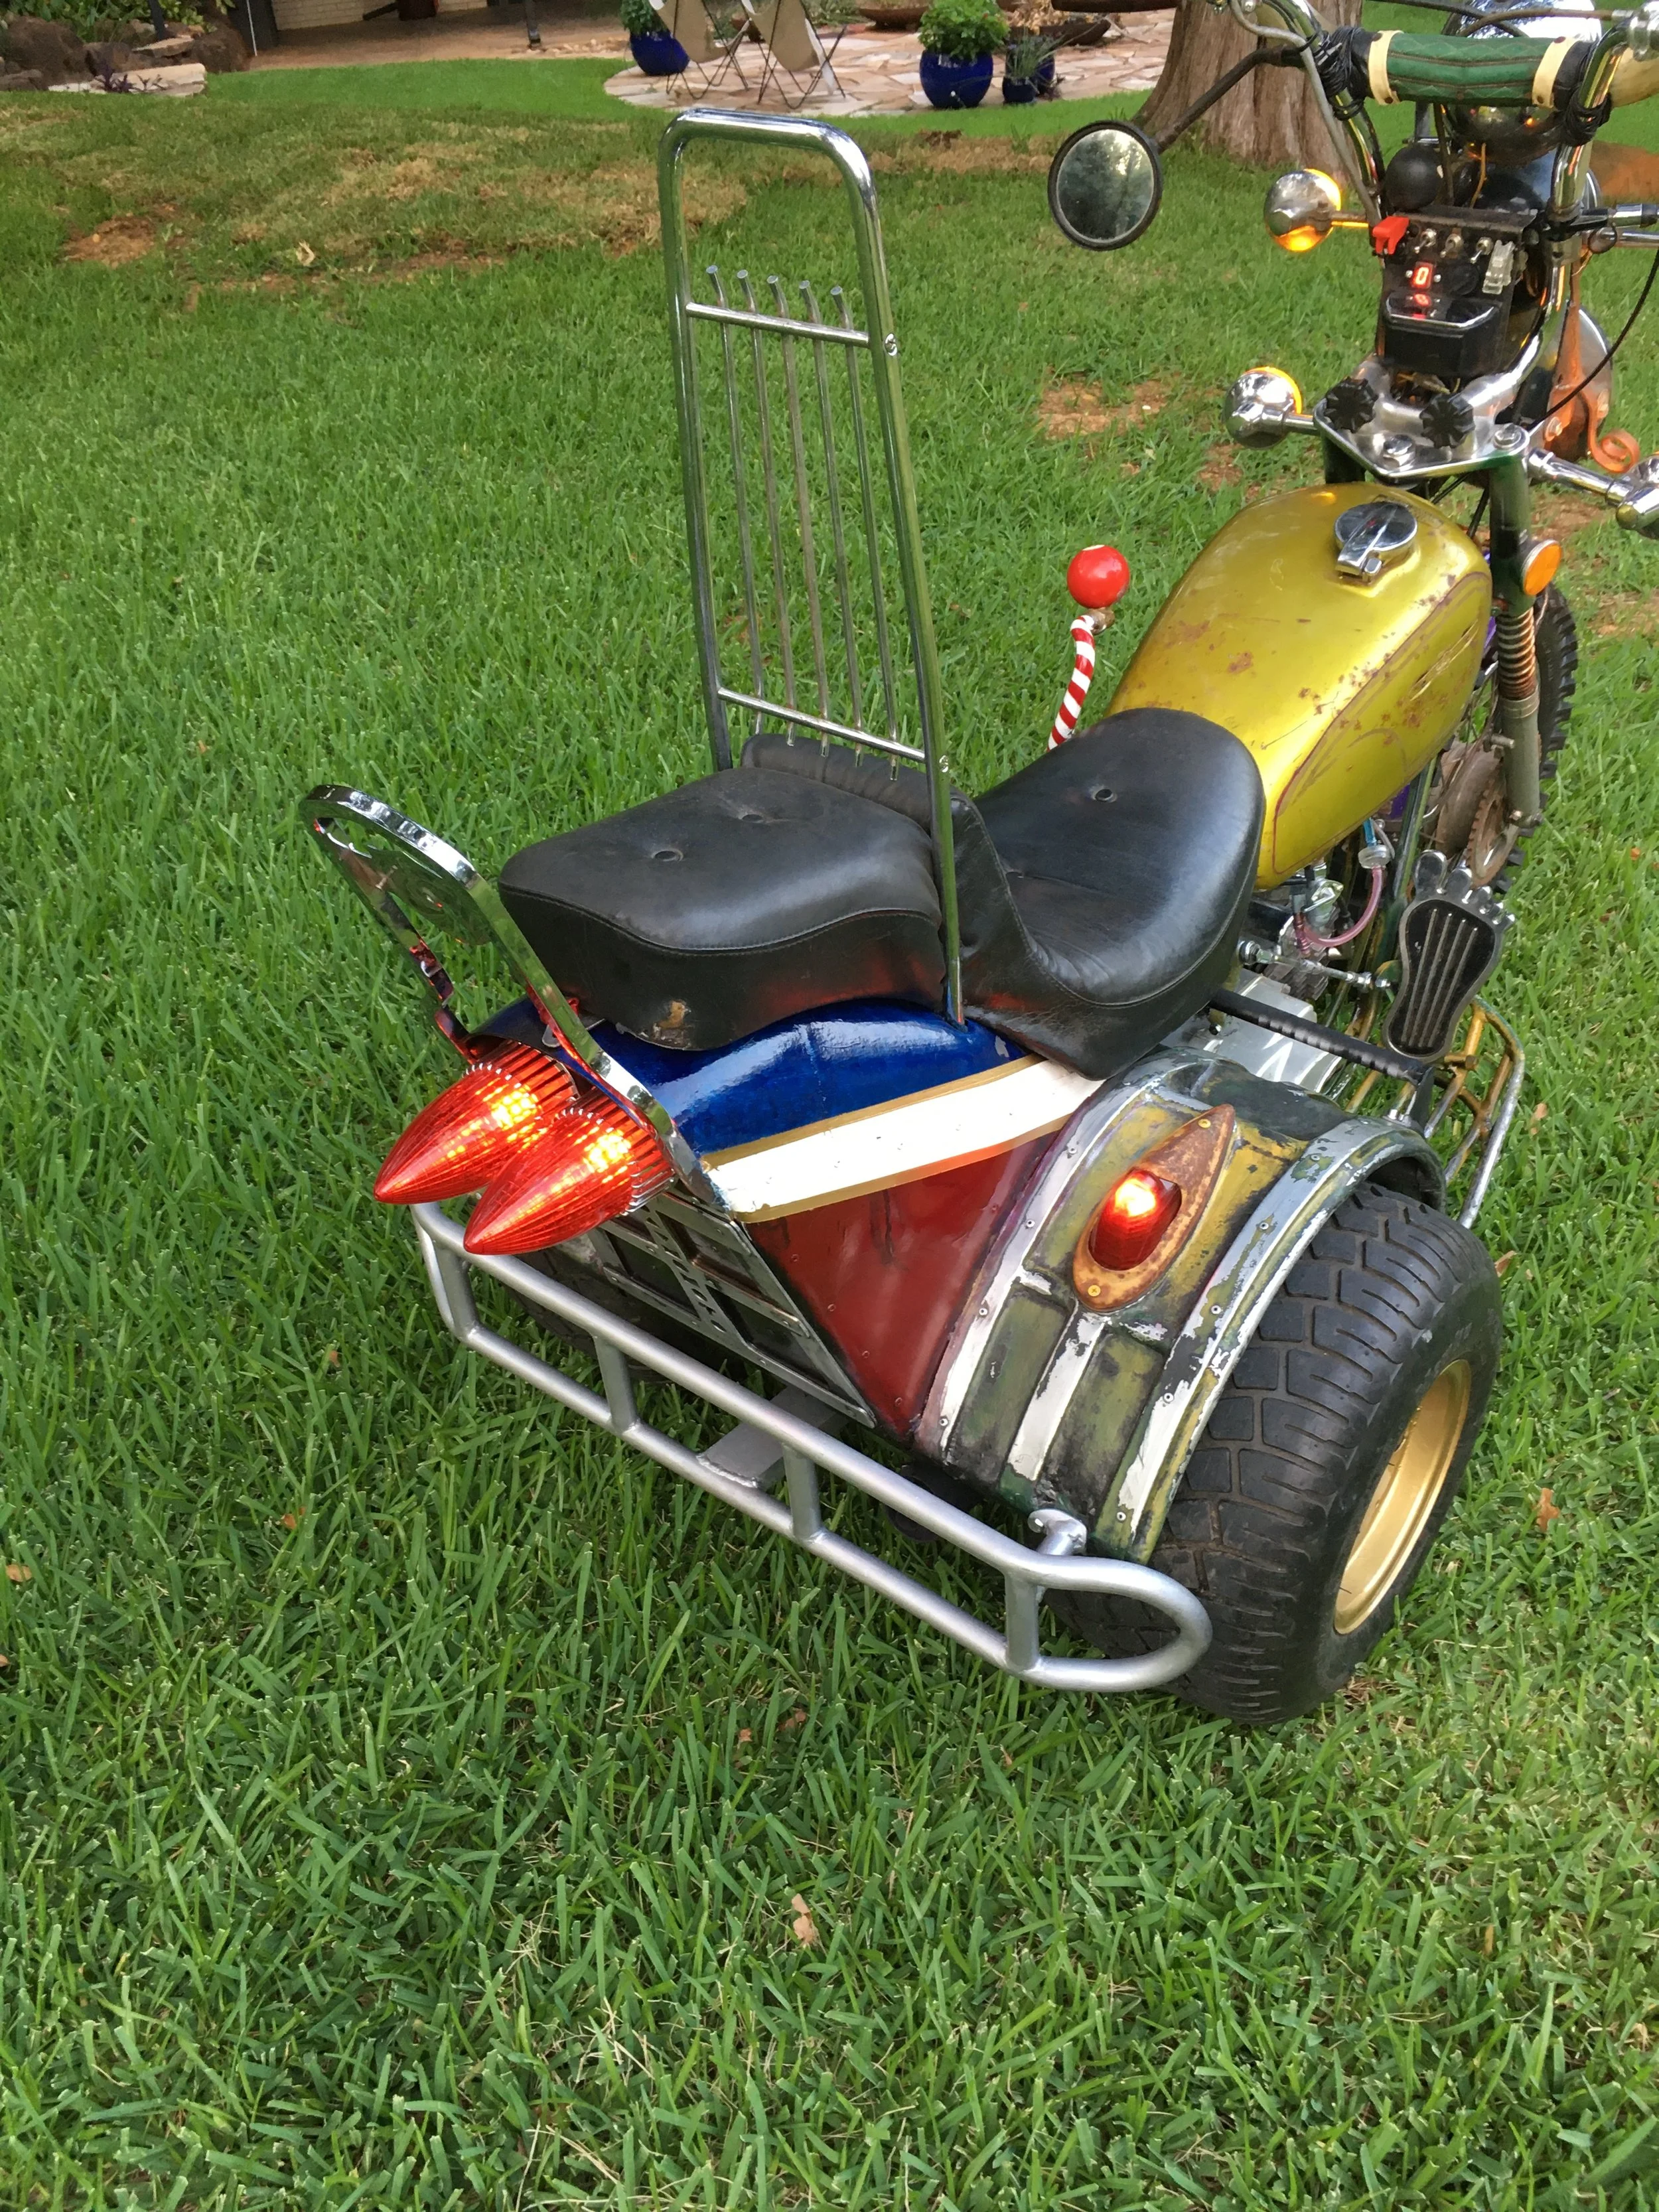
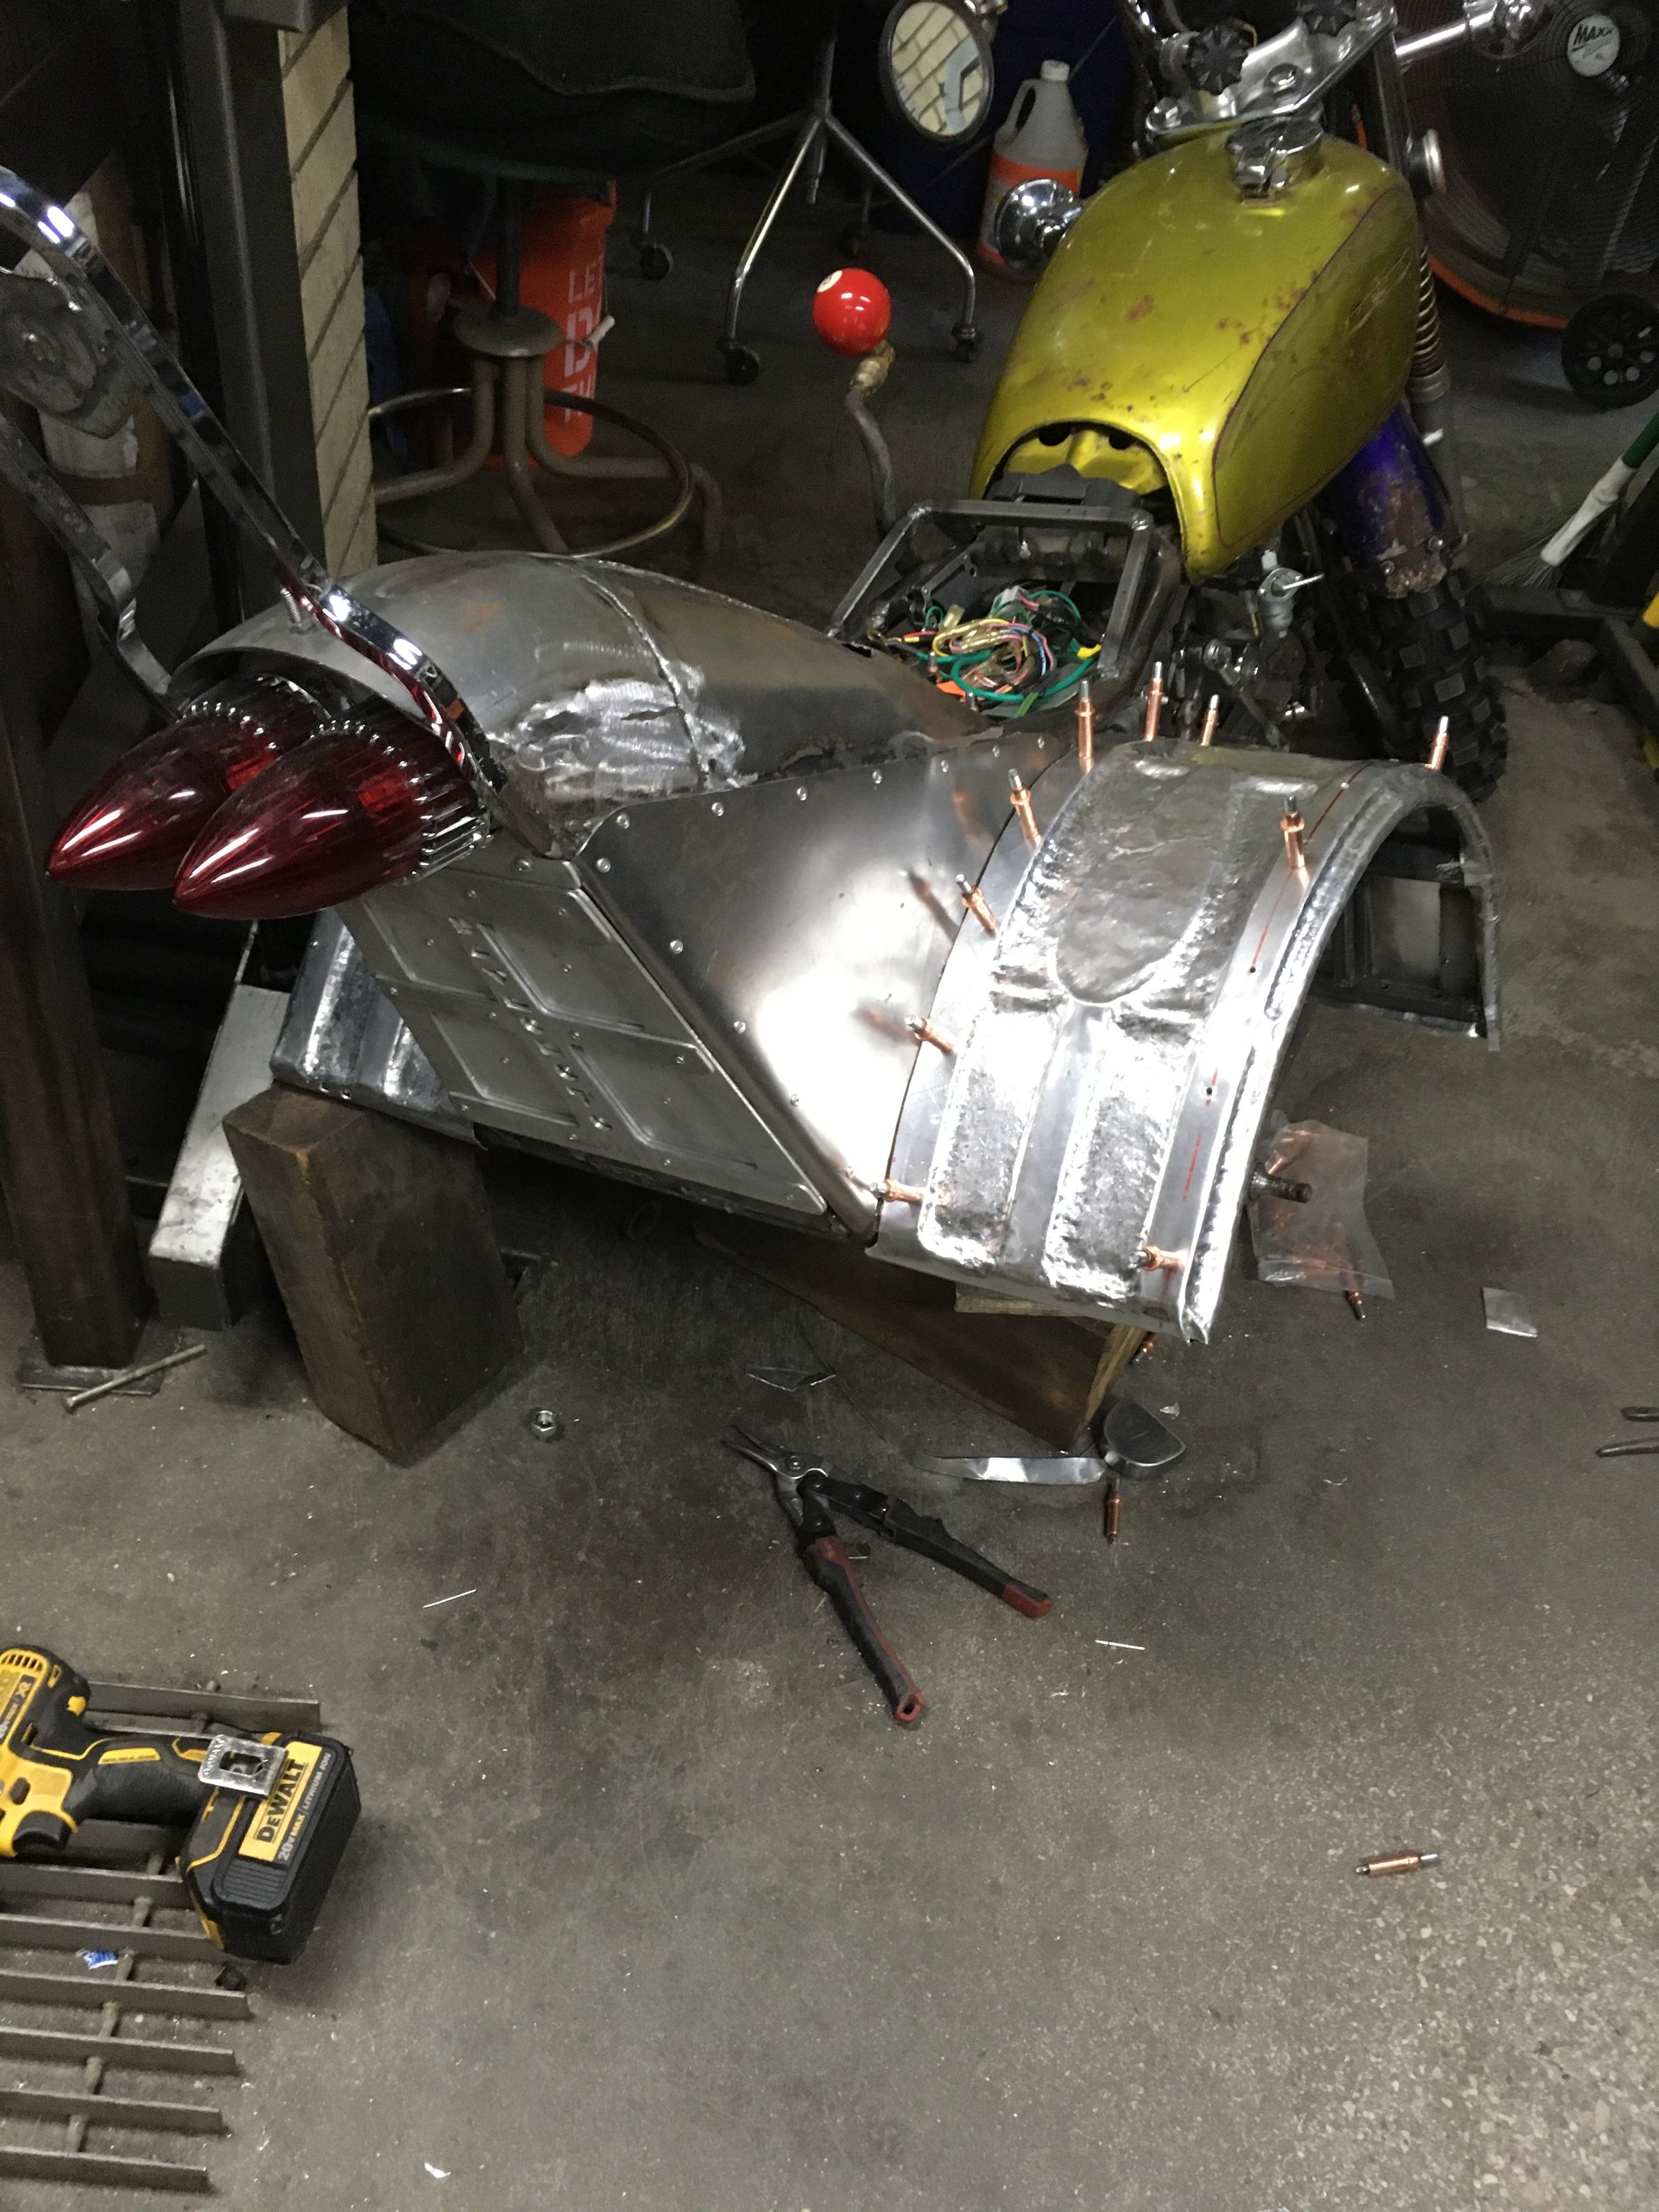
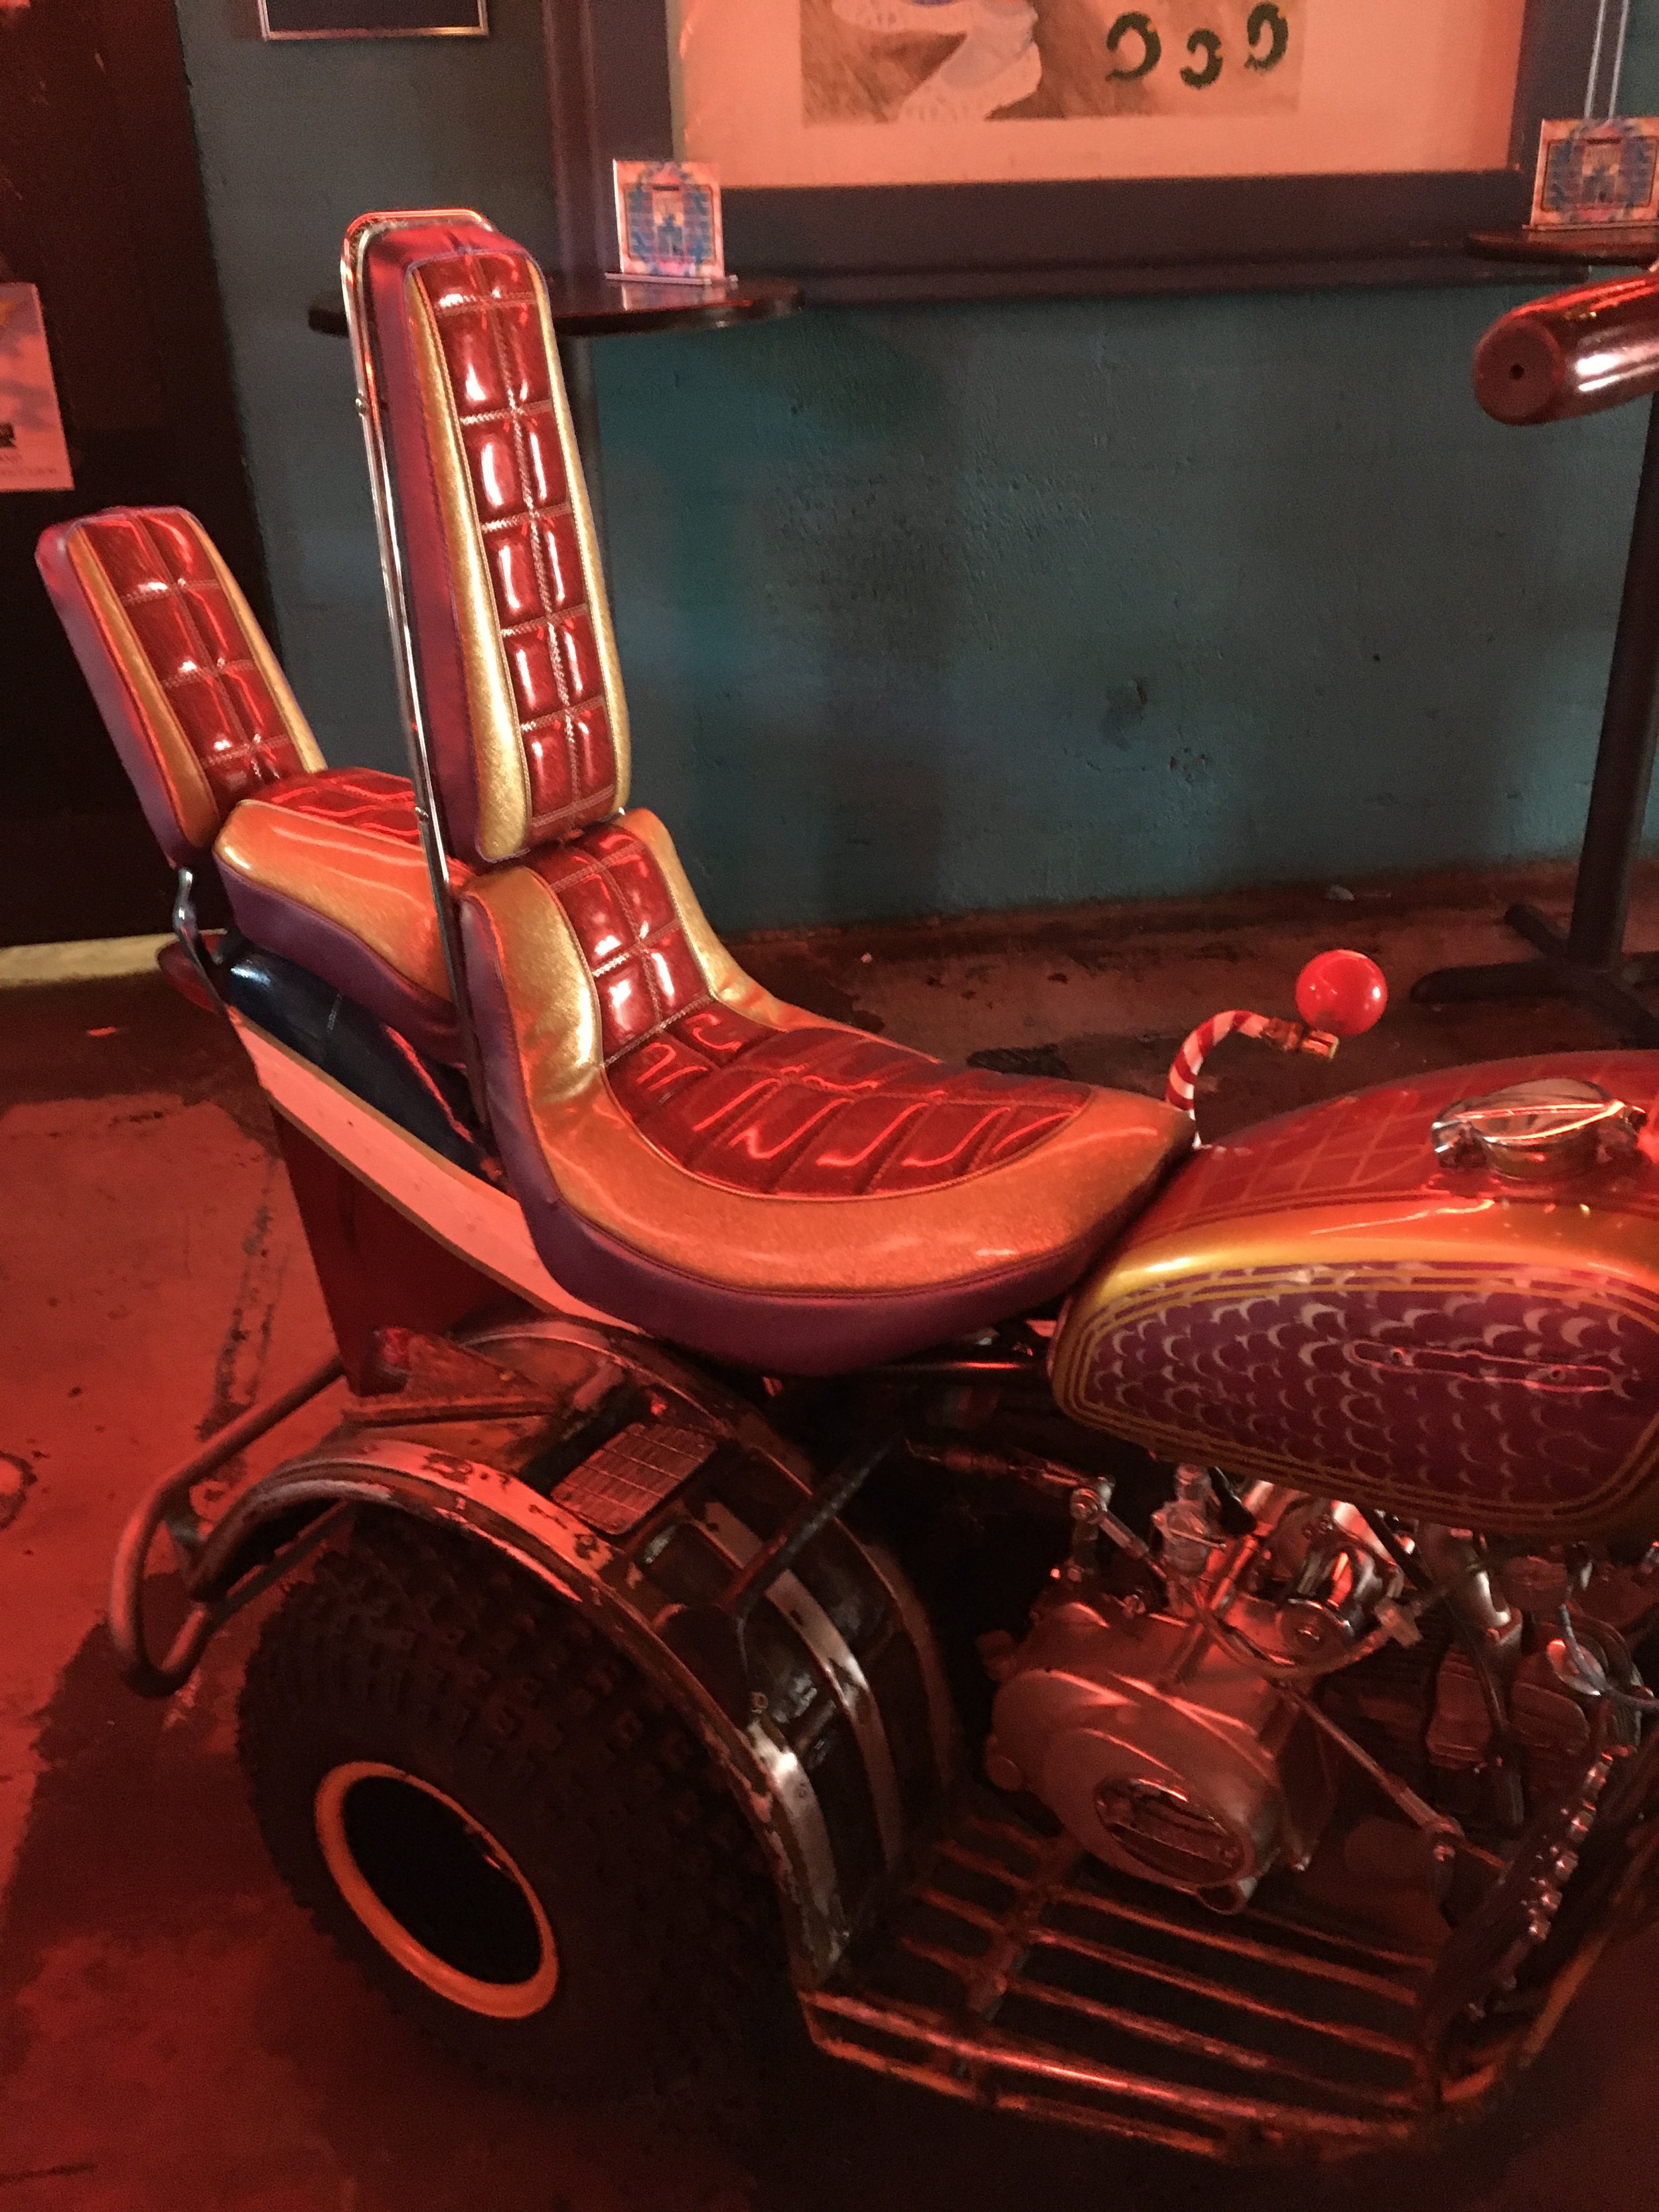
The Tijuana Trike saw some more changes in preparation for the August kick-off of Denton Bike Night. The amazing seat cover by Mobtown Mikey Kneavel out in Weatherford, Texas is the cherry on top.

At Denton Bike Night, hamming it up for the camera. Photo by RWD Designs.

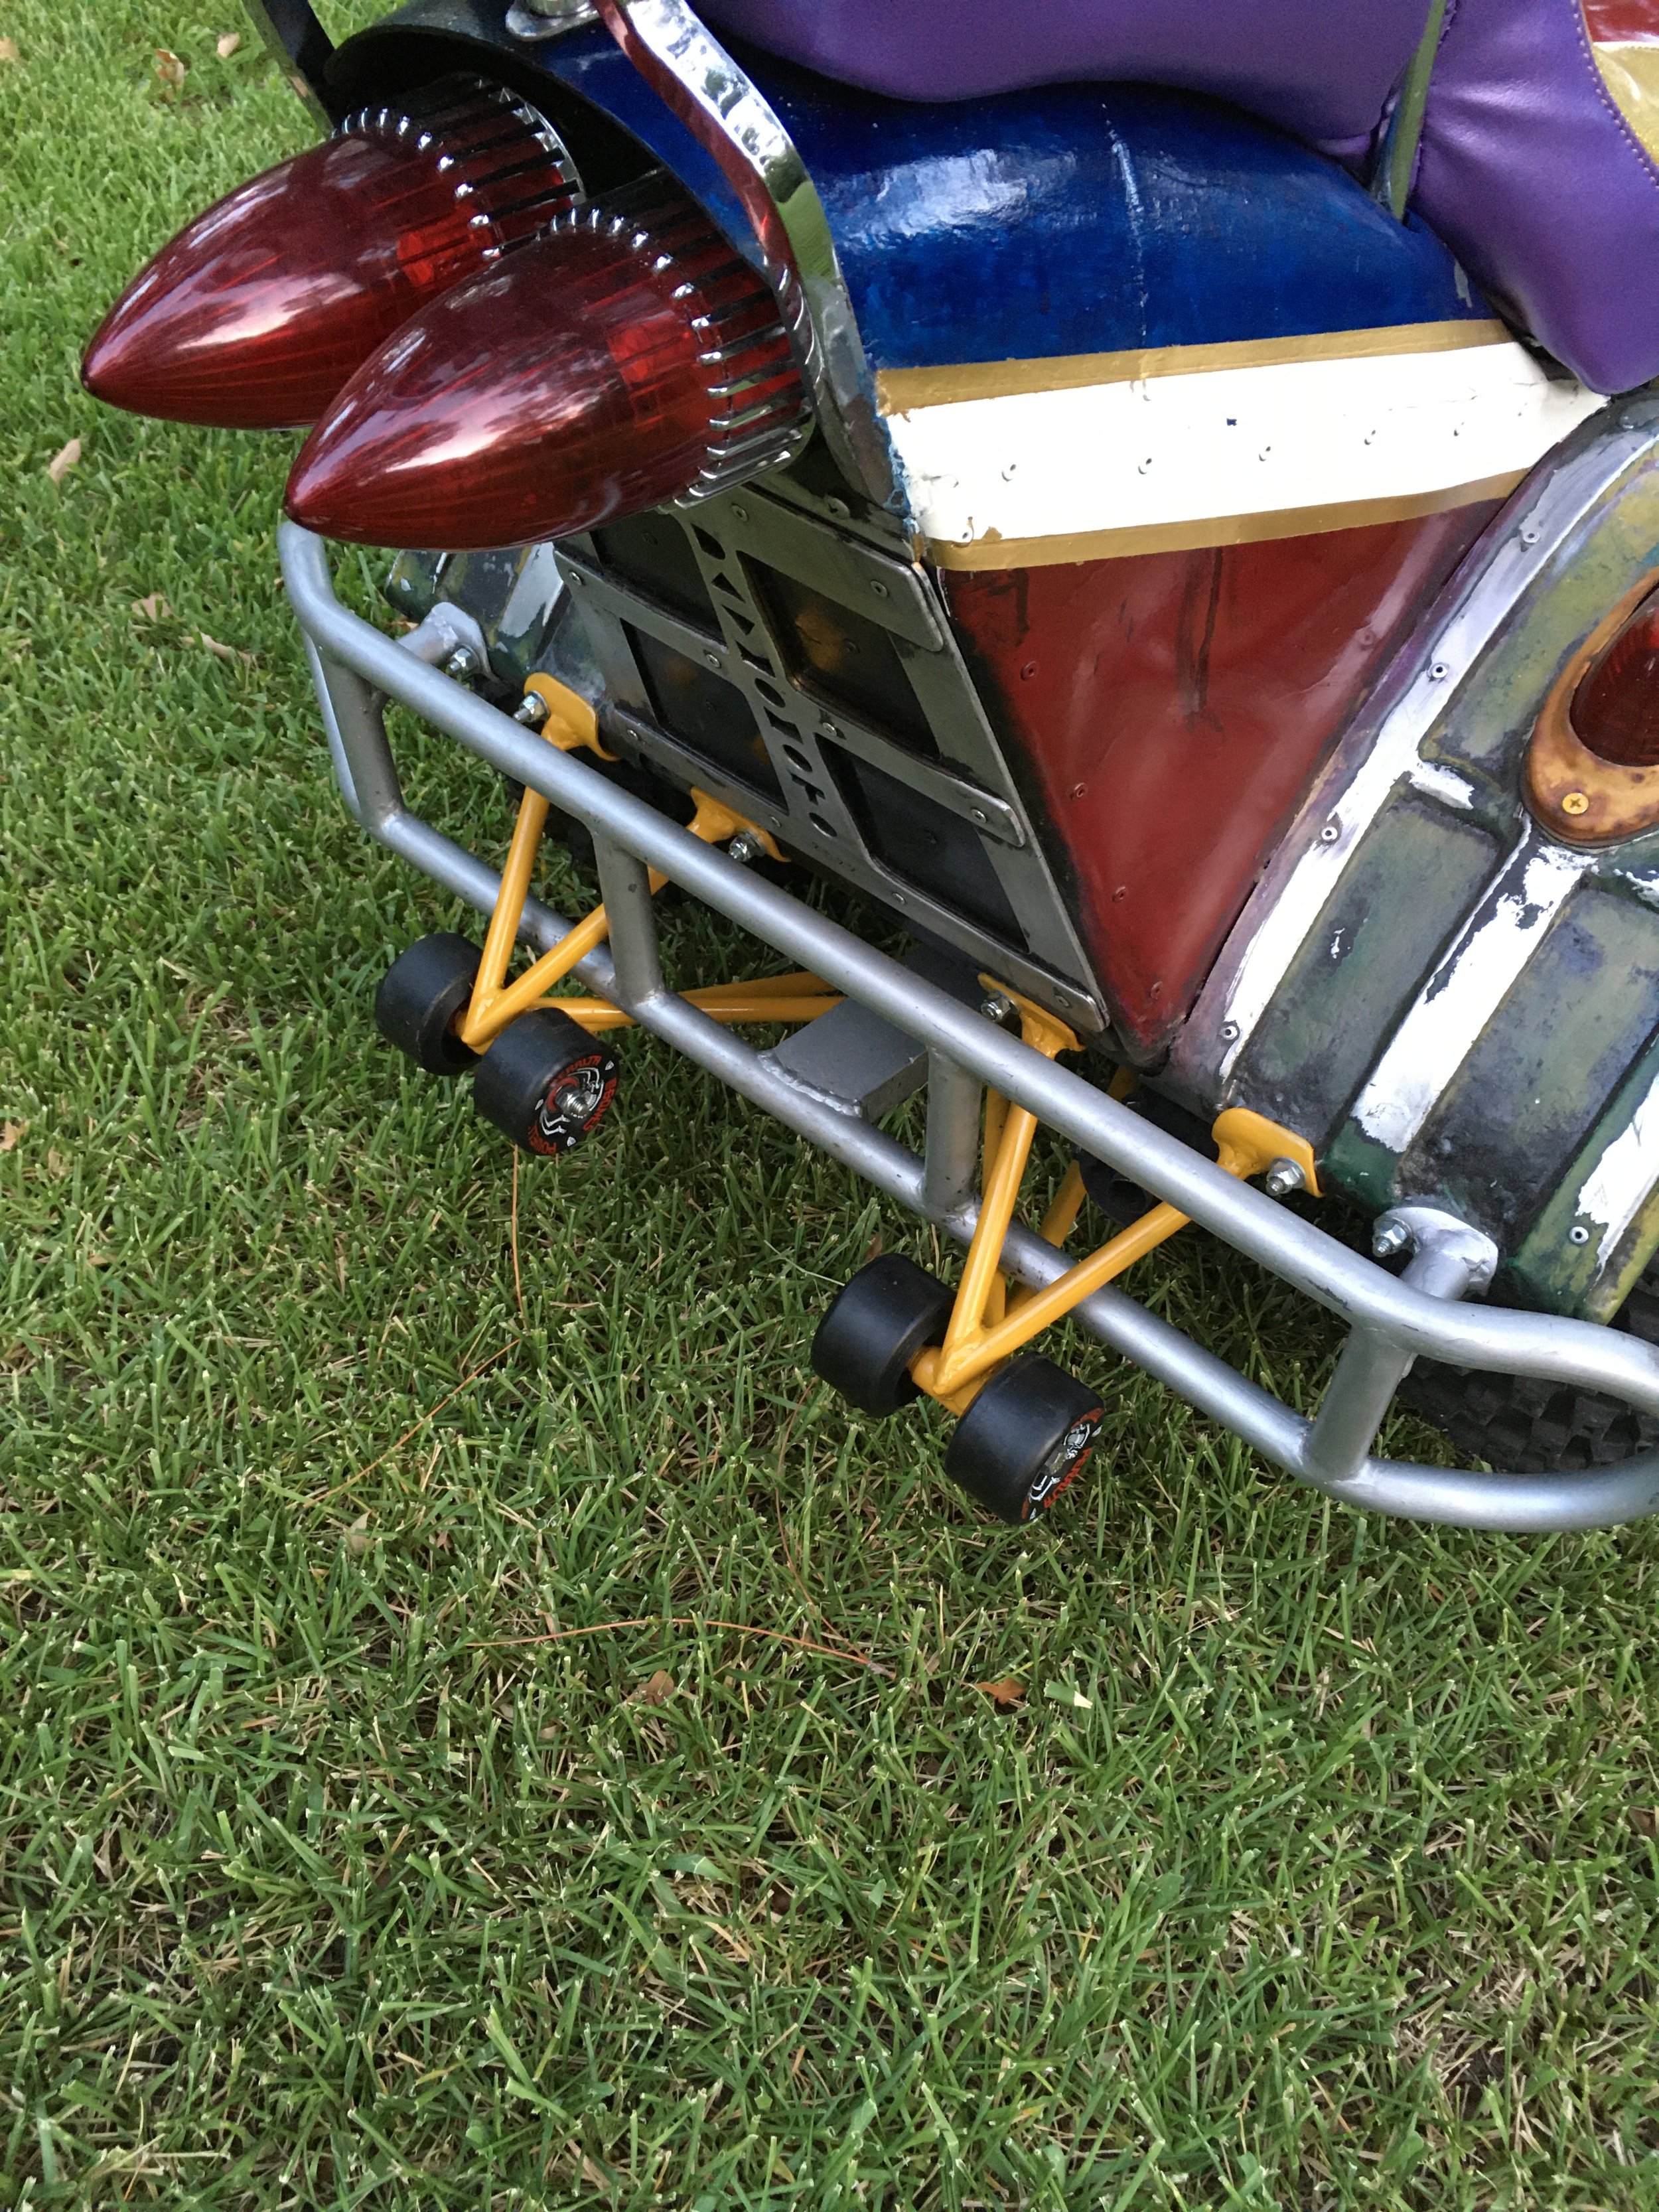
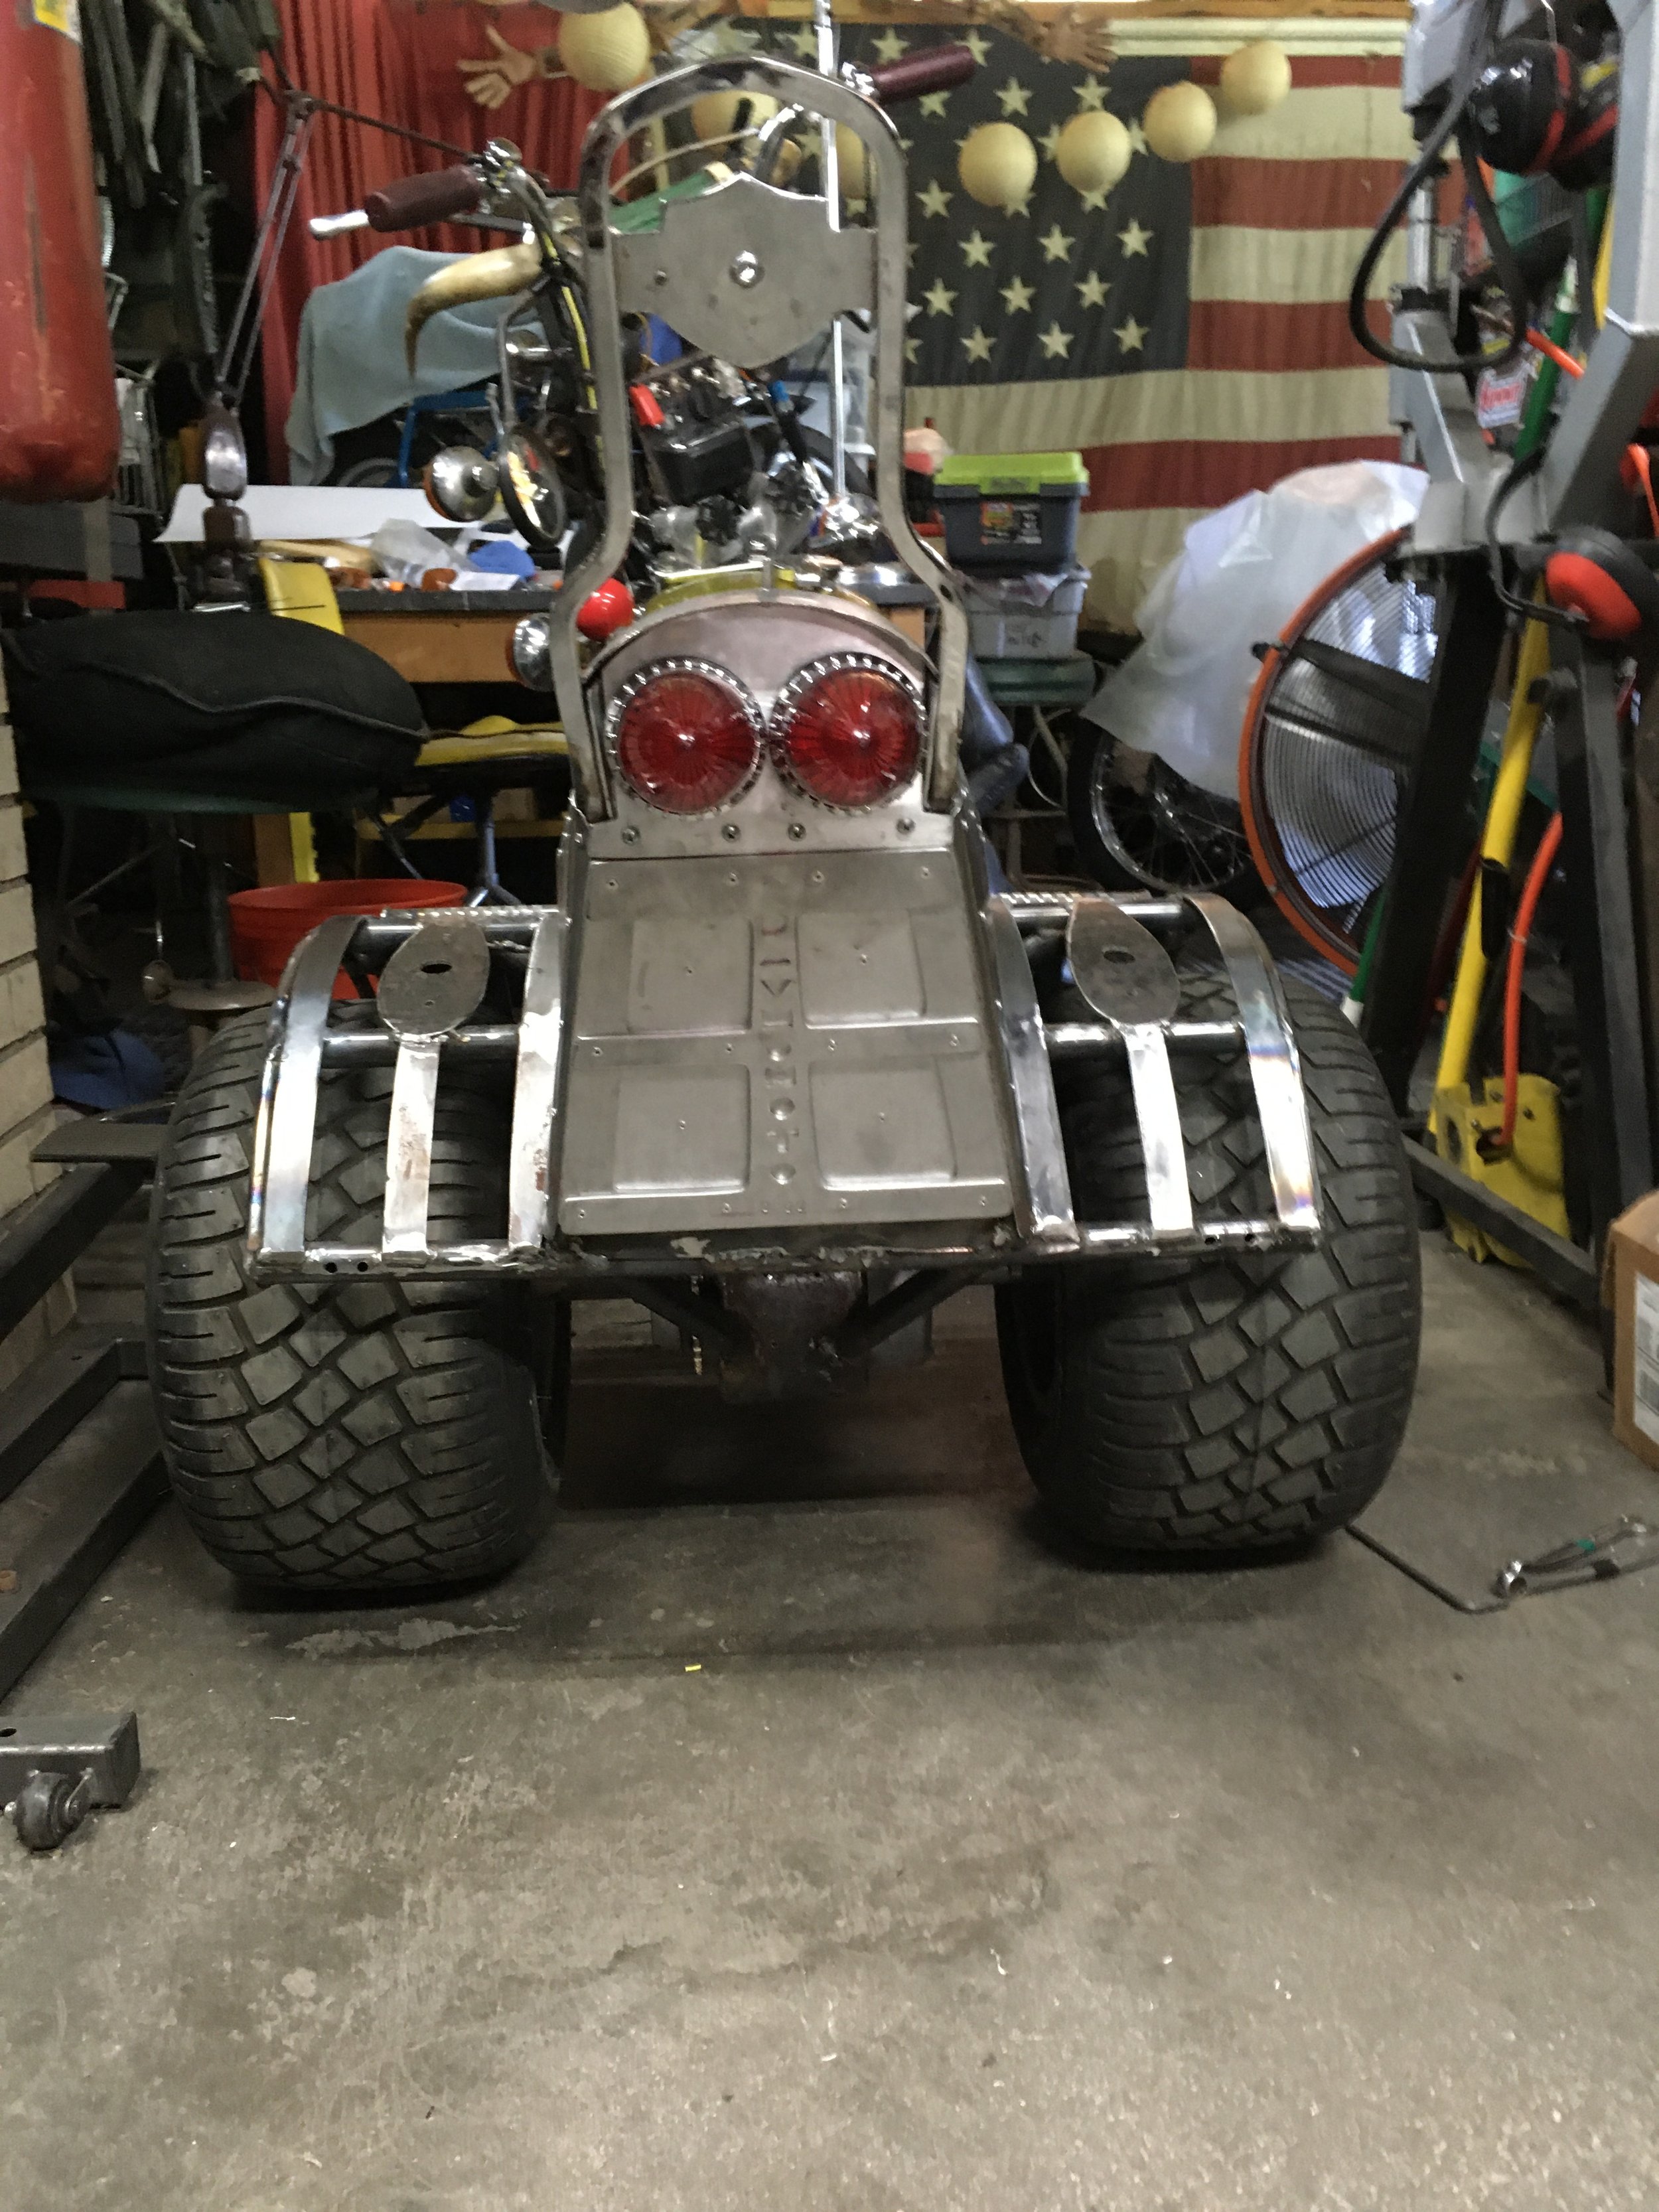
A set of skateboard wheels was used to make a wheelie bar. With a rider on the rear, it is expected to wheelie easily. Whoever is on back needs to be small and agile. I am thinking like the “monkey” position in sidecar racing, where they use their weight strategically to keep things in balance.

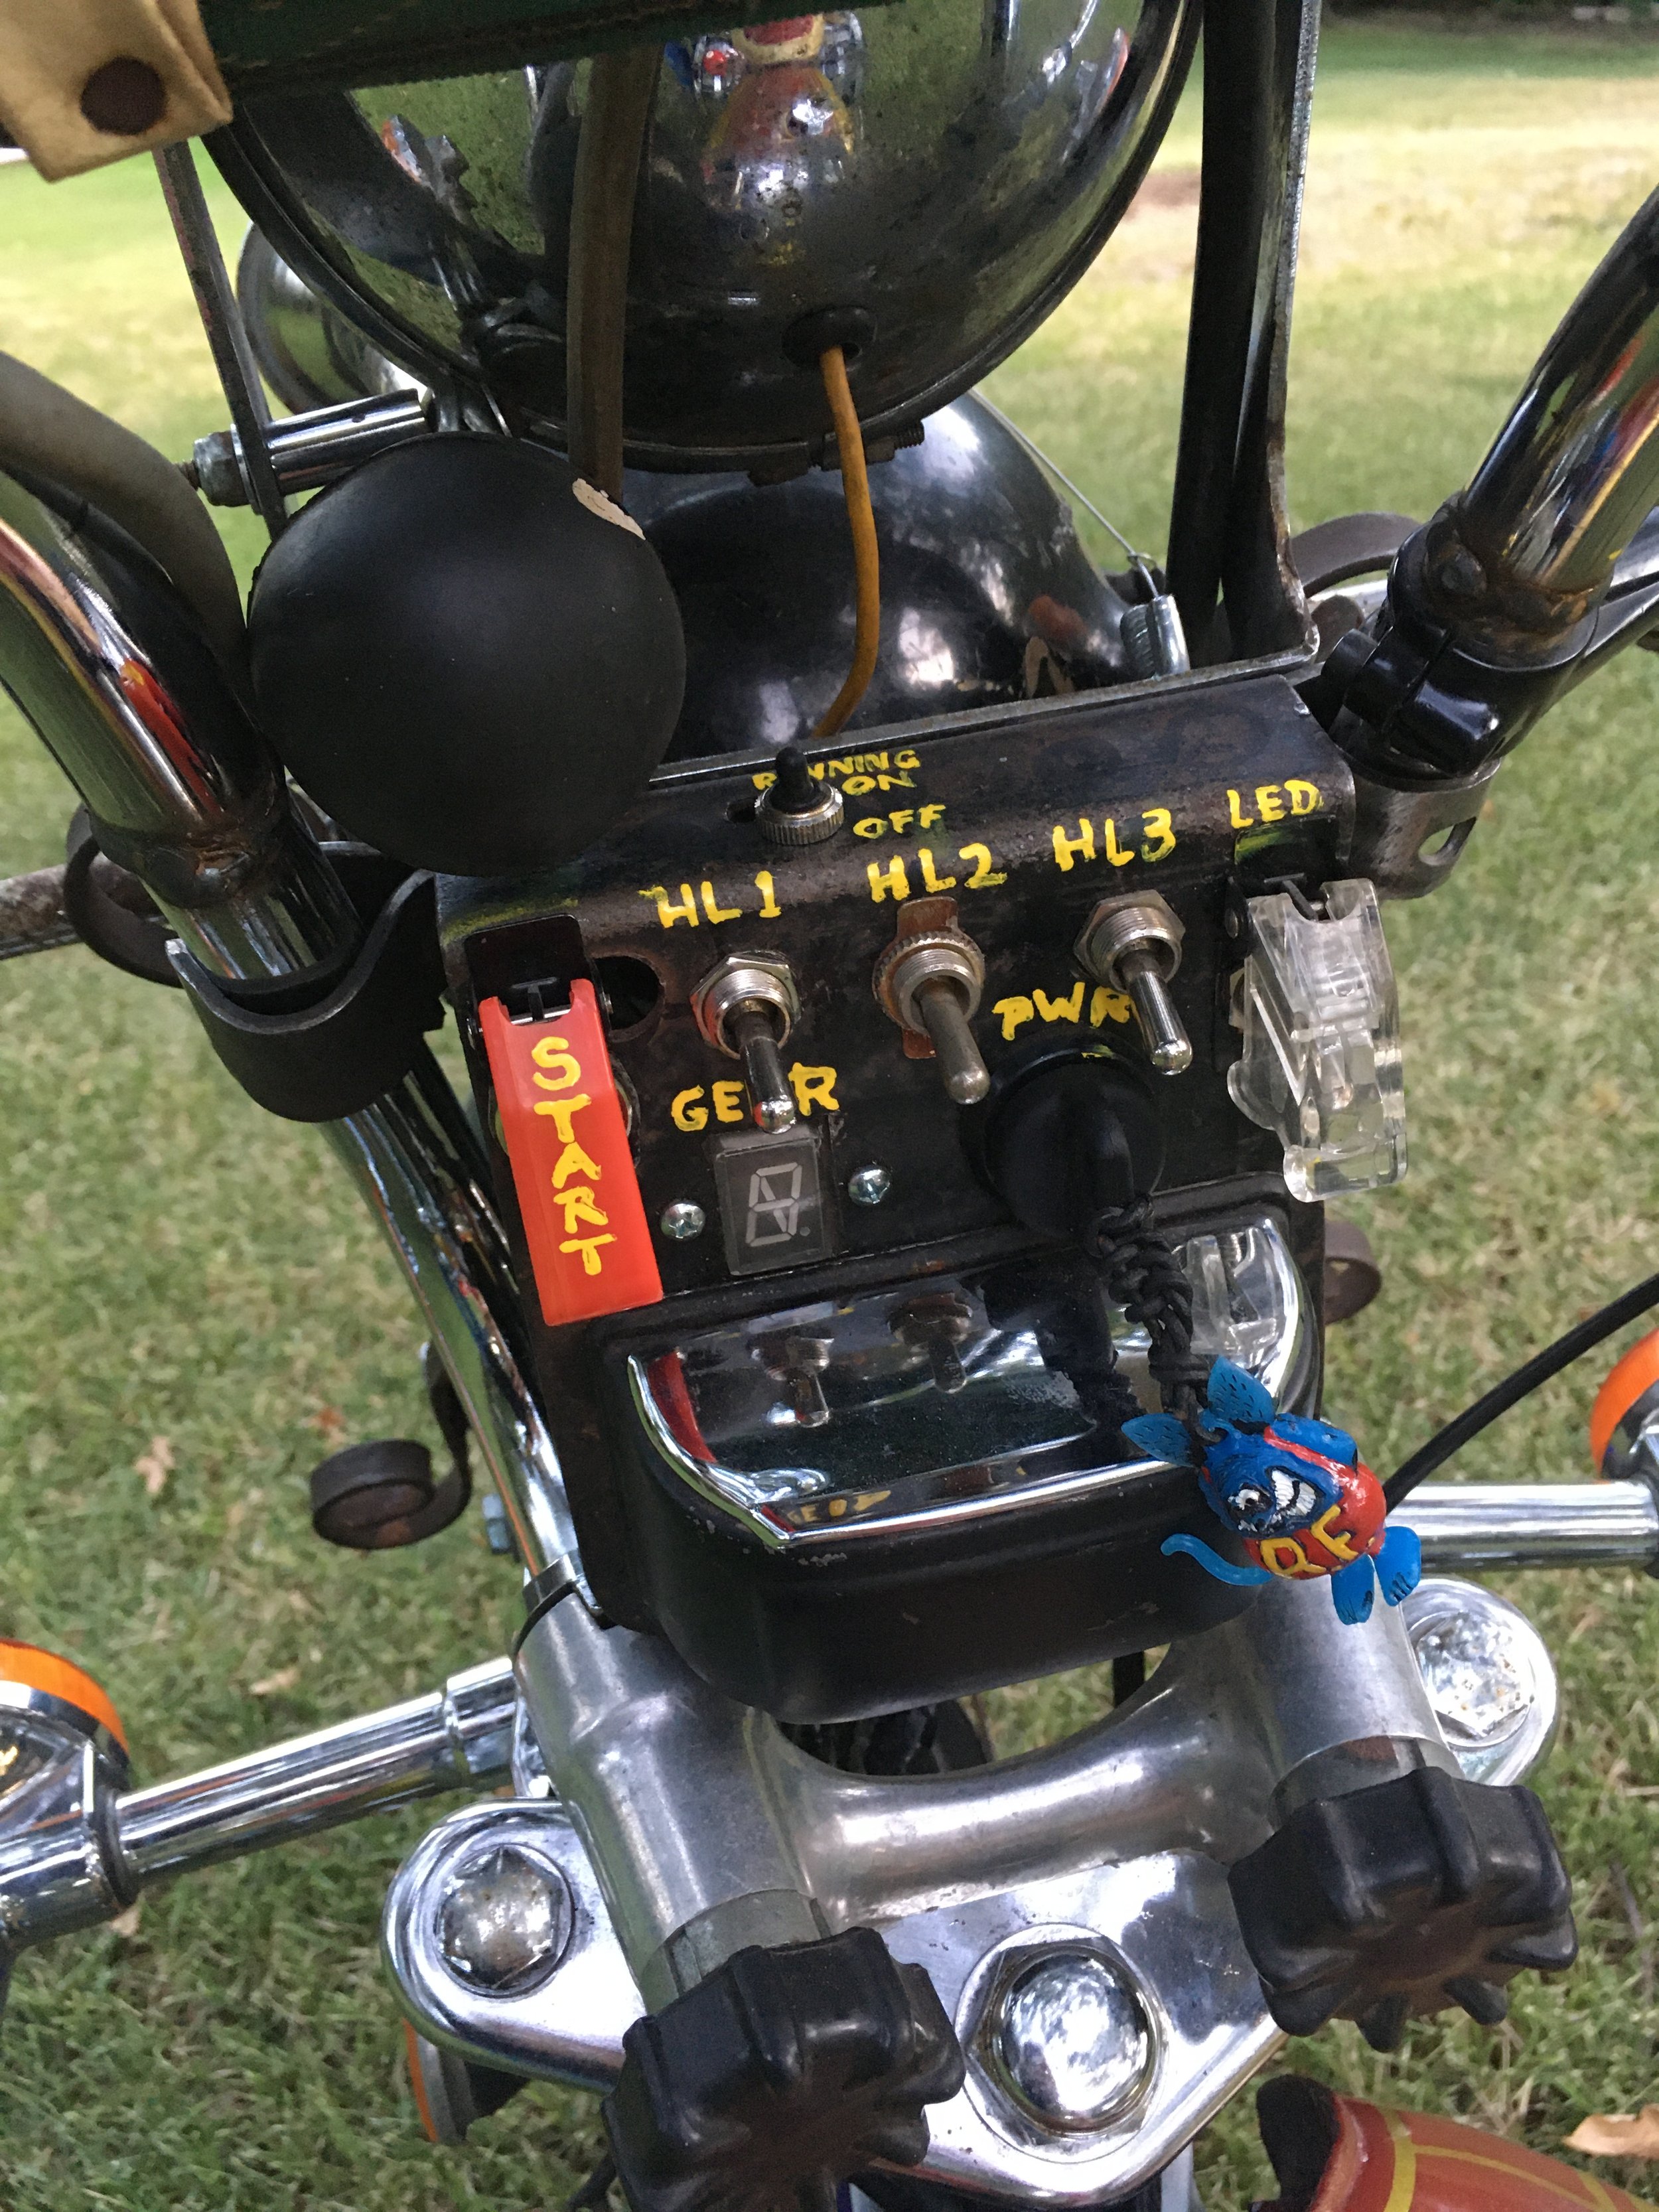
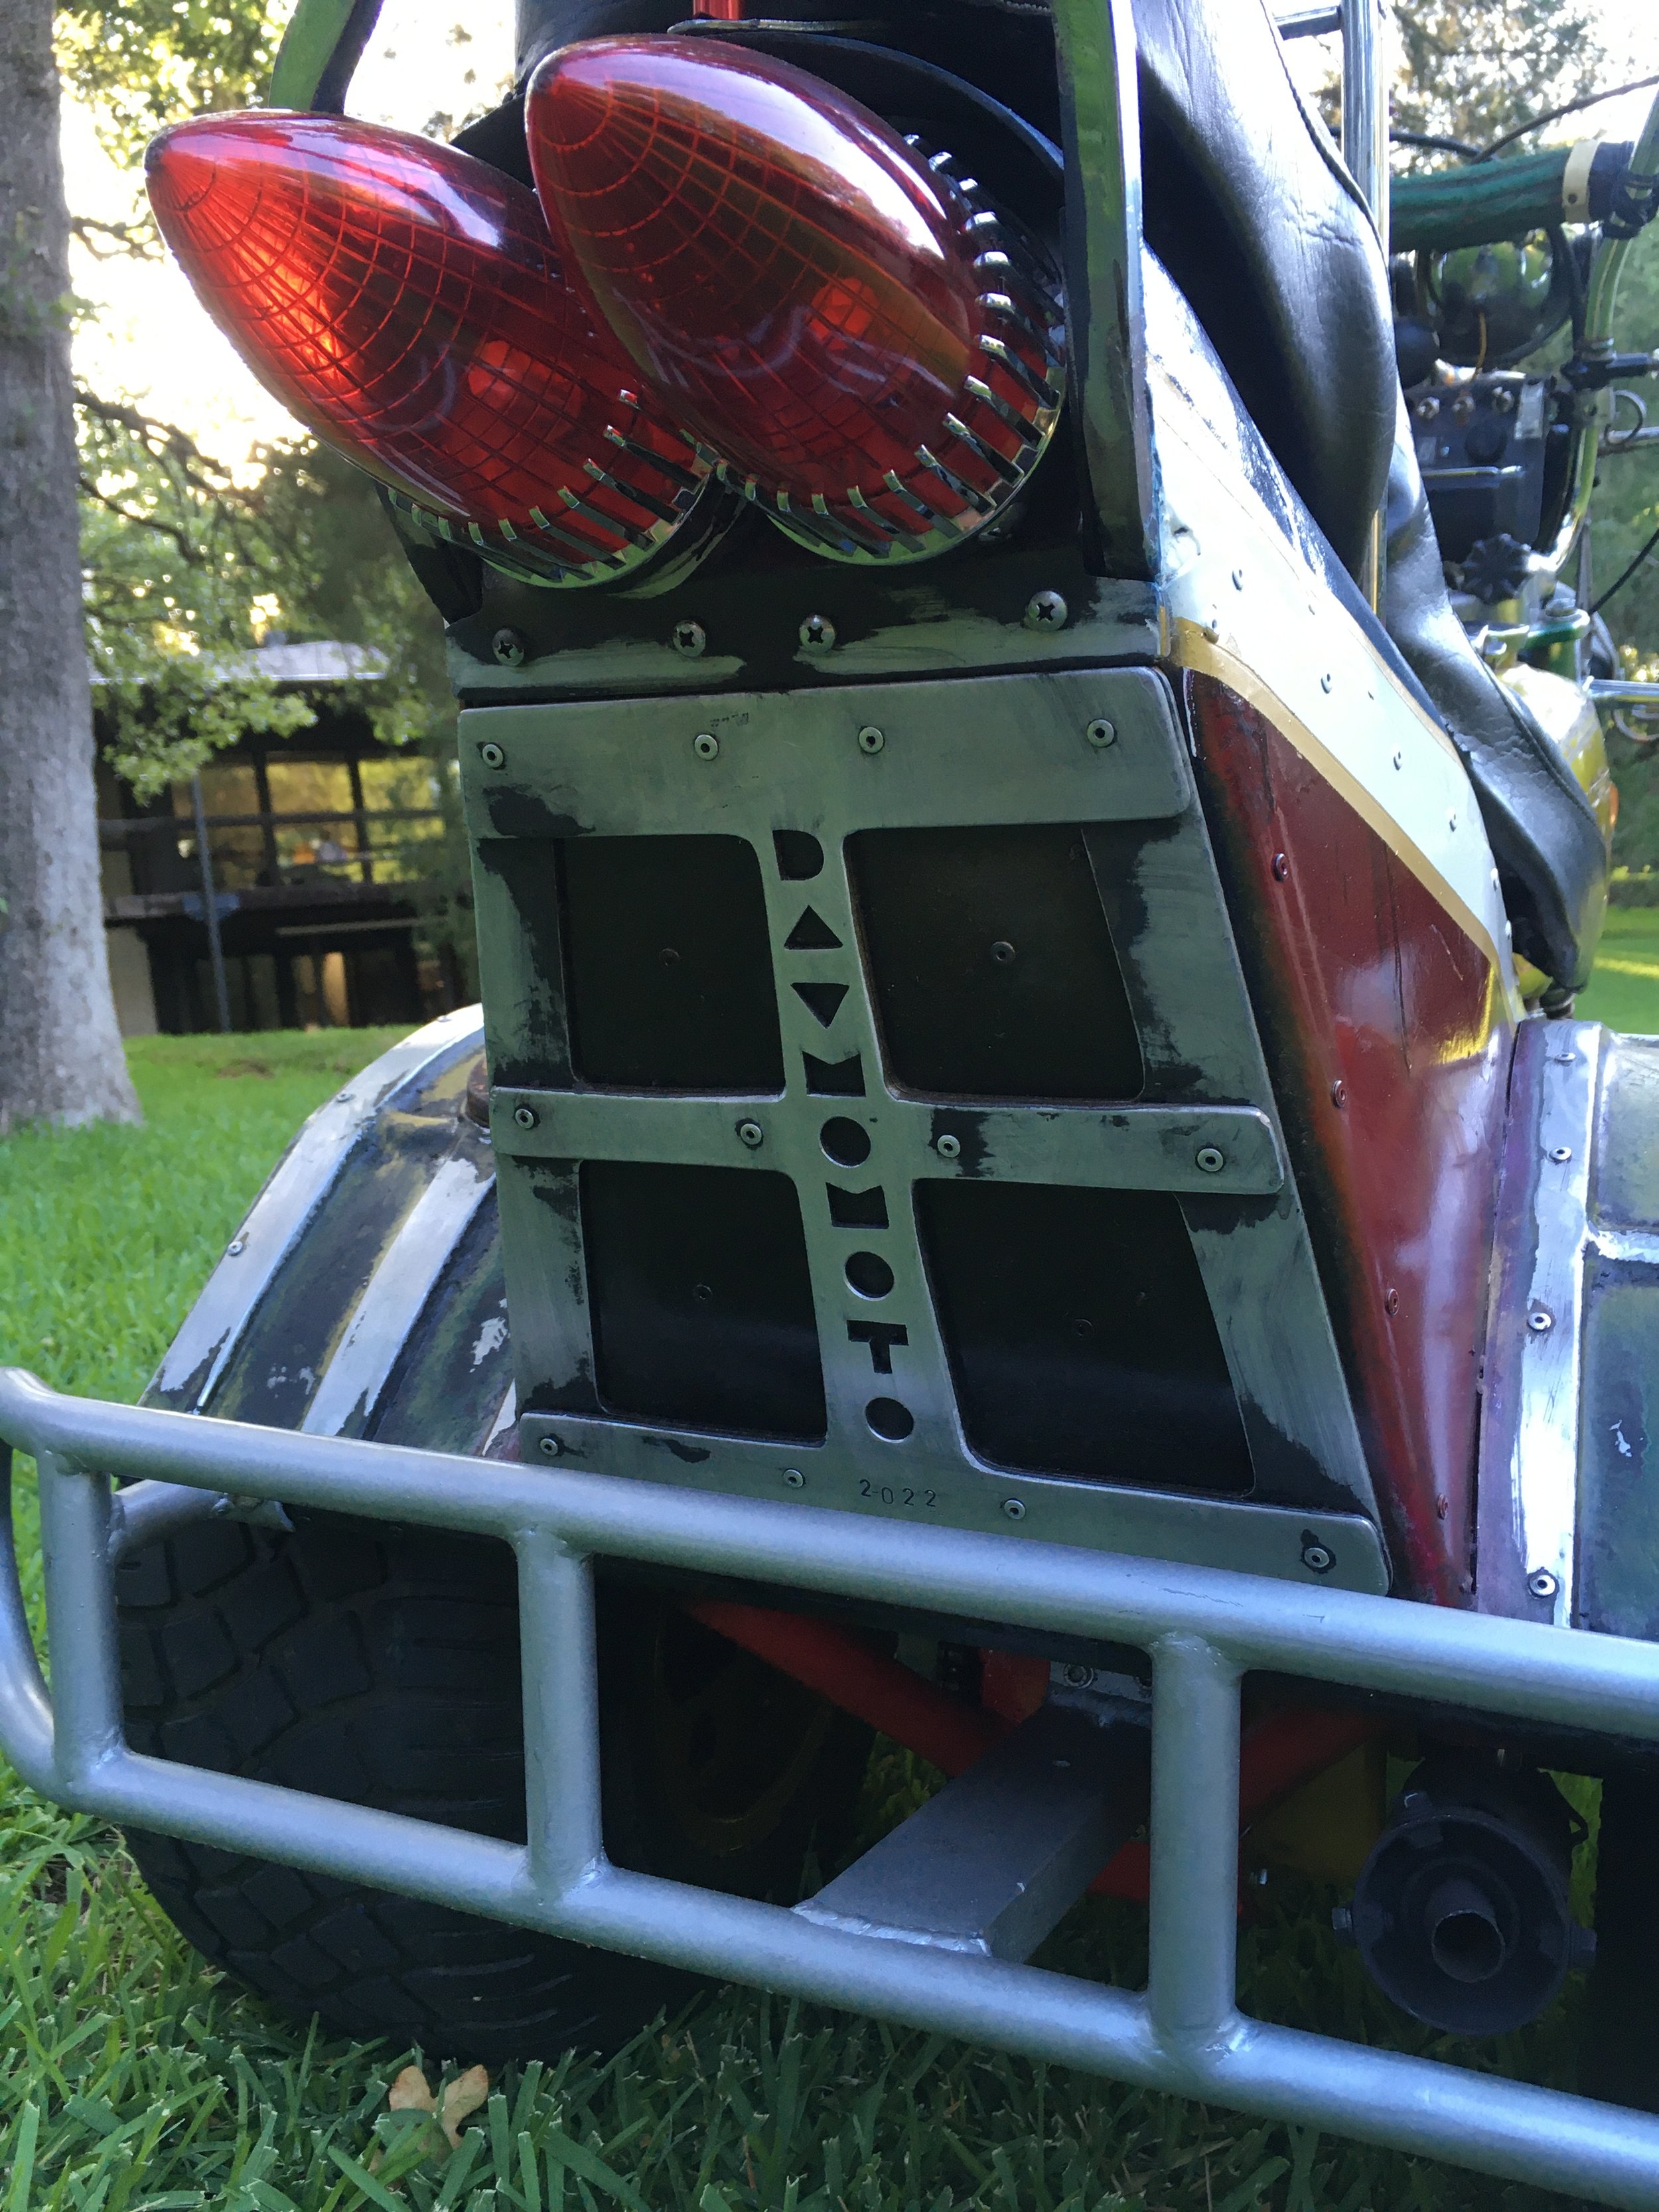
Pretty self explanatory, the dash houses switches for the running lights, head lights, LED ground effects, engine start, ignition , a gear position indicator, and cigarette butt receptacle.

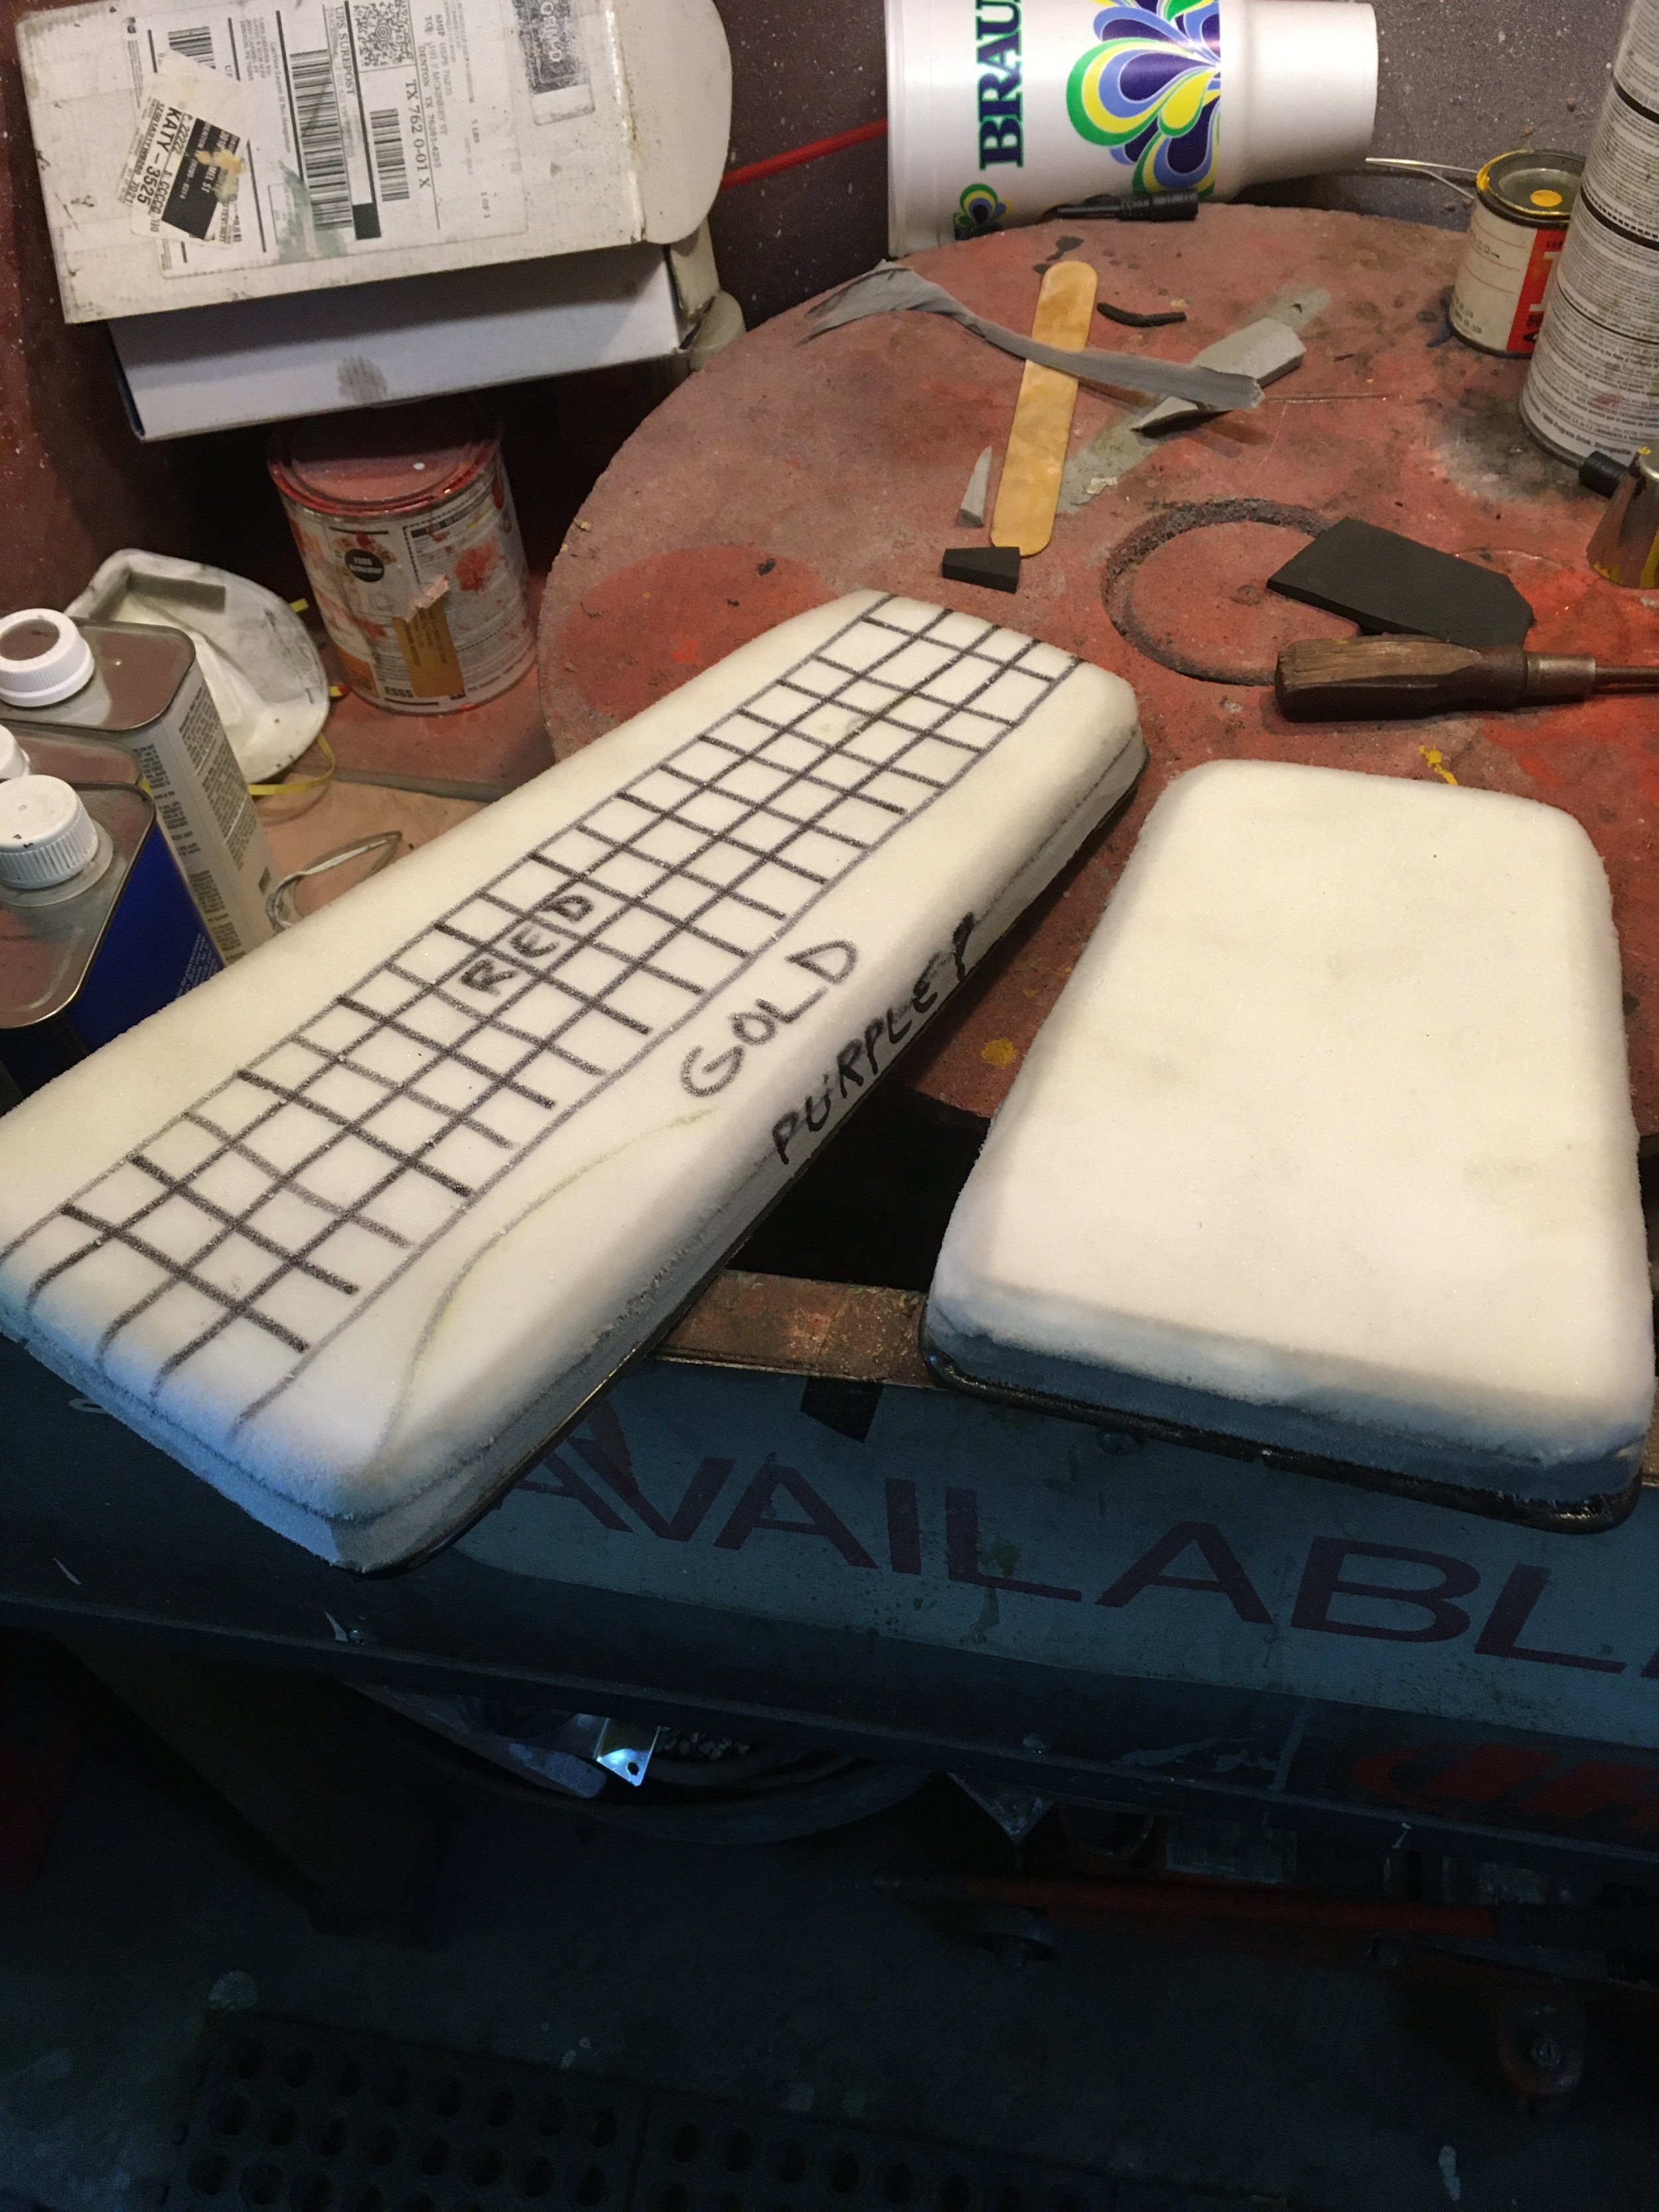
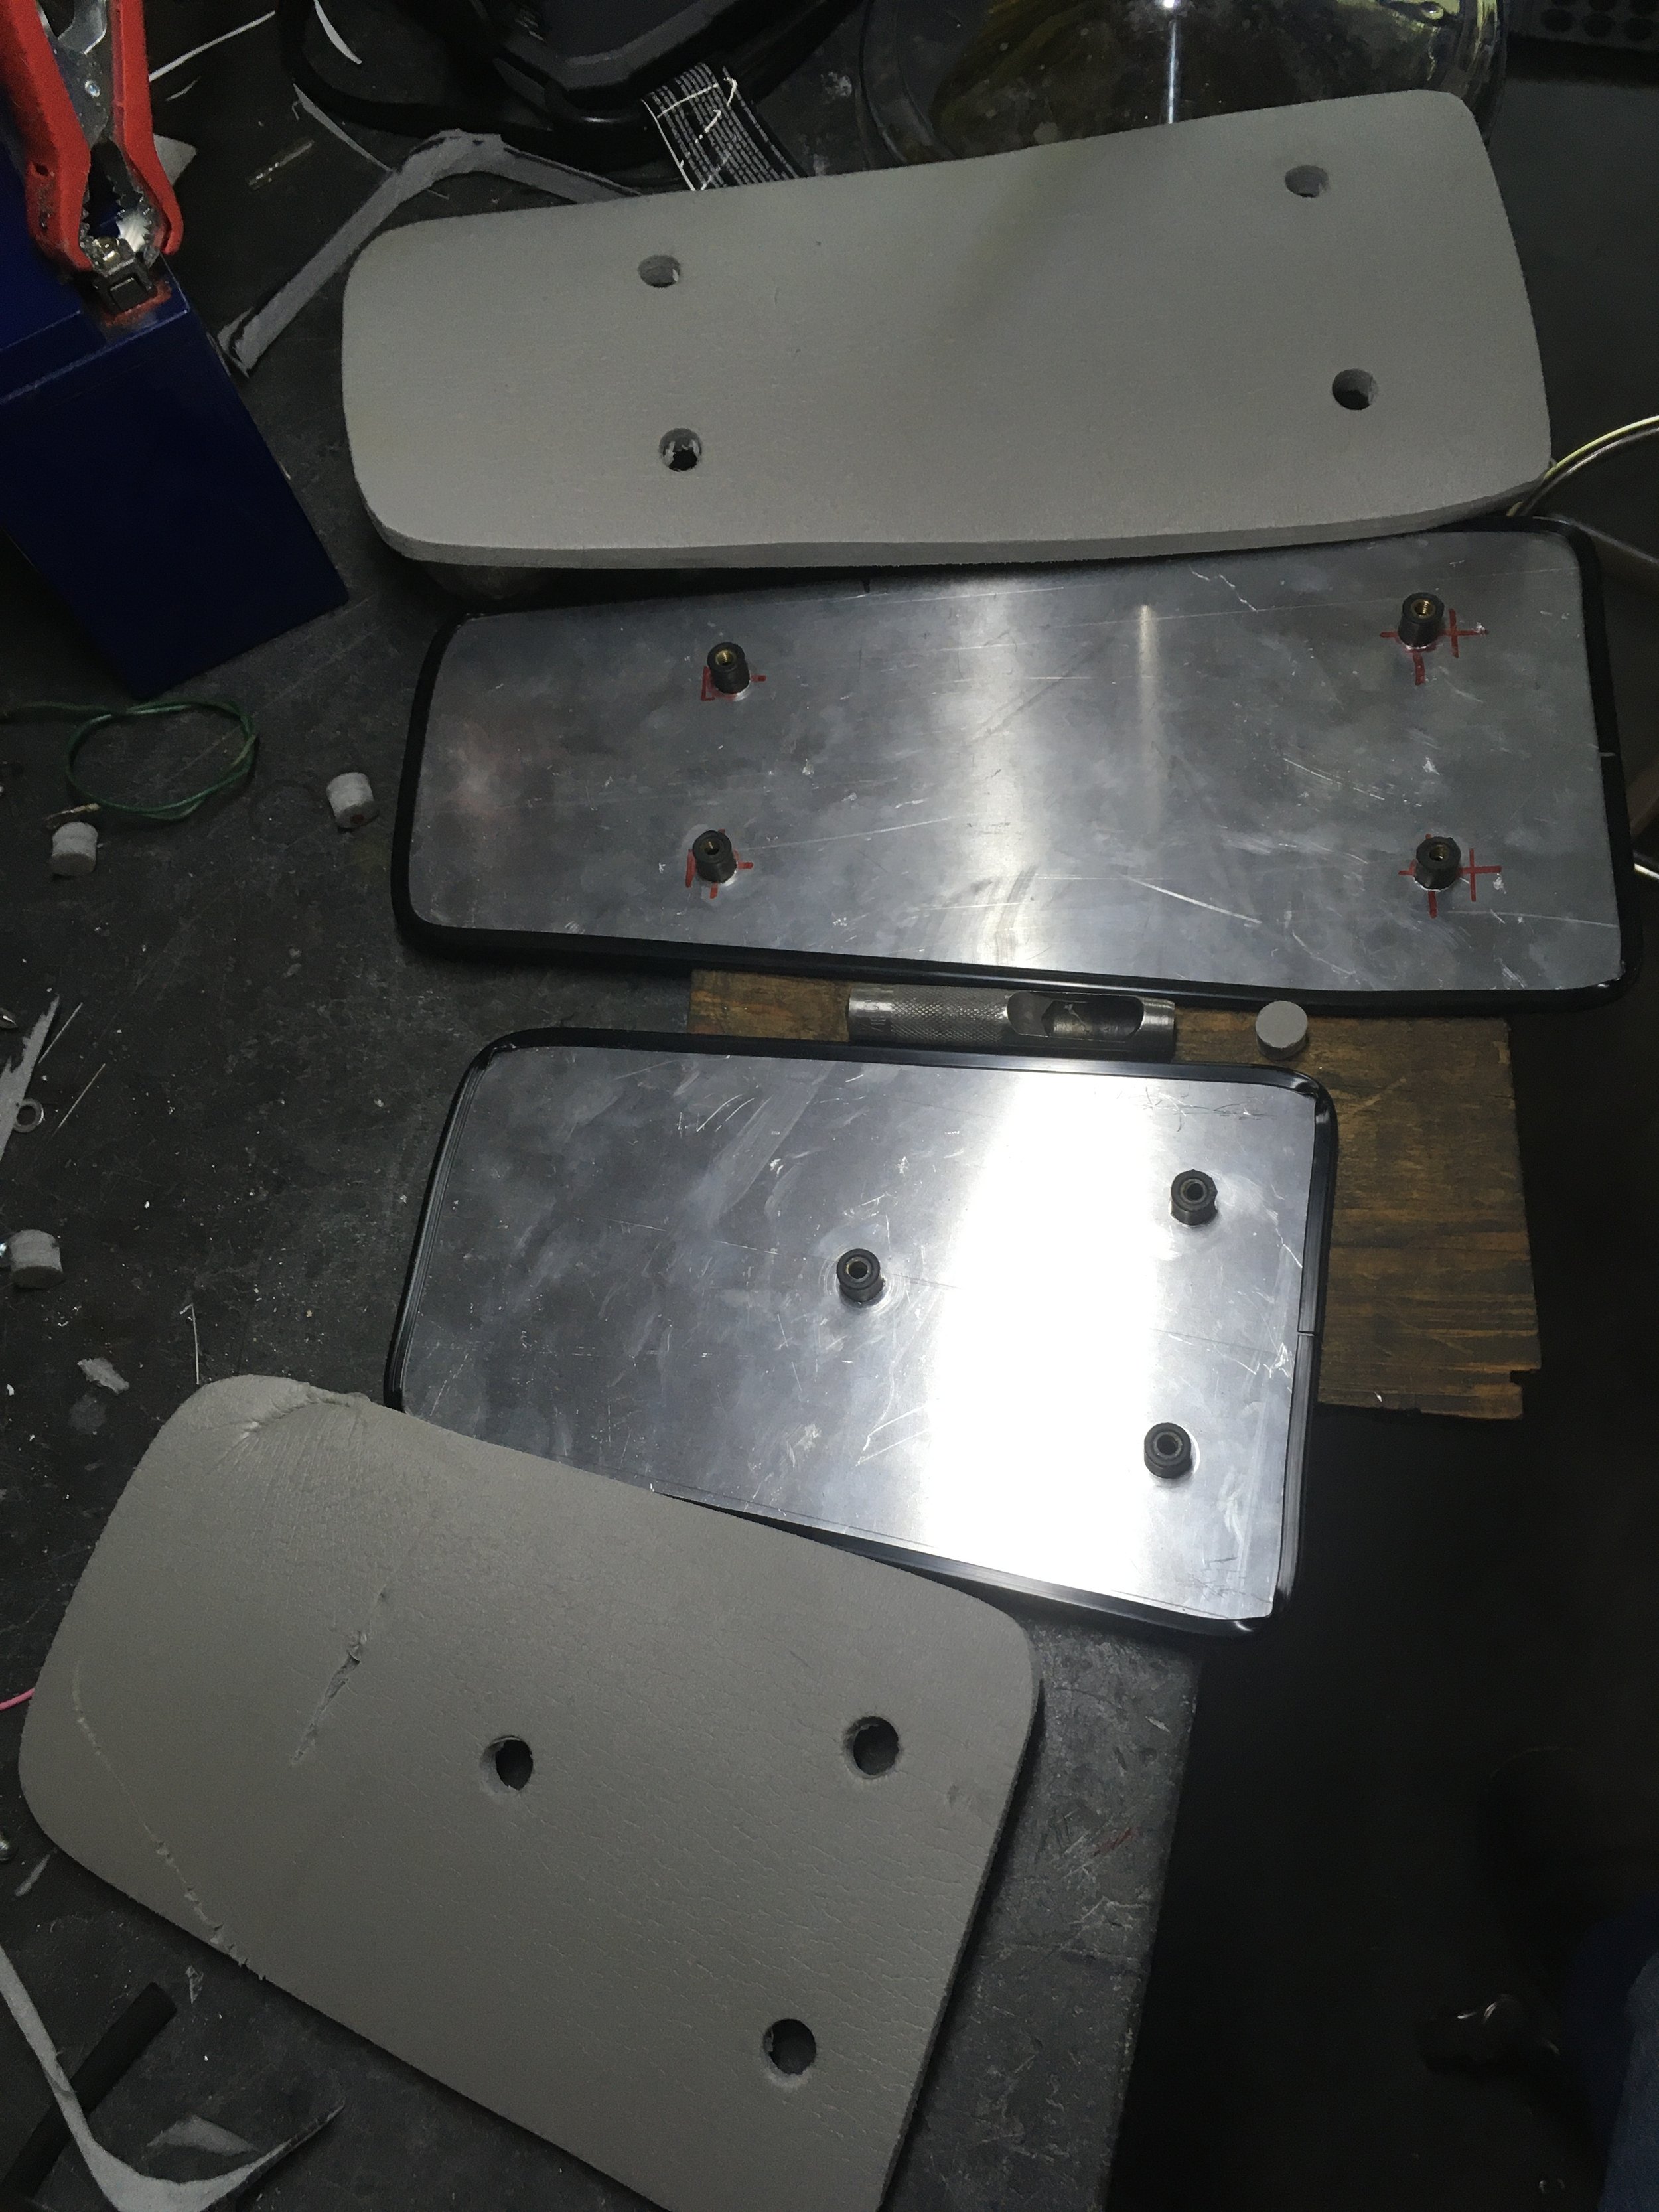
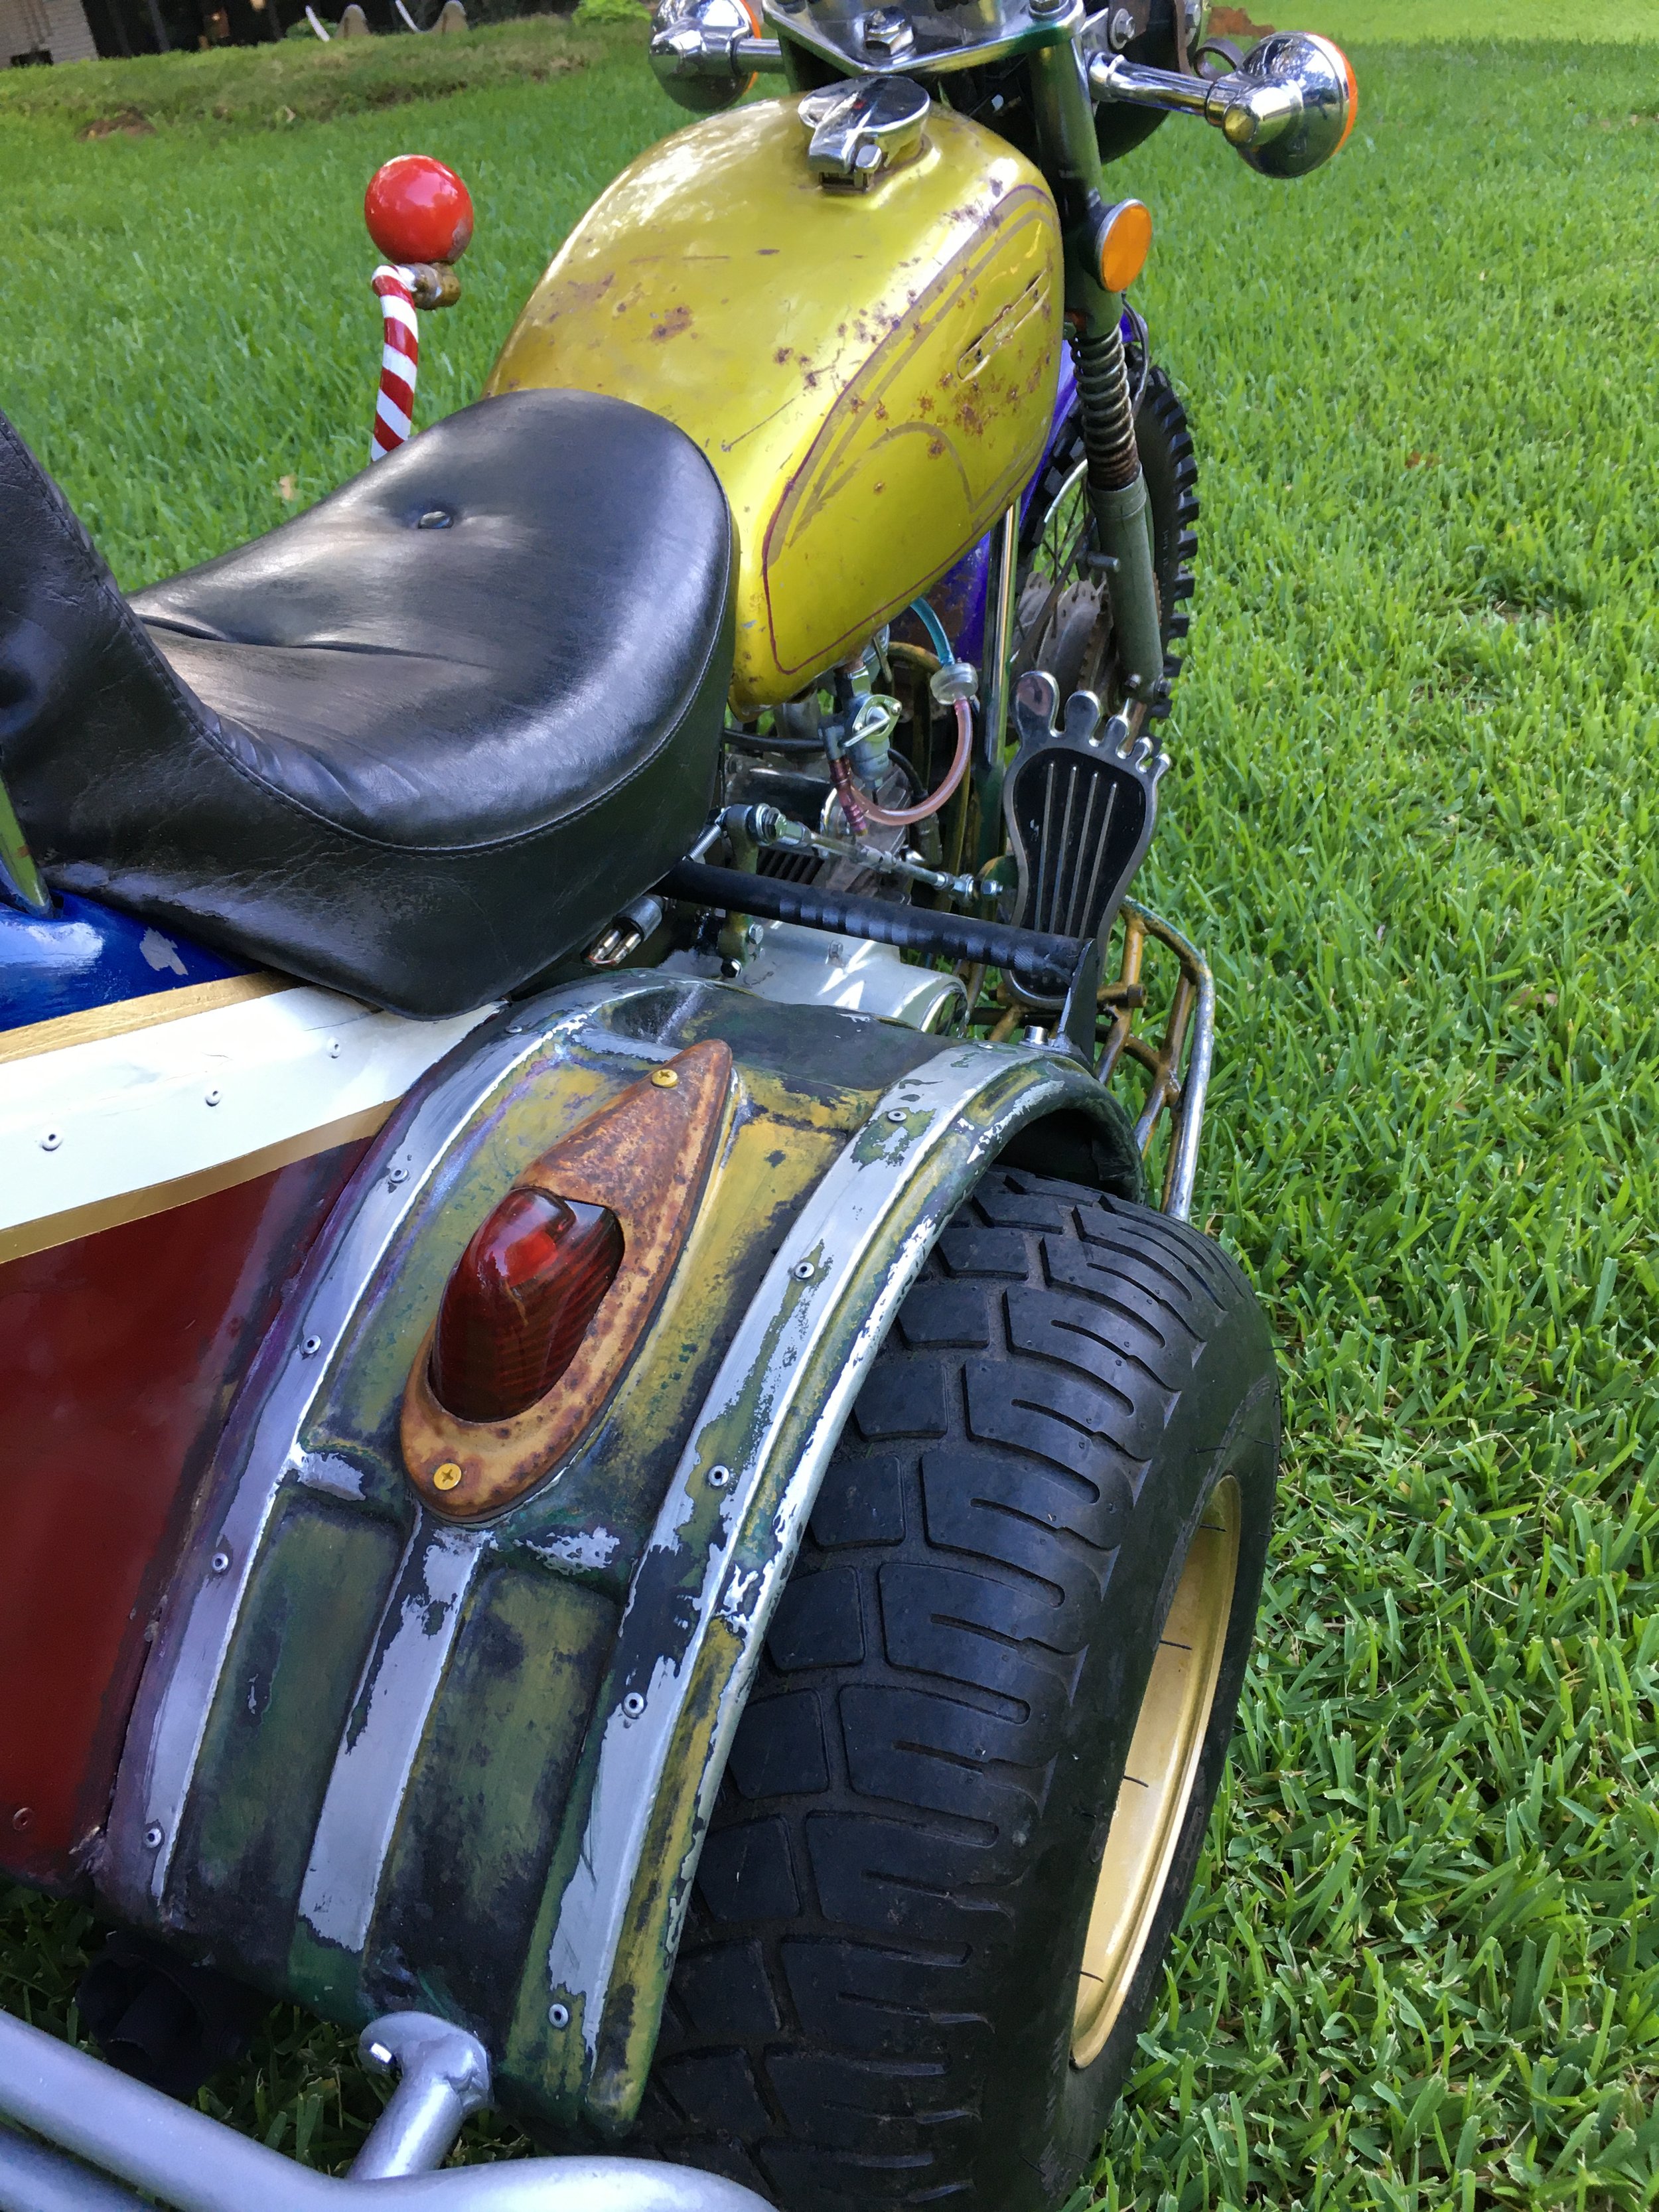
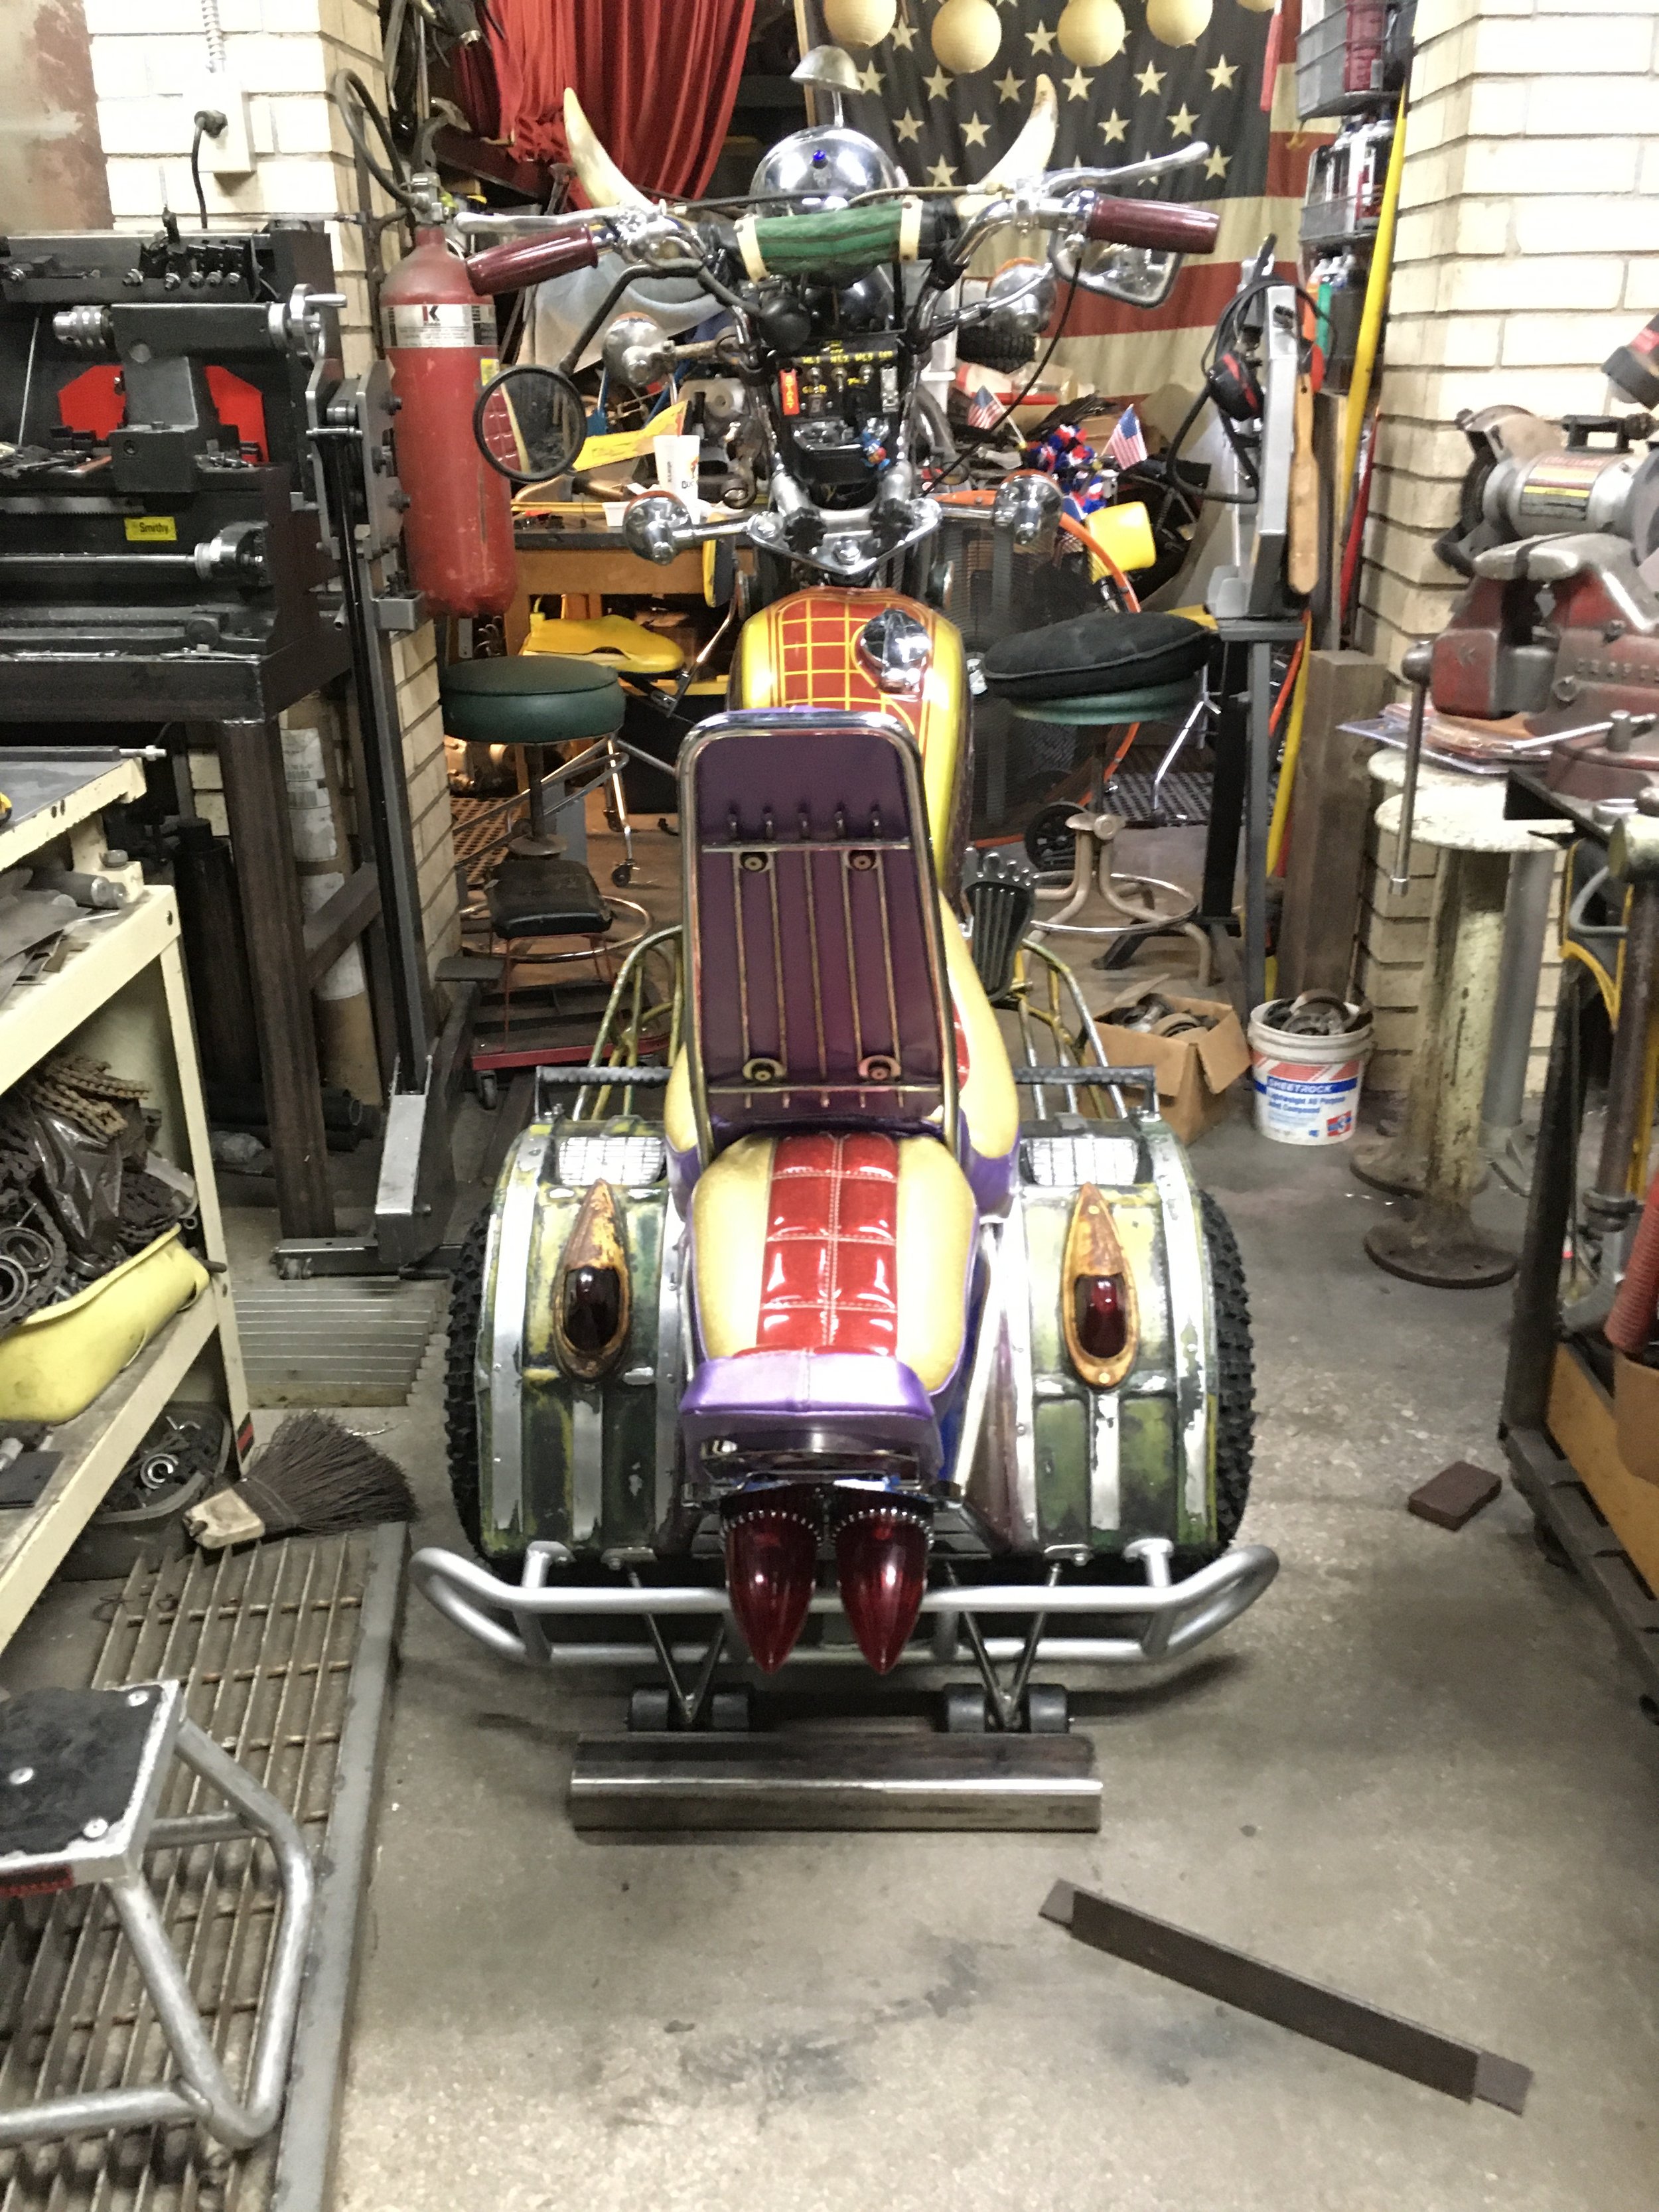
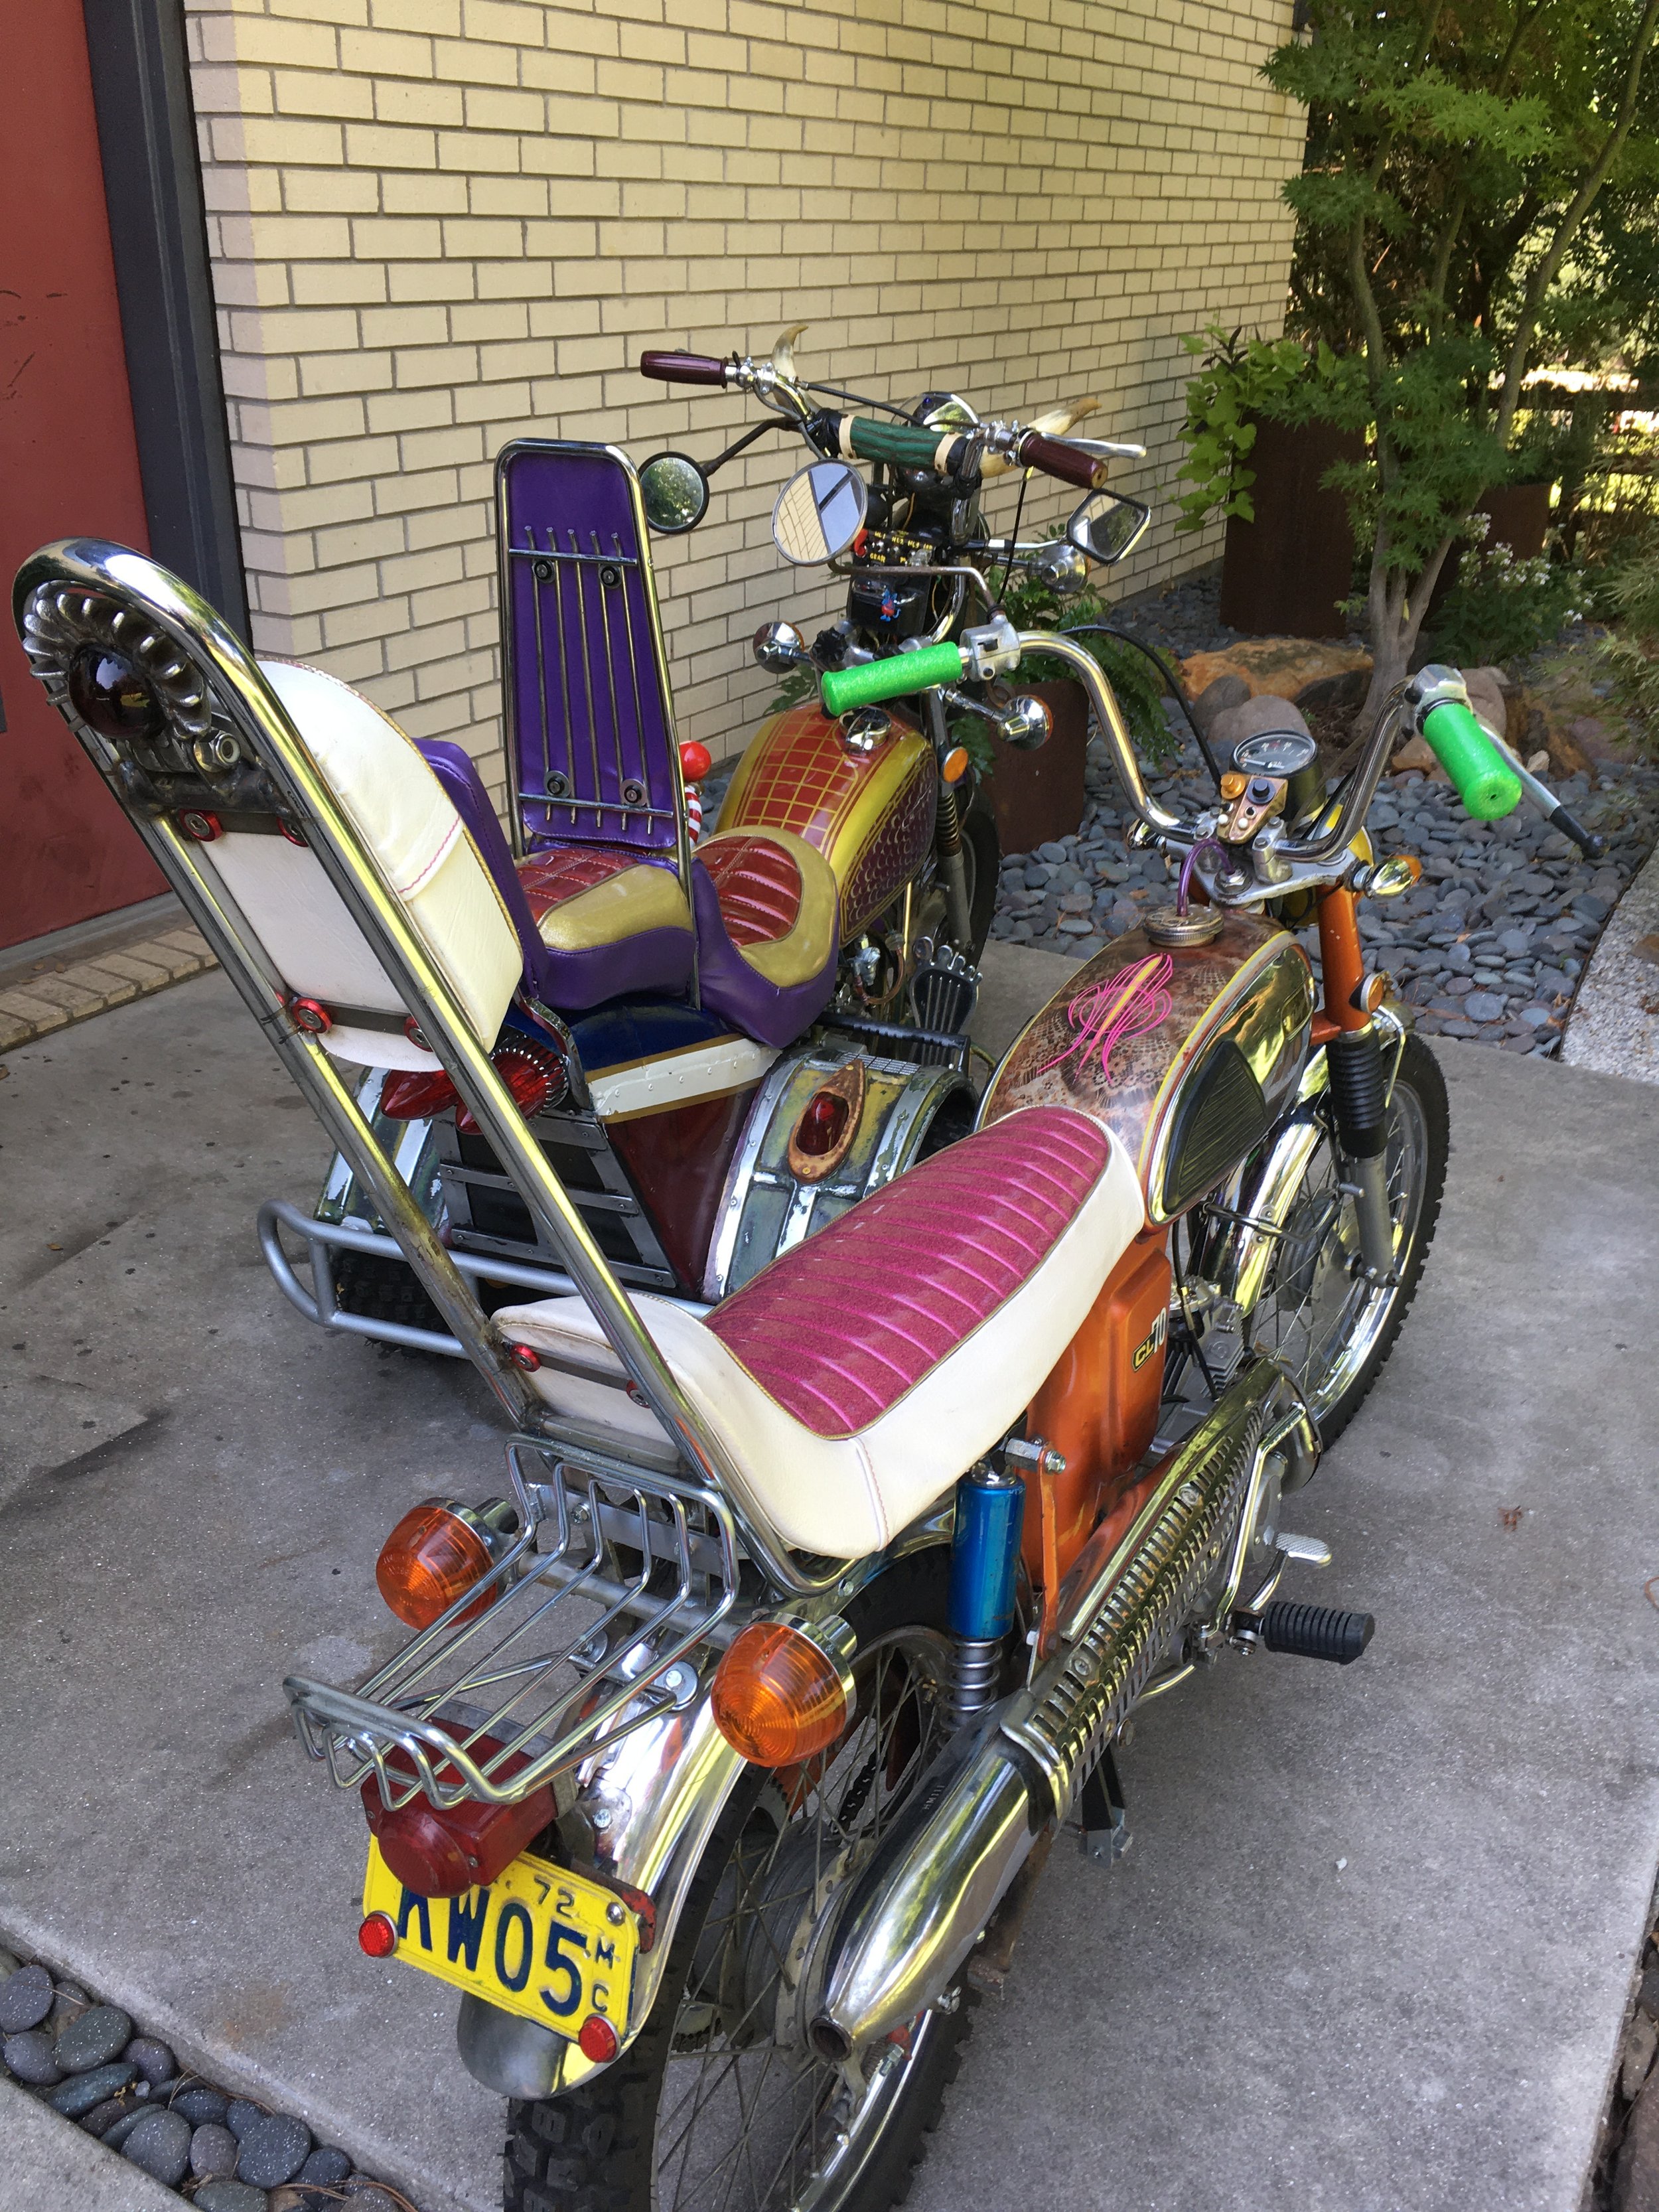
When I told Mobtown Mike the colors I wanted, and the pattern, he said okay, but later told me he initially had his doubts on the colors. When I took him the seat, the tank was not yet painted, and the vision was only floating in my head. Fortunately, the end result makes some sense of what I was trying to pull off. The purple on the seat ties in with the tank sides and front fender. The gold and red of the seat, and the green gold and red of the tank end up harmonizing with one another. The squares and rectangles are echoed throughout the build, showing up in numerous places.

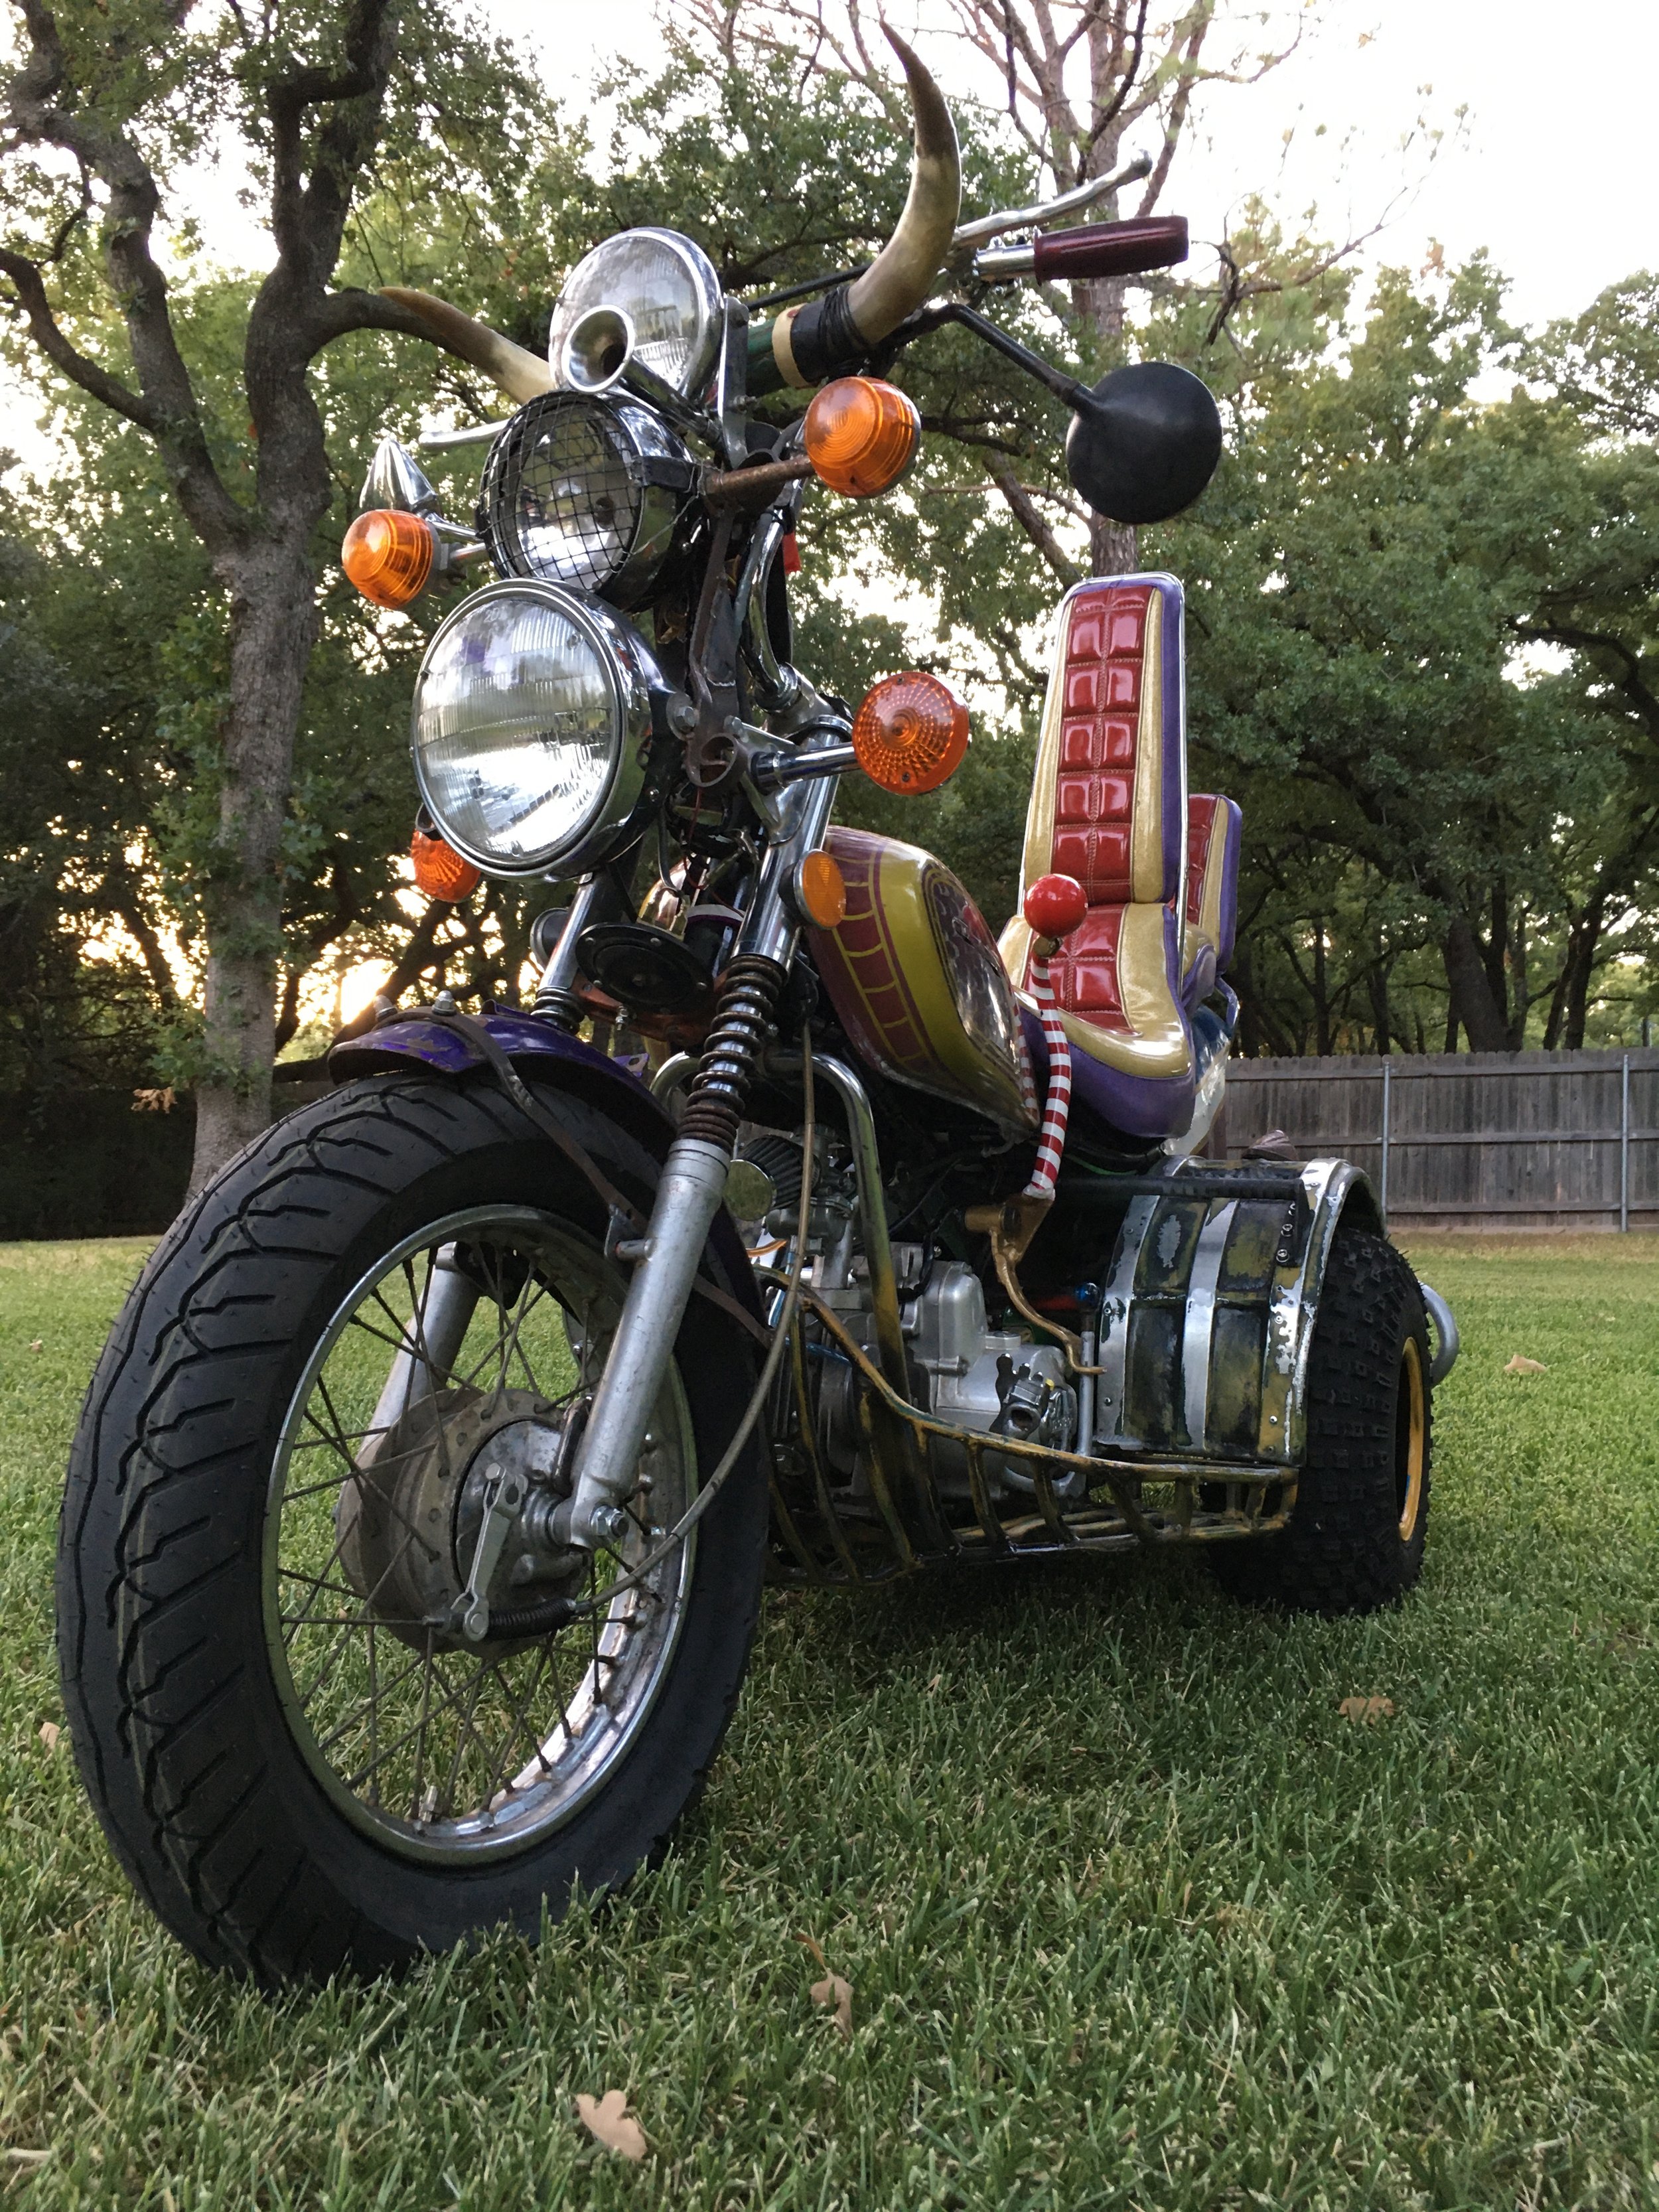
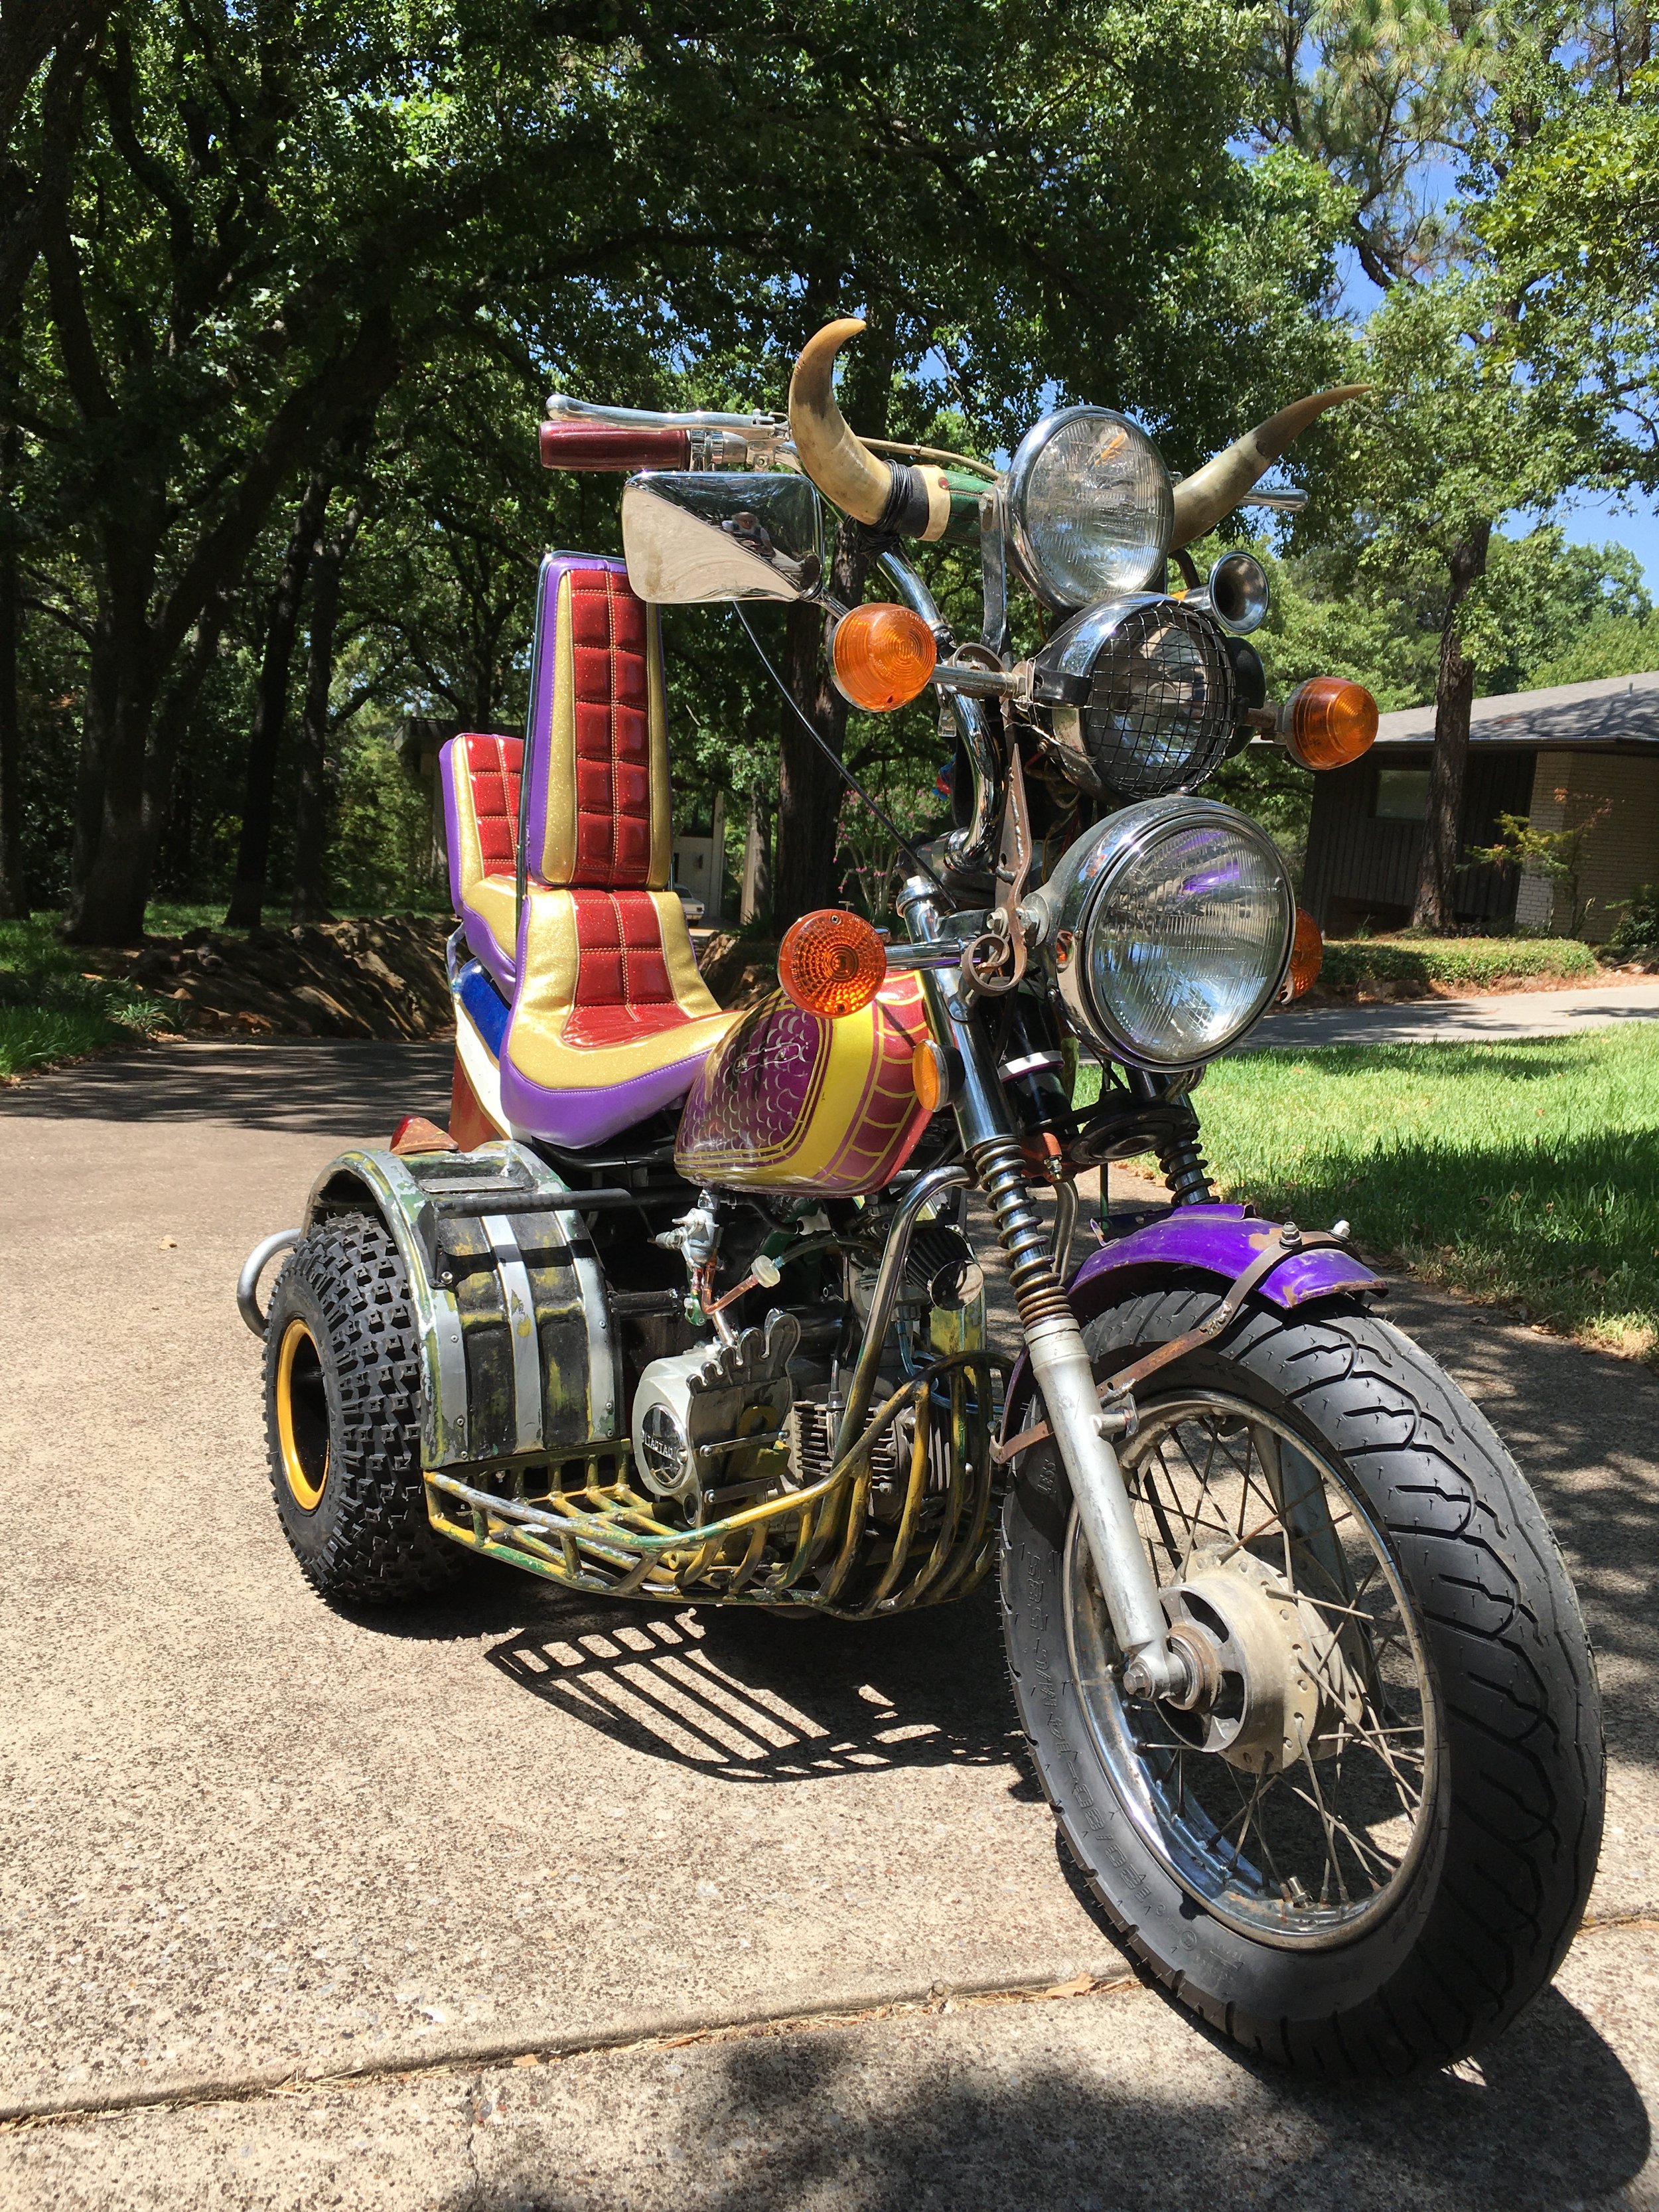
The street tire is great on pavement, but the knobby that was on before it was better for off-road handling. The rear wheels, tires, and mounting hubs as well as the knobby front tire and wheel were kept together, and can be changed out easily.

While figuring out the angles on the wheelie bar, the front end was elevated so the skateboard wheels could be checked for the best contact and alignment.

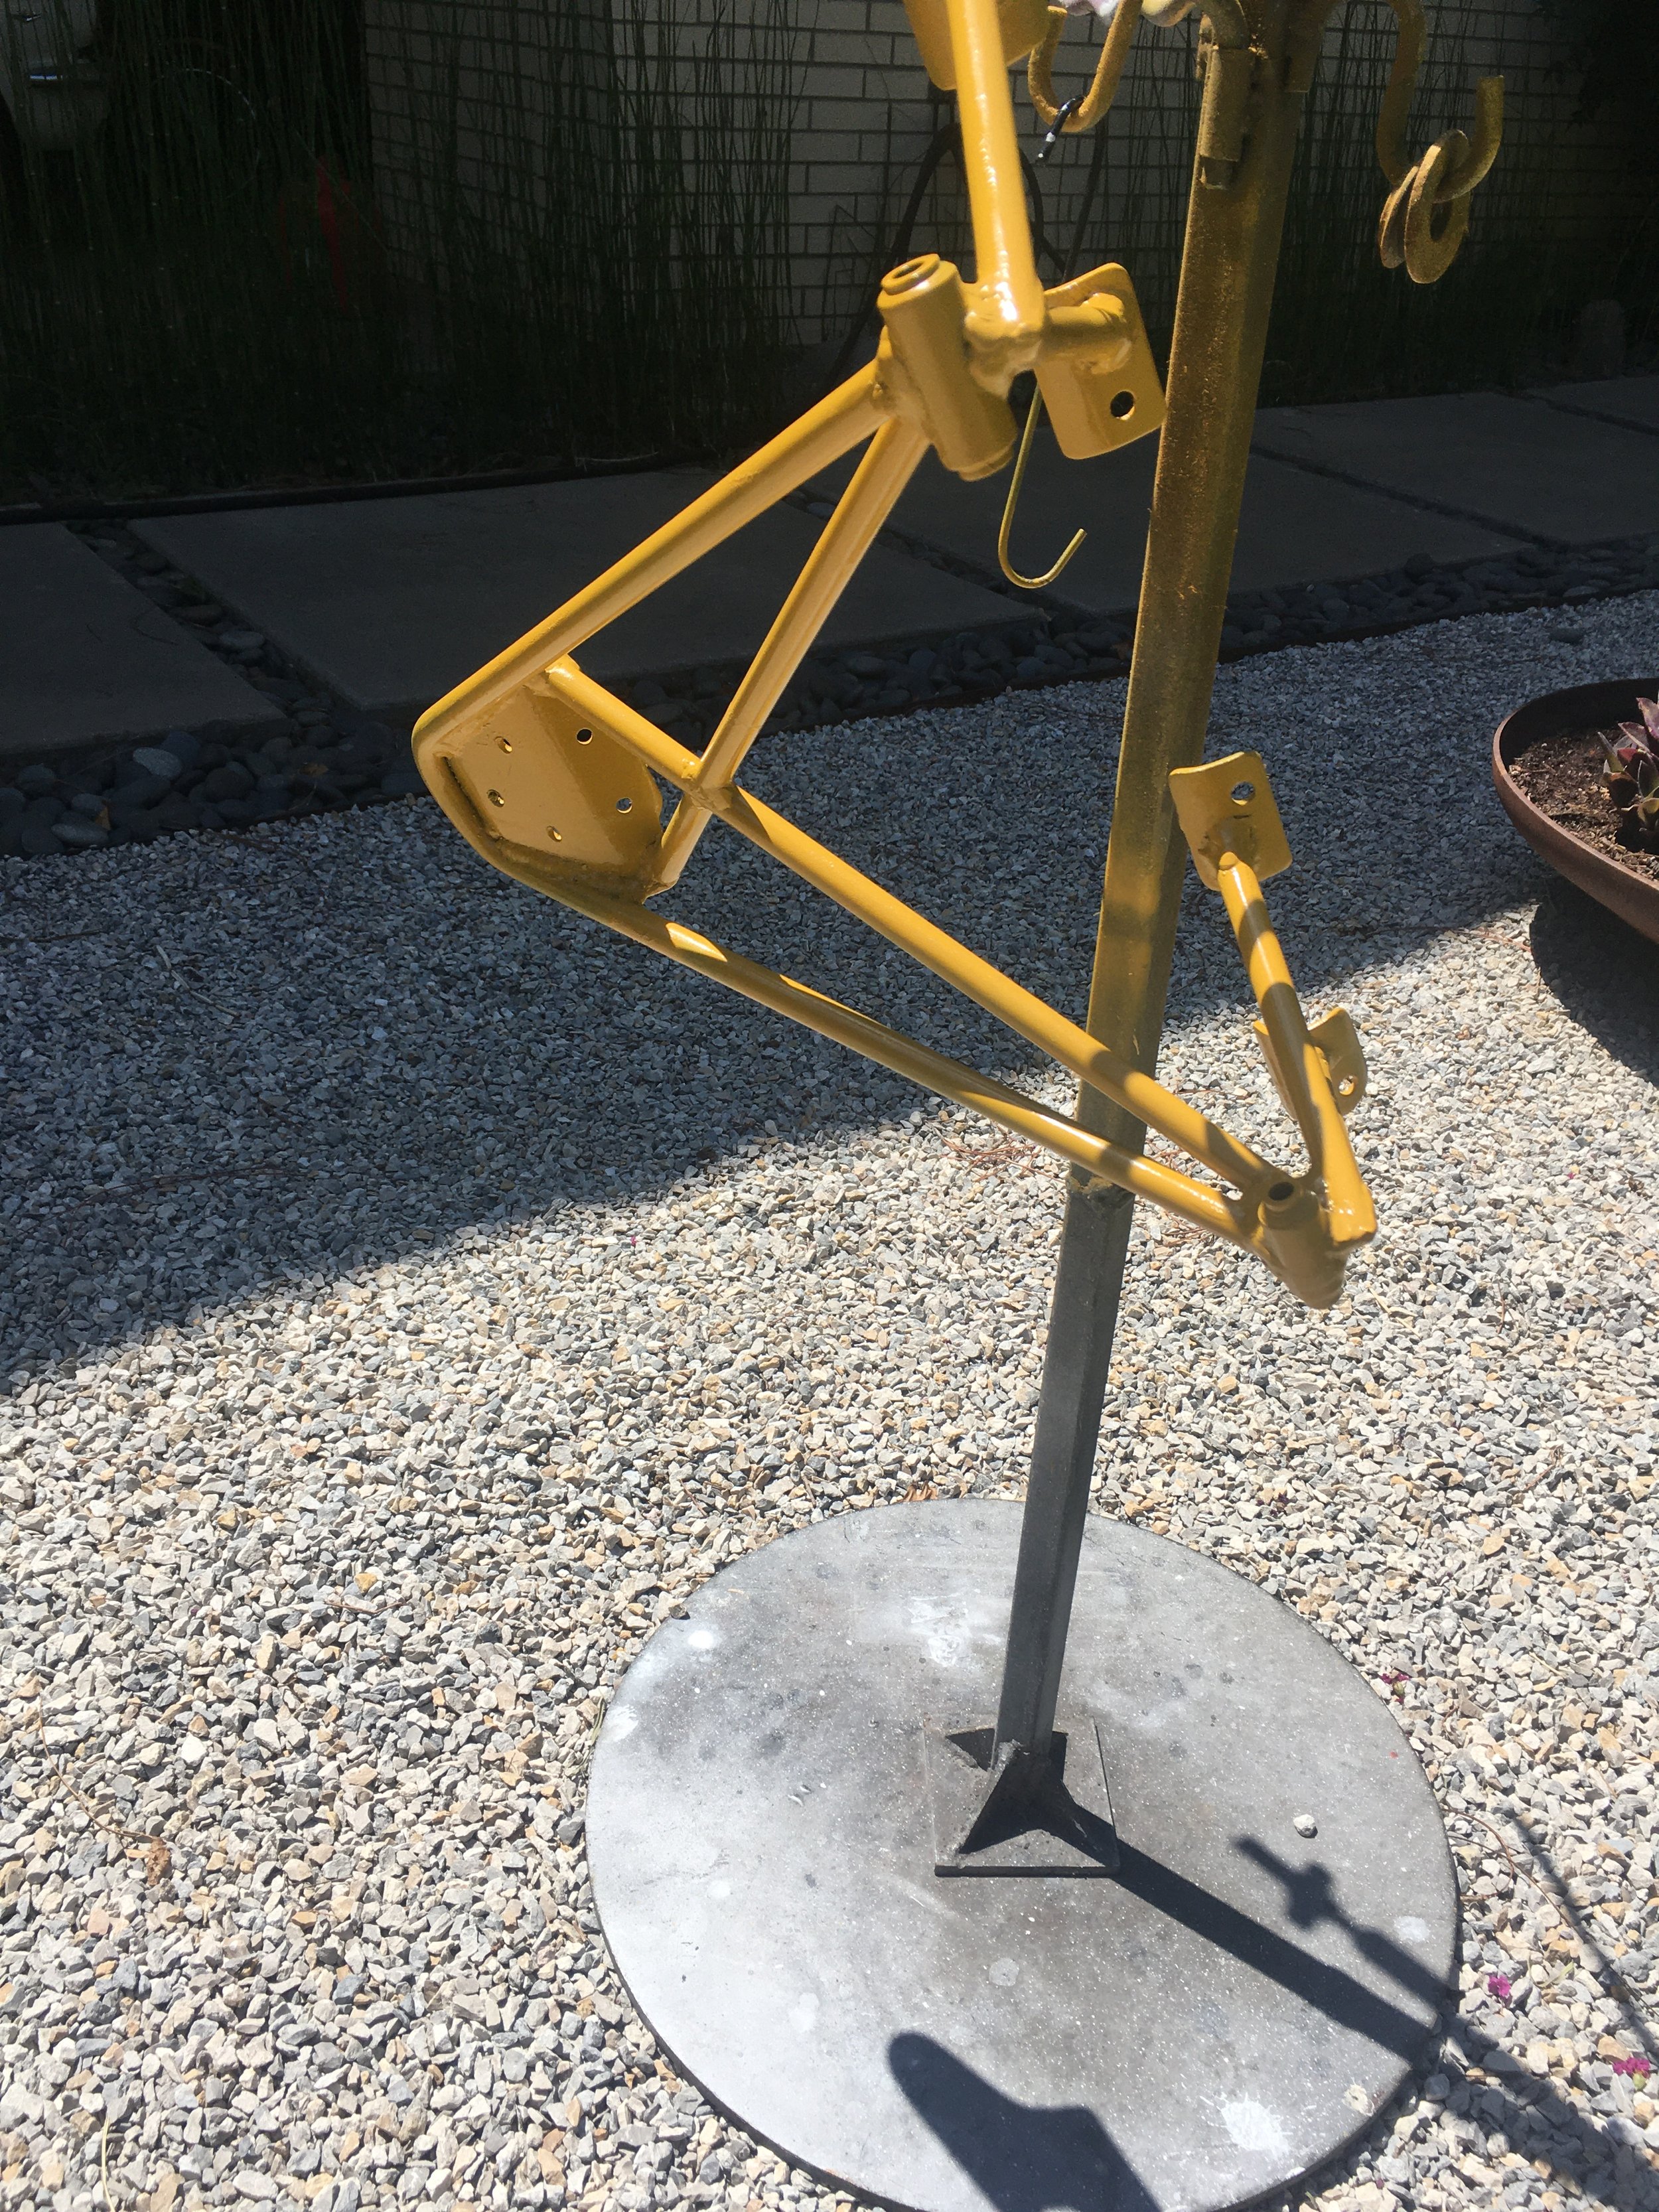
Made from 1/2”’ 4130 moly steel tube, the wheelie bar is cross braced and should be rigid.

Setting sun rays gave it an odd glow at the Dan’s Bar reveal.

Red neon setting it on fire!

Mikey working relentlessly on projects, I was glad he could work this one in. The seat is so awesome, and transforms the trike.

At one point we were going to go with gold on the back of the sissy bar pads. Glad we went with purple!

There were a number of posts of the trike at Denton Bike Night online, this was a favorite.

Dentonmoto had a booth, and we were selling merch and giving away some too.

Just back from Denton bike night, Flaquita and the Tijuana trike looking pretty sharp.

Bobby at RWD Designs, also known as Mr Fotography, takes some great pictures in the studio, and on location, like Denton Bike night.

Working out details on the Tijuana Trike.

The geometric styling on the tank top echos the fender wells and soon to be made seat cover. The fish scales are my first attempt on a tank. The Koi fish is my symbol, and one usually gets worked in these builds. This tank is a near identical match to the one currently on the bike. While that one is doing fine, The inside was severely rusted and the walls are thinner than usual. The epoxy coating inside adds some rigidity, but I have seen too many tank lining failures to believe it will last forever. This one was found online and is in nice shape inside.

Somewhere there is a purple fish…and he is jealous.

Bought a set of used factory wheels. After a lot of wrestling and cleaning, they are getting a good coat of primer and safety yellow.

Some 1/4” aluminum plate was milled and shaped to make some treads for the rear seat foot wells. Rectangles again.

The seat backs have been made and are off to Mobtown Mike for some upholstery along with the seat. These will be Zodiac style vinyls again.

Doing some testing and practicing on the scales. Different shapes, sizes, and masks were experimented with till an acceptable result was found. While not perfect, it is consistent with the rest of the bikes imperfection.

Wellnuts, vinyl edging, .090 aluminum, dense and soft foam layers, and then shaped with sanders. A simple seat back has a lot of steps going into it before you even consider the cover.

The 1985 Honda ATC70 Tijuana Trike is a runner.

Here she is, after over ten years of sitting around the shop, finally running, and complete, save a few mostly cosmetic details.

With the knobby front tire, she tracks well in dirt, gravel ,or grass, but needs some serious counter-weighting to turn sharply on pavement.

There are styling cues from 1959 Cadillacs to dune buggies, rockets, and midget racers, to name a few. Frames from two Honda ATC70’s, front fork tubes from a honda MR50, triple tree clamps from a CT70, Harley bitch bar, Bates sissybar, headlight and turn signals from a CB750, Kawasaki KLX110 muffler and KZ400 turn signals, Mustang King/Queen seat, CL350 tank, CT90 skidplate, SL70 front wheel, custom wheels made from Z50 and ATC70 wheel halves, shifter made from a mangled Z50 brake pedal. Yeah, there are parts from a bunch of different bikes in there.

The aluminum rear panel with my old logo. The logo was used on the CT117 custom bike in 2010, and not since. The panel conceals a lunch-box size fold-out bin. The actual panel came from the sides of an old ultrasound machine I used to push around a hospital in my other career. As a kid, I saw bumpers on dune buggies, midget racers, and vans like this one. Always wanted to do one on my 1963 Econoline van, but sixteen year old me didn’t have the skills yet. This one is made from tube steel, with the cross pieces brass brazed in for a cleaner look.

The rear bin is spring loaded, and will retract tightly.

Because the bike is for holiday parades like Christmas, a little candy cane is not totally out of place. I was thinking more “The Cat In The Hat” or 1980’s Memphis styling when I did it. At the bottom right, the recesses for the foot rest and the footpeg cross-bar can be seen. They are either for the “Queen seat” rider, or the driver can also stand on them.

A vintage Cal-Custom barefoot accelerator cover is used for the rear brake. There is also a hand lever for the rear brake on the left handlebar. The fender lights were a Pate Swap Meet find a few years back. I was told they came off the cab of an old Packard or Studebaker truck. They have glass lenses and LED bulbs.

1959 Cadillac tail lights have always been evocative of rocket or jet flames. These repops look right at home under the seat. The metal under the seat is from a left over section of a Harley rear fender for the 1993 FXR custom build. Since the rear part of the seat is arched to fit on a fender, it seemed appropriate. A Takegawa brake nut secures the seat.

Ready for take-off! The red, white and blue with gold accents was done quickly with rattle cans, as was the rest of the bike. There is a look I love, of hard driven race cars, painted just well enough to cover last weeks damage, and look good from twenty feet. The cars I am thinking of are beater circle-burners and midget racers, driven by week-end warriors and semi-pros on the local town track. The kind of tracks that have mostly disappeared, but were plentiful in the sixties and seventies, when I was a kid. The multi layer paint, front skid plate, and rear bumper were all a nod to that style.

A digital gear indicator is a great thin to have when there is a reverse gear. There are also covered switches for the electric start button and still to be installed ground effects.

The front forks were lengthened a little over two inches, and Z50 rear shock springs were used for the external springs. There are inner springs only in the original CT70 forks, but the additional weight meant a little more spring is needed.

The bike can be shifted by foot or the suicide shifter. A mini Cal-Custom style barefoot pedal is on the front end, with the foot tread removed from the Z50 brake pedal used for the shifter. No waste around here!

The underneath structure of the fenders can be seen here. Originally, I had planned to use some beaded aluminum fenders laid on top of this structure, but I only had some .030 thickness, which is too thin to support much weight. With the probability these fenders would be stepped on, a new plan that did not involve buying thicker metal was figured out. It would have been much easier to buy the metal, but I have found improvisation makes a chance for some growth, and forces you to go outside your box. The rear aluminum panel was made from two layers of .125 aluminum plate( harvested from an old medical ultrasound machine,) and a layer of .090 on the bottom layer. The rectangles were made to go with the fender indentations.

The left fender is partially pounded, and the right one has Clequos holding it together. First curved on a Jet tools slip roller, and then an assortment of wood, plastic, and steel hammers and dollies were used to form the fender indents.

After the first round of pounding, additional rounds were performed to smooth and equal out each sides. The thinness is the aluminum makes it easy to bust through, so it has to be moved gently.

The first two plates of the rear panel.